Tài liệu Creating Web Applications with ASP.NET doc
Bạn đang xem bản rút gọn của tài liệu. Xem và tải ngay bản đầy đủ của tài liệu tại đây (59.38 KB, 20 trang )
Creating Web Applications with ASP.NET
A Web application that uses ASP.NET typically consists of one or more ASP.NET pages
or Web forms, code files, and configuration files.
A Web form is held in an .aspx file, which is essentially an HTML file with some
Microsoft .NET–specific tags. An .aspx file defines the layout and appearance of a page.
Each .aspx file often has an associated code file containing the application logic for the
components in the .aspx file, such as event handlers and utility methods. A tag, or
directive, at the start of each .aspx file specifies the name and location of the
corresponding code file. ASP.NET also supports application-level events, which are
defined in Global.asax files.
Each Web application can also have a configuration file called Web.config. This file,
which is in XML format, contains information regarding security, cache management,
page compilation, and so on.
Building an ASP.NET Application
In the following exercise, you will build a simple ASP.NET application that uses Server
controls to gather input from the user about the details of the employees of a fictitious
software company. The application will show you the structure of a typical Web
application.
NOTE
You do not need to have IIS running on your computer in order to develop Web
applications. Visual Studio 2005 includes its own Development Web server. When you
build and run a Web application, by default Visual Studio 2005 will run the application
using this server. However, you should still use IIS for hosting production Web
applications after you have finished developing and testing them.
Create the Web application
1. Start Microsoft Visual Studio 2005, if it is not already running.
2. On the File menu, point to New and then click Web Site.
The New Web Site dialog box appears.
3. Click the ASP.NET Web Site template. Select File System in the Location drop-
down list box, and type C:\Documents and Settings\YourName\My
Documents\Microsoft Press\Visual CSharp Step by Step\Chapter 25\HonestJohn
where YourName is your Windows login name. Set the Language to Visual C#,
and then click OK.
NOTE
Setting the Location to FileSystem uses the Development Web server provided
with Visual Studio 2005. You can use IIS by setting the Location to HTTP and
specifying the URL of the Web Site you want to create rather than a file name.
An application is created consisting of a Web Folder called App_Data, and a Web
form called Default.aspx. The HTML code for the default page appears in the
Source View window.
4. In the Solution Explorer select the Default.aspx file. In the Properties window,
change the File Name property of Default.aspx to EmployeeForm.aspx.
5. Click the Design button at the bottom of the form to display the Design View of
the form. The Design View window is currently empty.
In the Design View window, you can drag controls onto the Web form from the
Toolbox, and Visual Studio 2005 will generate the appropriate HTML for you.
This is the HTML that you see when you view the form in the Source View
window. You can also edit the HTML directly if you want.
In the next exercise, you will define a style to be used by the form and add controls to the
form to make it functional. Using a style enables you to ensure that all controls on the
form share a common look and feel (such as color and font), as well as setting items such
as a background image of the form.
Lay out the Web form
1. Click the form in the Design View window. In the Properties window, change the
Title property of the DOCUMENT object to Employee Information.
The value you specify for the Title property appears in the title bar of the Web
Browser when you run the Web application.
2. Select the Style property and click the ellipses button.
The Style Builder dialog box opens. This dialog box allows you to create a style
for the form. (A style specifies the default font, color, layout, and other attributes
for the Web form and its controls.)
3. In the Font Name section, verify that the Family option is selected, and then click
the ellipses button on the right side. In the Font Picker dialog box that opens,
select Arial in the Installed Fonts list, and then click the >> button to add it to the
Selected Fonts list. Click OK to return to the Style Builder dialog box.
4. In the Color drop-down list, select Blue.
5. In the left pane of the dialog box, click Background. The Background page is
displayed. Select the Transparent check box.
6. Using Windows Explorer, copy the file \Microsoft Press\Visual CSharp Step By
Step\Chapter 25\computer.bmp in your My Documents folder to the \Microsoft
Press\Visual CSharp Step By Step\Chapter 25\HonestJohn folder.
7. Return to the Style Builder dialog box in the Visual Studio 2005 programming
environment. In the Image text box, type computer.bmp. Click OK.
The Web form will contain a background image of a computer.
8. Open the Toolbox and ensure that the Standard category is expanded.
The Toolbox contains controls that you can drop onto ASP.NET forms. These
controls are similar, in many cases, to the controls you have been using to build
Windows forms. The difference is that these controls have been designed to
operate in an HTML environment, and they are rendered using HTML at run time.
9. From the Toolbox, drag and drop four Label controls and three TextBox controls
onto the Web form. Notice how the controls pick up the font and color specified
by the Web form's style.
NOTE
The controls will be automatically positioned using a left-to-right flow layout in
the Design View window. Do not worry about their location just yet as you will
move them after setting their properties.
NOTE
As well as using a Label control, you can also type text directly onto a Web page.
However, you cannot format this text so easily, set properties, or apply Themes to
it. If you are building a Web site that has to support different languages (such as
French or German), use Label controls as you can more easily localize the text
they display by using Resource files. For more information, see “Resources in
Applications” in the Microsoft Visual Studio 2005 Documentation.
10. Using the Properties window, set the properties of these controls to the values
shown in the following table.
Control Property Value
Control Property Value
Label1 Font Bold (expand the Font property) True
Font Name Arial Black
Font Size X-Large
Text Honest John Software Developers
Height 36px
Width 630px
Label2 Text First Name
Label3 Text Last Name
Label4 Text Employee Id
TextBox1 Height 24px
Width 230px
(ID) firstName
TextBox2 Height 24px
Width 230px
(ID) lastName
TextBox3 Height 24px
Width 100px
(ID) employeeID
11. In the Design View window, select all four labels and all three text boxes (click
Label1, and the click the remaining controls while holding down the Shift key).
12. In the Layout menu, point to Position and then click Absolute.
This setting enables you to drag the controls to an absolute position on the form
rather than Visual Studio 2005 laying them out automatically.
13. Move the labels and text boxes to the positions shown on the form in the following
graphic:
TIP
You can align and space controls by using the commands on the Format menu. To
align a set of controls, select them all and then, on the Format menu, click Align
and select the appropriate alignment (Lefts, Centers, Rights, Tops, Middles,
Bottoms). Similarly, you can space controls by selecting them and then by using
the Horizontal Spacing or Vertical Spacing commands on the Format menu.
14. Click the Source button at the bottom of the form to display the HTML
representation of the form and controls in the Source View window.
The HTML should look like similar to the following code (the positions of the
controls might vary slightly on your form):
<%@ Page Language="C#" AutoEventWireup="true"
CodeFile="EmployeeForm.aspx.cs"
Inherits="_Default" %>
<!DOCTYPE html PUBLIC "-//W3C//DTD XHTML 1.1//EN"
"
xhtml11.dtd">
<html xmlns=" >
<head runat="server">
<title>Employee Information</title>
</head>
<body style="background-image: url(computer.bmp); color: blue; font-family:
Arial;
background-color: transparent">
<form id="form1" runat="server">
<div>
<asp:Label ID="Label1" runat="server" Text="Honest John Software
Developers"
style="z-index: 100; left: 96px; position: absolute; top: 24px" Font-Bold="True"
Font-
Names="Arial Black" Font-Size="X-Large" Height="36px"
Width="630px"></asp:Label>
<asp:Label ID="Label2" runat="server" Text="First Name" style="z-index:
101;
left: 62px; position: absolute; top: 104px"></asp:Label>
<asp:Label ID="Label3" runat="server" Text="Last Name" style="z-index:
102; left:
414px; position: absolute; top: 104px"></asp:Label>
<asp:Label ID="Label4" runat="server" Text="Employee Id" style="z-index:
103;
left: 62px; position: absolute; top: 167px"></asp:Label>
<asp:TextBox ID="firstName" runat="server" style="z-index: 104; left:
156px;
position: absolute; top: 101px" Height="24px" Width="230px"></asp:TextBox>
<asp:TextBox ID="lastName" runat="server" style="z-index: 107; left:
507px;
position: absolute; top: 101px" Height="24px" Width="230px"></asp:TextBox>
<asp:TextBox ID="employeeID" runat="server" style="z-index: 106; left:
160px;
position: absolute; top: 161px" Height="24px" Width="100px"></asp:TextBox>
</div>
</form>
</body>
</html>
15. Return to the Design View window.
16. In the Layout menu, point to Position and click Auto-position Options. In the
Options dialog box, expand the HTML Designer node of the tree view control if it
is not already expanded and click CSS Positioning. In the right-hand pane of the
dialog box, check “Change positioning to the following for controls added by
using the Toolbox, paste, or drag and drop”, and select “Absolutely positioned”
from the drop-down menu:
This action allows all future controls that you add to the form to be placed
wherever you drag them after adding them to the form; you do not need enable
absolute positioning for each one.
17. Add another Label control and four RadioButton controls to the Web form. Set the
properties of these controls to the values listed in the following table.
Control Property Value
Label5 Text Position
RadioButton1 Text Worker
TextAlign Left
GroupName positionGroup
Checked True
(ID) workerButton
RadioButton2 Text Boss
TextAlign Left
GroupName positionGroup
Checked False
(ID) bossButton
RadioButton3 Text Vice President
Control Property Value
TextAlign Left
GroupName positionGroup
Checked False
(ID) vpButton
RadioButton4 Text President
TextAlign Left
GroupName positionGroup
Checked False
(ID) presidentButton
18. The GroupName property determines how a set of radio buttons are grouped. All
buttons with the same value for GroupName are in the same group—only one can
be selected at a time.
19. Position these controls so that your Web form looks like the following graphic:
20. Add another Label control and a DropDownList control to the Web form. Set their
properties to the values shown in the following table.
Control Property Value
Label6 Text Role
DropDownList1 Width 230px
(ID) positionRole
21. The positionRole drop-down list will display the different positions that an
employee can have within the company. This list will vary according to the
position of the employee in the company. You will write code to populate this list
dynamically.
22. Position these controls so that the form looks like the following graphic:
23. Add two Button controls and another Label control to the form. Set their
properties to the values shown in the following table.
Control Property Value
Button1 Text Save
Control Property Value
(ID) saveButton
Button2 Text Clear
(ID) clearButton
Label7 Text leave blank
Height 48px
Width 680px
(ID) infoLabel
24. Position the controls so that the form looks like the following graphic:
You will write event handlers for these buttons in a later exercise. The Save button will
collate the information entered by the user and display it in the InfoLabel control at the
bottom of the form. The Clear button will clear the text boxes and set other controls to
their default values.
Test the Web form
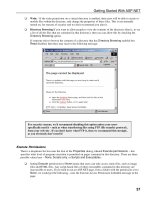
1. On the Debug menu, click Start Debugging.
Visual Studio 2005 builds the application, the ASP.NET Development Server
starts, and then Internet Explorer starts and displays the form.
NOTE
The first time you run a Web application by using the Start Debugging command,
you will be prompted with a message box stating that debugging is not enabled.
You can either select “Run without debugging”, or select “Modify the Web.config
file to enable debugging” if you really want to run in debug mode. Running in
debug mode is useful initially because you can set breakpoints and single step
through the code using the debugger, as described in Chapter 3, “Writing Methods
and Applying Scope.” However, enabling debugging will slow the application
down and should be disabled before deploying the application to a production
Web site. You can do this by editing the Web.config file and removing the
following line: <compilation debug="true"/>
2. Enter some information for a fictitious employee. Test the radio buttons to verify
that they are all mutually exclusive. Click the drop-down arrow in the Role list;
the list will be empty. Click Save and Clear.


