30 giám sát active directory sử dụng event viewer
Bạn đang xem bản rút gọn của tài liệu. Xem và tải ngay bản đầy đủ của tài liệu tại đây (1.19 MB, 12 trang )
Giám sát Active Directory sử dụng Event Viewer
Nội dung bài lab và các bước cần thực hiện:
Sử dụng tính năng Event Viewer thực hiện các vấn đề sau:
- Trên máy BKNP-DC08-01 tạo Custom View:
•
•
Tạo một custom view với tên: Directory Service theo dõi các sự kiện trên Active
Directory và DNS Server ở các chế độ: Critical, Warning, và Error.
Export custom view này ra một file: Active Directory.xml
- Trên máy BKNP-SRV08-01thực hiện Import file Active Directory.xml được chuyển sang từ máy BKNPDC08-01, để theo dõi các Event đã cấu hình trên máy này.
- Tạo một Subscription: Service Events, nhằm chuyển các event system (event có ID 7036) trên máy BKNP-DC0801 sang máy BKNP-SRV08-01.
Sử dụng tính năng Attach a Task to this Log trong Windows Log, để gửi một email cho administrator khi xuất hiện
các file log có ID 7036.
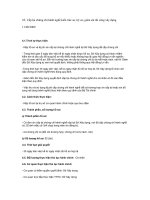
Mơ hình bài lab:
Giám sát Active Directory sử dụng Event Viewer
Yêu cầu chuẩn bị:
•
•
Máy BKNP-DC08-01 đã được nâng cấp lên Domain Controller.
Máy BKNP-SRV08-01 nâng cấp lên Additional Domain Controller: Bknpower.vn.
Hướng dẫn chi tiết:
*Tạo một custom view theo dõi các dịch vụ trên BKNP-DC08-01
- Trên máy BKNP-DC08-01, đăng nhập Administrator.
- Start > Administrative Tools > Event Viewer.
- Nhấp chuột phải Custom Views, chọn Create Custom View.
- Trong cửa sổ Create Custom View chọn: Critical, Warning, và Error. Trong phần Event Logs > Application
and Services Logs, chọn Directory Service và DNS Server, chọn OK.
- Trong cửa sổ Save Filter to Custom View nhập tên cho custom: Directory Service, sau đó chọn OK.
- Export custom view này ra file: Active Directory.xml: Nhấp chuột phải Directory Service, chọn Export
Custom View.
- Trong cửa sổ Save As lưu tại thư mục chia sẻ Share trên ổ D, nhập tên: Active Directory sau đó chọn Save.
*Import custom view: Active Directory.xml
- Đăng nhập máy BKNP-SRV08-01 với quyền Administrator.
- Start > Administrative Tools > Event Viewer.
- Nhấp chuột phải Custom Views, chọn Import Custom View.
- Trong cửa sổ Import Custom View trỏ tới thư mục chia sẻ chứa file Active Directory.xml, sau đó chọn Open.
- Trong cửa sổ Import Custom View File chọn OK.
*Tạo một Subscription nhằm chuyển các event system trên máy BKNP-DC08-01 sang máy BKNPSRV08-01
- Trên máy BKNP-SRV08-01( máy thu thập event), chọn Start ® Command Prompt.
- Trong cửa sổ command-prompt nhập lệnh wecutil qc, ENTER, nhập y, ENTER.
-
Đóng command prompt.
Chyển sang máy BKNP-DC08-01 (máy cung cấp event).
Chọn Start ® Command Prompt.
Trong cửa sổ command-prompt, nhập lệnh winrm quickconfig, ENTER, nhập y, ENTER.
- Đóng command prompt.
- Tạo một Subscription theo yêu cầu đề bài: Trên máy BKNP-SRV08-01, khởi động Event Viewer, nhấp chuột
phải Subscriptions, chọn Create Subscription.
- Trong cửa sổ Subscription Properties, nhập tên Subscription: Theo doi DNS tu may DC08-01,
chọn Collector Initiated, sau đó chọn Select Computers.
- Trong cửa sổ Computers chọn Add Domain Computers
- Trong cửa sổ Select Computers nhập BKNP-DC08-01, chọn OK 2 lần.
- Chọn Select Events, trong cửa sổ Query Filter, chọn Information. Chọn tiếp Event Logs > Windows Logs.
Chọn System. Trong phần Event ID nhập 7036, chọn OK.
- Chọn Advanced, chọn Specific User, sau đó chọn User and Password.
- Trong cửa sổ Credentials for Subscriptions Source, đăng nhập tài khoản và mật khẩu của Administrator,
chọn OK.
- Chọn Minimize Latency, sau đó chọn OK 2 lần.
- Chọn Yes tại cửa sổ Event Viewer
- Chọn Subscriptions đảm bảo Service Events subscription có trạng thái Active.
- Thực hiện tiếp trên máy BKNP-DC08-01.
- Chọn Start ® Command Prompt. Trong cửa sổ Command Prompt nhập:
•
•
Net Stop DNS, ENTER.
Net Start DNS, ENTER.
- Chuyển sang máy BKNP-SRV08-01,
- Start > Administrative Tools > Event Viewer > Windows Logs > Forwarded Events.
- Khảo sát các sự kiện trong này.
*Sử dụng tính năng Attach a Task to this Log
- Thực hiện trên máy BKNP-SRV08-01.
- Start > Administrative Tools > Event Viewer > Windows Logs. Nhấp chuột phải chọn Attach a Task to this
Event.
- Trong cửa sổ Create a Basic Task chọn Next.
- Trong cửa sổ When a Specific Event is Logged chọn Next.
- Trong cửa sổ Action chọn Display a Message, chọn Next.
- Trong cửa sổ Display a Message nhập các thông số như sau:
- Chọn Next, sau đó chọn Finish. Xuất hiện cửa sổ Event Viewer, chọn OK.
- Chuyển sang máy BKNP-DC08-01, nhập lại lệnh stop và start DNS service.
- Quay lại máy BKNP-SRV08-01. xuất hiện thông báo.
BÀI VIẾT CÙNG CHUYÊN MỤC