Tài liệu HTTP Apache Web Server pdf
Bạn đang xem bản rút gọn của tài liệu. Xem và tải ngay bản đầy đủ của tài liệu tại đây (300.51 KB, 8 trang )
1 - 8 IT Essentials II v1.1 - Lab 10.4.3 Copyright 2002, Cisco Systems, Inc.
Lab 10.4.3: HTTP Apache Web Server
Estimated Time: 55 minutes
Objective
In this lab, the student will learn to install the Apache web server. The student will
examine the configuration files, check the status of the HTTPD daemon and test the
Apache server using Netscape.
Equipment
The following equipment is required for this exercise:
• A computer running Linux Red Hat 7.2 or greater
• A CD-ROM with the Apache RPM
Scenario
The student is the administrator of a Linux server. Install the Apache web application and
test all of its configuration files.
Procedures
Login as the root user and install the Apache web server. Check the Apache
configuration files and the HTTPD daemon. Launch a local web page and test it both
locally and on other classroom computers.
2 - 8 IT Essentials II v1.1 - Lab 10.4.3 Copyright 2002, Cisco Systems, Inc.
Step 1: Mounting the Apache RPM CD-ROM
1. Boot the Linux computer and login as the root user. Launch X Windows (use the
startx command) and make sure to be using the KDE desktop.
2. Go to the desktop and look for the CD-ROM icon. In some Linux systems, the CD-
ROM can be mounted automatically. Click on the CD-ROM to view the contents. If
the contents of the CD-ROM are not visible, run the following command from a
terminal window. Again, the user must be logged with the root account for this
command to work:
mount /mnt/cdrom
Go to the KDE Home Directory window and click on the CD-ROM icon. The contents
of the CD-ROM will now be visible in KDE.
Open the Home Directory (the Linux equivalent of Windows Explorer)
by clicking (once) on the folder in the taskbar.
3 - 8 IT Essentials II v1.1 - Lab 10.4.3 Copyright 2002, Cisco Systems, Inc.
Step 2: Install the Apache RPM
1. When the CD-ROM is open, go to the following directory:
/RedHat/RPMS
Note: If the apache RPM is not found, it might be located on the second disk that came
with RedHat.
Once in the RPMS directory, locate the file called apache-1.3.19-5.i386.rpm. Click once
on this file. The RedHat Package manager will open.
4 - 8 IT Essentials II v1.1 - Lab 10.4.3 Copyright 2002, Cisco Systems, Inc.
2. Click on the Install button. This will install Apache. To verify that the Apache server
was installed correctly, run the following command from the terminal window:
rpm –q apache
3. Write down the results.
__________________________________________________________________
If Apache was installed correctly the screen will look like the following example:
4. After Apache has been installed, remove the CD-ROM. To do this, go back to the
KDE Home Directory and locate the CD-ROM. Again the icon is usually located
under the desktop directory. Once located, right click on the CD-ROM and select the
eject option.
The CD-ROM can also be ejected using a command from the CLI. First, unmount the
CD-ROM, from a terminal window:
umount/mnt/cdrom
5 - 8 IT Essentials II v1.1 - Lab 10.4.3 Copyright 2002, Cisco Systems, Inc.
Press the eject button on the CD-ROM itself and the CD-ROM will come out.
Step 3: Checking the Apache installation files
1. It is important for the Linux administrator to know where the RPM has placed the
Apache configuration files and directories. Below is a list of the important Apache
files and directories with a brief description of each:
Use the cd command (from a terminal window) and go to the following directory:
cd /etc/httpd/conf
2. The /etc/httpd/conf directory is where the configuration file for Apache is located. Use
the ls command to verify that the file exists:
ls –a
Is there a file called httpd.conf present in this directory? Yes/No
___________
3. Go to the following directory:
cd /var/www/html/
This directory is where Apache finds the html startup page. Use the ls command to
verify that the file exists:
ls –a
Is there a file called index.html present in this directory? Yes/No
___________
Go to the following directory. Use the cd command:
cd /etc/init.d/
This directory contains the httpd daemon. A daemon is a small application that runs
as a background task. The httpd daemon must be running for the Apache web server
to work.
Using the ls command, is there a file in this directory called httpd? Yes/No
______
Step 4: The Apache config Files
1. To get familiar with the Apache config file, run the following command from the
command line:
more /etc/httpd/conf/httpd.conf
This is a long file, just skim it and do not make any changes. The # before most of the
lines signifies a comment. Reading the comments is one of the best ways to
understand how the Apache web server works.
2. Can the httpd configuration file be used to determine what TCP port number Apache
uses?
______________________________________________________________
Note: To exit the more command type the letter q and return to the terminal window.
6 - 8 IT Essentials II v1.1 - Lab 10.4.3 Copyright 2002, Cisco Systems, Inc.
Step 5: The Apache home page
1. The Apache index.html (Apache’s startup page) file runs the following command:
vi/var/www/html/index.html
This file contains the startup page text. Change the name of the startup page by
editing this file. Change the main heading of this page to the student login name or
any name the instructor gives.
<!DOCTYPE HTML PUBLIC "-//W3C//DTD HTML 3.2 Final//EN">
<HTML>
<HEAD>
<TITLE>Test Page for the Apache Web Server on Red Hat Linux</TITLE>
</HEAD>
<! Background white, links blue (unvisited), navy (visited), red
(active) >
<BODY BGCOLOR="#FFFFFF">
<H1 ALIGN="CENTER">studentA1</H1>
This page is used to test the proper operation of the Apache Web server
after
it has been installed. If you can read this page, it means that the
Apache
Web server installed at this site is working properly.
<HR WIDTH="50%">
<H2 ALIGN="CENTER">If you are the administrator of this website:</H2>
<P>
You may now add content to this directory, and replace this page. Note
that
until you do so, people visiting your website will see this page, and
not your
content.
</P>
Exit the vi editor and be sure to save, :wq
Step 6: HTTPD Daemon Status
1. Next, verify the httpd daemon status by typing in the following command:
/etc/init.d/httpd status
What is the status of the httpd daemon? Write down the results:
_______________________________________________________________
The following is an example of an httpd daemon that has been stopped.
Using the vi editor, delete the
text here (Test Page) and place
the login ID here.
7 - 8 IT Essentials II v1.1 - Lab 10.4.3 Copyright 2002, Cisco Systems, Inc.
If the httpd daemon is stopped, enter the following command:
/etc/init.d/httpd start
Write down the results:
_______________________________________________________________
Note: To stop Apache type: /etc/init.d/httpd stop
Step 7: Looking at the Home Page in Netscape
1. Go back to the KDE desktop and launch the Netscape browser. Netscape will be
under the “K” button. Go to the Internet subdirectory.
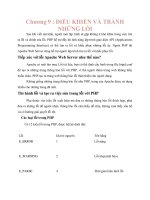
2. After Netscape has loaded, go to the following URL:
http://localhost
The user will see the local Apache server index.html file.
See the student name at the top of the page? Yes/No
_______________________
Example of Apache server
8 - 8 IT Essentials II v1.1 - Lab 10.4.3 Copyright 2002, Cisco Systems, Inc.
Step 8: Connecting to Neighbors
From a terminal window, run the following command:
ifconfig
Find the IP address of the eth0. Write down the IP address and give it to other students in
the class. Have them type in the IP address being used in their Netscape browser.
Example: http://192.168.5.5
Can they see the web page? Can their web pages be seen? Yes/No
____________
Troubleshooting
Did the web page work? If not, go through this checklist:
__________________________________________________________________
• Is Apache installed correctly? Use the rpm –q apache command.
• Were the configuration files in the correct directories?
• Is the HTTPD daemon running? Test it: /etc/init.d/httpd status
• Did the Web server work locally but the neighbors could not see it? Check the
network connections. Make sure to not be behind a firewall.
Reflection
With a web server up and running, the Linux system now needs to be more reliable than
ever. In the space below identify five hardware and software issues that affect a computer’s
reliability. After each item, list what can be done as the Linux administrator in order to make
the computer more reliable.
_____________________________________________________________________
_____________________________________________________________________
_____________________________________________________________________
_____________________________________________________________________