Tài liệu Methods of Restricting Registry Access phần 1 ppt
Bạn đang xem bản rút gọn của tài liệu. Xem và tải ngay bản đầy đủ của tài liệu tại đây (33.34 KB, 7 trang )
Methods of Restricting Registry Access
As was already mentioned, Windows GUI was always oriented towards beginners who
may need protection from human errors. Starting with Windows 2000, Microsoft began
to introduce additional protective measures, practically each of these are also present in
Windows XP and products of the Windows Server 2003 family. One such feature is
known as "protected operating system files"(which shouldn't be edited, or even seen, by
an ordinary user). These files are sometimes called "super hidden". Actually, there's no
such attribute. The files simply have a combination of Hidden and System attributes. By
default, Windows Explorer doesn't display these files. You may set Hidden and System
attributes for the tools that ordinary users should not run, including networking tools,
resource kit utilities and, of course, registry editors. Thus, you'll "hide" them from
beginners, who may be afraid of command lines such as dir /a.
N
ote Did you place the Regedit shortcut on the desktop or on the Start menu (just for
convenience)? Well, don't forget to remove all such shortcuts, otherwise users will
be able to find them with the Search command. Also, don't forget that the Start
menu contains the Run command, and setting the Hidden and System attributes
won't prevent the user from starting Regedit.exe using this command.
Some other methods of preventing users from running potentially dangerous programs
include the following approaches:
Removing executable files from users' workstations
Using Software Restriction Policies
Protecting executable files by using file system permissions
Editing access rights to registry keys
Removing Executables
One of the most common ways to prevent users from running undesirable tools is to
remove the executables that you don't want them to run. For example, some authors
recommend that one "delete Regedit.exe from all workstations". This, of course, will
prevent beginners from running it. But what about convenience? A better solution would
be to rename the file and move it to another directory. Of course, if you decide to do so,
don't forget where you moved the file and what you named it. Besides this, there are
other problems associated with this approach:
First, Windows File Protection (WFP) might make it difficult to remove tools that
are considered part of the OS and thus protected. Furthermore, patches, system
updates, and additional Windows components might reinstall the removed
executable without warning.
Second, savvy users and skilled attackers can still provide their own copies of a
tool that you want to restrict, not to mention other unauthorized programs,
including software pranks, spyware, and keystroke loggers that could enable them
to capture passwords or other sensitive information. This has become a primary
concern with the arrival of pocket-sized ultra-portable storage media, such as USB
Flash drives, which can hold 8 Mb - 1 GB of data that can be instantly accessed
from any PC with a USB port. As was outlined in Chapter 2
, the introduction of
these devices into corporate networks offers users a convenient alternative to
floppy disks and ZIP drives. At the same time, however, these devices present
several security challenges to network administrators. Besides the introduction of
harmful software, the threat of data theft is also a possibility. Note that any
unattended and unlocked PC with a USB port can become an ideal target for
attackers or disgruntled employees.
N
ote In order to protect one's computer against the risks posed by ultra-portable USB
media, several steps can be taken. First of all, you must educate your users and
establish a corporate policy for taking data out of the office and bringing files from
home. In order to foil attempts at data theft, it is recommended that you configure
all workstations to lock automatically when left unattended for a few minutes.
Usually this interval is set from 10 to 20 minutes, but for those desktops holding
sensitive data the recommended value is 5 minutes or less. Also notice that recently
USB Flash drives with built-in security features have become available. Thus, if
you don't want to completely eliminate such a device from being used, consider
using only secure devices. Finally, you might wish to restrict USB ports on all
desktops. Although USB devices can't be managed using Group Policy, you can use
third-party tools such as SecureNT (which can be downloaded from
/>). This software can
control access to all I/O devices such as floppy drives, PDAs, USB external storage,
CD-ROM, and many other PnP devices.
Using Software Restriction Policies
The ability to use Software Restriction Policies is a new feature of Windows XP and
Windows Server 2003. Software Restriction Policies provide a completely new method
of preventing unauthorized usage of system tools and other potentially dangerous
software. It also helps you to restrict users by allowing them to run only approved
software, and prevents attackers from using system tools in an attack on the system.
When using Software Restriction Policies, the system administrator can choose one of the
following two approaches:
Create a policy that prohibits all software, then create unrestricted rules, which
allow only approved software to run.
Create a policy that allows all software to run, then create a set of rules which
prevents specific programs from running.
Software Restriction Policies are based on the following types of rules:
Path - Rules of this type explicitly identify a program path; can be bypassed if the
user places a copy of the restricted program in a different location.
Hash - When a program is selected, a cryptographic hash is built. Any attempt to
run the program will result in a check of the hash, and the program will be allowed
to run or prohibited from doing so according to the policy type. In contrast to the
previous type, rules of this type are not so easy to bypass, since the program can
reside anywhere, and the action taken will be the same.
Certificate - Rules of this type are built based on the presence of a code publishers'
software-signing certificate. Certificate rules apply to scripts and MSI files only.
To use them, a code-signing certificate is used to sign the files. Certificate rules
are used to identify the code-signing certificates that are valid on this computer or
on the computers within the Group Policy Container (GPC) of this GPO.
Internet zone - This option enables the administrator to prevent users from running
software from a particular Internet Explorer (IE) zone. However, this type of rule
cannot prevent users from running software that has already been downloaded
from that zone.
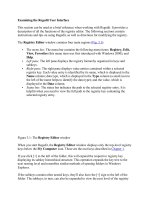
To create, examine, or manage local Software Restriction Policies, proceed as follows:
1. Click Start, select Run, and type secpol.msc in the Open field, then click OK, or,
alternately, open the Control Panel window, and select Administrative Tools |
Local Security Policy.
2. Select the Software Restriction Policies container. If no policy exists, right-click
the container, and select the Create New Policies command (Fig. 9.1
).
Figure 9.1: Creating a new Software Restriction Policy
N
ote To create or manage Software Restriction Polices for a site, domain, or
organizational unit (OU), open the Group Policy Object (GPO) for the
appropriate container. The Software Restriction Policy container is located
under Computer Settings | Security Settings.
3. After you create a new Software Restriction policy, the console window will look
as shown in Fig. 9.2
. Enforcement properties include or exclude DLLs and
identify whether the policy applies to members of the Administrators group (Fig.
9.3). By default, policies apply to all users and program files except library files
such as DLLs. Additional settings include the Designated File Types option (Fig.
9.4) that allows you to edit the list of so-called designated file types, which
includes files that by default are considered to be in executable code. Using this
option, you can add new file types to that list as well as delete specific files from
the list of executables. Finally, the Trusted Publishers option opens the Trusted
Publishers Properties window (Fig. 9.5
), where you can determine whether
users, computer administrators, or enterprise administrators can select the trusted
publishers of the software.
Figure 9.2: Newly created Software Restriction Policies
Figure 9.3: The Enforcement Properties window
Figure 9.4: The Designated File Types Properties window
Figure 9.5: The Trusted Publishers Properties window
4. Using the Software Restriction Policies, you can easily create a policy restricting
the use of specific software tools. To do so, you have to determine the list of tools
that need to be restricted and the type of rule that will be used. Notice that it is up
to you to compose the list of restricted tools (as was already mentioned, this list
would normally include various networking tools, resource kit utilities, registry
editors, and other potentially dangerous tools).
N
ote
N
o
t
ice that Software Restriction Policy is itself a potentially dangerous tool
that can easily allow you to create such a policy that can wreak havoc on
your organization by prohibiting users from running applications they really
need or even preventing client systems from running. As a result, it is
advisable that you first create a test policy using the Local Security Policy
MMC snap-in on a standalone workstation running Windows XP, and then
test it on a single machine first. Having created the policy, test it by applying
it to a single OU that represents a test computer or computers to make sure
that the test policy satisfies your requirements without having a negative
impact on other software. After that, you can enforce the policy in multiple
systems in your production environment.
5. The best way of creating your first software restriction policy is by starting up
with all software allowed to run and then creating rules that prevent individual
programs from running. To illustrate this approach, let us create a simple Software
Restriction Policy that will prevent the following tools from running:
o All software located in the D:\Program Files\Resource Kit and
E:\Olga\TOOLZ folders
o Regedt32.exe and Regedit.exe tools (no matter where registry editors are
located)
o LC3.exe password-auditing tool (no matter where it is located)
o Software on sites included in the IE Restricted Sites security zone
o Solitaire game (sol.exe - no matter where it is located)
The completed software restriction policy is shown in Fig. 9.6
.
Figure 9.6: The completed software restriction policy, which lists the policy
type and basic information
6. Since this policy should not restrict administrators, the first step to take is to set
the policy so that it will only affect ordinary users. To do so, double-click the
Enforcement object at the root of the Software Restriction Policy container. In
the resulting window (see Fig. 9.3
), set the All users except local administrators
option, then click OK.
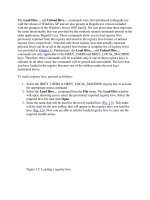
7. Next, create a new rule for each tool that should be restricted. For example, in
order to create a new path rule, right-click the Additional Rules container, and
select the Create new path rule command from the context menu. The New Path
Rule window will open (Fig. 9.7
). Enter the path (for example,
E:\OLGA\TOOLZ), leave the Security level option at Disallowed and click OK.
Proceed the same way to create path rules for all the software that you want to
restrict using path rules.