Tài liệu Utilities: Your Mac OS X Toolbox phần 2 docx
Bạn đang xem bản rút gọn của tài liệu. Xem và tải ngay bản đầy đủ của tài liệu tại đây (55.54 KB, 14 trang )
Tip: After you double-click a disk image, click Skip in the verification box that appears.
If something truly got scrambled during the download, you'll know about it right away—
your file won't decompress correctly, or it'll display the wrong icon, for example.In fact,
you can make Disk Utility always skip that verification business, which is a relic from the
days of floppy disks. To do so, choose Disk Utility Preferences, and turn off "Check
images on locked media."
You can create disk images, too. Doing so can be very handy in situations like the
following:
• You want to create a backup of an important CD. By turning it into a disk-image
file on your hard drive, you'll always have a safety copy, ready to burn back onto a
new CD. (This is an essential practice for educational CDs that kids will be
handling soon after eating peanut butter and jelly.)
• You want to replicate your entire hard drive—complete with all of its files,
programs, folder setups, and so on—onto a new, bigger hard drive (or a new,
better Mac), using the Restore feature described earlier.
• You want to back up your entire hard drive, or maybe just a certain chunk of it,
onto an iPod or another disk. (Again, you can later use the Restore function to
complete the transaction.)
GEM IN THE ROUGH
The Sparse Image
One of the coolest Disk Utility features is also one of the most buried.
Turns out you can make a nice, hermetically sealed, password-protected disk
image that starts out small, but magically increases as you stuff more files into
it. If the usual disk image is like a steel bucket—a fixed size forever—a sparse
image is like an elastic bag.
Choose File New Blank Disk Image. In the resulting dialog box, name
the file you're creating (which you'll double-click to make the virtual disk
appear), as well as the virtual disk itself.
From the Volume Size pop-up menu, choose the maximum size this disk image
will ever be. The beautiful part is that it will probably never occupy that much
disk space; it starts out small, and slowly expands only as necessary. But you're
setting the maximum here.
From the Encryption pop-up menu, choose one of the two scrambling methods
that will password-protect your disk image. Finally, from the Image Format
pop-up menu—this is the key step—choose "sparse disk image."
Click Create. Make up a password (type it twice); for added security, don't store
in your Keychain. (If you store it in your Keychain, no password at all will be
required to open it by snoopy passersby.) Then click Create.
Now, on your desktop, there's a disk image file with the suffix ". sparseimage."
It occupies only 26 MB on your hard drive to start with.
Double-click it and enter your password to bring the actual virtual disk icon to
your desktop. You can now start filling the disk image up with private stuff. The
.sparseimage file will grow automatically to accommodate it—but only as
necessary.
•
• You bought a game that requires its CD to be in the drive at all times. Many
programs like these run equally well off of a mounted disk image that you made
from the original CD.
• You want to send somebody else a copy of a disk via the Internet. You simply
create a disk image, and then send that—preferably in compressed form.
Here's how you make a disk image.
• To imageize a disk or partition. Click the name of the disk in the left-panel list,
where you see the disks currently in, or attached to, your Mac. (The topmost item
is the name of your drive, like "484.0 MB MATSHITA DVD-R" for a DVD drive
or "74.5 GB Hitachi" for a hard drive. Beneath that entry, you generally see the
name of the actual partition, like "Macintosh HD," or the CD's name as it appears
on the screen.)
Then choose File New Disk Image from [whatever the disk or partition's
name is].
• To image-ize a folder. Choose File New Disk Image from Folder. In the
Open dialog box, click the folder you want and then click Image.
Tip: Disk Utility can't turn an individual file into a disk image. But you can put a single
file into a folder, and then make a disk image of it.
Either way, the next dialog box (Figure 10-29
) offers some fascinating options.
• Image Format. If you choose "read/write," your disk image file, when double
clicked, turns into a super-bimitation of a hard drive. You can drag files and
folders onto it, drag them off of it, change icons' names on it, and so on.
If you choose "read-only," however, the result behaves more like a CD. You can
copy things off of it, but not make any changes to it.
Figure 10-29. These two pop-up menus let you specify (a) what kind of disk
image you want, and (b) whether or not you want it password protected. The
latter option is great when you want to password-protect one folder, without
bothering with your entire Home folder.
The "compressed" option is best if you intend to send the resulting file by email,
post it for Web download, or preserve the disk image on some backup disk for a
rainy day. It takes a little longer to create a simulated disk when you double-click
the disk image file, but it takes up a lot less disk space than an uncompressed
version.
Finally, choose "DVD/CD master" if you're copying a CD or a DVD. The
resulting file is a perfect mirror of the original disc, ready for copying onto a blank
CD or DVD when the time comes.
• Encryption. Here's an easy way to lock private files away into a vault that nobody
else can open. If you choose one of these two AES encryption options (choose
AES-128, if you value your time), you're asked to assign a password to your new
image file. Nobody can open it without the password—not even you. On the other
hand, if you save it into your Keychain (Section 12.9.5.1
), it's not such a disaster if
you forget the password.
• SaveAs. Choose a name and location for your new image file. The name you
choose here doesn't need to match the original disk or folder name.
When you click Save (or press Enter), if you opted to create an encrypted image,
you're asked to make up a password at this point.
Otherwise, Disk Utility now creates the image and then mounts it—that is, turns
the image file into a simulated, yet fully functional, disk icon on your desktop.
When you're finished working with the disk, eject it as you would any disk
(Controlclick it and choose Eject, for example). Hang onto the .dmg disk image
file itself, however. This is the file you'll need to double-click if you ever want to
recreate your "simulated disk."
10.30.11.3. Turning an image into a CD
One of the other most common disk-image tasks is turning a disk image back into a CD
or DVD—provided you have a CD or DVD burner on your Mac, of course.
All you have to do is drag the .dmg file into the Disk Utility window, select it, and click
the Burn icon on the toolbar (or, alternatively, Control-click the .dmg icon and choose
Burn from the shortcut menu). Insert a blank CD or DVD, and then click Burn.
10.30.12. Grab
Grab takes pictures of your Mac's screen, for use when you're writing up instructions,
illustrating a computer book, or collecting proof of some secret screen you found buried
in a game. You can take pictures of the entire screen (press -Z, which for once in its
life does not mean Undo) or capture only the contents of a rectangular selection (press
Shift- -A). When you're finished, Grab displays your snapshot in a new window,
which you can print, close without saving, or save as a TIFF file, ready for emailing or
inserting into a manuscript.
Now, as experienced Mac enthusiasts already know, the Mac OS has long had its own
built-in shortcuts for capturing screenshots: Press Shift- -3 to take a picture of the
whole screen, and Shift- -4 to capture a rectangular selection.
So why use Grab instead? In many cases, you shouldn't. The Shift- -3 and Shift- -
4 shortcuts work like a dream. But there are some cases in which it might make more
sense to opt for Grab. Here are three:
• Grab can make a timed screen capture (choose Capture Timed Screen, or
press Shift- -Z), which lets you enjoy a 10-second delay be fore the screen shot
is actually taken. After you click the Start Timer button, you have an opportunity
to activate windows, pull down menus, drag items around, and otherwise set up
the shot before Grab shoots the picture.
• When you capture a screenshot using Grab's Selection command, the size of your
selection is displayed, in pixels, right under the pointer as you drag. If you need to
capture a 256-pixel-wide square, for example, you can do so with pinpoint
accuracy. (Choose Edit Inspector to read the dimensions of a screenshot after
you capture it.)
• With Grab, you have the option of including the cursor in the picture, which is
extremely useful when you're showing a menu being pulled down or a button
being clicked. (Mac OS X's screenshot keystrokes, by contrast, always eliminate
the pointer.) Use the technique described in Figure 10-30
to add the pointer style
of your choice to a Grab screenshot.
Tip: Actually, if you're going to write a book or manual about Mac OS X, the program
you really need is Snapz Pro X; a trial version is available from this book's "Missing CD"
at www.missingmanuals.com
, among other places. It offers far more flexibility than any
of Mac OS X's own screenshot features. For example, you have a choice of file format,
you can neatly snip out just one dialog box or window with a single click, and you can
even capture movies of screen activity.
Figure 10-30. Unlike the Shift- -3 or Shift- -4 keystrokes, Grab lets you
include the pointer/cursor in the picture—or hide it. Choose Grab Preferences
and pick one of the eight different pointer styles, or choose to keep the pointer
hidden by activating the blank button in the upper-left corner.
10.30.13. Grapher
Yes, kids, it's the next episode of Apple's on-again, off-again love affair with the
graphing calculator! Now you, too, can create 2-D or 3-D graphs of staggering beauty
and complexity.
But seriously, folks. This equation grapher is an amazing piece of work.
When you first open Grapher, you're asked to choose what kind of virtual "graph paper"
you want: two-dimensional (standard, polar, logarithmic) or three-dimensional (cubic,
spherical, cylindrical). Click a name to see a preview; when you're happy with the
selection, click Open.
Now the main Grapher window appears (Figure 10-31
). Do yourself a favor. Spend a few
wow-inducing minutes choosing canned equations from the Examples menu, and
watching how Grapher whips up gorgeous, colorful, sometimes animated graphs on the
fly.
Figure 10-31. In general, you type equations into Grapher just as you would on
paper (like z=2xy). If in doubt, check the online help, which offers enough hints on
functions, constants, differential equations, series, and periodic equations to keep
the A Beautiful Mind guy busy for days.
When you're ready to plug in an equation of your own, type it into the text box at the top
of the window. If you're not such a math hotshot, or you're not sure of the equation
format, work from the canned equations and mathematical building blocks that appear
when you choose Equation New Equation from Template or Window Show
Equation Palette (a floating window containing a huge selection of math symbols and
constants).
Tip: If you don't know the keystroke that produces a mathematical symbol like pi or
theta, you can just type the word pi or theta. Grapher replaces it with the correct symbol
automatically.
Once the graph is up on the screen, you can tailor it like this:
• To move a 2-D graph in the window, choose View Move Tool and then drag;
to move a 3-D graph, -drag it.
• To rotate a 3-D graph, drag in any direction. If you add the Option key, you flip
the graph around only one axis.
• To change the colors, line thicknesses, 3-D "walls," and other graphic elements,
click the I button (or choose Window Show Inspector) to open the formatting
palette. The controls you find here vary by graph type, but rest assured that
Grapher can accommodate your every visual whim.
• To change the fonts and sizes, choose Grapher Preferences. On the Equations
panel, the four sliders let you specify the relative sizes of the text elements. If you
click the sample equation, the Font panel appears (Section 14.7.3
), so you can
fiddle with the type.
• Add your own captions, arrows, ovals, or rectangles using the Object menu.
When it's all over, you can preserve your masterpiece using any of these techniques:
• Export a graphic by choosing File Export.
• Copy an equation to the Clipboard by Control-clicking it and choosing Copy As
TIFF (or EPS, or whatever) from the shortcut menu. Now you can paste it into
another program.
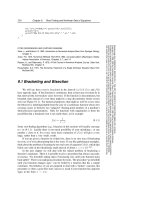
POWER USERS' CLINIC
For Mathematicians (and Physicists, Scientists, and Students) Only
If you're into math, science, or studying math or science, Grapher is a
tremendous addition to Mac OS X. There's a whole lot to it—but if you're just
getting started, here are a few features not to miss:
o You can calculate values, intercepts, derivatives, and integrals (even
indefinite integrals) by using the Equation Evaluation and Equation
Integration commands.
o Some useful ready-made equation components await in the pop-up button
at the right side of the equation text box. Using the Sum and Product
symbols, for example, you can quickly calculate summations and
products.
o That same pop-up menu can help you generate piecewise, parametric,
and other specialized kinds of graphs (this means you, math students).
• Export an animated graph by choosing Equation Create Animation. The
resulting dialog box lets you specify how long you want the movie to last (and a
lot of other parameters).
Tip: If you Shift-drag the starting or ending images at the bottom, you can change their
size.
Finally, click Create Animation. After a moment, the finished movie appears. If you like
it the way it is, choose File Save As to preserve it on your hard drive for future
generations.
10.30.14. Java
Programmers generally use the Java programming language to create small programs that
they then embed into Web pages—animated effects, clocks, calculators, stock tickers,
and so on. Your browser automatically downloads and runs such applets (assuming that
you have "Enable Java" turned on in your browser).
Your Java folder contains several Java-related tools, which exist primarily for the benefit
of Web programmers and Web programs (including Safari).
10.30.15. Keychain Access
Keychain Access memorizes and stores all your secret information—passwords for
network access, file servers, FTP sites, Web pages, and other secure items. For
instructions on using Keychain Access, see Chapter 12
.
10.30.16. Migration Assistant
This little cutie automates the transfer of all your stuff from one Mac to another—your
Home folder, network settings, programs, and more. This comes in extremely handy
when you buy a newer, better Mac—or when you need Time Machine to recover an
entire dead Mac's worth of data. (It can also copy everything over from a secondary hard
drive or partition.)
The instructions on the screen guide you through the process (see Section A.7
).
10.30.17. Network Utility
The Network Utility gathers information about Web sites and network citizens. It offers a
suite of standard Internet tools like NetStat, Ping, Traceroute, Finger, and Whois—
advanced tools, to be sure, but ones that even Mac novices may be asked to fire up when
calling a technician for Internet help.
FREQUENTLY ASKED QUESTIONS
Key Caps: Missing In Action?
Hey, where's Key Caps!? I used to use this program all the time to figure out
how to type special symbols (like ¢) with hidden key combinations (like Option-
4). Now it's not even there anymore!
Well, that's not quite true. It's now called Keyboard Viewer. You get to it via
System Preferences International Input Menu.
Section 9.13.3.1 tells all.
Otherwise, you probably won't need to use Network Utility to get your work done.
However, Network Utility can be useful when you're performing Internet detective work.
• Whois ("who is") can gather an amazing amount of information about the owners
of any particular domain (such as www.apple.com
)—including name and address
info, telephone numbers, and administrative contacts. It uses the technique shown
in Figure 10-32
.
Figure 10-32. The Whois tool is a powerful part of Network Utility. First
enter a domain that you want information about, then choose a Whois server
from the pop-up menu (you might try whois. networksolutions. com). When
you click the Whois button, you get a surprisingly revealing report about the
owner of the domain, including phone numbers, fax numbers, contact names,
and so on.
• Use Ping to enter a Web address (such as www.google.com), and then "ping"
(send out a "sonar" signal to) the server to see how long it takes for it to respond to
your request. Network Utility reports the response time in milliseconds—a useful
test when you're trying to see if a remote server (a Web site, for example) is up
and running. (The time it takes for the ping to report back to you also tells you
how busy that server is.)
• Traceroute lets you track how many "hops" are required for your Mac to
communicate with a certain Web server. Just type in the network address or URL,
and then click Trace. You'll see that your request actually jumps from one trunk of
the Internet to another, from router to router, as it makes its way to its destination.
You'll learn that a message sometimes crisscrosses the entire country before it
arrives at its destination. You can also see how long each leg of the journey took,
in milliseconds.
10.30.18. ODBC Administrator
This program is designed to arbitrate ODBC access requests. Any questions?
If you have no idea what that means, and no corporate system administrator has sat down
to explain it to you, then your daily work probably doesn't involve working with
corporate ODBC (Open Database Connectivity) databases. You can ignore this program
or throw it away.
10.30.19. Podcast Capture
This program is a front end for Podcast Producer, a professional-league podcast recording
and publishing program that's part of Apple's Mac OS X Server software suite. Unless
you work in an office where a Mac OS X Server hums away in a back room, you can toss
this program.
10.30.20. RAID Utility
Another program you probably don't need. It's useful only if your office has Mac OS X
Server, and only if your Mac has a RAID (multiple-disk system) card installed.
10.30.21. System Profiler
System Profiler (once called Apple System Profiler) is a great tool for learning exactly
what's installed on your Mac and what's not—in terms of both hardware and software.
The people who answer the phones on Apple's tech-support line are particularly fond of
System Profiler, since the detailed information it reports can be very useful for
troubleshooting nasty problems.
There are now three ways to open System Profiler:
• Slow. Burrow into your Applications Utilities folder; double-click System
Profiler.
• Medium. Choose About This Mac. In the resulting dialog box, click
More Info.
Tip: If you click your Mac OS X version number twice in the About box, you get
to see your Mac's serial number!
• Fast. Hold down the Option key, which makes the About This Mac
command change to say System Profiler. Choose it.
When you launch System Profiler, it reports information about your Mac in a list down
the left side (Figure 10-33
).
They fall into these categories:
• Hardware. Click this word to see precisely which model Mac you have, what kind
of chip is inside (and how many), how much memory it has, and its serial number.
If you expand the flippy triangle, you get to see details about which Memory slots
are filled and the size of the memory module in each slot; what kind of Disc
Burning your Mac can do (DVD-R, DVD+R, and so on); what PCI Cards are
installed in your expansion slots; what Graphics/Displays circuitry you have
(graphics card and monitor); what's attached to your ATA bus (internal drives, like
your DVD drive and hard drive); what's connected to your SCSI, USB, and
FireWire chains, if anything; and much more.
Figure 10-33. Does your Mac-Book's chip run at 2 Ghz or 2.6? What
percentage of your external hard drive is filled up? Want a comprehensive
list of every program installed on your Mac, with version numbers? Can your
DVD burner burn dual-layer discs? And (shown here): Does your laptop have
any open slots for extra RAM?
• Network. This section reveals details on your AirPort Card (if you have one), what
Modems you have, what Internet connection Locations you've established (Section
18.5.1), and so on.
• Software. Click this heading to see exactly which version of Mac OS X you have,
and what your computer's name is, as far as the network is concerned ("Chris's
Computer," for example).
The Applications list documents every program on your system, with version
information—a quick inventory of what you've installed on your Mac. It's useful
for spotting duplicate copies of programs.
Tip: The right-hand column of the Applications list identifies each program as
being Universal or PowerPC (or, in rare cases, Intel). (A Universal program can
run natively—at full speed—on either Intel-based Macs or earlier models; a
PowerPC program runs natively on older Macs, but somewhat slower on Intel
Macs because it has to go through the Rosetta translator described on Section
5.10.7). This list is a handy summary of which programs have been updated for
the Intel generation.
Similar information shows up in the Extensions panel. In this sense, "extensions"
doesn't mean system extensions like those that made life a living hell in Mac OS 9
and earlier. In Mac OS X, the term extensions refers to a different kind of addon
component to the core system software. Generally, these are drivers for the Mac's
various components, which sit in the System Library Extensions folder.
Whatever's in that folder is what you see listed in this panel.
Other categories include self-explanatory lists like Fonts, Preference Panes, and
Startup Items.
Finally, the Logs panel reveals your Mac's secret diary: a record of the traumatic
events that it experiences from day to day. (Many of these are the same as those
revealed by the Console utility; see Section 10.30.7
.) Some reveal crash logs,
which are detailed technical descriptions of what went wrong when various
programs crashed, and what was stored in memory at the time.
POWER USERS' CLINIC
The Xcode Tools
The Leopard DVD includes a special batch of programs, known as the Xcode
Tools, primarily for developers (programmers) who write Mac OS X software.
You'll need some of these programs if you want to get into some of the more
esoteric (or, as some would say, fun) Mac OS X tricks and tips.
To install these tools, open the Optional Installs Xcode Tools window on
the DVD, and doubleclick XcodeTools. mpkg. After following the onscreen
prompts, you wind up with a new folder called Developer on your hard drive. Its
Applications Utilities folder contains a few programs that are user-friendly
enough even for nonprogrammers.
CrashReporterPrefs, for example, lets you tell Mac OS X when to display the
"Application Unexpectedly Quit" dialog box. If you choose Server, you'll never
see one of those annoying dialog boxes again—perfect if you have a program
that just won't stop crashing.
Also, if you open Developer Applications Graphics Tools, you'll find
Quartz Composer Visualizer. This program lets you build screen savers,
animations, and tons of other graphical goodies without writing a single line of
code.
Finally, don't miss Core Image Fun House (also in Developer Applications
Graphics Tools). It's intended to be a showcase for Mac OS X's Core Image
technologies, which constitute a ready-to-use photo-transformation toolkit that
software companies can build into their programs. Fun House lets you apply
dozens of mindblowing visual effects to your images and movies—distortions,
color corrections, solar flares, and so on—with nothing more than a few clicks.
(If your Mac is fast enough, you can even adjust filters in real time, so you can
see the result of your modifications as you make them.) One possibility is
shown here.
When you're done psychedelicizing your image, you can export it to a standard
JPEG or TIFF image by choosing File Save As. From there, you can show
it off on a Web site, email it to your friends, or make it your desktop
background.
Unfortunately, there's not much plain English here to help you understand the
crash, or how to avoid it in the future. Most of it runs along the lines of
"Exception: EXC_BAD_ACCESS (0x0001); Codes:
KERN_INVALID_ADDRESS (0x0001) at 0x2f6b657d." In other words, it's
primarily for the benefit of programmers. Still, tech-support staff may occasionally
ask to see the information in one of these logs.
Tip: If any of these screens is showing you more or less technical information than you'd
like, use the View menu to choose Mini Profile, Basic Profile, or Full Profile.
10.30.21.1. Saving a report
To create a handsomely formatted report that you can print or save, choose File
Save, and then choose Rich Text Format from the File Format pop-up menu. Note,
however, that the resulting report can be well over 100 pages long. In many cases, you're
better off simply making a screenshot of the relevant Profiler screen, as described on
Section 14.10
, or saving the thing as a PDF file (Section 14.2.2).
10.30.22. Terminal
Terminal opens a terminal window with a command line interface, taking you deep into
the world of Unix, the operating system on which Mac OS X is based. Chapters Chapter
16 and Chapter 17 offer a crash course on this powerful window into the Mac's shadow
operating system.
10.30.23. VoiceOver Utility
For details on this screen-reader software, see Section 15.5.1.3
.
10.30.24. X11
Deep inside Mac OS X beats the heart of Unix, the industrial-strength operating system
that drives many a corporation (and thrills many a programmer geek). X11 is a version of
the X Window System, a software suite that gives Unix programs a face—makes them
appear in actual windows. Some details are in Chapter 17
, and many more are at
/>.