Tài liệu Windows and How to Work Them phần 2 doc
Bạn đang xem bản rút gọn của tài liệu. Xem và tải ngay bản đầy đủ của tài liệu tại đây (29.19 KB, 5 trang )
appear dimmed and colorless. Second, the title bar acts as a handle that lets you move the
window around on the screen.
Of course, you can also move Mac OS X windows by dragging any "shiny gray" edge;
see Figure 1-4
.
Tip: Here's a nifty keyboard shortcut: You can cycle through the different open windows
in one program without using the mouse. Just press -~ (that is, the tilde key, to the
left of the number 1 key). With each press, you bring a different window forward within
the current program. It works both in the Finder and in your everyday programs, and it
beats the pants off using the mouse to choose a name from the Window menu.
Figure 1-4. Mac OS X is no longer made of simulated brushed aluminum. Now it's
accented with strips of gradient gray (that is, light-to-dark shading). Any of these
gradient gray strips are fair game as handles to drag the window.
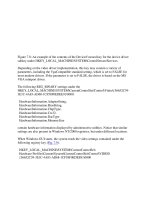
After you've opened one folder that's inside another, the title bar's secret folder hierarchy
menu is an efficient way to backtrack—to return to the enclosing window. Get in the
habit of right-clicking (or Control-clicking, or -clicking) the name of the window to
access the menu shown in Figure 1-5
. (You can release the Control or key
immediately after clicking.)
By choosing the name of a folder from this menu, you open the corresponding window.
When browsing the contents of the Users folder, for example, you can return to the main
hard drive window by Control-clicking the folder name Users and then choosing
Macintosh HD from the menu. (The option to Control- or right-click for this function is
new in Leopard.)
Tip: Keyboard lovers, take note. Instead of using this title bar menu, you can also jump to
the enclosing window by pressing -up arrow, which is the shortcut for the Go
Enclosing Folder command.
Figure 1-5. Control-click (or right-click, or -click) a Finder window's title bar to
summon the hidden folder hierarchy menu.
This trick also works in most other Mac OS X programs. For example, you can
-click a document window's title to find out where the document is actually saved on
your hard drive.
Pressing -down arrow takes you back into the folder you started in, assuming that it's
still highlighted. (This makes more sense when you try it than when you read it.)
Once you've mastered dragging, you're ready for these three terrific title bar tips:
• Pressing the key lets you drag the title bar of an inactive window—one that's
partly covered by a window in front—without bringing it to the front. (Drag any
empty part of the title bar—not the title itself.)
By the way, you can close, minimize, or zoom a background window without the
help of the key. Just click one of those three corresponding title-bar buttons
normally. Mac OS X does its thing without taking you out of your current window
or program.
Tip: In previous Mac OS X versions, you could press the key to operate any
control—resize boxes, pop-up menus, and even scroll bars—in a background
window without bringing it to the front. But no longer; in Leopard, you can't
operate those window features when they're in the background, with or without the
key.
• By double-clicking the title bar,you minimize the window, making it collapse into
the Dock exactly as though you had clicked the Minimize button (assuming you
haven't turned off this feature in System Preferences, of course).
• The Option key means "Apply this action to all windows in the current program."
For example, Option-double-clicking any title bar minimizes all desktop windows,
sending them flying to the Dock.
1.2.4. Close Button
As the tip of your cursor crosses the three buttons at the upper-left corner of a window,
tiny symbols appear inside them: x, -, and +. Ignore the gossip that these symbols were
added to help color-blind people who can't distinguish the colors red, yellow, and green.
Color-blind people are perfectly capable of distinguishing the buttons by their positions,
just as they do with traffic lights.
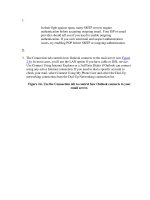
POWER USERS' CLINIC
The Go to Folder Command
Sometimes a Unix tentacle pokes through the user-friendly Mac OS X interface.
Every now and then, you find a place where you can use Unix shortcuts instead
of the mouse.
One classic example is the Go Go to Folder command (Shift- -G). It
brings up a box like the one shown here.
The purpose of this box is to let you jump directly to a certain folder on your
Mac by typing its Unix folder path. Depending on your point of view, this
special box is either a shortcut or a detour.
For example you want to see what's in the Documents folder of your Home
folder, you could choose Go Go to Folder and type this:
/Users/chris/Documents
Then click Go or press Return. (In this example, of course, chris is your short
account name.)
In other words, you're telling the Mac to open the Users folder in your main
hard drive window, then your Home folder inside that, and then the Documents
folder inside that. Each slash means "and then open." (You can leave off the
name of your hard drive if your path begins with a slash.) When you press
Enter, the folder you specified pops open immediately.
Of course, if you really wanted to jump to your Documents folder, you'd be
wasting your time by typing all that. Unix (and therefore Mac OS X) offers a
handy shortcut that means "home folder." It's the tilde character (~) at the upper-
left corner of your keyboard.
To see what's in your Home folder, then, you could type just that ~ symbol into
the Go To Folder box and then press Return. Or you could add some slashes to
it to specify a folder inside your Home folder, like this:
~/Documents
You can even jump to someone else's Home folder by typing a name after the
symbol, like this:
~chris
If you get into this sort of thing, here's another shortcut worth noting: If you
type nothing but a slash (/), and then press Return, you jump immediately to the
Computer window, which provides an overview of all your disks.
Note, too, that you don't have to type out the full path—only the part that drills
down from the win-dow you're in. If your Home folder window is already open,
for example, you can open the Pictures folder just by typing Pictures.
But the Go to Folder trick really turns into a high-octane timesaver if you use
auto completion. Here's how it works: After each slash, you can type only
enough letters of a folder's name to give Mac OS X the idea—de instead of
desktop, for example—and then wait a fraction of a second (or, if you're late for
a plane, press the Tab key). Mac OS X instantly and automatically fills in the
rest of the folder's name. It even auto-capitalizes the folder names for you. (In
Unix, capitalization matters.)
For example, instead of typing /Applications/Microsoft Office/ clipart/standard,
you could type nothing more than /ap/mi/ cl/st, remembering to press Tab after
each pair of letters. Now that's a way to feel like a Unix programmer.
Instead,these cues appear to distinguish the buttons when all three are identical shades of
gray, as they are when you use Graphite mode(page142).They also signal you when it's
time to click. For example, as described in the previous section, you can use these three
buttons even when the window is not frontmost.You know the buttons are ripe for the
clicking when you see the little symbols appear under your cursor.
The most important window gadget is the Close button, the red, droplet-like button in the
upper-left corner (Figure 1-6
). Clicking it closes the window, which collapses back into
the icon from which it came.
Tip: If, while working on a document, you see a tiny dot in the center of the Close button,
Mac OS X is trying to tell you that you haven't yet saved your work. The dot goes away
when you save the document.