Tài liệu Creating a Simple ASP.NET Web Application Using VS .NET pptx
Bạn đang xem bản rút gọn của tài liệu. Xem và tải ngay bản đầy đủ của tài liệu tại đây (54.72 KB, 8 trang )
Creating a Simple ASP.NET Web Application Using VS .NET
In this section, you'll see how to create a simple ASP.NET Web application that contains
a text box and a button using VS .NET. When you press the button, a string of text will
appear in your text box. You'll learn how to deploy this application to Microsoft's Internet
Information Server (IIS). You'll also see how to run the example Web application from
Internet Explorer.
N
ote IIS is software that allows you to run ASP.NET Web applications and display
HTML pages. To deploy the ASP.NET applications shown in this chapter, you'll
need access to a computer that runs IIS, along with the FrontPage Server
Extensions. These extensions allow you to deploy an ASP.NET Web application
from Visual Studio .NET. You can find full information on installing IIS and the
FrontPage Server Extensions in the Windows online help documentation; to access
this documentation, select Start ➣ Help.
Perform the following steps:
1. Start Visual Studio .NET (VS .NET) and select File ➣ New Project. Select Visual
C# Projects from the Project Types area on the left of the New Project dialog box,
and select ASP .NET Web Application from the Templates area on the right. Enter
http://localhost/MyWeb-Application in the Location field, as shown in Figure
15.1.
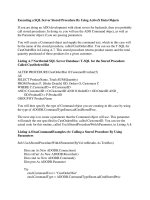
Figure 15.1: Creating an ASP.NET Web application in Visual Studio .NET
N
ote The name localhost represents your local computer on which you are
developing your Web application. If you're using IIS that is running on a
computer other than your local computer, you should replace localhost with
the name of the remote computer.
2. Click the OK button to continue. VS .NET will create a new directory named
MyWebApplication in the wwwroot directory; this is the directory where IIS
stores published Web pages and applications. After you click the OK button, you'll
see the new application being sent to IIS.
Once your application has been deployed to IIS, VS .NET will display a blank
Web form. You can think of the Web form as the canvas on which you can place
controls, such as text boxes and buttons. When you later run your form, you'll see
that the page displayed by the Web browser is laid out in a similar manner to your
form.
3. Add a TextBox control to your form. The default value for the ID property of your
TextBox control is TextBox1.
N
ote You use the ID property when referencing a Web control in C# code. You'll
see an example of code that does this shortly.
4. Set the TextMode property for TextBox1 to MultiLine; this allows the text to be
displayed on more than one line. Next, add a Button control to your form. The
default ID for your Button control is Button1. Set the Text property for Button1 to
Press Me! Figure 15.2
shows the form with the TextBox and Button controls.
Figure 15.2: Adding TextBox and Button controls to the form
5. Next, you'll add a line of code to the Button1_Click() method. This method is
executed when Button1 is pressed in your running form. The statement you'll add
to Button1_Click() will set the Text property of TextBox1 to a string. This string
will contain a line from Shakespeare's Romeo and Juliet. To add the code, double-
click Button1 and enter the following code in the Button1_Click() method:
6. TextBox1.Text =
7. "But, soft! what light through yonder window breaks?\n" +
8. "It is the east, and Juliet is the sun.\n" +
9. "Arise, fair sun, and kill the envious moon,\n" +
10. "Who is already sick and pale with grief,\n" +
11. "That thou her maid art far more fair than she";
12.
N
ote If you're a Shakespeare fan, you'll recognize these lines from the magnificent
balcony scene in which Romeo professes his true love for Juliet.
13. You're now ready to run your form. Select Debug ➣ Start Without Debugging, or
press Ctrl+F5 on the keyboard to run your form (see Figure 15.3
).
Figure 15.3: The running form
Now that you've created and run the form, let's examine the code generated by VS .NET.
There are two main parts to the code:
• The WebForm1.aspx file, which contains HTML and ASP.NET code.
• The WebForm1.aspx.cs file, which contains C# code that supports the Web form.
You can think of this C# code as running behind the form, and for this reason the
WebForm1.aspx.cs file is known as the code-behind file.
N
ote The extension .aspx identifies ASP.NET files.
You'll examine the details of the WebForm1.aspx and WebForm1.aspx.cs files in the
following sections.
The WebForm1.aspx File
You can view the HTML containing the ASP.NET tags for your form by clicking the
HTML link at the bottom of the form designer. Click the HTML link to view the code for
your form. Listing 15.1
shows the contents of the WebForm1.aspx file.
Listing 15.1: WebForm1.aspx
<%@ Page language="c#" Codebehind="WebForm1.aspx.cs"
AutoEventWireup="false"
Inherits="MyWebApplication.WebForm1" %>
<!DOCTYPE HTML PUBLIC "-//W3C//DTD HTML 4.0 Transitional//EN" >
<HTML>
<HEAD>
<title>WebForm1</title>
<meta content="Microsoft Visual Studio 7.0" name="GENERATOR">
<meta content="C#" name="CODE_LANGUAGE">
<meta content="JavaScript" name="vs_defaultClientScript">
<meta content="
name="vs_targetSchema">
</HEAD>
<body MS_POSITIONING="GridLayout">
<form id="Form1" method="post" runat="server">
<asp:TextBox id="TextBox1" style="Z-INDEX: 101; LEFT: 13px;
POSITION: absolute; TOP: 11px" runat="server"
Width="386px" Height="212px"
TextMode="MultiLine"></asp:TextBox>
<asp:Button id="Button1" style="Z-INDEX: 102; LEFT: 17px;
POSITION: absolute; TOP: 231px" runat="server" Width="82px" Height="22px"
Text="Press Me!"></asp:Button>
</form>
</body>
</HTML>
N
ote The exact values for the positions and sizes of the controls in your own code might
differ slightly from those shown in Listing 15.1
.
Let's examine the lines in this file. The first lines are
<%@ Page language="c#" Codebehind="WebForm1.aspx.cs"
AutoEventWireup="false"
Inherits="MyWebApplication.WebForm1" %>
The language attribute indicates that the file uses the C# language. The Codebehind
attribute specifies the code-behind file that supports the form, and in this case, the code-
behind file is Web-Form1.aspx.cs. The AutoEventWireUp attribute indicates whether the
ASP.NET framework automatically calls the Page_Init() and Page_Load() event handler
methods. These methods are defined in the WebForm1.aspx.cs; you'll learn more about
these event handler methods shortly. The Inherits attribute specifies the name of the class
in the WebForm1.aspx.cs file from which the form inherits.
The next few lines are standard HTML that specifies the header and some meta-
information describing the file:
<!DOCTYPE HTML PUBLIC "-//W3C//DTD HTML 4.0 Transitional//EN" >
<HTML>
<HEAD>
<title>WebForm1</title>
<meta content="Microsoft Visual Studio 7.0" name="GENERATOR">
<meta content="C#" name="CODE_LANGUAGE">
<meta content="JavaScript" name="vs_defaultClientScript">
<meta content="
name="vs_targetSchema">
</HEAD>
The next line starts the body of the file:
<body MS_POSITIONING="GridLayout">
The MS_POSITIONING attribute indicates that the form controls are laid out in a grid.
The alternative to GridLayout is LinearLayout, which specifies that the form controls are
to be laid out one after another in the browser.
The next line starts a form:
<form id="Form1" method="post" runat="server">
The ID attribute specifies that the name of the form is Form1. The method attribute
indicates that the form uses an HTTP post request to send information to the server. The
runat attribute specifies that the form is executed on the server.
The next lines contain the details of the TextBox control that you added to your form:
<asp:TextBox id="TextBox1" style="Z-INDEX: 101; LEFT: 13px;
POSITION: absolute; TOP: 11px" runat="server"
Width="386px" Height="212px"
TextMode="MultiLine"></asp:TextBox>
The next lines contain the details of the Button control that you added to your form:
<asp:Button id="Button1" style="Z-INDEX: 102; LEFT: 17px;
POSITION: absolute; TOP: 231px" runat="server"
Width="82px" Height="22px" Text="Press Me!"></asp:Button>
The remaining lines in the WebForm1.aspx file end the form, the body, and the file:
</form>
</body>
</HTML>
The WebForm1.aspx.cs File
The WebForm1.aspx.cs file contains the code behind your form. You can view this code
by selecting View ➣ Code, or you can press F7 on your keyboard.
Listing 15.2
shows the contents of the WebForm1.aspx.cs file.
Listing 15.2: WebForm1.aspx.cs
using System;
using System.Collections;
using System.ComponentModel;
using System.Data;
using System.Drawing;
using System.Web;
using System.Web.SessionState;
using System.Web.UI;
using System.Web.UI.WebControls;
using System.Web.UI.HtmlControls;
namespace MyWebApplication
{
/// <summary>
/// Summary description for WebForm1.
/// </summary>
public class WebForm1 : System.Web.UI.Page
{
protected System.Web.UI.WebControls.TextBox TextBox1;
protected System.Web.UI.WebControls.Button Button1;
private void Page_Load(object sender, System.EventArgs e)
{
// Put user code to initialize the page here
}
#region Web Form Designer generated code
override protected void OnInit(EventArgs e)
{
//
// CODEGEN: This call is required by the ASP.NET Web Form Designer.
//
InitializeComponent();
base.OnInit(e);
}
/// <summary>
/// Required method for Designer support - do not modify
/// the contents of this method with the code editor.
/// </summary>
private void InitializeComponent()
{
this.Button1.Click += new System.EventHandler(this.Button1_Click);
this.Load += new System.EventHandler(this.Page_Load);
}
#endregion
private void Button1_Click(object sender, System.EventArgs e)
{
TextBox1.Text =
"But, soft! what light through yonder window breaks?\n" +
"It is the east, and Juliet is the sun.\n" +
"Arise, fair sun, and kill the envious moon,\n" +
"Who is already sick and pale with grief,\n" +
"That thou her maid art far more fair than she";
}
}
}
As you can see, the WebForm1 class is derived from the System.Web.UI.Page class. In
fact, when you run your form, .NET actually creates an object of the Page class that
represents your form.
The WebForm1 class declares two protected objects named TextBox1 and Button1,
which represent the TextBox and Button controls you added to your form.
The Page_Load() event handler method is called when the Page_Load event is raised.
The Page_Load event is raised whenever the Web form is loaded by a browser.
Typically, you'll place any initialization code in the Page_Load() method. For example, if
you wanted to access a database, you would open the database connection in the
Page_Load() method.
The OnInit() and InitializeComponent() methods are placed within #region and
#endregion preprocessor directives. These directives enclose an area of code that may
then be collapsed in VS .NET's code editor, leaving only the text that immediately
follows #region visible.
The OnInit() method is called when the form is initialized. This method calls the
InitializeComponent() method and adds the button Click and the form Load events to the
System.EventHandler object. This informs the system that these two events are to be
handled by the Button1_Click() and Page_Load() methods, respectively.
The Button1_Click() method is the method you modified earlier with code that sets the
Text property of your TextBox1 control to a string containing the quote from Romeo and
Juliet.
In the next section
, you'll be introduced to some of the other controls you can add to a
Web form.