Tài liệu HTML & CSS: The Complete Reference- P3 ppt
Bạn đang xem bản rút gọn của tài liệu. Xem và tải ngay bản đầy đủ của tài liệu tại đây (1.12 MB, 50 trang )
76
P a r t I : C o r e M a r k u p
76
P a r t I : C o r e M a r k u p
After seeing such an example, you might wonder what the point is of this element,
because a
<span> tag or maybe even an <em> tag could be used instead. Again, semantics is
the key to this element. It makes the meaning of HTML documents more obvious.
Indicating Dates and Time
Another semantic inline element, time, was introduced by HTML5 to indicate content that
is a date, time, or both. For example,
<p>Today it is <time>2009-07-08</time> which is an interesting date.</p>
as well as
<p>An interesting date/time for SciFi buffs is <time>1999-09-13T09:15:00
</time>!</p>
would both be valid. The element should contain a date/time value that is in the format
YYYY-MM-DDThh:mm:ssTZD, where the letters correspond to years, months, days, hours,
minutes, and seconds, T is the actual letter ‘T,’ and ZD represents a time zone designator of
either Z or a value like +hh:mm to indicate a time zone offset. However, it seems reasonable
that the time element would contain values that may not be in a common format but are
recognized by humans as dates. If you try something like
<p>Right now it is <time>6:15</time>.</p>
it may be meaningful to you but it does not conform to HTML5. To provide both human-
and machine-friendly date/time content, the element supports a datetime attribute, which
should be set to the previously mentioned date format of YYYY-MM-DDThh:mm:ssTZD. So,
the following example is meaningful because it provides both a readable form and a
machine-understood value:
<p>My first son was born on <time datetime="2006-01-13">Friday the 13th
</time> so it is my new lucky day.</p>
ONLINE />Similar to
mark, the time element has no predefined rendering, though you could
certainly define a look using CSS.
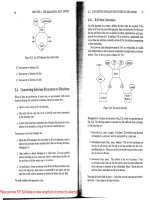
Inserting Figures
It is often necessary to include images, graphs, compound objects that contain text and
images, and so on in our Web documents, all of which usually are called figures. Long ago,
HTML 3 tried to introduce the fig element to represent such constructs; HTML5
reintroduces the idea with the more appropriately named
figure element. A simple
example illustrates this new element’s usage:
<figure id="fig1">
<dd>
<img src="figure.png" height="100" width="100"
Please purchase PDF Split-Merge on www.verypdf.com to remove this watermark.
C h a p t e r 2 : I n t r o d u c i n g H T M L 5
77
C h a p t e r 2 : I n t r o d u c i n g H T M L 5
77
PART I
alt="A screen capture of the figure element in action">
<p>This mighty <figure> tag has returned from HTML 3 to haunt your
dreams.</p>
</dd>
<dt>Figure Ex-1</dt>
</figure>
ONLINE />Acting as a semantic element, figure simply groups items within an enclosed <dd>
tag, though it may associate them with a caption defined by a <dt> tag as shown in the
example. You may desire to style a <figure> tag by placing a stroke around its visual
rendering or display it in some other appropriate manner; of course, that is the duty of CSS.
You should also note that the use of id on a <figure> will likely be useful to target using
links, as figures may be positioned away from the content that references them.
NOTE In early drafts of the HTML5 specification, the <legend> was used instead of <dt> and no
special tag was required for content enclosure.
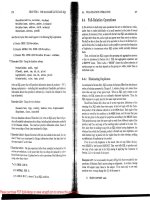
Specifying Navigation
One new HTML5 element that is long overdue is the nav element. The purpose of this
element is to encapsulate a group of links that serves as a collection of offsite links,
document navigation, or site navigation:
<nav>
<h2>Offsite Links</h2>
<a href="">W3C</a><br>
<a href="">Book site</a><br>
<a href="">Author's Firm</a><br>
</nav>
Conventionally, many Web developers have used <ul> and <li> tags to encapsulate
navigation and then styled the elements appropriately as menu items. This seems to
introduce quite a bit of ambiguity in markup because it may be difficult to determine the
difference between a list that has links in it and a list that is simply navigation. The
semantics defined by HTML5 for a <nav> tag eliminate this confusion. Interestingly, there is
no requirement to avoid using <ul> and <li> tags within navigation, so if you are a CSS
aficionado who is comfortable with that approach, it is fine to use markup like this:
<nav id="mainNav">
<ul>
<li><a href="about.html">About</a></li>
<li><a href="services.html">Services</a></li>
<li><a href="contact.html">Contact</a></li>
<li><a href="index.html">Home</a></li>
</ul>
</nav>
ONLINE />Please purchase PDF Split-Merge on www.verypdf.com to remove this watermark.
78
P a r t I : C o r e M a r k u p
78
P a r t I : C o r e M a r k u p
HTML5’s Open Media Effort
An interesting aspect of HTML5 that is reminiscent of the previous efforts of Netscape and
Microsoft is the support for tag-based multimedia in HTML documents. Traditionally,
multimedia has been inserted with the embed and object elements, particularly when
inserting Adobe Flash, Apple QuickTime, Windows Media, and other formats. However,
there was a time when tags specifically to insert media were supported; interestingly, some
of those features, such as the dynsrc attribute for <img> tags, lived on until just recently.
HTML5 brings this concept of tag-based multimedia back.
<video>
To insert video, use a <video> tag and set its src attribute to a local or remote URL containing
a playable movie. You should also display playblack controls by including the controls
attribute, as well as set the dimensions of the movie to its natural size. This simple demo shows
the use of the new element:
<video src="
width="640" height="360" controls>
<strong>HTML5 video element not supported</strong>
</video>
Please purchase PDF Split-Merge on www.verypdf.com to remove this watermark.
C h a p t e r 2 : I n t r o d u c i n g H T M L 5
79
C h a p t e r 2 : I n t r o d u c i n g H T M L 5
79
PART I
NOTE If you are using XHTML5, given that controls is an occurrence style attribute, use
controls="controls" to be conforming.
You should note the included content in the tag that nonsupporting browsers fall back
to. The following shows Internet Explorer displaying the alternative content:
However, even if a browser supports the video element, it might still have problems
displaying the video. For example, Firefox 3.5 won’t load this particular media format directly:
HTML5 open video has, as it currently stands, brought back the madness of media
codec support that Flash solved, albeit in a less than stellar way. To address the media
support problem, you need to add in alternative formats to use by including a number of
<source> tags:
<video width="640" height="360" controls poster="loading.png">
<source src="html_5.mp4" type="video/mp4">
<source src="html_5.ogv" type="video/ogg">
<strong>HTML5 video element not supported</strong>
</video>
Please purchase PDF Split-Merge on www.verypdf.com to remove this watermark.
80
P a r t I : C o r e M a r k u p
80
P a r t I : C o r e M a r k u p
Also note in the preceding snippet the use of the poster attribute, which is set to display an
image in place of the linked object in case it takes a few moments to load. Other
video element–
specific attributes like autobuffer can be used to advise the browser to download media
content in the background to improve playback, and autoplay, which when set, will start the
media as soon as it can. A complete example of the video element in action is shown here:
<!DOCTYPE html>
<html>
<head>
<meta http-equiv="Content-Type" content="text/html; charset=utf-8">
<title>HTML5 video example</title>
</head>
<body>
<h1>Simple Video Examples</h1>
<video src="
width="640" height="360" controls>
<strong>HTML5 video element not supported</strong>
</video>
<br><br><br>
<video width="640" height="360" controls poster="loading.png">
<source src=" type="video/mp4">
<source src=" type="video/ogg">
<strong>HTML5 video element not supported</strong>
</video>
</body>
</html>
ONLINE />The reference section in Chapter 3 shows the complete list of attributes for the video
element supported as of late 2009. Be warned, though, that if the various media markup
efforts of the late 1990s repeat themselves, it is quite likely that there will be an explosion of
attributes, many of which may be specific to a particular browser or media format.
<audio>
HTML5’s audio element is quite similar to the video element. The element should support
common sound formats such as WAV files:
<audio src=" />In this manner, the audio element looks pretty much the same as Internet Explorer’s
proprietary bgsound element. Having the fallback content rely on that proprietary tag
might not be a bad idea:
<audio>
<bgsound src="
</audio>
Please purchase PDF Split-Merge on www.verypdf.com to remove this watermark.
C h a p t e r 2 : I n t r o d u c i n g H T M L 5
81
C h a p t e r 2 : I n t r o d u c i n g H T M L 5
81
PART I
If you want to allow the user to control sound play, unless you have utilized JavaScript
to control this, you may opt to show controls with the same named attribute. Depending on
the browser, these controls may look quite different, as shown next.
<audio src=" controls></audio>
As with the video element, you also have autobuffer and autoplay attributes for the
audio element. Unfortunately, just like video, there are also audio format support issues,
so you may want to specify different formats using <source> tags:
<audio controls autobuffer autoplay>
<source src=" type="audio/ogg">
<source src=" type="audio/wav">
</audio>
A complete example is shown here:
<!DOCTYPE html>
<html>
<head>
<meta http-equiv="Content-Type" content="text/html; charset=utf-8">
<title>HTML5 audio examples</title>
</head>
<body>
<h1>Simple Audio Examples</h1>
<h2>wav Format</h2>
<audio src=" controls></audio>
<h2>ogg Format</h2>
<audio src=" controls></audio>
<h2>Multiple Formats and Fallback</h2>
<audio controls autobuffer autoplay>
<source src=" type="audio/ogg">
<source src=" type="audio/wav">
<! [if IE]>
<bgsound src="
<![endif] >
</audio>
</body>
</html>
ONLINE />Please purchase PDF Split-Merge on www.verypdf.com to remove this watermark.
82
P a r t I : C o r e M a r k u p
82
P a r t I : C o r e M a r k u p
Media Considerations
An interesting concern about “open” media formats is whether or not they really are open.
As the HTML5 specification emerges, fissures are already forming in terms of how these
elements are implemented, what codecs will be supported by what browser vendors, and
whether HTML5 will require a particular codec to be supported by all HTML5–compliant
browsers. Valid concerns about so-called “submarine” patents surfacing and torpedoing the
open media effort are real and hotly debated.
Unfortunately, given this media codec chaos, at the time of this edition’s writing, getting
an example to work in all browsers can be quite a chore and Flash and/or QuickTime support
must be added to address older browsers. Simply put, for all its possibilities, so far HTML5
media is a messy solution at best. The following adds in a fallback within the previous video
example for Flash:
<video width="640" height="360" controls poster="loading.png">
<source src=" type="video/mp4">
<source src=" type="video/ogg">
<object data="html_5.swf" type="application/x-shockwave-flash"
width="640" height="360" id="player">
<param name="movie" value="html_5.swf"/>
<strong>Error: No video support at all</strong>
</object>
</video>
Given the example, I think it isn’t much of a stretch to imagine a <source> tag being set to
a Flash type eventually; making the direction this is going even more confusing.
So while the potential benefits of open media formats can be debated endlessly, there is
also the pragmatic concern of how long it will take before HTML5’s open media movement
becomes viable. Getting to the stable media playback world provided by Flash took many
years, and it seems unlikely that HTML5 solutions will move much faster.
NOTE The current state of the HTML5 specification before press suggests that no codec is official.
While the neutrality is welcome, the reality that implementations vary considerably still continues.
Client-Side Graphics with <canvas>
The canvas element is used to render simple graphics such as line art, graphs, and other custom
graphical elements on the client side. Initially introduced in the summer of 2004 by Apple in its
Safari browser, the canvas element is now supported in many browsers, including Firefox 1.5+,
Opera 9+, and Safari 2+, and as such is included in the HTML5 specification. While Internet
Explorer does not directly support the tag as of yet, there are JavaScript libraries
3
that emulate
<canvas> syntax using Microsoft’s Vector Markup Language (VML).
From a markup point of view, there is little that you can do with a <canvas> tag. You
simply put the element in the page, name it with an id attribute, and define its dimensions
with height and width attributes:
3
Circa late 2009, the most popular IE <canvas> emulation library is explorercanvas, available at http://
code.google.com/p/explorercanvas/.
Please purchase PDF Split-Merge on www.verypdf.com to remove this watermark.
C h a p t e r 2 : I n t r o d u c i n g H T M L 5
83
C h a p t e r 2 : I n t r o d u c i n g H T M L 5
83
PART I
<canvas id="canvas" width="300" height="300">
<strong>Canvas Supporting Browser Required</strong>
</canvas>
Note the alternative content placed within the element for browsers that don’t support
the element.
After you place a <canvas> tag in a document, your next step is to use JavaScript to
access and draw on the element. For example, the following fetches the object by its id
value and creates a two-dimensional drawing context:
var canvas = document.getElementById("canvas");
var context = canvas.getContext("2d");
NOTE 3D drawing is coming to <canvas> but is not currently defined outside of extensions.
Once you have the drawing context, you might employ various methods to draw on it.
For example, the
strokeRect(x,y,width,height) method takes x and y coordinates and
height and width, all specified as numbers representing pixels. For example,
context.strokeRect(10,10,150,50);
would draw a simple rectangle of 150 pixels by 50 pixels starting at the coordinate 10,10
from the origin of the placed <canvas> tag. If you wanted to set a particular color for the
stroke, you might set it with the strokeStyle() method, like so:
context.strokeStyle = "blue";
context.strokeRect(10,10,150,50);
Similarly, you can use the fillRect(x,y,width,height) method to make a rectangle,
but this time in a solid manner:
context.fillRect(150,30,75,75);
By default, the fill color will be black, but you can define a different fill color by using
the fillColor() method. As a demonstration this example sets a light red color:
context.fillStyle = "rgb(218,0,0)";
You can use standard CSS color functions, which may include opacity; for example, here
the opacity of the reddish fill is set to 40 percent:
context.fillStyle = "rgba(218,112,214,0.4)";
A full example using the first canvas element and associated JavaScript is presented here:
<!DOCTYPE html>
<html>
<head>
<meta http-equiv="Content-Type" content="text/html; charset=utf-8">
<title>HTML5 canvas example</title>
<script type="text/javascript">
window.onload = function() {
var canvas = document.getElementById("canvas");
Please purchase PDF Split-Merge on www.verypdf.com to remove this watermark.
84
P a r t I : C o r e M a r k u p
84
P a r t I : C o r e M a r k u p
var context = canvas.getContext("2d");
context.strokeStyle = "orange";
context.strokeRect(10,10,150,50);
context.fillStyle = "rgba(218,0,0,0.4)";
context.fillRect(150,30,75,75);
}
</script>
</head>
<body>
<h1>Simple Canvas Examples</h1>
<canvas id="canvas" width="300" height="300">
<strong>Canvas Supporting Browser Required</strong>
</canvas>
</body>
</html>
ONLINE />In a supporting browser, the simple example draws some rectangles:
Unfortunately, Internet Explorer up to version 8 will not be able to render the example
without a compatibility library:
Please purchase PDF Split-Merge on www.verypdf.com to remove this watermark.
C h a p t e r 2 : I n t r o d u c i n g H T M L 5
85
C h a p t e r 2 : I n t r o d u c i n g H T M L 5
85
PART I
Reworking the example to add just such a library makes things work just fine:
ONLINE />Drawing and Styling Lines and Shapes
HTML5 defines a complete API for drawing on a canvas element, which is composed of
many individual sub-APIs for common tasks. For example, to do some more complex
shapes, the path API must be used. The path API stores a collection of subpaths formed by
various shape functions and connects the subpaths via a fill() or stroke() call. To begin
a path,
context.beginPath() is called to reset the path collection. Then, any variety of
shape calls can occur to add a subpath to the collection. Once all subpaths are properly
added,
context.closePath() can optionally be called to close the loop. Then fill() or
stroke() will also display the path as a newly created shape. This simple example draws
a V shape using lineTo():
context.beginPath();
context.lineTo(20,100);
context.lineTo(120,300);
context.lineTo(220,100);
context.stroke();
Now, if you were to add context.closePath()before context.stroke(), the V
shape would turn into a triangle, because
closePath() would connect the last point and
the first point.
Also, by calling fill() instead of stroke(), the triangle will be filled in with whatever
the fill color is, or black if none is specified. Of course, you can call both fill() and
stroke() on any drawn shape if you want to have a stroke around a filled region. Thus, to
Please purchase PDF Split-Merge on www.verypdf.com to remove this watermark.
86
P a r t I : C o r e M a r k u p
86
P a r t I : C o r e M a r k u p
style the drawing, you can specify the fillStyle and strokeStyle and maybe even
define the width of the line using
lineWidth, as shown in this example:
context.strokeStyle = "blue";
context.fillStyle = "red";
context.lineWidth = 10;
context.beginPath();
context.lineTo(200,10);
context.lineTo(200,50);
context.lineTo(380,10);
context.closePath();
context.stroke();
context.fill();
As you saw in a few previous examples, you can change color by setting the fillColor
property. In addition to the CSS color values, you can also set the fillColor to a gradient
object. A gradient object can be created by using createLinearGradient() or
createRadialGradient().
The following example creates a simple linear gradient that will be applied to a rectangle
using the createLinearGradient(x1,y1,x2,y2) method. The gradient is positioned at
10,150 and is set to go 200 pixels in both directions.
var lg = context.createLinearGradient(10,150,200,200);
Next, the gradient colors are added using the addColorStop() method. This specifies
a color and the offset position in the gradient where the color should occur. The offset must
be between 0 and 1.
lg.addColorStop(0,"#B03060");
lg.addColorStop(0.75,"#4169E1");
lg.addColorStop(1,"#FFE4E1");
Of course, you could use the rgba CSS function to create a gradient with transparency
as well. Finally, the
fillColor is set to the gradient. Here is the complete code snippet,
followed by a visual example:
var lg = context.createLinearGradient(10,150,200,200);
lg.addColorStop(0,"#B03060");
lg.addColorStop(0.5,"#4169E1");
lg.addColorStop(1,"#FFE4E1");
context.fillStyle = lg;
context.beginPath();
context.rect(10,150,200,200);
context.fill();
Please purchase PDF Split-Merge on www.verypdf.com to remove this watermark.
C h a p t e r 2 : I n t r o d u c i n g H T M L 5
87
C h a p t e r 2 : I n t r o d u c i n g H T M L 5
87
PART I
Note that before you draw the shape, you reset the path to ensure that you do not apply
these changes to previously rendered parts of the drawing.
To create a radial gradient using createRadialGradient(x1,y1,r1,x2,y2,r2), you
must set the position and radius of two circles to serve as the gradient. You add color stops
in the same manner as the linear gradient, so the code looks quite similar otherwise:
var rg = context.createRadialGradient(350,300,80,360,250,80);
rg.addColorStop(0,"#A7D30C");
rg.addColorStop(0.9,"#019F62");
rg.addColorStop(1,"rgba(1,159,98,0) ");
context.fillStyle = rg;
context.beginPath();
context.fillRect(250,150,200,200);
The complete example, drawing a few different shapes with fills and styles, is presented
here:
<!DOCTYPE html>
<html>
<head>
<meta http-equiv="Content-Type" content="text/html; charset=utf-8">
<title>HTML5 canvas lines and shapes example</title>
<script type="text/javascript">
window.onload = function() {
var canvas = document.getElementById("canvas");
var context = canvas.getContext("2d");
context.strokeStyle = "blue";
context.fillStyle = "red";
context.lineWidth = 10;
context.beginPath();
context.lineTo(200,10);
Please purchase PDF Split-Merge on www.verypdf.com to remove this watermark.
88
P a r t I : C o r e M a r k u p
88
P a r t I : C o r e M a r k u p
context.lineTo(200,50);
context.lineTo(380,10);
context.closePath();
context.stroke();
context.fill();
var lg = context.createLinearGradient(10, 150, 200, 200);
lg.addColorStop(0, "#B03060");
lg.addColorStop(0.5, "#4169E1");
lg.addColorStop(1, "#FFE4E1");
context.fillStyle = lg;
context.beginPath();
context.rect (10, 150, 200, 200);
context.fill();
var rg = context.createRadialGradient(50,50,10,60,60,50);
rg.addColorStop(0, "#A7D30C");
rg.addColorStop(0.9, "#019F62");
rg.addColorStop(1, "rgba(1,159,98,0)");
context.fillStyle = rg;
context.beginPath();
context.fillRect(0,0,130,230);
context.beginPath();
context.lineTo(250,150);
context.lineTo(330,240);
context.lineTo(410,150);
context.stroke();
}
</script>
</head>
<body>
<h1>Simple Shapes on canvas Example</h1>
<canvas id="canvas" width="500" height="500">
<strong>Canvas Supporting Browser Required</strong>
</canvas>
</body>
</html>
ONLINE />Applying Some Perspective
As the context is specified as 2d, it is no surprise that everything you have seen so far has
been two-dimensional. It is possible to add some perspective by choosing proper points and
shades. The 3D cube shown in Figure 2-3 is created using nothing more than several
moveTo() and lineTo() calls. The lineTo() call is used to create three sides of the cube,
but the points set are not straight horizontal and vertical lines as we see when we make 2D
squares. Shading is applied to give the illusion of dimensionality because of the application
of a light source. While the code here is pretty simple, you can see that using canvas
Please purchase PDF Split-Merge on www.verypdf.com to remove this watermark.
C h a p t e r 2 : I n t r o d u c i n g H T M L 5
89
C h a p t e r 2 : I n t r o d u c i n g H T M L 5
89
PART I
properly is often a function more of what you may know about basic geometry and drawing
than anything else.
<!DOCTYPE html>
<html>
<head>
<meta http-equiv="Content-Type" content="text/html; charset=UTF-8">
<title>Canvas Cube Example</title>
<style type="text/css" media="screen">
body {background-color: #E67B34;}
</style>
<script type="text/javascript">
window.onload = function(){
var context = document.getElementById("canvas").getContext("2d");
context.fillStyle = "#fff";
context.strokeStyle = "black";
context.beginPath();
context.moveTo(188,38);
context.lineTo(59,124);
FIGURE 2-3 Faking 3D with perspective
Please purchase PDF Split-Merge on www.verypdf.com to remove this watermark.
90
P a r t I : C o r e M a r k u p
90
P a r t I : C o r e M a r k u p
context.lineTo(212,197);
context.lineTo(341,111);
context.lineTo(188,38);
context.closePath();
context.fill();
context.stroke();
context.fillStyle = "#ccc";
context.strokeStyle = "black";
context.beginPath();
context.moveTo(341,111);
context.lineTo(212,197);
context.lineTo(212,362);
context.lineTo(341,276);
context.lineTo(341,111);
context.closePath();
context.fill();
context.stroke();
context.fillStyle = "#999";
context.strokeStyle = "black";
context.beginPath();
context.moveTo(59,289);
context.lineTo(59,124);
context.lineTo(212,197);
context.lineTo(212,362);
context.lineTo(59,289);
context.closePath();
context.fill();
context.stroke();
}
</script>
</head>
<body>
<h1>Canvas Perspective</h1>
<canvas id="canvas" width="400" height="400">
<strong>Canvas Supporting Browser Required</strong>
</canvas>
</body>
</html>
ONLINE />Drawing Arcs and Curves
Drawing on canvas isn’t limited to simple lines; it is also possible to create curved lines
using arc(), arcTo(), quadraticCurveTo(), and bezierCurveTo(). To illustrate these
methods, this section shows how to draw a simple face.
You can use the arc(x,y,radius,startAngle,endAngle,counterclockwise)
method to draw circles and parts of circles. Its location is defined by the point of its center
Please purchase PDF Split-Merge on www.verypdf.com to remove this watermark.
C h a p t e r 2 : I n t r o d u c i n g H T M L 5
91
C h a p t e r 2 : I n t r o d u c i n g H T M L 5
91
PART I
(x,y) as well as the circle’s radius. How much of the circle is drawn is defined by
startAngle and endAngle, in radians. The direction of the curve is set by a Boolean value,
which is the final parameter specified by counterclockwise. If it is set to true, the curve
will move counterclockwise; otherwise, it will move clockwise. If your math is a bit rusty, to
make a full circle, the start angle should be set to 0 and the end angle should be 2π. So to
start your face drawing, use
arc() to draw the head as a circle:
context.arc(150,150,100,0,Math.PI*2,true);
Use the quadraticCurveTo(cpx,cpy,x,y) method to draw the nose and the mouth.
This function starts at the last point in the path and draws a line to (x,y). The control point
(cpx,cpy) is used to pull the line in that direction, resulting in a curved line. However, you
call moveTo() first to set the last point in the path. In the following snippet, a line was
drawn from (155,130) to (155,155). Because the x-coordinate of the control point (130,145)
is to the left, the line is pulled in that direction. Because the y-coordinate is in between the
y-coordinates, the pull is roughly in the middle.
context.moveTo(155,130);
context.quadraticCurveTo(130,145,155,155);
context.moveTo(100,175);
context.quadraticCurveTo(150,250,200,175);
You call bezierCurveTo(cp1x,cp1y,cp2x,cp2y,x,y) to draw the eyes. This function
is similar to quadraticCurveTo() except that it has two control points and has a line that is
pulled toward both of them. Again, moveTo() is used to set the start point of the line:
context.moveTo(80,110);
context.bezierCurveTo(95,85,115,85,130,110);
context.moveTo(170,110);
context.bezierCurveTo(185,85,205,85,220,110);
Lastly, use arcTo(x1,y1,x2,y2,radius) to draw a frame around the face. Unfortunately,
foreshadowing some issues with the canvas API, we note that arcTo() is not currently
supported properly in all browsers, so it may render oddly. When it does work, it creates
two lines and then draws an arc with the radius specified and containing a point tangent to
each of the lines. The first line is drawn from the last point in the subpath to (x1,y1) and
the second line is drawn from (x1,y1) to (x2,y2).
context.moveTo(50,20);
context.arcTo(280,20,280,280,30);
context.arcTo(280,280,20,280,30);
context.arcTo(20,280,20,20,30);
context.arcTo(20,20,280,20,30);
The complete example is shown next. Note that, given layering, you draw and fill the
frame and face and then draw the features last. Also note that you reset the paths with the
beginPath() method. Commonly, people forget to do this, which can produce some
interesting drawings. A rendering of the face example is shown in Figure 2-4.
Please purchase PDF Split-Merge on www.verypdf.com to remove this watermark.
92
P a r t I : C o r e M a r k u p
92
P a r t I : C o r e M a r k u p
<!DOCTYPE html>
<html>
<head>
<meta http-equiv="Content-Type" content="text/html; charset=UTF-8">
<title>Canvas Face Example</title>
<script type="text/javascript">
window.onload = function(){
var canvas = document.getElementById("canvas");
var context = canvas.getContext("2d");
context.strokeStyle = "black";
context.lineWidth = 5;
/* create a frame for our drawing */
context.beginPath();
context.fillStyle = "blue";
context.moveTo(50,20);
context.arcTo(280,20,280,280,30);
context.arcTo(280,280,20,280,30);
context.arcTo(20,280,20,20,30);
context.arcTo(20,20,280,20,30);
context.stroke();
context.fill();
FIGURE 2-4 Drawing a canvas smiley
Please purchase PDF Split-Merge on www.verypdf.com to remove this watermark.
C h a p t e r 2 : I n t r o d u c i n g H T M L 5
93
C h a p t e r 2 : I n t r o d u c i n g H T M L 5
93
PART I
/* draw circle for head */
context.beginPath();
context.fillStyle = "yellow";
context.arc(150,150,100,0,Math.PI*2,true);
context.fill();
/* draw the eyes, nose and mouth */
context.beginPath();
context.moveTo(80,110);
context.bezierCurveTo(95,85,115,85,130,110);
context.moveTo(170,110);
context.bezierCurveTo(185,85,205,85,220,110);
context.moveTo(155,130);
context.quadraticCurveTo(130,145,155,155);
context.moveTo(100,175);
context.quadraticCurveTo(150,250,200,175);
context.moveTo(50,20);
context.stroke();
}
</script>
</head>
<body>
<h1>Smile you're on canvas</h1>
<canvas id="canvas" width="300" height="300">
<strong>Canvas Supporting Browser Required</strong>
</canvas>
</body>
</html>
ONLINE />Scaling, Rotating, and Translating Drawings
You now have looked at the basic shapes and styling, but there is much more that you can
do to customize a drawing through transformations. The canvas API provides a number of
useful methods that accomplish the common tasks you will likely want to perform. First
let’s explore the scale(x,y) function, which can be used to scale objects. The x parameter
shows how much to scale in the horizontal direction and the y parameter indicates how
much to scale vertically.
/* scale tall and thin */
context.scale(.5,1.5);
writeBoxes(context);
/* move short and wide */
context.scale(1.75,.2);
writeBoxes(context);
Please purchase PDF Split-Merge on www.verypdf.com to remove this watermark.
94
P a r t I : C o r e M a r k u p
94
P a r t I : C o r e M a r k u p
ONLINE />Next up is the
rotate(angle) method, which can be used to rotate a drawing in a
clockwise direction by an angle defined in radians:
/* rotate to the right */
context.rotate(Math.PI/8);
writeBoxes(context);
/* rotate to the left */
context.rotate(-Math.PI/8);
writeBoxes(context);
ONLINE />Please purchase PDF Split-Merge on www.verypdf.com to remove this watermark.
C h a p t e r 2 : I n t r o d u c i n g H T M L 5
95
C h a p t e r 2 : I n t r o d u c i n g H T M L 5
95
PART I
The translate(x,y) function is a handy function to use to change the origin from
(0,0) to another location in the drawing. The following example moves the origin to
(100,100). Then, when the start coordinates of the rectangle are specified at (0,0), it really
starts at (100,100).
context.translate(100,100);
context.fillRect(0,0,100,100);
A simple example of moving some boxes around is shown here:
ONLINE />All the methods presented so far are conveniences to help us use an underlying
transform matrix associated with paths. All paths have an identity matrix as their default
transform. As an identity, this transform matrix does nothing, but it is certainly possible to
adjust this matrix in a few ways. First, it can be directly modified by calling setTransform
(m11,m12,m21,m22,dx,dy)
, which resets the matrix to the identity matrix and then
calls transform() with the given parameters. Or you can do this directly by using
transform(m11,m12,m21,m22,dx,dy), which multiplies whatever the current matrix is
with the matrix defined by
m11 m21 dx
m12 m22 dy
0 0 1
The problem with the method should be obvious: unless you understand more than a
bit about matrix math, this can be a bit daunting to use. On the bright side, with the
method, you can do just about anything you want. Here a simple example skews and
moves some simple rectangles. The result is shown in Figure 2-5.
Please purchase PDF Split-Merge on www.verypdf.com to remove this watermark.
96
P a r t I : C o r e M a r k u p
96
P a r t I : C o r e M a r k u p
<!DOCTYPE html>
<html>
<head>
<meta http-equiv="Content-Type" content="text/html; charset=UTF-8">
<title>canvas transform() Example</title>
<style type="text/css">
canvas {border: 1px solid black;}
</style>
<script type="text/javascript">
window.onload = function(){
var canvas = document.getElementById("canvas");
var context = canvas.getContext("2d");
context.fillStyle = "rgba(255,0,0,.4)";
context.rect(0,0,100,100);
context.fill();
context.setTransform(1,1,1,0,0,0);
context.beginPath();
context.fillStyle = "rgba(0,255,0,.4)";
context.rect(75,75,100,100);
context.fill();
context.setTransform(0,.5,1,.8,0,0);
context.beginPath();
FIGURE 2-5 Transforming a rectangle
Please purchase PDF Split-Merge on www.verypdf.com to remove this watermark.
C h a p t e r 2 : I n t r o d u c i n g H T M L 5
97
C h a p t e r 2 : I n t r o d u c i n g H T M L 5
97
PART I
context.fillStyle = "rgba(0,0,255,.4)";
context.rect(50,50,100,100);
context.fill();
}
</script>
</head>
<body>
<h1>Simple Transforms</h1>
<canvas id="canvas" width="400" height="300">
<strong>Canvas Supporting Browser Required</strong>
</canvas>
</body>
</html>
ONLINE />Using Bitmaps in Drawings
A very interesting feature of canvas is the ability to insert images into the drawing There
are several ways to do this, but let’s start with the most basic, drawImage(img,x,y), which
takes an image object and the coordinates for where the image should be placed. The image
will be its natural size when called in this manner. You can use drawImage(img,x,y,w,h)
if you need to modify the image size and set the width and height.
The actual image passed in to the drawImage() method can come from a few places.
It can be
• An image already loaded on the page
• Dynamically created through the DOM
• Another
canvas object
• An image created by setting its
src to a data: URL
The important thing to remember is that the image must be loaded by the time canvas
is ready to access it. This may require use of the onload function for the image:
var img = new Image();
img.onload = function(){
context.drawImage(img,0,0,400,400);
}
img.src = "dog.jpg";
The last way that drawImage(img,sx,sy,sw,sh,dx,dy,dw,dh) may be called allows
a part of the image to be cut out and drawn to the canvas. The (sx,sy) coordinates are the
location on the image, and sw and sh are the width and height, respectively. The rest of the
parameters prefixed with d are the same as in the previous form of the method.
var img = document.getElementById("image1");
/* slices a 100px square from image1 at location (200,75)
Places on the canvas at (50,50) and stretches it to 300px square. */
context.drawImage(img,200,75,100,100,50,50,300,300);
Please purchase PDF Split-Merge on www.verypdf.com to remove this watermark.
98
P a r t I : C o r e M a r k u p
98
P a r t I : C o r e M a r k u p
However you decide to place it, once an image is on the canvas, it is then possible to
draw on it. The following example loads an image and draws a region in preparation for
eventually adding a caption:
<!DOCTYPE html>
<html>
<head>
<meta http-equiv="Content-Type" content="text/html; charset=UTF-8">
<title>canvas drawImage() Example</title>
<style type="text/css">
canvas {border: 1px solid black;}
</style>
<script type="text/javascript">
window.onload = function(){
var canvas = document.getElementById("canvas");
var context = canvas.getContext("2d");
var img = new Image();
img.src = "dog.jpg";
img.onload = function(){
context.lineWidth = 5;
context.drawImage(img,0,0,400,400);
context.beginPath();
context.lineWidth = 5;
context.fillStyle = "orange";
context.strokeStyle = "black";
context.rect(50,340,300,50);
context.fill();
context.stroke();
}
}
</script>
</head>
<body>
<canvas id="canvas" width="400" height="400">
<strong>Canvas Supporting Browser Required</strong>
</canvas>
</body>
</html>
ONLINE />Text Support for canvas
In browsers that supported early forms of the canvas element, text was not well supported
in a drawing, if at all. Per HTML5, text functions should now be supported by the canvas
API, and several browsers already do support it. You can write text by using fillText
(text,x,y [,maxWidth]) or strokeText(text,x,y [,maxWidth]). Both functions
take an optional last parameter, maxWidth, that will cut the text off if the width is longer
than specified. Often, both fillText() and strokeText() will be utilized to display an
outline around the text. Here we set a fill color of blue and then write the phrase “Canvas is
great!” with a black stroke around the letters.
Please purchase PDF Split-Merge on www.verypdf.com to remove this watermark.
C h a p t e r 2 : I n t r o d u c i n g H T M L 5
99
C h a p t e r 2 : I n t r o d u c i n g H T M L 5
99
PART I
context.fillStyle = "rgb(0,0,255)";
context.strokeStyle = "rgb(0,0,0)";
context.fillText("Canvas is great!",10,40);
context.strokeText("Canvas is great!",10,40);
To get more-customized text, you can use the font property, which you set identically
to a CSS font property. You can use textAlign and textBaseline to set the horizontal
and vertical alignment of the text string. The textAlign property has the possible values of
start, end, left, right, and center. The textBaseline property can be set to top,
hanging, middle, alphabetic, ideographic, and bottom.
context.font = "bold 30px sans-serif";
context.textAlign = "center";
context.textBaseline = "middle";
You can add shadows to shapes simply by setting the shadow properties, shadowOffsetX,
shadowOffsetY, shadowBlur, and shadowColor. The offsets simply set how far the shadow
should be offset from the image. A positive number would make the shadow go to the right
and down. A negative number would make it go to the left and up. The shadowBlur property
indicates how blurred the shadow will be, and the shadowColor property indicates the color.
This code fragment demonstrates setting a shadow.
context.shadowOffsetX = 10;
context.shadowOffsetY = 5;
context.shadowColor = "rgba(255,48,48,0.5)";
context.shadowBlur = 5;
context.fillStyle = "red";
context.fillRect(100,100,100,100);
All the concepts from this and the last section can be put together as follows to caption
an image with some shadowed text, as shown in Figure 2-6.
<!DOCTYPE html>
<html>
<head>
<meta http-equiv="Content-Type" content="text/html; charset=UTF-8">
<title>canvas Text Example</title>
<style type="text/css">
canvas {border: 1px solid black;}
</style>
<script type="text/javascript">
window.onload = function(){
var canvas = document.getElementById("canvas");
var context = canvas.getContext("2d");
var img = new Image();
img.src = "dog.jpg";
img.onload = function(){
context.lineWidth = 5;
context.drawImage(img,0,0,400,400);
context.beginPath();
context.lineWidth = 5;
context.fillStyle = "orange";
context.strokeStyle = "black";
Please purchase PDF Split-Merge on www.verypdf.com to remove this watermark.
100
P a r t I : C o r e M a r k u p
100
P a r t I : C o r e M a r k u p
context.rect(50,340,300,50);
context.fill();
context.stroke();
context.lineWidth = 2;
context.font = '40px sans-serif';
context.strokeStyle = "black";
context.fillStyle = "white";
context.fillText("Canvas is great!",60,375);
context.shadowOffsetX = 10;
context.shadowOffsetY = 5;
context.shadowColor = "rgba(0,48,48,0.5)";
context.shadowBlur = 5;
context.strokeText("Canvas is great!",60,375);
}
}
</script>
</head>
<body>
<canvas id="canvas" width="400" height="400">
<strong>Canvas Supporting Browser Required</strong>
</canvas>
</body>
</html>
FIGURE 2-6 Even dogs love <canvas>.
Please purchase PDF Split-Merge on www.verypdf.com to remove this watermark.