Tài liệu Populate DropDown and ListBox Controls pdf
Bạn đang xem bản rút gọn của tài liệu. Xem và tải ngay bản đầy đủ của tài liệu tại đây (22.98 KB, 6 trang )
5.3 Populate DropDown and ListBox Controls
I saw in this chapter's first How-To how to bind a ListBox control to a dataset that was
created in the design. How do I populate DropDown and ListBox controls on a Web
Form using code at runtime?
Technique
ListBoxes and DropDowns, which are equivalent to ComboBoxes on Windows Forms,
have different properties that are used for data binding than their Windows counterparts.
Besides these properties, displayed in Table 5.4, you also need to use the Databind
method and session object to track the data table that is created for products.
Table 5.4. Properties Used to Bind Columns to Controls
Property Description
DataTextField Column in data source to use for displaying in the DropDown or
ListBox control.
DataValueField Column in data source that is the lookup value.
Note
You can use a property called DataFormatString to format the
DataTextField data for display in the ListBox or DropDown controls.
Steps
Open and run the Visual Basic .NET-Chapter 5 solution. From the main page, click on
the hyperlink with the caption How-To 5.3: Populate DropDown and ListBox controls.
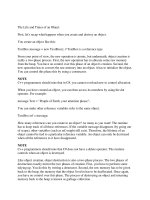
When the Web Form loads, you will see a Categories dropdown with the Beverages
category selected and the products for that category in the list box with the label
Products. If you click on a product, the three text boxes are loaded on the right of the
page (see Figure 5.3).
1. Create a Web Form. Then place the controls listed in Table 5.5 and seen in Figure
5.3 with the following properties set.
Table 5.5. Control Property Settings for Validation Controls Web Form
Object Property Setting
Label Text Categories:
DropDown ID ddCategories
AutoPostBack True
Label Text Products:
ListBox ID lstProducts
AutoPostBack True
Label Text Product ID
Label Text Product Name
Label Text Unit Price
TextBox ID txtProductID
BackColor Transparent
TextBox ID txtProductName
BackColor Transparent
TextBox ID txtUnitPrice
BackColor Transparent
HyperLink ID hplReturnToMain
NavigateURL wfrmMain.aspx
2. As with some of the other chapters' projects, a support routine needs to be built to
create the Connection string. Called BuildCnnStr, the function can been seen in
Listing 5.5. This function takes a server and database name passed to it and creates
a connection string.
Listing 5.5 modGeneralRoutines.vb: Creating a Connection String
Function BuildCnnStr(ByVal strServer As String, ByVal strDatabase As String)
As String
Dim strTemp As String
strTemp = "Provider=SQLOleDB; Data Source=" & strServer & ";"
strTemp &= "Initial Catalog=" & strDatabase & ";"
strTemp &= "Integrated Security=SSPI"
Return strTemp
End Function
Although you could create a routine that would pass back a Connection object, a
more versatile method would be to pass back a string. The reason for this is that
for some objects, you are asked for a Connection object, but for others, you are
asked for just a string.
3. In the class module for the Web Form, add the following Private declaration just
below the line of code that reads Web Form Designer Generated Code.
4. Private mdtProducts As New DataTable()
This line of code declares a DataTable object that you will use throughout the Web
Form. However, in addition to using this variable, you will use the Session object
to retain the data between round trips to the server.
5. Add the code in Listing 5.6 to the Load event of the page. This code creates a
DataAdapter object and then fills the dtCategories DataTable object. The
ddCategories DropDown control is bound to dtCategories. The LoadProducts
routine is called to load the products into the lstProducts ListBox control, which is
described in the next step. Finally, the Session object is checked to see if the item
MyProductsTable has been saved to it, and if so, it is loaded back into the
mdtProducts variable.
Listing 5.6 wfrmHowTo5_3.aspx.vb: Initializing the Page
Private Sub Page_Load(ByVal sender As System.Object,
ByVal e As System.EventArgs) Handles MyBase.Load
'Put user code to initialize the page here
If Not Me.IsPostBack Then
Dim dtCategories As New DataTable()
Dim odaCategories As _
New OleDb.OleDbDataAdapter( _
"Select CategoryID, CategoryName From Categories",
BuildCnnStr("(local)", "Northwind"))
' Fill the data table
odaCategories.Fill(dtCategories)
' Assign the properties and bind the dropdown.
ddCategories.DataValueField = "CategoryID"
ddCategories.DataTextField = "CategoryName"
ddCategories.DataSource = dtCategories
ddCategories.DataBind()
LoadProducts()
End If
' Load the products data table back from the session variable
If Not (Session("MyProductsTable") Is Nothing) Then
mdtProducts = CType(Session("MyProductsTable"), DataTable)
End If
End Sub
6. In the class module for the page, create the LoadProducts routine that is displayed
in Listing 5.7. This code looks similar to other routines that generate a DataTable
object and then assign the properties to bind mdtProducts to the lstProducts
ListBox control. mdtProducts is then added to the Session object for round trips to
the server.
Listing 5.7 wfrmHowTo5_3.aspx.vb: Creating the LoadProducts Routine
Private Sub LoadProducts()
Dim odaProducts As New OleDb.OleDbDataAdapter( _
"Select * From Products Where CategoryID = "
& ddCategories.SelectedItem.Value, _
BuildCnnStr("(local)", "Northwind"))
mdtProducts.Clear()
odaProducts.Fill(mdtProducts)
' Assign the properties and bind the list box.
lstProducts.DataValueField = "ProductID"
lstProducts.DataTextField = "ProductName"
lstProducts.DataSource = mdtProducts
lstProducts.DataBind()
' Save the data table out to a session variable for round trips
Session.Item("MyProductsTable") = mdtProducts
End Sub
7. Add the code in Listing 5.8 to the SelectedIndexChanged event off the
ddCategories DropDown control.
Listing 5.8 wfrmHowTo5_3.aspx.vb: Calling the LoadProducts Routine
When a New Category Is Chosen
Private Sub ddCategories_SelectedIndexChanged(ByVal sender As Object,
ByVal e As System.EventArgs) _
Handles ddCategories.SelectedIndexChanged
LoadProducts()
End Sub
8. Add the code in Listing 5.7 to the SelectedIndexChanged event off of lstProducts.
This code takes the SelectedIndex property of the lstProducts ListBox control and
helps retrieve the row in the DataTable object. The individual columns are then
loaded into the corresponding text boxes on the page.
Listing 5.9 wfrmHowTo5_3.aspx.vb: Locating the Row in the mdtProducts
DataTable Object
Private Sub lstProducts_SelectedIndexChanged(ByVal sender As Object,
ByVal e As System.EventArgs) _
Handles lstProducts.SelectedIndexChanged
With mdtProducts.Rows(lstProducts.SelectedIndex)
txtProductID.Text = .Item("ProductID")
txtProductName.Text = .Item("ProductName")
txtUnitPrice.Text = .Item("UnitPrice")
End With
End Sub
Figure 5.3. DropDown and ListBox controls used to display data on this Web Form.
Comments
One of the main items to note, besides the use of the Session variables, is the use of the
ddCategorie.SelectedItem.Value and lstProducts.SelectedIndex. These are two ways to
use items that are selected in the DropDown and ListBox objects, respectively.
After you have used the Session object to keep variables during round trips to the server,
it becomes more intuitive as you use it.