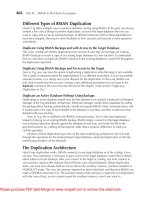
Tài liệu Oracle RMAN 11g Backup and Recovery- P2 pptx
Bạn đang xem bản rút gọn của tài liệu. Xem và tải ngay bản đầy đủ của tài liệu tại đây (1.33 MB, 50 trang )
18
Part I:
Getting Started with RMAN in Oracle Database 11g
■
Inactive
This is an online redo log that isn’t active and has been archived.
■
Unused
This is an online redo log that has yet to be used by the Oracle database.
The status of an online redo log group can be seen by querying the V$LOG view as seen here:
SQL> select group#, status from v$Log;
GROUP# STATUS
---------- ---------------1 INACTIVE
2 INACTIVE
3 INACTIVE
4 CURRENT
Multiplexing Online Redo Logs
If you want to have a really bad day, then just try losing your active online redo log. If you do, it’s
pretty likely that your database is about to come crashing down and that you will have experienced
some data loss. This is because recovery to the point of failure in an Oracle database is dependent
on the availability of the online redo log. As you can see, the online redo log makes the database
vulnerable to loss of a disk device, mistaken administrative delete commands, or other kinds of
errors. To address this concern, you can create mirrors of each online redo log. When you have
created more than one copy of an online redo log, the group that log is a member of is called
a multiplexed online redo log group. Typically these multiplexed copies are put on different
physical devices to provide additional protection for the online redo log groups. For highest
availability, we recommend that you separate the members of each online redo log group onto
different disk devices, different everything… Here is an example of creating a multiplexed online
redo log group:
alter database add logfile group 4
('C:\ORACLE\ORADATA\BETA1\REDO04a.LOG','C:\ORACLE\ORADATA\BETA1\REDO04b.LOG')
size 100m reuse;
Each member of a multiplexed online redo log group is written to in parallel, and having
multiple members in each group rarely causes performance problems.
The Log Sequence Number
As each online redo log group is written to, that group is assigned a number. This is the log
sequence number. The first log sequence number for a new database is always 1. As the online
redo log groups are written to, the number will increment by one during each log switch operation.
So, the next online redo log being written to will be log sequence 2, and so on.
During normal database operations, Oracle will open an available online redo log, write redo
to it, and then close it once it has filled the online redo log. Once the online redo log has filled,
the LGWR process switches to another online redo log group. At that time, if the database is in
ARCHIVELOG mode, LGWR also signals ARCH to wake up and start working. This round-robin
style of writing to online redo logs is shown in Figure 1-1.
ARCH responds to the call from LGWR by making copies of the online redo log in the locations
defined by the Oracle database parameter LOG_ARCHIVE_DEST_n and/or to the defined flash
recovery area. Until the ARCH process has successfully completed the creation of at least one
archived redo log, then the related online redo log file cannot be reused by Oracle. Depending
Please purchase PDF Split-Merge on www.verypdf.com to remove this watermark.
Chapter 1:
FIGURE 1-1
Oracle Database 11g Backup and Recovery Architecture Tour
19
Writing to online redo logs
on your system configuration, more than one archived redo log may need to be created before the
associated online redo log can be reused. As archived redo logs are created, they maintain the log
sequence number assigned to the parent online redo log. That log sequence number will remain
unique for that database until the database is opened using the resetlogs operation. Once a resetlogs
operation is executed, then the log sequence number is reset to 1.
One final note about opening the database using the resetlogs command when performing
recovery. If you are using Oracle Database 10g and later Oracle provides the ability to restore the
database using a backup taken before the point in time that you issued the resetlogs command,
when you issue the resetlogs command, Oracle will archive any remaining unarchived online
redo logs, before the online redo logs are reset. This provides the ability to restore the database
from a backup taken before the issuance of the resetlogs command. Using these backup files, and
all the archived redo logs, you can now restore beyond the point of the resetlogs command. The
ability to restore past the point of the resetlogs command relieves the DBA from the urgency of
performing a backup after a resetlogs-based recovery (though such a backup is still important).
This also provides for reduced mean-time-to-recover, as you can open the database to users after
the restore, rather than having a requirement to back up the database first.
Management of Online Redo Logs
The alter database command is used to add or remove online redo logs. In this example, we are
adding a new online redo log group to the database. The new logfile group will be group 4, and
we define its size as 100m:
alter database add logfile group 4
'C:\ORACLE\ORADATA\BETA1\REDO04.LOG' size 100m;
Please purchase PDF Split-Merge on www.verypdf.com to remove this watermark.
20
Part I:
Getting Started with RMAN in Oracle Database 11g
You can see the resulting logfile group in the V$LOG and V$LOGFILE views:
SQL> select group#, sequence#, bytes, members from v$log
2 where group# 4;
GROUP# SEQUENCE#
BYTES
MEMBERS
---------- ---------- ---------- ---------4
0 104,857,600
1
SQL> select group#, member from v$logfile
2 where group# 4;
GROUP# MEMBER
---------- ------------------------------------------------------------4 C:\ORACLE\ORADATA\BETA1\REDO04.LOG
In this next example, we remove redo log file group 4 from the database. Note that this does
not physically remove the physical files. You will still have to perform this function after removing
the log file group. This can be dangerous, so be careful when doing so:
alter database drop logfile group 4;
NOTE
If you are using the FRA or have set the DB_CREATE_ONLINE_LOG_
DEST_n, then Oracle will remove online redo logs for you after you
drop them.
To resize a logfile group, you will need to drop and then re-create it with the bigger file size.
ARCHIVELOG Mode vs. NOARCHIVELOG Mode
An Oracle database can run in one of two modes. By default, the database is created in
NOARCHIVELOG mode. This mode permits normal database operations, but does not provide
the capability to perform point-in-time recovery operations or online backups. If you want to do
online (or hot) backups, then run the database in ARCHIVELOG mode. In ARCHIVELOG mode,
the database makes copies of all online redo logs via the ARCH process, to one or more archive
log destination directories.
The use of ARCHIVELOG mode requires some configuration of the database beyond simply
putting it in ARCHIVELOG mode. You must also configure the ARCH process and prepare the
archived redo log destination directories. Note that once an Oracle database is in ARCHIVELOG
mode, that database activity will be suspended once all available online redo logs have been
used. The database will remain suspended until those online redo logs have been archived. Thus,
incorrect configuration of the database when it is in ARCHIVELOG mode can eventually lead to
the database suspending operations because it cannot archive the current online redo logs. This
might sound menacing, but really it just boils down to a few basic things:
■
Configure your database properly (we cover configuration of your database for backup
and recovery in this book quite well).
■
Make sure you have enough space available.
Please purchase PDF Split-Merge on www.verypdf.com to remove this watermark.
Chapter 1:
■
Oracle Database 11g Backup and Recovery Architecture Tour
21
Make sure that things are working as you expect them to. For example, if you define a
flash recovery area in your ARCHIVELOG mode database, make sure the archived redo
logs are being successfully written to that directory.
More coverage on the implications of ARCHIVELOG mode, how to implement it (and disable
it), and configuration for ARCHIVELOG operations can be found in Chapter 3.
Oracle Logical Structures
There are several different logical structures within Oracle. These structures include tables,
indexes, views, clusters, user-defined objects, and other objects within the database. Schemas
own these objects, and if storage is required for the objects, that storage is allocated from a
tablespace.
It is the ultimate goal of an Oracle backup and recovery strategy to be able to recover these
logical structures to a given point in time. Also, it is important to recover the data in these
different objects in such a way that the state of the data is consistent to a given point in time.
Consider the impact, for example, if you were to recover a table as it looked at 10 A.M., but only
recover its associated index as it looked at 9 A.M. The impact of such an inconsistent recovery
could be awful. It is this idea of a consistent recovery that really drives Oracle’s backup and
recovery mechanism, and RMAN fits nicely into this backup and recovery architectural framework.
The Combined Picture
Now that we have introduced you to the various components of the Oracle database, let’s quickly
put together a couple of narratives that demonstrate how they all work together. First, we look at
the overall database startup process, which is followed by a narrative of the basic operational use
of the database.
Startup and Shutdown of the Database
Our DBA, Eliza, has just finished some work on the database, and it’s time to restart it. She starts
SQL*Plus and connects as SYS using the SYSDBA account. At the SQL prompt, Eliza issues the
startup command to open the database. The following shows an example of the results of this
command:
SQL> startup
ORACLE instance started.
Total System Global Area
Fixed Size
Variable Size
Database Buffers
Redo Buffers
Database mounted.
Database opened.
84700976
282416
71303168
12582912
532480
bytes
bytes
bytes
bytes
bytes
Recall the different phases that occur after the startup command is issued: instance startup,
database mount, and then database open. Let’s look at each of these stages now in a bit more
detail.
Please purchase PDF Split-Merge on www.verypdf.com to remove this watermark.
22
Part I:
Getting Started with RMAN in Oracle Database 11g
Instance Startup (startup nomount)
The first thing that occurs when starting the database is instance startup. It is here that Oracle
parses the database parameter file and makes sure that the instance is not already running by
trying to acquire an instance lock. Then, the various database processes (as described in “The
Oracle Processes,” earlier in this chapter), such as DBWn and LGWR, are started. Also, Oracle
allocates memory needed for the SGA. Once the instance has been started, Oracle reports to the
user who has started it that the instance has been started back, and how much memory has been
allocated to the SGA.
Had Eliza issued the command startup nomount, then Oracle would have stopped the
database startup process after the instance was started. She might have started the instance in
order to perform certain types of recovery, such as control file re-creation.
Mounting the Database (startup mount)
The next stage in the startup process is the mount stage. As Oracle passes through the mount
stage, it opens the database control file. Having done that successfully, Oracle extracts the
database datafile names from the control file in preparation for opening them. Note that Oracle
does not actually check for the existence of the datafiles at this point, but only identifies their
location from the control file. Having completed this step, Oracle reports back that it has
mounted the database.
At this point, had Eliza issued the command startup mount, Oracle would have stopped
opening the database and waited for further direction. When the Oracle instance is started and
the database is mounted but not open, certain types of recovery operations may be performed,
including renaming the location of database datafiles and recovery system tablespace datafiles.
Opening the Database
Eliza issued the startup command, however, so Oracle moves on and tries to open the database.
During this stage, Oracle verifies the presence of the database datafiles and opens them. As it
opens them, it checks the datafile headers and compares the SCN information contained in those
headers with the SCN stored in the control files. Let’s talk about these SCNs for a second.
SCNs are Oracle’s method of tracking the state of the database. As changes occur in the
database, they are associated with a given SCN. As these changes are flushed to the database
datafiles (which occurs during a checkpoint operation), the headers of the datafiles are updated
with the current SCN. The current SCN is also recorded in the database control file.
When Oracle tries to open a database, it checks the SCNs in each datafile and in the database
control file. If the SCNs are the same and the bitmapped flags are set correctly, then the database is
considered to be consistent, and the database is opened for use.
NOTE
Think of SCNs as being like the counter on a VCR. As time goes on,
the counter continues to increment, indicating a temporal point in
time where the tape currently is. So, if you want to watch a program
on the tape, you can simply rewind (or fast forward) the tape to the
counter number, and there is the beginning of the program. SCNs
are the same way. When Oracle needs to recover a database, it
“rewinds” to the SCN it needs to start with and then replays all of
the transactions after that SCN until the database is recovered.
Please purchase PDF Split-Merge on www.verypdf.com to remove this watermark.
Chapter 1:
Oracle Database 11g Backup and Recovery Architecture Tour
23
If the SCNs are different, then Oracle automatically performs crash or instance recovery, if
possible. Crash or instance recovery occurs if the redo needed to generate a consistent image is
in the online redo log files. If crash or instance recovery is not possible, because of a corrupted
datafile or because the redo required to recover is not in the online redo logs, then Oracle
requests that the DBA perform media recovery. Media recovery involves recovering one or more
database datafiles from a backup taken of the database and is a manual process, unlike instance
recovery. Assisting in media recovery is where RMAN comes in, as you will see in later chapters.
Once the database open process is completed successfully (with no recovery, crash recovery, or
media recovery), then the database is open for business.
Shutting Down the Database
Of course, Eliza will probably want to shut down the database at some point in time. To do so,
she could issue the shutdown command. This command closes the database, unmounts it, and
then shuts down the instance in almost the reverse order as the startup process already discussed.
There are several options to the shutdown command.
Note in particular that a shutdown abort of a database is basically like simulating a database
crash. This command is used often, and it rarely causes problems. Oracle generally recommends
that your database be shut down in a consistent manner, if at all possible.
If you must use the shutdown abort command to shut down the database (and in the real
world, this does happen frequently because of outage constraints), then you should reopen the
database with the startup command (or even better, startup restrict). Following this, do the final
shutdown on the database using the shutdown immediate command before performing any
offline backup operations. Note that even this method may result in delays shutting down the
database because of the time it takes to roll back transactions during the shutdown process.
NOTE
As long as your backup and recovery strategy is correct, it really
doesn’t matter whether the database is in a consistent state (as with
a normal shutdown) or an inconsistent state (as with a shutdown
abort) when an offline backup occurs. Oracle does recommend that
you do cold backups with the database in a consistent state, and we
recommend that, too (because the online redo logs will not be getting
backed up by RMAN). Finally, note that online backups eliminate this
issue completely!
Using the Database and Internals
In this section, we are going to follow some users performing different transactions in an Oracle
database. First, we provide you with a graphical roadmap that puts together all the processes,
memory structures, and other components of the database for you. Then, we follow a user as the
user makes changes to the database. We then look at commits and how they operate. Finally, we
look at database checkpoints and how they work.
Process and Database Relationships
We have discussed a number of different processes, memory structures, and other objects
that make up the Oracle database. Figure 1-2 provides a graphic that might help you better
understand the interrelationships between the different components in Oracle.
Please purchase PDF Split-Merge on www.verypdf.com to remove this watermark.
24
Part I:
Getting Started with RMAN in Oracle Database 11g
FIGURE 1-2
A typical Oracle database
Changing Data in the Database
Now, assume the database is open. Let’s say that Fred needs to add a new record to the DEPT
table for the janitorial department. So, Fred might issue a SQL statement like this:
INSERT INTO DEPT VALUES (60, 'JANITOR','DALLAS');
The insert statements (as well as update and delete commands) are collectively known as
Data Manipulation Language (DML). As a statement is executed, redo is generated and stored in
the redo log buffer in the Oracle SGA. Note that redo is generated by this command, regardless
of the presence of the commit command. The delete and update commands work generally the
same way with respect to redo generation.
One of the results of DML is that undo is generated and stored in rollback segments. Undo
consists of instructions that allow Oracle to undo (or roll back) the statement being executed.
Using undo, Oracle can roll back the database changes and provide read consistent images (also
Please purchase PDF Split-Merge on www.verypdf.com to remove this watermark.
Chapter 1:
Oracle Database 11g Backup and Recovery Architecture Tour
25
known as read consistency) to other users. Let’s look a bit more at the commit command and read
consistency.
Committing the Change
Having issued the insert command, Fred wants to ensure that this change is committed to the
database, so he issues the commit command:
COMMIT;
The effects of issuing the commit command include the following:
■
The change becomes visible to all users who query the table at a point in time after the
commit occurs. If Eliza queries the DEPT table after the commit occurs, then she will see
department 60. However, if Eliza had already started a query before the commit, then this
query would not see the changes to the table.
■
The change is recoverable if the database is in NOARCHIVELOG mode and if crash or
instance recovery is required.
■
The change is recoverable if the database is in ARCHIVELOG mode (assuming a valid
backup and recovery strategy) and media recovery is required and if all archived and
online redo logs are available.
The commit command causes the Oracle LGWR process to flush the online redo log buffer to
the online redo logs. Uncommitted redo is flushed to the online redo logs regardless of a commit
(in fact, uncommitted changes can be written to the datafiles, too). When a commit is issued,
Oracle writes a commit vector to the redo log buffer, and the buffer is flushed to disk before the
commit returns. It is this commit vector, and the fact that the commit issued by Fred’s session will
not return until his redo has been flushed to the online redo logs successfully, that will ensure that
Fred’s changes will be recoverable.
The commit Command and Read Consistency Did you notice that Eliza was not able to see
Fred’s change until he issued the commit command? This is known as read consistency. Another
example of read consistency would be a case where Eliza started a report before Fred committed
his change. Assume that Fred committed the change during Eliza’s report. In this case, it would be
inconsistent for department 60 to show up in Eliza’s report, since it did not exist at the time that
her report started. As Eliza’s report continues to run, Oracle checks the start SCN of the report
query against the SCNs of the blocks being read in Oracle to produce the report output. If the
time of the report is earlier than the current SCN on the data block, then Oracle goes to the
rollback segments and finds undo for that block that will allow Oracle to construct an image
consistent with the time that the report started.
As Fred continues other work on the database, the LGWR process writes to the online redo
logs on a regular basis. At some point in time, an online redo log will fill up, and LGWR will
close that log file, open the next log file, and begin writing to it. During this transition period,
LGWR also signals the ARCH process to begin copying the log file that it just finished using to
the archive log backup directories.
Please purchase PDF Split-Merge on www.verypdf.com to remove this watermark.
26
Part I:
Getting Started with RMAN in Oracle Database 11g
Checkpoints
Now, you might be wondering, when does this data actually get written out to the database
datafiles? Recall that a checkpoint is an event in which Oracle (through DBWR) writes data out
to the datafiles. There are several different kinds of checkpoints. Some of the events that result in
a checkpoint are the following:
■
A redo log switch
■
Normal database shutdowns
■
When a tablespace is taken in or out of online backup mode (see “Oracle Physical
Backup and Recovery” later in this chapter)
Note that ongoing incremental checkpoints occur throughout the lifetime of the database,
providing a method for Oracle to decrease the overall time required when performing crash
recovery. As the database operates, Oracle is constantly writing out streams of data to the database
datafiles. These writes occur in such a way as to not impede performance of the database. Oracle
provides certain database parameters to assist in determining how frequently Oracle must process
incremental checkpoints.
Oracle Backup and Recovery Primer
Before you use RMAN, you should understand some general backup and recovery concepts in
Oracle. Backups in Oracle come in two general categories, logical and physical. In the following
sections, we quickly look at logical backup and recovery and then give Oracle physical backup
and recovery a full treatment.
Logical Backup and Recovery
Oracle Database 11g uses the Oracle Data Pump architecture to support logical backup and
recovery. These utilities include the Data Pump Export program (expdp) and the Data Pump
Import program (impdp). With logical backups, point-in-time recovery is not possible. RMAN
does not do logical backup and recovery, so this topic is beyond the scope of this book.
Oracle Physical Backup and Recovery
Physical backups are what RMAN is all about. Before we really delve into RMAN in the remaining
chapters of this book, let’s first look at what is required to manually do physical backups and
recoveries of an Oracle database. While RMAN removes you from much of the work involved
in backup and recovery, some of the principles remain the same. Understanding the basics of
manual backup and recovery will help you understand what is going on with RMAN and will
help us contrast the benefits of RMAN versus previous methods of backing up Oracle.
We have already discussed ARCHIVELOG mode and NOARCHIVELOG mode in Oracle. In
either mode, Oracle can do an offline backup. Further, if the database is in ARCHIVELOG mode,
then Oracle can do offline or online backups. We will cover the specifics of these operations with
RMAN in later chapters of this book.
Of course, if you back up a database, it would be nice to be able to recover it. Following the
sections on online and offline backups, we will discuss the different Oracle recovery options
available. Finally, in these sections, we take a very quick, cursory look at Oracle manual backup
and recovery.
Please purchase PDF Split-Merge on www.verypdf.com to remove this watermark.
Chapter 1:
Oracle Database 11g Backup and Recovery Architecture Tour
27
NOARCHIVELOG Mode Physical Backups
We have already discussed NOARCHIVELOG mode in the Oracle database. This mode of
database operations supports backups of the database only when the database is shut down. Also,
only full recovery of the database up to the point of the backup is possible in NOARCHIVELOG
mode. To perform a manual backup of a database in NOARCHIVELOG mode, follow these steps
(note that these steps are different if you are using RMAN, which we will cover in later chapters):
1. Shut down the database completely.
2. Back up all database datafiles, the control files, and the online redo logs.
3. Restart the database.
ARCHIVELOG Mode Physical Backups
If you are running your database in ARCHIVELOG mode, you can continue to perform full
backups of your database with the database either running or shut down. Even if you perform
the backup with the database shut down, you will want to use a slightly different cold backup
procedure:
1. Shut down the database completely.
2. Back up all database datafiles.
3. Restart the database.
4. Force an online redo log switch with the alter system switch logfile command. Once the
online redo logs have been archived, back up all archived redo logs.
5. Create a backup of the control file using the alter database backup control file to trace
and alter database backup controlfile to ‘file_name’ commands.
Of course, with your database in ARCHIVELOG mode, you may well want to do online, or
hot, backups of your database. With the database in ARCHIVELOG mode, Oracle allows you to
back up each individual tablespace and its datafiles while the database is up and running. The
nice thing about this is that you can back up selective parts of your database at different times.
To do an online backup of your tablespaces, follow this procedure:
1. Use the alter tablespace begin backup command to put the tablespaces and datafiles
that you wish to back up in online backup mode. If you want to back up the entire
database, you can use the alter database begin backup command to put all the database
tablespaces in hot backup mode.
2. Back up the datafiles associated with the tablespace you have just put in hot backup
mode. (You can opt to just back up specific datafiles.)
3. Take the tablespaces out of hot backup mode by issuing the alter tablespace end backup
command for each tablespace you put in online backup mode in Step 1. If you want
to take all tablespaces out of hot backup mode, use the alter database end backup
command.
4. Force an online redo log switch with the alter system switch logfile command.
5. Once the log switch has completed and the current online redo log has been archived,
back up all the archived redo logs.
Please purchase PDF Split-Merge on www.verypdf.com to remove this watermark.
28
Part I:
Getting Started with RMAN in Oracle Database 11g
Note the log switch and backup of archived redo logs in Step 5. This is required, because all
redo generated during the backup must be available to apply should a recovery be required. While
Oracle continues to physically update the datafiles during the online backup (except for the
datafile headers), there is a possibility of block splitting during backup operations, which will make
the backed up datafile inconsistent. Further, since a database datafile might be written after it has
been backed up but before the end of the overall backup process, it is important to have the redo
generated during the backup to apply during recovery because each datafile on the backup might
well be current as of a different SCN, and thus the datafile backup images will be inconsistent.
Redo generation changes when you issue the alter tablespace begin backup command or
alter database begin backup command. Typically, Oracle only stores change vectors as redo
records. These are small records that just define the change that has taken place. When a datafile
is in online backup mode, Oracle will record the entire block that is being changed rather than
just the change vectors. This means total redo generation during online backups can increase
significantly. This can impact disk space requirements and CPU overhead during the hot backup
process. RMAN enables you to perform hot backups without having to put a tablespace in hot
backup mode, thus eliminating the additional I/O you would otherwise experience. Things return
to normal when you end the online backup status of the datafiles.
Note that in both backups in ARCHIVELOG mode (online and offline), we do not back up the
online redo logs, and instead back up the archived redo logs of the database. In addition, we do
not back up the control file, but rather create backup control files. We do this because we never
want to run the risk of overwriting the online redo logs or control files during a recovery.
You might wonder why we don’t want to recover the online redo logs. During a recovery in
ARCHIVELOG mode, the most current redo is likely to be available in the online redo logs, and thus
the current online redo log will be required for full point-in-time recovery. Because of this, we do
not overwrite the online redo logs during a recovery of a database that is in ARCHIVELOG mode. If
the online redo logs are lost as a result of the loss of the database (and hopefully this will not be the
case), then you will have to do point-in-time recovery with all available archived redo logs.
For much the same reason that we don’t back up the online redo logs, we don’t back up the
control files. Because the current control file contains the latest online and archived redo log
information, we do not want to overwrite that information with earlier information on these
objects. In case we lose all of our control files, we will use a backup control file to recover the
database.
Finally, consider performing supplemental backups of archived redo log files and other means
of protecting the archived redo logs from loss. Loss of an archived redo log directly impacts your
ability to recover your database to the point of failure. If you lose an archived redo log and that
log sequence number is no longer part of the online redo log groups, then you will not be able to
recover your database beyond the archived redo log sequence prior to the sequence number of
the lost archived redo log.
NOARCHIVELOG Mode Recoveries
If you need to recover a backup taken in NOARCHIVELOG mode, doing so is as simple as
recovering all the database datafiles, the control files, and the online redo logs and starting the
database. Of course, a total recovery may require such things as recovering the Oracle RDBMS
software, the parameter file, and other required Oracle items, which we will discuss in the last
section of this chapter.
Please purchase PDF Split-Merge on www.verypdf.com to remove this watermark.
Chapter 1:
Oracle Database 11g Backup and Recovery Architecture Tour
29
Note that a recovery in NOARCHIVELOG mode is only possible to the point in time that you
took your last backup. If you are recovering a database backed up in NOARCHIVELOG mode,
you can only recover the database to the point of the backup. No database changes after the point
of the backup can be recovered if your database is in NOARCHIVELOG mode.
ARCHIVELOG Mode Recoveries
A database that is in ARCHIVELOG mode can be backed up using online or offline backups. The
fortunate thing about ARCHIVELOG mode, as opposed to NOARCHIVELOG mode, is that you
can recover the database to the point of the failure that occurred. In addition, you can choose to
recover the database to a specific point in time, or to a specific point in time based on the change
number.
ARCHIVELOG mode recoveries also allow you to do specific recoveries on datafiles,
tablespaces, or the entire database. In addition, you can do point-in-time recovery or recovery
to a specific SCN. Let’s quickly look at each of these options.
In this section, we briefly cover full database recoveries in ARCHIVELOG mode. We then
look at tablespace and datafile recoveries, followed by point-in-time recoveries.
ARCHIVELOG Mode Full Recovery You can recover a database backup in ARCHIVELOG
mode up to the point of failure, assuming that the failure of the database did not compromise at
least one member of each of your current online redo log groups and any archived redo logs that
were not backed up. If you have lost your archived redo logs or online redo logs, then you will
need to perform some form of point-in-time recovery, as discussed later in this section. Also, if
you have lost all copies of your current control file, you will need to recover it and perform
incomplete recovery.
To perform full database recovery from a backup of a database in ARCHIVELOG mode, follow
this procedure:
1. Restore all the database datafiles from your backup.
2. Restore all backed up archived redo logs.
3. Mount the database (startup mount).
4. Recover the database (recover database).
5. Oracle prompts you to apply redo from the archived redo logs. Simply enter AUTO at the
prompt, and Oracle will automatically apply all redo logs.
6. Once all redo logs have been applied, open the recovered database (alter database open).
ARCHIVELOG Tablespace and Datafile Recovery Tablespace and datafile recovery can be
performed with the database mounted or open. To perform a recovery of a tablespace in Oracle
with the database open, follow these steps:
1. Take the tablespace offline (alter tablespace offline).
2. Restore all datafiles associated with the tablespace to be recovered.
3. Recover the tablespace (recover tablespace) online.
4. Once recovery has completed, bring the tablespace online (alter tablespace online).
Please purchase PDF Split-Merge on www.verypdf.com to remove this watermark.
30
Part I:
Getting Started with RMAN in Oracle Database 11g
Just as you can recover a tablespace, you can also recover specific datafiles. This has the
benefit of leaving the tablespace online. Only data that resides in the offline datafiles will be
unavailable during the recovery process. The rest of the database will remain available during the
recovery. Here is a basic outline of a datafile recovery:
1. Take the datafile offline (alter database datafile ‘file_name’ offline).
2. Restore all datafiles to be recovered.
3. Recover the tablespace (recover datafile) online.
4. Once recovery has completed, bring the datafile online (alter database datafile ‘file_
name’ online).
ARCHIVELOG Point-In-Time Recoveries Another benefit of ARCHIVELOG mode is the
capability to recover a database to a given point in time rather than to the point of failure. This
capability is used often when creating a clone database (perhaps for testing or reporting purposes)
or in the event of major application or user error. You can recover a database to either a specific
point in time or a specific database SCN.
If you want to recover a tablespace to a point in time, you need to recover the entire database
to the same point in time (unless you perform tablespace point-in-time recovery, which is a different
topic). For example, assume that you have an accounting database, that most of your data is in
the ACCT tablespace, and that you wish to recover the database back in time two days. You
cannot just restore the ACCT tablespace and recover it to a point in time two days ago, because
the remaining tablespaces (SYSTEM, TEMP, and RBS, for example) will still be consistent to the
current point in time, and the database will fail to open because it will be inconsistent.
To recover a database to a point in time, follow these steps:
1. Recover all database datafiles from a backup that ended before the point in time that you
want to recover the database to.
2. Recover the database to the point in time that you wish it to be recovered to. Use the
command recover database until time ‘01-01-2010 21:00:00’ and apply the redo logs
as required.
3. Once the recovery is complete, open the database using the alter database open
resetlogs command.
You can also choose to recover the database using an SCN number:
1. Recover all database datafiles from a backup that ended before the point in time that you
want to recover the database to.
2. Recover the database to the SCN that you wish it to be recovered to. Use the command
recover database until change ‘221122’ and apply the redo logs as required.
3. Once the recovery is complete, open the database.
Further, you can apply changes to the database and manually cancel the process after a
specific archived redo log has been applied:
1. Recover all database datafiles from a backup that ended before the point in time that you
want to recover the database to.
Please purchase PDF Split-Merge on www.verypdf.com to remove this watermark.
Chapter 1:
Oracle Database 11g Backup and Recovery Architecture Tour
31
2. Recover the database to the point in time that you wish it to be recovered to. Use the
command recover database until cancel and apply the redo logs as required. When
you have applied the last archived redo log, simply issue the cancel command to finish
applying redo.
3. Once the recovery is complete, open the database.
Keep in mind the concept of database consistency when doing point-in-time recovery (or any
recovery, for that matter). If you are going to recover a database to a given point in time, you must
do so with a backup that finished before the point in time that you wish to recover to. Also, you
must have all the archived redo logs (and possibly the remaining online redo logs) available to
complete recovery.
A Word About Flashback Database Another recovery method available to you is the use of
Oracle’s flashback features. We will cover Oracle’s flashback features in more depth in Chapter 13,
but know that with the various flashback functionality, you can significantly reduce the overall time
it takes to recover your database from user- and application-level errors. RMAN supports some of
the Oracle Database 11g flashback features, so it is most appropriate to cover those in this book.
Backing Up Other Oracle Components
We have quickly covered the essentials of backup and recovery for Oracle. One last issue that
remains to be covered are the things that need to be backed up. These are items that generally are
backed up with less frequency because they change rarely. These items include
■
The Oracle RDBMS software (Oracle Home and the Oracle Inventory).
■
Network parameter files (names.ora, sqlnet.ora, and tnsnames.ora).
■
Database parameter files (init.ora, INI files, and so forth). Note that RMAN does allow you
to back up the database parameter file (only if it’s a SPFILE) along with the control file!
■
The system oratab file and other system Oracle-related files (for example, all rc startup
scripts for Oracle).
It is important that these items be backed up regularly as a part of your backup and recovery
process. You need to plan to back up these items regardless of whether you do manual backups
or RMAN backups, because RMAN does not back up these items either.
As you can see, the process of backup and recovery of an Oracle database can involve a
number of steps. Since DBAs want to make sure they do backups correctly every time, they
generally write a number of scripts for this purpose. There are a few problems with this practice.
First of all, scripts can break. When the script breaks, who is going to support it, particularly when
the DBA who wrote it moves to a new position somewhere in the inaccessible tundra in northern
Alaska? Second, either you have to write the script to keep track of when you add or remove
datafiles, or you have to manually add or remove datafiles from the script as required.
With RMAN, you get a backup and recovery product that is included with the base database
product for free, and that reduces the complexity of the backup and recovery process. Also, you
get the benefit of Oracle support when you run into a problem. Finally, with RMAN, you get
additional features that no other backup and recovery process can match. We will look at those
in coming chapters.
Please purchase PDF Split-Merge on www.verypdf.com to remove this watermark.
32
Part I:
Getting Started with RMAN in Oracle Database 11g
RMAN solves all of these problems and adds features that make its use even more beneficial
for the DBA. In this book, we will look at these features and how they can help make your life
easier and make your database backups more reliable.
Summary
We didn’t discuss RMAN much in this chapter, but we laid some important groundwork for future
discussions of RMAN that you will find in later chapters. As promised, we covered some essential
backup and recovery concepts, such as high availability and backup and recovery planning, that
are central to the purpose of RMAN. We then defined several Oracle terms that you need to be
familiar with later in this text. We then reviewed the Oracle database architecture and internal
operations. We cannot stress enough how important it is to have an understanding of how Oracle
works inside when it comes time to actually recover your database in an emergency situation.
Finally, we discussed manual backup and recovery operations in Oracle. Contrast these to the
same RMAN operations in later chapters, and you will find that RMAN is ultimately an easy
solution to backup and recovery of your Oracle database.
Please purchase PDF Split-Merge on www.verypdf.com to remove this watermark.
CHAPTER
2
Introduction to the
RMAN Architecture
Please purchase PDF Split-Merge on www.verypdf.com to remove this watermark.
34
Part I:
Getting Started with RMAN in Oracle Database 11g
his chapter will take you through each of the components in the RMAN architecture
one by one, explaining the role each plays in a successful backup or recovery of the
Oracle database. Most of this discussion assumes that you have a good understanding
of the Oracle RDBMS architecture. If you are not familiar at a basic level with the
different components of an Oracle database, you might want to read the brief
introduction in Chapter 1, or pick up a beginner’s guide to database administration, before
continuing. After we discuss the different components for backup and recovery, we walk
through a simple backup procedure to disk and talk about each component in action.
T
Server-Managed Recovery
In the previous chapter, you learned the principles and practices of backup and recovery in the
old world. It involved creating and running scripts to capture the filenames, associate them with
tablespaces, get the tablespaces into backup mode, get an OS utility to perform the copy, and
then stop backup mode.
But this book is really about using Recovery Manager (RMAN). Recovery Manager implements
a type of server-managed recovery (SMR). SMR refers to the ability of the database to perform the
operations required to keep itself backed up successfully. It does so by relying on built-in code in
the Oracle RDBMS kernel. Who knows more about the schematics of the database than the
database itself?
The power of SMR comes from what details it can eliminate on your behalf. As the degree of
enterprise complexity increases, and the number of databases that a single DBA is responsible for
increases, personally troubleshooting dozens or even hundreds of individual scripts becomes too
burdensome. In other words, as the move to “grid computing” becomes more mainstreamed, the
days of personally eyeballing all the little details of each database backup become a thing of the
past. Instead, many of the nitpicky details of backup management get handled by the database
itself, allowing us to take a step back from the day-to-day upkeep and to concentrate on more
important things. Granted, the utilization of RMAN introduces certain complexities that overshadow
the complete level of ease that might be promised by SMR—why else would you be reading this
book? But the blood, sweat, and tears you pour into RMAN will give you huge payoffs. You’ll see.
The RMAN Utility
RMAN is the specific implementation of SMR provided by Oracle. RMAN is a stand-alone
application that makes a client connection to the Oracle database to access internal backup and
recovery packages. It is, at its very core, nothing more than a command interpreter that takes
simplified commands you type and turns those commands into remote procedure calls (RPCs)
that are executed at the database.
We point this out primarily to make one thing very clear: RMAN does very little work. Sure,
the coordination of events is important, but the real work of actually backing up and recovering
a database is performed by processes at the target database itself. The target database refers to the
database that is being backed up. The Oracle database has internal packages that actually take
the PL/SQL blocks passed from RMAN and turn them into system calls to read from, and write
to, the disk subsystem of your database server.
The RMAN utility is installed as part of the Database Utilities suite of command-line utilities.
This suite includes Data Pump, SQL*Loader, DBNEWID, and dbverify. During a typical Oracle
installation, RMAN will be installed. It is included with Enterprise and Standard Editions, although
there are restrictions if you have a license only for Standard Edition: without Enterprise Edition,
Please purchase PDF Split-Merge on www.verypdf.com to remove this watermark.
Chapter 2:
Introduction to the RMAN Architecture
35
RMAN can only allocate a single channel for backups. If you are performing a client installation,
it will be installed if you choose the Administrator option instead of the Runtime client option.
The RMAN utility is made up of two pieces: the executable file and the recover.bsq file. The
recover.bsq file is essentially the library file, from which the executable file extracts code for
creating PL/SQL calls to the target. The recover.bsq file is the brains of the whole operation. These
two files are invariably linked and logically make up the RMAN client utility. It is worth pointing
out that the recover.bsq file and the executable file must be the same version or nothing will work.
The RMAN utility serves a distinct, orderly, and predictable purpose: it interprets commands
you provide into PL/SQL calls that are remotely executed at the target database. The command
language is unique to RMAN, and using it takes a little practice. It is essentially a stripped-down
list of all the things you need to do to back up, restore, or recover databases, or to manipulate
those backups in some way. These commands are interpreted by the executable translator, then
matched to PL/SQL blocks in the recover.bsq file. RMAN then passes these RPCs to the database
to gather information based on what you have requested. If your command requires an I/O operation
(in other words, a backup command or a restore command), then when this information is returned,
RMAN prepares another block of procedures and passes it back to the target database. These
blocks are responsible for engaging the system calls to the OS for specific read or write operations.
RMAN and Database Privileges
RMAN needs to access packages at the target database that exist in the SYS schema. In addition,
RMAN requires the privileges necessary to start up, shut down, and—during restore operations—
create the target database. Therefore, RMAN always connects to the target database as a sysdba
user. Don’t worry, you do not need to specify this as you would from SQL*Plus; because RMAN
requires it for every target database connection, it is assumed. Therefore, when you connect to the
target, RMAN automatically supplies the “as sysdba” to the connection:
RMAN> connect target sys/password
connected to target database: PROD (DBID 4159396170)
If you try to connect as someone who does not have sysdba privileges, RMAN will give you
an error:
RMAN> connect target /
RMAN-00571:
RMAN-00569:
ERROR MESSAGE STACK FOLLOWS
RMAN-00571:
ORA-01031: insufficient privileges
This is a common error during the setup and configuration phase of RMAN. It is encountered
when you are not logged into your server as a member of the dba group. This OS group controls
the authentication of sysdba privileges to all Oracle databases on the server. (The name dba is the
default and is not required. Some OS installs use a different name, and you are by no means
obligated to use dba.) Typically, most Unix systems have a user named oracle that is a member of
the group dba. This is the user that installs the Oracle software to begin with, and in most modern
configurations, you will have sudo set up so that you can ‘sudo oracle’—still logged in as yourself,
but assuming oracle privileges. It doesn’t matter who you connect as within RMAN—you will
always be connected as a sysdba user, with access to the SYS schema and the ability to start up
and shut down the database. On Windows platforms, Oracle creates a local group called ORA_
DBA and adds the installing user to the group.
Please purchase PDF Split-Merge on www.verypdf.com to remove this watermark.
36
Part I:
Getting Started with RMAN in Oracle Database 11g
If you are logged in as a user who does not have dba group membership and you will need to
use RMAN, then you must create and use a password file for your target database. If you will be
connecting RMAN from a client system across the network, you need to create and use a password
file. The configuration steps for this can be found in Chapter 3.
The Network Topology of RMAN Backups
The client/server architecture of RMAN inevitably leads to hours of confusion. This confusion
typically comes from where RMAN is being executed, versus where the backup work is actually
being done. RMAN is a client application that attaches to the target database via an Oracle Net
connection. If you are running the RMAN executable in the same ORACLE_HOME as your target
database, then this Oracle Net connection can be a bequeath, or local, connection and won’t require
you to provide an Oracle Net alias—so long as you have the appropriate ORACLE_SID variable set
in your environment. Otherwise, you will need to configure your tnsnames.ora file with an entry
for your target database, and you will need to do this from the location where you will be running
RMAN. Figure 2-1 provides an illustration of the network topology of different RMAN locations.
Running RMAN Remotely
If you are responsible for many databases spread over the enterprise, one option is to consolidate
your RMAN application at a single client system, where you can better manage your tnsnames.ora
entries. All your RMAN scripts can be consolidated, and you have no confusion later on where
RMAN is running. You know exactly where it is running: on your laptop, your desktop, or your
Linux workstation. This client/server model makes sense, as well, if you will be using a recovery
catalog in your RMAN configuration, as you will be making more than one Oracle Net connection
each time you operate RMAN. On the other hand, running RMAN from a different system (or even
from a different ORACLE_HOME) than the target database means you will be required to set up a
password file, leading to more configuration and management at each of your target databases.
FIGURE 2-1
Five different locations (and versions) for the RMAN executable
Please purchase PDF Split-Merge on www.verypdf.com to remove this watermark.
Chapter 2:
Introduction to the RMAN Architecture
37
Who Uses a Recovery Catalog?
A recovery catalog is a repository for RMAN’s backup history, with metadata about when the
backups were taken, what was backed up, and how big the backups are. It includes crucial
information about these backups that is necessary for recovery. This metadata is extracted
from the default location, the target database control file, and held in database tables within a
user’s schema. Do you need a recovery catalog? Not really—only stored scripts functionality
actually requires the catalog. If you end up configuring a more complex environment with
standby configurations (Chapter 20), or sync/split configurations (Chapter 22), you will need
one. Does a recovery catalog come in handy? Usually. Does a recovery catalog add a layer
of complexity? Indubitably. Chapter 3, which discusses the creation and setup of a recovery
catalog, goes into greater depth about why you should or should not use a recovery catalog.
We provide a discussion of the recovery catalog architecture later in this chapter.
If you will be making a remote connection from RMAN to the target database, you need to
create a tnsnames.ora entry that can connect you to the target database with a dedicated server
process. RMAN cannot use Shared Servers (formerly known as Multi-Threaded Servers, or MTS) to
make a database connection. So if you use Shared Servers, which is the default setup on all new
installations, then you need to create a separate Oracle Net alias that uses a dedicated server
process. The difference between the two can be seen in the following sample tsnames.ora file.
Note that the first alias entry is for dedicated server processes, and the second uses the Shared
Servers architecture.
PROD RMAN
(DESCRIPTION
(ADDRESS LIST
(ADDRESS
(PROTOCOL
)
(CONNECT DATA
(SERVER = DEDICATED)
(SERVICE NAME
prod)
)
)
PROD
(DESCRIPTION
(ADDRESS LIST
(ADDRESS
(PROTOCOL
)
(CONNECT DATA
(SERVER = SHARED)
(SERVICE NAME
prod)
)
)
TCP)(HOST
cervantes)(PORT
1521))
TCP)(HOST
cervantes)(PORT
1521))
Running RMAN Locally from the Target Database’s
ORACLE_HOME
In our opinion, running RMAN locally from each target database is the best way to manage a
large enterprise with hundreds (or thousands) of database targets. Because of RMAN’s legendary
compatibility headaches, keeping the rman.exe bundled tightly to the target database will save
Please purchase PDF Split-Merge on www.verypdf.com to remove this watermark.
38
Part I:
Getting Started with RMAN in Oracle Database 11g
you time in the long run. There are drawbacks to deploying your RMAN backups in this fashion,
but with many deployments under our belt, we feel that it is the best way to go.
Running RMAN locally means you can always make a bequeath connection to the database,
requiring no password file setup and no tnsnames.ora configuration. Bear in mind that the simplicity
of this option is also its drawback: as soon as you want to introduce a recovery catalog, or
perform a database duplication operation, you introduce all the elements that you are trying to
avoid in the first place. This option can also lead to confusion during usage: because you always
make a local connection to the database, it is easy to connect to the wrong target database. It can
also be confusing to know which environment you are connecting from; if you have more than
one Oracle software installation on your system (and who doesn’t?), then you can go down a
time-sucking rat hole if you assume you are connecting to your PROD instance, when in fact you
set up your ORACLE_HOME and ORACLE_SID environment variables for the TEST instance.
Perhaps the true difference between running RMAN from your desktop workstation and
running it locally at each target database server comes down to OS host security. To run RMAN
locally, you always have to be able to log into each database server as the oracle user at the OS
level and to have privileges defined for such. However, if you always make an Oracle Net
connection to the database from a remote RMAN executable, you need never have host login
credentials.
Choose your option wisely. We’ve stated our preference, and then given you its bad news. As
Figure 2-2 depicts, even our simplification into two options—client RMAN or server RMAN—can
be tinkered with, giving you a hybrid model that fits your needs. Figure 2-2 shows five different
scenarios:
1. RMAN runs as a client connection from the DBA’s workstation, because the DBA in
charge of backing up PRODWB and DW_PROD does not have the oracle user password
on the production database server.
FIGURE 2-2
Running different versions of the RMAN executable in the enterprise
Please purchase PDF Split-Merge on www.verypdf.com to remove this watermark.
Chapter 2:
Introduction to the RMAN Architecture
39
2. RMAN backs up DW_PROD remotely, as with PRODWB, due to security restrictions on
the database production server.
3. The 10.2 TEST database is backed up with a local RMAN executable that runs from the
TEST $ORACLE_HOME.
4. The 11.1.0 DEV database is backed up locally. Because the DBA has oracle user
privileges on the Test and Dev Server, this is feasible, and it minimizes the number of
client installs to maintain at the local workstation.
5. The 11.2.0 DEV database is backed up locally as well, for the same reasons as the 11.1.0
DEV database.
Remember to remain flexible in your RMAN topology. At times you will need to run your
backups in NOCATALOG mode, using the local RMAN executable. And there may come a time
when you need to run a remote RMAN job as well.
The Database Control File
So far, we have discussed the RMAN executable and its role in the process of using servermanaged recovery with Oracle 11g. As we said, the real work is being done at the target
database—it’s backing itself up. Next, we must discuss the role of the control file in an RMAN
backup or recovery process.
The control file has a day job already; it is responsible for the physical schematics of the
database. The name says it all: the control file controls where the physical files of a database can
be found, and what header information each file currently contains (or should contain). Its contents
include datafile information, redo log information, and archive log information. It has a snapshot
of each file header for the critical files associated with the database. Because of this wealth of
information, the control file has been the primary component of any recovery operation prior to
RMAN (Chapter 1 discusses this in greater detail).
Because of the control file’s role as the repository of database file information, it makes sense
that RMAN would utilize the control file to pull information about what needs to be backed up.
And that’s just what it does: RMAN uses the control file to compile file lists, obtain checkpoint
information, and determine recoverability. By accessing the control file directly, RMAN can
compile file lists without a user having to create the list herself, eliminating one of the most
tiresome steps of backup scripting. And RMAN does not require that the script be modified when
a new file is added. It already knows about your new file. RMAN knows this because the control
file knows this.
The control file also moonlights as an RMAN data repository. After RMAN completes a
backup of any portion of the database, it writes a record of that backup to the control file, along
with checkpoint information about when the backup was started and completed. This is one of
the primary reasons that the control file grew exponentially in size between Oracle version 7
and Oracle version 8—RMAN tables in the control file. These records are often referred to as
metadata—data about the data recorded in the actual backup. This metadata will also be stored
in a recovery catalog when one is used (see Chapter 3).
Record Reuse in the Control File
The control file can grow to meet space demands. When a new record is added for a new datafile, a
new log file, or a new RMAN backup, the control file can expand to meet these demands. However,
there are limitations. As most databases live for years, in which thousands of redo logs switch and
Please purchase PDF Split-Merge on www.verypdf.com to remove this watermark.
40
Part I:
Getting Started with RMAN in Oracle Database 11g
thousands of checkpoints occur, the control file has to be able to eliminate some data that is no
longer necessary. So, it ages out information as it needs space and reuses certain “slots” in tables in
round-robin fashion. However, some information cannot be eliminated—for instance, the list of
datafiles. This information is critical for the minute-to-minute database operation, and new space
must be made available for these records.
The control file thus separates its internal data into two types of records: circular reuse records
and noncircular reuse records. Circular reuse records are records that include information that
can be aged out of the control file if push comes to shove. This includes, for instance, archive log
history information, which can be removed without affecting the production database. Noncircular
reuse records are those records that cannot be sacrificed. If the control file runs out of space for
these records, the file expands to make more room. These records include datafile and log file lists.
The record of RMAN backups in the control file falls into the category of circular reuse records,
meaning that the records will get aged out if the control file section that contains them becomes
full. This can be catastrophic to a recovery situation: without the record of the backups in the
control file, it is as though the backups never took place. Remember this: if the control file does
not have a record of your RMAN backup, the backup cannot easily be used by RMAN for
recovery (we’ll explain how to re-add backups to the control file records in Chapter 12). This
makes the control file a critical piece in the RMAN equation. Without one, we have nothing. If
records get aged out, then we have created a lot of manual labor to rediscover the backups.
Fear not, though. Often, it is unimportant when records get aged out; it takes so long for the
control file to fill up, the backups that are removed are obsolete. You can also set a larger
timeframe for when the control file will age out records. This is controlled by the init.ora
parameter CONTROL FILE_RECORD_KEEP_TIME. By default, this parameter is set to 7 (in days).
This means that if a record is less than seven days old, the control file will not delete it, but rather
expand the control file section. You can set this to a higher value, say, 30 days, so that the control
file always expands, until only records older than a month will be overwritten when necessary.
Setting this to a higher day value is a good idea, but the reverse is not true. Setting this parameter
to 0 means that the record section never expands, in which case you are flirting with disaster.
In addition, if you will be implementing a recovery catalog, you need not worry about
circular reuse records. As long as you resync your catalog at least once within the timeframe
specified by the CONTROL FILE_RECORD_KEEP_TIME parameter, then let those records age
out—the recovery catalog never ages out records.
The Snapshot Control File
As you can tell, the control file is a busy little file. It’s responsible for schematic information about
the database, which includes checkpoint SCN information for recovery. This constant SCN and
file management is critical to the livelihood of your database, so the control file must be available
for usage by the RDBMS on a constant basis.
This poses a problem for RMAN. RMAN needs to get a consistent view of the control file
when it sets out to make a backup of every datafile. It only needs to know the most recent
checkpoint information and file schematic information at the time the backup begins. After the
backup starts, RMAN needs this information to stay consistent for the duration of the backup
operation; in other words, it needs a read consistent view of the control file. With the constant
updates from the database, this is nearly impossible—unless RMAN were to lock the control file
for the duration of the backup. But that would mean the database could not advance the checkpoint
or switch logs or produce new archive logs. Impossible.
To get around this, RMAN uses the snapshot control file, an exact copy of your control file
that is only used by RMAN during backup and resync operations. At the beginning of these
Please purchase PDF Split-Merge on www.verypdf.com to remove this watermark.
Chapter 2:
Introduction to the RMAN Architecture
41
Re-Creating the Control File: RMAN Users Beware!
It used to be that certain conditions required the occasional rebuild of the database control
file, such as resetting the MAXLOGFILES parameter or the MAXLOGHISTORY parameter.
Certain parameters cannot be set unless you rebuild the control file, because these parameters
define the size of the internal control file tables that hold noncircular reuse records. Therefore,
if you need that section to be larger, you have to rebuild the control file.
If you use RMAN and you do not use a recovery catalog, be very careful of the control file
rebuild. When you issue the command
alter database backup control file to trace;
the script that is generated does not include the information in the control file that identifies
your backups. Without these backup records, you cannot access the backups when they are
needed for recovery. All RMAN information is lost, and you cannot get it back. The only
RMAN information that gets rebuilt when you rebuild the control file is any permanent
configuration parameters you have set with RMAN. In Oracle 10g and higher, a new
mechanism generates limited backup metadata within a control file, but you are still building
in a lot of manual work that never used to exist. Therefore, we encourage you to avoid a
control file rebuild at all costs.
If you back up the control file to a binary file, instead of to trace, then all backup
information is preserved. This command looks like the following:
alter database backup controlfile to '/u01/backup/bkup cfile.ctl';
operations, RMAN refreshes the snapshot control file from the actual control file, thus putting
a momentary lock on the control file. Then, RMAN switches to the snapshot and uses it for the
duration of the backup; in this way, it has read consistency without holding up database activity.
By default, the snapshot control file exists in the ORACLE_HOME/dbs directory on Unix
platforms and in the ORACLE_HOME/database directory on Windows. It has a default name of
SNCF<ORACLE_SID>.ORA. This can be modified or changed at any time by using the configure
snapshot controlfile command:
configure snapshot controlfile name to '<location\file name>';
Certain conditions might lead to the following error on the snapshot control file, which is
typically the first time a person ever notices the file even exists:
RMAN-08512: waiting for snapshot controlfile enqueue
This error happens when the snapshot control file header is locked by a process other than
the one requesting the enqueue. If you have multiple backup jobs, it may be that you are trying to
run two backup jobs simultaneously from two different RMAN sessions. To troubleshoot this error,
open a SQL*Plus session and run the following SQL statement:
SELECT s.sid, username AS "User", program, module, action, logon time
"Logon", l.*
FROM v$session s, v$enqueue lock l
WHERE l.sid
s.sid and l.type
'CF' AND l.id1
0 and l.id2
2;
Please purchase PDF Split-Merge on www.verypdf.com to remove this watermark.
42
Part I:
Getting Started with RMAN in Oracle Database 11g
The RMAN Server Processes
RMAN makes a client connection to the target database, and two server processes are spawned.
The primary process is used to make calls to packages in the SYS schema in order to perform
the backup or recovery operations. This process coordinates the work of the channel processes
during backups and restores.
The secondary, or shadow, process polls any long-running transactions in RMAN and then
logs the information internally. You can view the results of this polling in the view V$SESSION_
LONGOPS:
SELECT SID, SERIAL#, CONTEXT, SOFAR, TOTALWORK,
ROUND(SOFAR/TOTALWORK*100,2) "% COMPLETE"
FROM V$SESSION LONGOPS
WHERE OPNAME LIKE 'RMAN%'
AND OPNAME NOT LIKE '%aggregate%'
AND TOTALWORK ! 0
AND SOFAR <> TOTALWORK
/
You can also view these processes in the V$SESSION view. When RMAN allocates a channel,
it provides the session ID information in the output:
allocated channel: ORA DISK 1
channel ORA DISK 1: sid=16 devtype DISK
The “sid” information corresponds to the SID column in V$SESSION. So you could construct
a query such as this:
SQL> column client info format a30
SQL> column program format a15
SQL> select sid, saddr, paddr, program, client info
from v$session where sid 16;
SID SADDR
PADDR
PROGRAM
CLIENT INFO
---------- -------- -------- --------------- -----------------------16 682144E8 681E82BC RMAN.EXE
rman channel ORA DISK 1
RMAN Channel Processes
In addition to the two default processes, an individual process is created for every channel that
you allocate during a backup or restore operation. In RMAN lingo, the channel is the server
process at the target database that coordinates the reads from the datafiles and the writes to the
specified location during backup. During a restore, the channel coordinates reads from the
backup location and the writing of data blocks to the datafile locations. There are only two kinds
of channels: disk channels and tape channels. You cannot allocate both kinds of channels for a
single backup operation—you are writing the backup either to disk or to tape. Like the background
RMAN process, the channel processes can be tracked from the data dictionary, and then correlated
with a SID at the OS level. It is the activity of these channel processes that gets logged by the
polling shadow process into the V$SESSION_LONGOPS view.
Please purchase PDF Split-Merge on www.verypdf.com to remove this watermark.