XNA 3.0 Game Programming Recipes: A Problem-Solution Approach potx
Bạn đang xem bản rút gọn của tài liệu. Xem và tải ngay bản đầy đủ của tài liệu tại đây (2.95 MB, 663 trang )
XNA 3.0 Game
Programming Recipes
A Problem-Solution Approach
Riemer Grootjans
XNA 3.0 Game Programming Recipes: A Problem-Solution Approach
Copyright © 2009 by Riemer Grootjans
All rights reserved. No part of this work may be reproduced or transmitted in any form or by any means,
electronic or mechanical, including photocopying, recording, or by any information storage or retrieval
system, without the prior written permission of the copyright owner and the publisher.
ISBN-13 (pbk): 978-1-4302-1855-5
ISBN-13 (electronic): 978-1-4302-1856-2
Printed and bound in the United States of America 9 8 7 6 5 4 3 2 1
Trademarked names may appear in this book. Rather than use a trademark symbol with every occurrence
of a trademarked name, we use the names only in an editorial fashion and to the benefit of the trademark
owner, with no intention of infringement of the trademark.
Lead Editor: Ewan Buckingham
Development Editor: Joohn Choe
Technical Reviewer: Fabio Claudio Ferracchiati
Editorial Board: Clay Andres, Steve Anglin, Mark Beckner, Ewan Buckingham, Tony Campbell,
Gary Cornell, Jonathan Gennick, Michelle Lowman, Matthew Moodie, Jeffrey Pepper,
Frank Pohlmann, Ben Renow-Clarke, Dominic Shakeshaft, Matt Wade, Tom Welsh
Project Manager: Richard Dal Porto
Copy Editors: Heather Lang, Kim Wimpsett
Associate Production Director: Kari Brooks-Copony
Production Editor: Elizabeth Berry
Compositor: Linda Weidemann, Wolf Creek Publishing Services
Proofreader: April Eddy
Indexer: Broccoli Information Management
Artist: April Milne
Cover Designer: Kurt Krames
Manufacturing Director: Tom Debolski
Distributed to the book trade worldwide by Springer-Verlag New York, Inc., 233 Spring Street, 6th Floor,
New York, NY 10013. Phone 1-800-SPRINGER, fax 201-348-4505, e-mail kn`ano)ju<olnejcan)o^i*_ki,
or visit dppl6++sss*olnejcankjheja*_ki.
For information on translations, please contact Apress directly at 2855 Telegraph Avenue, Suite 600,
Berkeley, CA 94705. Phone 510-549-5930, fax 510-549-5939, e-mail ejbk<]lnaoo*_ki, or visit
dppl6++sss*]lnaoo*_ki.
Apress and friends of ED books may be purchased in bulk for academic, corporate, or promotional
use. eBook versions and licenses are also available for most titles. For more information, reference our
Special Bulk Sales–eBook Licensing web page at dppl6++sss*]lnaoo*_ki+ejbk+^qhgo]hao.
The information in this book is distributed on an “as is” basis, without warranty. Although every pre-
caution has been taken in the preparation of this work, neither the author(s) nor Apress shall have any
liability to any person or entity with respect to any loss or damage caused or alleged to be caused directly
or indirectly by the information contained in this work.
The source code for this book is available to readers at dppl6++sss*]lnaoo*_ki. You may need to answer
questions pertaining to this book in order to successfully download the code.
To Elisa, the most lovely woman I know.
Without your love and support, this would not have been possible.
To my parents and brothers, for giving me each and every opportunity.
To my friends and coworkers, for their support and laughs.
v
Contents at a Glance
About the Author xxiii
About the Technical Reviewer xxv
Acknowledgments xxvii
Introduction xxix
CHAPTER 1 Getting Started with XNA 3.0 1
CHAPTER 2 Setting Up Different Camera Modes in Your 3D World 29
CHAPTER 3 Working with 2D Images/Textures in XNA 3.0 173
CHAPTER 4 Working with Models 281
CHAPTER 5 Getting the Most Out of Vertices 393
CHAPTER 6 Adding Light to Your Scene in XNA 3.0 521
CHAPTER 7 Adding Sounds to Your XNA 3.0 Project 583
CHAPTER 8 Networking in XNA 3.0 599
INDEX 631
vii
Contents
About the Author xxiii
About the Technical Reviewer xxv
Acknowledgments xxvii
Introduction xxix
CHAPTER 1 Getting Started with XNA 3.0 1
1-1. Install XNA Game Studio 3.0 1
1-2. Start Your First XNA 3.0 Project 2
1-3. Deploy Your XNA 3.0 Game on Xbox 360 5
1-4. Deploy Your XNA 3.0 Game on the Zune 8
1-5. Deploy Your XNA 3.0 Game on Another PC 10
1-6. Customize Game Loop Timing 12
1-7. Make Your Code Plug-and-Play Using GameComponents 14
1-8. Allow Your GameComponents to Communicate with
Each Other by Implementing GameServices
18
1-9. Save and Load Data to or from a File 23
CHAPTER 2 Setting Up Different Camera Modes in Your 3D World 29
2-1. Set Up the Camera: Position, Target, and View Frustum 30
2-2. Specify the Target of Your Camera 37
2-3. Create a First-Person Shooter Camera: A Quake-Style Camera 44
2-4. Create a Freelancer-Style Camera: Full 3D Rotation
Using Quaternions
50
2-5. Check Whether an Object Is in Sight of the Camera 57
2-6. Detect Camera Collision Against Models, Walls, or Terrains 63
2-7. Create a Camera Fly-by Action 66
2-8. Remove the Solid Background Color: Skybox 76
2-9. Draw Only the Parts of the Scene That Are in Sight
of the Camera: Octree
88
2-10. Use a Quadtree to Hide Parts of a Grid That Are Not in Sight 111
2-11. Create a Real-Time Camera-Dependant Optimally
Adapting Mesh (ROAM) Terrain
121
NCONTENTS
viii
2-12. Set Up a Post-Processing Framework 143
2-13. Create a Blur/Glow Post-Processing Effect 155
2-14. Write a Custom Content Importer 166
CHAPTER 3 Working with 2D Images/Textures in XNA 3.0 173
3-1. Display 2D Images: Load and Render Images Using the
SpriteBatch Class
174
3-2. Rotate, Scale, and Mirror an Image 180
3-3. Render Transparent Images Using Layers 183
3-4. Consider Performance When Using the SpriteBatch Class 187
3-5. Display Text 190
3-6. Create a 2D Menu Interface 192
3-7. Create a Texture, Define the Color of Each Pixel,
Save a Texture to a File
206
3-8. Render the Scene into a Texture 209
3-9. Extend the Image Content Processor 213
3-10. Extend the Image Content Processor: Grayscale Conversion
and Processor Parameters
226
3-11. Make Your Scene More Impressive with Billboarding:
Render 2D Images in a 3D World So They Always Face
the Camera
231
3-12. Create a 3D Explosion Effect/Simple Particle System 253
3-13. Create a Mirror: Projective Texturing 266
CHAPTER 4 Working with Models 281
4-1. Load and Render a Model Using the BasicEffect Class 282
4-2. Set Different World Matrices for Different Objects,
Combining World Matrices
286
4-3. Find the Rotation Angle Corresponding to a Direction 293
4-4. Use Acceleration to Control Velocity 295
4-5. Construct the Global BoundingSphere Around a Model 299
4-6. Scale the Model to a Predefined Size 302
4-7. Render a Model Using Custom Effects and Custom Textures
(Easy Approach)
304
4-8. Visualize the Bone Structure of a Model 309
4-9. Make the Bones Move Individually: Model Animation 316
4-10. Use BoundingSpheres for Basic Model Collision Detection 321
4-11. Use Ray-Traced Collision Detection for Small/Fast Objects 327
The Problem 327
NCONTENTS
ix
4-12. Extend the Model Content Processor to Load Custom Effects
(Clean Approach)
331
4-13. Gain Direct Access to Vertex Position Data by Extending the
Model Processor
339
4-14. Gain Direct Access to Vertex Position Data of Each ModelMesh
by Extending the Model Processor
344
4-15. Gain Direct Access to Vertex Position Data by Defining a
Custom TypeWriter and TypeReader
. . . . . . . . . . . . . . . . . . . . . . . . . . . . 349
4-16. Store Multiple Objects in the Tag Property by Defining a
Custom TypeWriter and TypeReader
. . . . . . . . . . . . . . . . . . . . . . . . . . . . 360
4-17. Correctly Tilt a Model According to the Terrain Underneath 366
4-18. Detect Ray-Model Collisions Using Per-Triangle Checks 378
4-19. Detect Whether the Pointer Is Over a Model 388
CHAPTER 5 Getting the Most Out of Vertices 393
5-1. Render Triangles, Lines, and Points in a 3D World 394
5-2. Apply a Texture to Your Triangles 405
5-3. Remove Redundant Vertices Using Indices 413
5-4. Store Your Vertices and Indices in the Memory of Your
Graphics Card Using a VertexBuffer and an IndexBuffer
417
5-5. Store Your Frequently Updated Vertices in a
DynamicVertexBuffer
423
5-6. Enable Backface Culling: What It Is and What It Can Do
for You
425
5-7. Automatically Calculate the Normals for All Vertices in a
VertexBuffer
429
5-8. Create a Terrain Based on a VertexBuffer and an IndexBuffer 436
5-9. Calculate the Exact Height of a Terrain Between Vertices
Using Bilinear Interpolation
446
5-10. Calculate the Collision Point Between the Pointer and
the Terrain: Surface Picking
452
5-11. Load Data from an XML File 460
5-12. Create Your Own Vertex Format 466
5-13. Work with Bump Mapping: Fixed Normal 476
5-14. Add Per-Pixel Detail by Bump Mapping in Tangent Space 481
5-15. Add an Ocean to Your 3D World 493
5-16. Apply Catmull-Rom Interpolation in 3D to Generate
Additional Vertices
507
5-17. Create the Vertices for a Racing Track 511
The Problem 511
NCONTENTS
x
CHAPTER 6 Adding Light to Your Scene in XNA 3.0 521
6-1. Define Normals and Use the BasicEffect. . . . . . . . . . . . . . . . . . . . . . . 522
6-2. Share Normals Between Vertices 528
6-3. Add Higher Detail to Your Lighting: Per-Pixel Lighting 533
6-4. Add Specular Highlights to Reflective Surfaces 536
6-5. Add HLSL Vertex Shading 538
6-6. Define a Point Light Using HLSL 545
6-7. Add HLSL Per-Pixel Lighting 547
6-8. Define a Spotlight Using HLSL 551
6-9. Add HLSL Specular Highlights 553
6-10. Add Multiple Lights to Your Scene Using Deferred Shading 558
6-11. Add Shadowing Capability to Your Deferred Shading Engine 574
CHAPTER 7 Adding Sounds to Your XNA 3.0 Project 583
7-1. Play and Control Simple .wav Sound Files 583
7-2. Play MP3 or WMA Sound Files 585
7-3. Play Simple .wav Sound Files Through XAct 586
7-4. Loop Sounds 590
7-5. Play Sounds from a 3D Location Relative to the Camera:
3D Sound
594
CHAPTER 8 Networking in XNA 3.0 599
8-1. Sign In for Networking Services 599
8-2. Create a Network Session 602
8-3. Join a Network Session 608
8-4. Send/Receive Data Over the Network 614
8-5. Search for Networking Sessions Asynchronously 622
8-6. Add Rich Presence Information 626
8-7. Move from the Lobby to the Actual Game 627
INDEX 631
xi
About the Author
NRIEMER GROOTJANS received a degree in electronic engineering with a
specialization in informatics at the Vrije Universiteit Brussel in Brussels,
Belgium. He is currently working toward a Ph.D. degree as a member of
a research team. The goal of the team is to develop a real-time, 3D,
depth-sensing camera, and he is responsible for (among other things)
the analysis and visualization of the 3D data. For a few years, Riemer has
been maintaining a website with tutorials for DirectX. Since the launch
of XNA in December 2006, he has ported all his content to XNA and is
helping more than 1,500 people on their paths to XNA success every day.
In July 2007 and July 2008, he received the Microsoft MVP Award for his contributions to the
XNA community.
xiii
About the Technical Reviewer
A prolific writer on cutting-edge technologies, FABIO CLAUDIO FERRACCHIATI has contributed to
over a dozen books on .NET, C#, Visual Basic, and ASP.NET. He is a .NET MCSD and lives in
Milan, Italy.
xv
Acknowledgments
I would like to express my appreciation and thankfulness to the skillful group of professionals
at Apress who helped me complete this book.
Thanks to Regis Le Roy for the 3D models he provided me to play around with and test
the code on. Furthermore, I would like to thank Danc from dppl6++hkopc]n`aj*_ki for the 2D
artwork used in my book and code. There are some real gems to be found on your site!
And last but definitely not least, I thank Xan Tium from dppl6++t)o_aja*_ki for providing
me with the necessary hardware on which to test my code.
xvii
Introduction
When Microsoft released XNA in December 2006, it immediately became clear that this
new technology would have a major impact on the possibilities for game developers. XNA was
designed from the ground up with ease of use in mind, while not sacrificing performance or
capabilities to achieve this goal. As a bonus, any game you create in XNA for the PC also runs
on the Xbox 360 console! With the coming of XNA 3.0, you can even run your 2D game on the
Zune handheld device.
In the span of two years, a large user community has grown around XNA. You can find
code examples on a vast number of sites, ask your questions in one of the lively forums, or
even meet local people who share the same passion in one of the XNA user groups. Whether
you want to get up to speed with XNA quickly or you have tried some of the tutorial sites and
are looking for the next step, this book is for you. With almost 100 recipes dealing with various
challenges you may encounter during your journey with XNA, this book covers each corner of
the XNA Framework.
The first recipes of the chapters in this book explain some stand-alone concepts and
have been kept as clear as possible. As an example, a recipe explaining how to load a 3D
Ik`ah from a file and render it to the screen will not render any trees in the background to
make the final result look nicer, because this would clutter the code and make it more com-
plex than it should be.
On the other hand, each chapter ends with some recipes that combine all you’ve learned
thus far into something new and powerful. As such, you can step through the recipes, building
up your experience in XNA as you move to the next recipe.
This book explains the functionality of the XNA 3.0 Framework. If any updates are made to
the XNA Framework in the future, I will update the code for this book and make it available for
download from my website at sss*neaiano*jap+. If you have any questions regarding the text
or code examples found in this book, I kindly invite you to post them on the forum on my site
so you can get an answer as soon as possible.
The XNA Framework is roughly divisible into three parts. The main part contains your
XNA project and its code. Next in line is the content pipeline, a flexible component allowing
you to preprocess any art assets you want to load into your XNA project. Last, but definitely
not least, are the High-Level Shading Language (HLSL) effects, which are used mainly to
improve the visual quality of the final image you render to the screen.
Each chapter starts with some recipes that cover the XNA functionality related to the
chapter. However, this book can also be used as a detailed guide to the content pipeline and to
HLSL effects. Whether you’re brand new to XNA or looking to take the step from 2D to 3D, this
book will help you on your way.
NINTRODUCTION
xviii
If You’re New to XNA and Starting Your
First 2D Game
If you’re completely new to XNA, you might be interested in going through the following reci-
pes to get you up and running as fast as possible:
s )NSTALL 8.! 'AME 3TUDIO
s 3TART 9OUR &IRST 8.! 0ROJECT
s #USTOMIZE 'AME ,OOP 4IMINGS
s $ISPLAY $ )MAGES ,OAD AND 2ENDER )MAGES 5SING THE 3PRITE"ATCH #LASS
s 2OTATE 3CALE AND -IRROR AN )MAGE
s 2ENDER 4RANSPARENT )MAGES 5SING ,AYERS
s #ONSIDER 0ERFORMANCE 7HEN 5SING THE 3PRITE"ATCH #LASS
s $ISPLAY 4EXT
If You’re Going from 2D to 3D
The step from 2D to 3D often seems much steeper than it actually is. If you go through the fol-
lowing recipes in the listed order, you’ll learn all about what’s needed to define your own 3D
worlds:
s 3ET 5P THE #AMERA 0OSITION 4ARGET AND 6IEW &RUSTUM
s 3PECIFY THE 4ARGET OF 9OUR #AMERA
s #REATE A &IRST0ERSON 3HOOTER #AMERA ! 1UAKE3TYLE #AMERA
s ,OAD AND 2ENDER A -ODEL 5SING THE "ASIC%FFECT #LASS
s 3ET $IFFERENT 7ORLD -ATRICES FOR $IFFERENT /BJECTS #OMBINING 7ORLD -ATRICES
s 2ENDER 4RIANGLES ,INES AND 0OINTS IN A $ 7ORLD
s !PPLY A 4EXTURE TO 9OUR 4RIANGLES
Start Using the Content Pipeline
If you’re interested in getting into the XNA content pipeline, I advise you to read the following
recipes in this order:
s %XTEND THE )MAGE #ONTENT 0ROCESSOR
s %XTEND THE )MAGE #ONTENT 0ROCESSOR 'RAYSCALE #ONVERSION AND 0ROCESSOR
Parameters
s 'AIN $IRECT !CCESS TO 6ERTEX 0OSITION $ATA BY %XTENDING THE -ODEL 0ROCESSOR
NINTRODUCTION
xix
s 'AIN $IRECT !CCESS TO 6ERTEX 0OSITION $ATA OF %ACH -ODEL-ESH BY %XTENDING THE
Model Processor
s 'AIN $IRECT !CCESS TO 6ERTEX 0OSITION $ATA BY $EFINING A #USTOM 4YPE7RITER AND
TypeReader
s 3TORE -ULTIPLE /BJECTS IN THE 4AG 0ROPERTY BY $EFINING A #USTOM 4YPE7RITER AND
TypeReader
s ,OAD $ATA FROM AN 8-, &ILE
s 7RITE A #USTOM #ONTENT )MPORTER
Enhance the Final Image with HLSL Shaders
This book also contains a lot of HLSL samples. You can follow these recipes in this order:
s !DD (,3, 6ERTEX 3HADING
s $EFINE A 0OINT ,IGHT 5SING (,3,
s !DD (,3, 0ER0IXEL ,IGHTING
s $EFINE A 3POTLIGHT 5SING (,3,
s !DD (,3, 3PECULAR (IGHLIGHTS
s #REATE 9OUR /WN 6ERTEX &ORMAT
s 7ORK WITH "UMP -APPING &IXED .ORMAL
s !DD 0ER0IXEL $ETAIL BY "UMP -APPING IN 4ANGENT 3PACE
s -AKE 9OUR 3CENE -ORE )MPRESSIVE WITH "ILLBOARDING 2ENDER $ )MAGES IN A $
World So They Always Face the Camera
s #REATE A $ %XPLOSION %FFECT3IMPLE 0ARTICLE 3YSTEM
s #REATE A -IRROR 0ROJECTIVE 4EXTURING
s !DD -ULTIPLE ,IGHTS TO 9OUR 3CENE 5SING $EFERRED 3HADING
s !DD 3HADOWING #APABILITY TO 9OUR $EFERRED 3HADING %NGINE
s !DD AN /CEAN TO 9OUR $ 7ORLD
Prerequisites
The software you need to develop your own games in XNA 3.0 is completely free. As I’ll explain
in recipe 1-1, you’ll need both the Visual C# 2008 Express Edition and XNA 3.0 Game Studio,
which you can download for free from Microsoft’s website.
The only cost incurred will be if you want to upload your finished game to your Xbox 360
console, when an annual subscription is payable to Microsoft. If you’re just targeting the PC
development environment, you won’t have to pay anything.
NINTRODUCTION
xx
Downloading the Code
The accompanying code for this book can be downloaded for free from this book’s page on the
Apress website (sss*]lnaoo*_ki+reas+^kkg+-0/, 411t) and sss*neaiano*jap.
Contacting the Author
You can ask any question and share all comments on my forum at sss*neaiano*jap+Bknqi,
which I visit as frequently as I can.
CHAPTER 1
Getting Started with XNA 3.0
The first part of this chapter will get you up and running with XNA 3.0 by guiding you through
the installation process and helping you get your code running on a PC and on the Xbox 360
console. The second part of this chapter contains some more advanced topics for those inter-
ested in the inner workings of the XNA Framework.
Specifically, the recipes in this chapter cover the following:
s )NSTALLING 8.! 'AME 3TUDIO AND STARTING YOUR FIRST 8.! PROJECT RECIPES
AND
s 2UNNING YOUR CODE ON THE 0# :UNE AND THE 8BOX CONSOLE RECIPES AND
s ,EARNING MORE ABOUT THE TIMING FOLLOWED BY THE 8.! &RAMEWORK RECIPE
s -AKING YOUR CODE PLUGANDPLAY USING C]ia?kilkjajp classes and C]iaOanre_ao
RECIPES AND
s !LLOWING USERS TO SAVE AND LOAD THEIR games using XNA’s storage capabilities
RECIPE
1-1. Install XNA Game Studio 3.0
The Problem
You want to start coding your own games.
The Solution
Before you can start coding your own games, you should install your development environ-
ment. XNA 'AME 3TUDIO ALLOWS YOU TO CREATE YOUR WHOLE GAME PROJECT USING A SINGLE
environment. Best of all, it’s completely free to install.
&IRST YOU NEED A VERSION OF 6ISUAL 3TUDIO THAT ALLOWS YOU TO DEVELOP # PROGRAMS
4HIS IS REQUIRED BECAUSE 8.! USES #
/N TOP OF 6ISUAL 3TUDIO YOU WILL INSTALL 8.! 'AME 3TUDIO
1
CHAPTER 1 N GETTING STARTED WITH XNA 3.0
2
How It Works
Installing Visual Studio 2008
8.! 'AME 3TUDIO REQUIRES 6ISUAL 3TUDIO TO BE INSTALLED ON YOUR 0# )F THIS IS NOT YET
THE CASE YOU CAN DOWNLOAD THE 6ISUAL # %XPRESS %DITION FOR FREE
To do this, go to sss*ie_nkokbp*_ki+atlnaoo+`ksjhk]`+ AND FIND THE 6ISUAL #
%XPRESS %DITION BOX MAKE SURE YOU SELECT THE # EDITION INDICATED BY THE GREEN COLOR 3ELECT
the language of your choice, and hit the Download button. This will download a very small file,
which you should run afterward.
During setup, use the default selections and hit Next until the program starts download-
ing and installing.
NNote You can find updated links to these packages on the Download section of my site (sss*neaiano*
jap
).
Installing XNA Game Studio 3.0
'O TO dppl6++_na]pkno*tj]*_ki+aj)QO+`ksjhk]`o AND CLICK THE $OWNLOAD 8.! 'AME 3TUDIO
3.0 link at the bottom-right corner of the top box. On the page that opens, click the Download
BUTTON JUST ABOVE THE 1UICK $ETAILS SECTION TO DOWNLOAD 8.! 'AME 3TUDIO
Once you’ve downloaded and run the file, the installer will check whether you have
INSTALLED 6ISUAL # %XPRESS %DITION )F YOU HAVE FOLLOWED THE INSTRUCTIONS IN THE PREVIOUS
section, you shouldn’t be getting any error messages.
During setup, you will be presented with the Firewall Setup page -AKE SURE YOU SELECT THE
FIRST OPTION AND ALLOW BOTH SUBOPTIONS )F YOU DONT YOU WILL RUN INTO TROUBLE WHEN CONNECT-
ing to your Xbox 360 or when testing multiplayer games between multiple PCs. Keep in mind
that when you experience trouble when connecting your game over other PCs or consoles, the
problem might be caused by incorrect or third-party firewall settings.
&INALLY HIT THE )NSTALL BUTTON TO INSTALL 8.! 'AME 3TUDIO .
1-2. Start Your First XNA 3.0 Project
The Problem
9OU WANT TO START CODING A NEW 8.! GAME )N ADDITION THE DEFAULT STARTUP CODE ALREADY
contains a few methods, so you want to know what these are for and how they help make your
life easier.
The Solution
/PENING A NEW PROJECT IS THE SAME IN MOST 7INDOWS PROGRAMS )N 8.! 'AME 3TUDIO GO TO
the File menu, and select New
° 0ROJECT
CHAPTER 1 N GETTING STARTED WITH XNA 3.0
3
How It Works
Starting XNA Game Studio 3.0
3TART 8.! 'AME 3TUDIO BY CLICKING THE 3TART BUTTON AND SELECTING 0ROGRAMS &IND -ICROSOFT
8.! 'AME 3TUDIO CLICK IT AND SELECT -ICROSOFT 6ISUAL 3TUDIO OR -ICROSOFT 6ISUAL #
%XPRESS %DITION IF YOU INSTALLED THE FREE VERSION
Starting a New XNA 3.0 Project
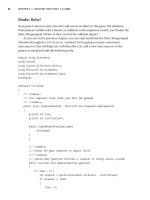
)N 8.! 'AME 3TUDIO OPEN the File menu, and select New ° 0ROJECT )N THE LIST ON THE
LEFT 8.! 'AME 3TUDIO UNDER 6ISUAL # SHOULD BE HIGHLIGHTED BY DEFAULT AS SHOWN IN &IG-
URE /N THE RIGHT HIGHLIGHT 7INDOWS 'AME 'IVE YOUR NEW PROJECT A FANCY NAME AND
hit the OK button.
Figure 1-1. Starting a new XNA 3.0 project (Visual Studio 2008 Express Edition)
Examining the Predefined Methods
7HEN YOU START A NEW 8.! PROJECT YOU WILL GET A CODE FILE ALREADY containing some code.
#OMMENTS SHOWN IN GREEN MAKE UP MORE THAN PERCENT OF THE CODE TO HELP YOU GET STARTED
)N A FEW MOMENTS YOU WILL FIND THAT THE METHODS YOURE PRESENTED WITH REALLY ARE QUITE
useful, because they greatly reduce the time you would otherwise spend doing basic stuff. For
EXAMPLE WHEN YOU RUN YOUR PROJECT AT THIS MOMENT YOU WILL ALREADY BE PRESENTED WITH AN
empty window, meaning you don’t have to waste your time coding a window or processing the
window’s message queue.
The predefined methods are discussed in the following sections.
CHAPTER 1 N GETTING STARTED WITH XNA 3.0
4
Game1 Constructor
The C]ia- method IS CALLED ONCE AT THE VERY MOMENT YOUR PROJECT IS RUN 4HIS MEANS NONE OF
THE INTERNAL CLOCKWORK HAS BEEN INITIALIZED THE MOMENT THIS METHOD THE CONSTRUCTOR IS CALLED
The only code you should add here consists of the instantiations of C]ia?kilkjajp classes SEE
RECIPE BECAUSE YOU CANNOT ACCESS ANY RESOURCES SUCH AS THE Cn]lde_o@are_a CLASS SINCE
they haven’t been initialized at this point.
Initialize Method
The Ejepe]heva method is also called once, after all the internal initialization has been done.
4HIS METHOD IS THE IDEAL PLACE TO SET THE INITIAL VALUES OF THE OBJECTS IN YOUR GAME SUCH AS THE
STARTING POSITIONS AND STARTING SPEEDS OF THE OBJECTS OF YOUR GAME 9OU HAVE FULL ACCESS TO ALL
resources of your C]ia OBJECT.
Update Method
7HEN RUNNING your game, XNA will make its best effort to call the Ql`]pa method exactly 60
TIMES PER SECOND ONCE EVERY SECONDS &OR MORE INFORMATION ON THIS TIMING INCLUDING
HOW TO CHANGE IT READ RECIPE
This makes the Ql`]pa method an excellent place to put code that updates the logic of
YOUR GAME 4HIS CAN INCLUDE UPDATING THE POSITIONS OF YOUR OBJECTS CHECKING WHETHER SOME
OBJECTS COLLIDE STARTING AN EXPLOSION AT THAT POSITION AND INCREASING THE SCORE
Also, processing user input and updating camera/model matrices should be done here.
Draw Method
)N THIS METHOD YOU SHOULD PUT THE CODE THAT RENDERS YOUR SCENE TO THE SCREEN )T SHOULD RENDER
ALL $ IMAGES $ OBJECTS AND EXPLOSIONS TO THE SCREEN AS WELL AS DISPLAY the current score.
By default, the @n]s method is called at the same frequency as the screen refresh rate,
WHICH DEPENDS ON THE SCREEN OR ON THE :UNE DEVICE 3EE RECIPE FOR MORE INFORMATION ON
the @n]s method.
LoadContent Method
7HENEVER YOU START A GAME YOU WILL WANT TO LOAD ART SUCH AS IMAGES MODELS AND AUDIO FROM
disk. To speed things up and allow a lot of flexibility, XNA manages this art through the con-
tent pipeline.
All art loading should be done in the Hk]`?kjpajp method. This method is called only once
AT THE BEGINNING OF YOUR PROJECT
! DETAILED EXAMPLE ON HOW TO LOAD A $ IMAGE INTO YOUR 8.! PROJECT IS GIVEN IN RECIPE
The same approach can be used to load any kind of art.
UnloadContent Method
)F SOME OF THE OBJECTS USED IN YOUR GAME REQUIRE SPECIFIC DISPOSING OR UNLOADING THE
Qjhk]`?kjpajp method IS THE IDEAL SPOT TO DO THIS )T IS CALLED ONCE BEFORE the game exits.
CHAPTER 1 N GETTING STARTED WITH XNA 3.0
5
Adding an .fx HLSL File
)F YOU WANT TO GO ONE STEP FURTHER AND ADD AN (,3, FILE TO YOUR PROJECT SIMPLY FIND THE #ONTENT
ENTRY IN YOUR 3OLUTION %XPLORER AT THE TOPRIGHT OF YOUR SCREEN 2IGHTCLICK IT AND SELECT !DD
°
.EW )TEM 3ELECT h%FFECT FILEv AND GIVE IT A NAME OF YOUR CHOICE
You’ll get some default code, which you’ll want to extend or replace with code you find
ELSEWHERE IN THIS BOOK !FTER THAT YOU NEED TO IMPORT IT LIKE ANY OTHER CONTENT OBJECT BY CREAT-
ing a suitable variable and linking this file to that variable.
Add this variable to the top of your main C]ia class:
Abba_p iuAbba_p7
Then link it to your code file in the Hk]`?kjpajp method:
lnkpa_pa` kranne`a rke` Hk]`?kjpajp$%
w
iuAbba_p 9 ?kjpajp*Hk]`8Abba_p:$abba_pBeha%7
y
NNote You’ll have to change the name of the asset, abba_pBeha in this case, to the name of your
HLSL file.
1-3. Deploy Your XNA 3.0 Game on Xbox 360
The Problem
Once you have created and tested your code on the PC, you want to upload your game to and
run it on your Xbox 360 console.
The Solution
One of the nicest features of XNA is that you can make your code run on both PCs and on
Xbox 360, without having to change anything. There are a few prerequisites before you can
upload your working code to Xbox 360 though.
&IRST YOU NEED TO HAVE AN 8BOX ,IVE ACCOUNT, which can be created for free through the
dppl6++_na]pkno*tj]*_ki site or on Xbox 360.
Next, you need a Creators Club license, which is free for most students or can be bought
THROUGH THE 8BOX ,IVE -ARKETPLACE 4HIS LICENSE COSTS 53$ FOR FOUR MONTHS OR 53$ FOR
ONE YEAR )F YOU ARE A STUDENT YOU MIGHT HAVE ACCESS TO A FREE LICENSE
.EXT YOU NEED TO DOWNLOAD AND INSTALL 8.! 'AME 3TUDIO #ONNECT, the front-end
program that listens for a connection from your PC.
,AST BUT DEFINITELY NOT LEAST YOU NEED A ,!. CONNECTION BETWEEN YOUR 0# AND 8BOX
AND THE 8BOX SHOULD BE CONNECTED TO THE )NTERNET 4HE 0# AND 8BOX SHOULD ALSO
CHAPTER 1 N GETTING STARTED WITH XNA 3.0
6
be paired, because you would otherwise run into trouble when you have multiple Xbox 360
consoles in your network.
Once you have fulfilled these four prerequisites, you can upload and run your code on
8BOX FROM WITHIN 8.! 'AME 3TUDIO ON YOUR PC very easily.
How It Works
Setting Up the Xbox Live Account
Signing up FOR A 3ILVER 8BOX ,IVE ACCOUNT IS FREE AND REQUIRED IF YOU WANT TO RUN YOUR OWN CODE
on your Xbox 360 console )F YOU HAVE ALREADY USED YOUR 8BOX CONSOLE YOULL PROBABLY
ALREADY HAVE A ,IVE ACCOUNT )F YOU HAVENT START YOUR 8BOX CONSOLE INSERT A GAME DISC
and follow the instructions on your screen.
Obtaining the Creators Club License
)F YOU ARE A STUDENT CHANCES ARE YOU CAN OBTAIN A FREE LICENSE FROM THE -ICROSOFT $REAM3PARK
program. You can access this from dppl6++`ksjhk]`o*_d]jjah4*io`j*_ki ,OG IN WITH YOUR STU-
DENT CREDENTIALS TO OBTAIN A CODE WHICH YOU CAN ENTER BY GOING TO THE -ARKETPLACE TAB IN YOUR
8BOX DASHBOARD AND CHOOSING h2EDEEM CODEv
/THERWISE YOU CAN SIMPLY LOG YOUR 8BOX CONSOLE ON TO THE 8BOX ,IVE -ARKETPLACE
AND THEN NAVIGATE TO 'AMES
° !LL 'AME $OWNLOADS )N THE LIST FIND 8.! #REATORS #LUB AND
select it.
4HEN SELECT -EMBERSHIPS AND YOU CAN BUY A LICENSE FOR FOUR MONTHS OR FOR ONE YEAR
Alternatively, you can also enter a code that you can find on a Creators Club voucher card.
Installing XNA Game Studio Connect on Your Xbox 360
This program makes your Xbox 360 listen for any incoming connections from your PC.
9OU CAN DOWNLOAD THIS FOR FREE BY GOING TO THE 8BOX ,IVE -ARKETPLACE AND BROWSING TO
'AME 3TORE
° -ORE ° 'ENRES ° Other. Start the program after you’ve finished installing it.
Connecting Your Xbox 360 and PC
Before your PC can stream data to the Xbox 360, the two devices need to be connected by a
,!. AND TO THE )NTERNET )F BOTH YOUR 8BOX AND 0# ARE ATTACHED TO A ROUTER SWITCH OR HUB
this should be OK.
Nowadays, more and more home networks are relying on a wireless network. This might
be a problem, because the Xbox 360 doesn’t ship with a wireless adapter by default. One solu-
TION IS TO HAVE A 0# WITH BOTH A WIRELESS AND A WIRED %THERNET NETWORK WHICH IS COMMON
FOR MOST NEW LAPTOPS #ONNECT THE 0# TO YOUR WIRELESS NETWORK AT HOME AND ADD A PATCH
cable between your Xbox 360 and PC. Finally, on your PC, click the Start button, and navigate
to Settings
° .ETWORK #ONNECTIONS (IGHLIGHT BOTH YOUR WIRELESS AND %THERNET ADAPTERS RIGHT
click one, and select Bridge Connections AS SHOWN IN &IGURE 7AIT FOR A FEW MINUTES AND
BOTH MACHINES SHOULD BE CONNECTED TO THE )NTERNET and to each other!
CHAPTER 1 N GETTING STARTED WITH XNA 3.0
7
Figure 1-2. Bridging two network adapters on one PC
Pairing Your PC and Xbox 360
)N CASE YOU have multiple Xbox 360 consoles in your network, you should specify which Xbox
YOU WANT TO UPLOAD YOUR CODE TO )F YOU HAVENT DONE ALREADY START 8.! 'AME 3TUDIO #ON-
nect ON YOUR 8BOX BY GOING TO THE 'AME TAB AND SELECTING 'AMES ,IBRARY
° -Y 'AMES °
8.! 'AME 3TUDIO #ONNECT )F THIS IS THE FIRST TIME YOUVE LAUNCHED #ONNECT YOU WILL BE PRE-
sented with your Xbox 360’s serial number, a series of five five-character strings.
On your PC, click the Start button, and navigate to Programs
° -ICROSOFT 8.! 'AME
Studio 3.0
° 8.! 'AME 3TUDIO $EVICE #ENTER. Click the Add Device button, click the Xbox 360
icon, and give your Xbox 360 console a name of your choosing. Next, you are invited to enter
THE SERIAL NUMBER SHOWN BY YOUR 8BOX )F BOTH YOUR 8BOX AND 0# ARE CONNECTED BY THE
network, the pairing should succeed, and your console should appear in the device list. The
green sign indicates your currently active Xbox 360, in case you have paired your PC to mul-
tiple Xbox 360 consoles.
Generating an Xbox 360 Project from an Existing XNA 3.0 Project
)N 8.! 'AME 3TUDIO ITS EASY TO CONVERT YOUR 0# GAME TO AN 8BOX PROJECT 3IMPLY
OPEN YOUR PROJECT AND FIND THE 3OLUTION %XPLORER AT THE TOPRIGHT OF YOUR SCREEN 2IGHTCLICK
YOUR PROJECTS NAME AND SELECT #REATE #OPY OF 0ROJECT FOR 8BOX AS SHOWN IN &IGURE
4HIS WILL RESULT IN A SECOND PROJECT BEING CREATED AND ADDED TO YOUR SOLUTION !LL FILES OF
YOUR ORIGINAL PROJECT WILL BE REFERENCED BY THE NEW PROJECT NOT COPIED SO THAT ANY CHANGES YOU
MAKE IN A FILE IN ONE PROJECT WILL BE VISIBLE IN THE OTHER PROJECT AS WELL
)N SOME CASES YOU MIGHT NEED TO ADD SOME REFERENCES THAT THE WIZARD HAS FORGOTTEN TO
copy, but all in all, the wizard will save you quite a bit of time.
&ROM NOW ON YOU CAN SELECT ON WHICH TARGET YOU WANT TO RUN YOUR PROJECT AT THE TOP
OF YOUR SCREEN )F THIS IS THE FIRST TIME YOUVE RUN A PROJECT ON 8BOX YOU NEED TO ADD THE
8BOX PROFILE BY SELECTING h#ONFIGURATION -ANAGERv AT THE TOP OF YOUR SCREEN AS SHOWN IN
&IGURE
CHAPTER 1 N GETTING STARTED WITH XNA 3.0
8
Figure 1-3. Generating an Xbox 360 project
Figure 1-4. Selecting the Configuration Manager
)N THE DIALOG THAT APPEARS CLICK THE h!CTIVE SOLUTION PLATFORMv LIST AND SELECT .EW
Next, select Xbox360, and close all dialogs.
&ROM NOW ON THE LIST SHOWN IN &IGURE SHOULD CONTAIN AN 8BOX ENTRY WHICH YOU
SHOULD SELECT WHENEVER YOU WANT TO DEPLOY TO YOUR 8BOX CONSOLE -AKE SURE YOUR 8BOX IS
RUNNING 8.! 'AME 3TUDIO #ONNECT AND IS WAITING FOR A CONNECTION 7HEN YOU HIT & YOUR
files will be uploaded to and executed on your Xbox 360 console!
1-4. Deploy Your XNA 3.0 Game on the Zune
The Problem
Once you HAVE CREATED AND TESTED YOUR $ GAME ON THE 0# YOU WANT TO UPLOAD YOUR GAME TO
YOUR :UNE AND RUN IT
The Solution
/NE OF THE MAIN NEW FEATURES OF 8.! IS :UNE SUPPORT FOR $ GAMES 3INCE THE :UNE OBVI-
ously can’t compare to the power of the graphics card inside your computer, you cannot
EXECUTE ANY 8.! $ APPLICATION ON THE :UNE (OWEVER THE COMPLETE Olnepa>]p_d !0) IS AVAIL-
ABLE ON THE :UNE ALLOWING YOU TO CREATE MOBILE $ GAMES
CHAPTER 1 N GETTING STARTED WITH XNA 3.0
9
How It Works
!S WITH THE 8BOX CONSOLE YOU DONT HAVE TO MAKE ANY ADJUSTMENTS TO YOUR CODE TO MAKE
IT RUN ON THE :UNE *UST CONNECT THE :UNE TO YOUR 0# SET IT AS THE ACTIVE TARGET AND DEPLOY
your game.
Connecting the Zune to Your PC
#ONNECT THE :UNE TO YOUR 0# USING THE 53" CABLE THAT SHIPPED WITH THE :UNE AND POWER IT
ON .EXT OPEN THE 8.! 'AME 3TUDIO $EVICE #ENTER BY CLICKING THE 3TART MENU AND SELECT-
ing Programs
° -ICROSOFT 8.! 'AME 3TUDIO ° 8.! 'AME 3TUDIO $EVICE #ENTER. Click
THE !DD $EVICE BUTTON AND SELECT THE :UNE )F YOU HAVENT DONE SO YET YOU MIGHT BE ASKED
TO DOWNLOAD AN UPTODATE VERSION OF THE :UNE SOFTWARE BY FOLLOWING THE PROVIDED LINK
)F YOU HAVE INSTALLED THE SOFTWARE MAKE SURE THE FIRMWARE ON YOUR :UNE IS UP TO DATE
9OU CAN DO SO BY CONNECTING YOUR :UNE AND OPENING UP THE :UNE SOFTWARE ON YOUR 0# )F
YOUR 0# IS CONNECTED TO THE )NTERNET AND A NEWER VERSION OF THE FIRMWARE IS FOUND THE :UNE
SOFTWARE WILL SHOW THE $EVICE 5PDATE SCREEN ALLOWING YOU TO UPDATE YOUR FIRMWARE BY
CLICKING THE )NSTALL BUTTON MAKE SURE YOU NEVER POWER OFF ANY DEVICE WHILE YOU ARE REPRO-
GRAMMING ITS FIRMWARE
7HEN YOU HAVE INSTALLED THE :UNE SOFTWARE UPDATED THE :UNE FIRMWARE AND CON-
NECTED THE :UNE YOUR :UNE SHOULD BE LISTED ON YOUR SCREEN WHEN YOU CLICK THE :UNE
BUTTON IN THE 8.! 'AME 3TUDIO $EVICE #ENTER 3ELECT YOUR :UNE AND CLICK .EXT !FTER THE
CONNECTION HAS BEEN VERIFIED YOUR :UNE SHOULD BE LISTED IN THE 8.! 'AME 3TUDIO $EVICE
Center main screen.
Setting the Zune As a Target Platform in XNA 3.0 Game Studio
7ITH THE :UNE CONNECTED GO TO 8.! 'AME 3TUDIO TO DEPLOY YOUR $ GAME TO THE :UNE !S
WITH THE 8BOX CONSOLE THE FIRST TIME YOU DEPLOY TO THE :UNE YOU NEED TO SET IT AS A DEPLOY-
ment target. This can be done by clicking the Solution Platforms box in the top-center of the
SCREEN AND SELECTING #ONFIGURATION -ANAGER AS SHOWN IN &IGURE
)N THE UPCOMING DIALOG SELECT .EWx FROM THE !CTIVE SOLUTION CONFIGURATION LIST AT THE
TOPLEFT OF THE SCREEN AND SELECT YOUR :UNE FROM THE TOP LIST IN THE FOLLOWING SCREEN !FTER CLICK-
ING THE /+ BUTTON A COUPLE OF TIMES YOU SHOULD SEE YOUR :UNE AS THE TARGET PLATFORM AT THE
top-center of your window.
Deploying Your XNA 3.0 Game to the Zune
&INALLY YOU NEED TO DUPLICATE YOUR 8.! 0# PROJECT TO AN 8.! :UNE PROJECT 4HIS IS DONE VERY
EASILY BY RIGHTCLICKING YOUR PROJECT IN THE 3OLUTION %XPLORER AND SELECTING #REATE #OPY OF
0ROJECT FOR :UNE 4HIS OPTION IS ALSO SHOWN IN THE LIST OF &IGURE 8.! WILL ADD THIS PROJECT
TO YOUR 3OLUTION %XPLORER AND WILL SYNC BOTH PROJECTS WHENEVER YOU CHANGE EITHER OF THEM
4O UPLOAD YOUR GAME TO THE :UNE MAKE SURE THE :UNE IS SELECTED AS THE ACTIVE TARGET PLAT-
FORM AT THE TOPCENTER OF YOUR SCREEN AND THAT THE :UNE SOFTWARE IS NOT RUNNING ON YOUR 0#
AND HIT & TO INITIATE THE DEPLOYMENT
/NCE YOUR :UNE SCREEN INDICATES THE DEPLOYMENT HAS BEEN COMPLETED RESTART YOUR :UNE
SELECT 'AMES IN YOUR :UNES MAIN menu, and start your game!