User Manual for Digital Scriptorium – WebGenDB
Bạn đang xem bản rút gọn của tài liệu. Xem và tải ngay bản đầy đủ của tài liệu tại đây (761.53 KB, 29 trang )
1
User Manual for Digital Scriptorium – WebGenDB
version 6
2018-03-14
Introduction
Digital Scriptorium data structure
As is known to partners who have worked with DS (as it will henceforth be called) under its
previous technology, and to new partners who have used the online version of DS, the
architecture of DS structures its bibliographic metadata in a 4-level hierarchy, in which each
parent may in theory produce zero, one or many children:
1) Manuscript (Context)
2) Part (Carrier)
3) Text (Content)
4) Image
In practice the upper two levels (Manuscript; Part) almost always have at least one child; the
third level (Text) occasionally has no children, i.e. Images, which constitute the fourth level.
Images have no children but are the last level in the hierarchy. An example might be:
WebGenDB
This guide is intended to provide basic instruction on creating hierarchical records using the
WebGenDB tool. The WebGenDB is a generic tool used to capture structural, descriptive,
administrative, and technical metadata for cultural materials. The data entry screens can be
customized to specific projects. The field labels and descriptive guidelines found in this
document are customized for the Digital Scriptorium project.
Digital Scriptorium data in WebGenDB
Description in WebGenDB is based on the Metadata Object Description Schema (MODS), which
is a plain-language version of MARC21 (i.e. it doesn't use numeric coding so that it is humanreadable). It is a simple set of descriptors meant for ease of digital object discovery, yet is more
2
robust than a simple schema like Dublin Core. All digital library projects sponsored by the
University of California, Berkeley employ this database. The advantage to DS is that technology
costs are shared across the range of digital library projects in daily operations, and eventual
updating innovations in technology of WebGenDB will include DS. The disadvantage is that the
system, while custom-configured to DS in the present version, is not custom-built for DS. Each
record and subrecord (called in the database object and subobject) in all configurations of
WebGenDB contain the same number and the same set of descriptors or fields. To build a
hierarchical relationship between segments of a record, one repeats the base record, specifying
the relationship of the new record to the first record as that of a sibling or that of a child;
subsequent siblings and children follow the same linear build-up, forming a unit that consists of
one object, plus as many subobjects as necessary.
WebGenDB-title Requirement
Within some limits, one can change the label on a WebGenDB field to match or approximate an
equivalent field in DS, but the fundamental nature of WebGenDB remains; it is most
immediately visible in the MARC, and thus in the WebGenDB requirement for a title for each
record/subrecord, no matter where that particular record/subrecord stands in the hierarchy of
relationships. Because the hierarchy in DS places (actual) titles only at the third or Text level,
and because of mapping decisions from DS's data structure into WebGenDB, there is frequently
no actual title in a record/subrecord; thus, WebGenDB's need for a title will be handled by a nondisplaying placeholder phrase, "[No Title for Display]"; specifically:
1. Manuscript level: no actual title, thus the WebGenDB-title, [No Title for Display]
2. Part level: no actual title, thus the WebGenDB-title, [No Title for Display]
3a. Text level: Title field mapped to WebGenDB-title, obviating need for dummy WebGenDBtitle (when there is data in the DS Title field)
3b. Text level: GenericTitle field: not mapped to WebGenDB-title, thus [No Title for Display]
(even when there is data in the DS GenericTitle field)
4. Image level: Caption field mapped to WebGenDB-title, obviating need for dummy
WebGenDB-title (when there is data in the DS Caption field)
The WebGenDB Title/Caption is necessary for DS inputters, since it drives the navigation of the
database interface particularly in the table of content (TOC), and is used for search and work
order displays. It appears at all levels and, per WebGenDB rules as stated here, must not be left
blank.
NOTE: The dummy title, i.e. [No Title for Display], must be used precisely with that spelling
and that format, because that is what the computer is instructed to ignore; any other spelling or
formatting will result in the dummy title (however it reads) appearing in the public view of DS.
DS field Requirements
As noted above, WebGenDB requires a title in each record/subrecord, wherever that
record/subrecord occurs in the hierarchy of an individual manuscript's description, and the
program reinforces that requirement: if one inputs no data in the WebGenDB-title field, the
record will be rejected. No other requirement is enforced by the computer. Thus the DS
inputters will need to practice extreme vigilance to ensure that their records meet DS standards
3
and functionalities. These are the fields that DS requires, followed by the name of the
WebGenDB field:
Manuscript level (called "Object" in WebGenDB):
City—City (where held)
Institution—supplied by default in each institution's section of WebGenDB
Repository—supplied by default in each institution's section of WebGenDB
Shelfmark—Shelfmark
TotalFolios—Total/Span/Range/Number Folios
Inputter—Inputter or Reviser/Inputter or ReviserDate
Inputter Date—[WebGenDB: included as part of preceding field]
Part level (called "Subobject" in WebGenDB):
Support—Support
Height—Height and Width
Width—[WebGenDB: included as part of preceding field]
SpanFolios—Total/Span/Range/Number Folios
Country—Country and Region [both in the same field]
Document: Yes/No—[dropdown box offering the one choice: Document]
Dated: Yes/No—Dated (Y/N) [with a blank data box]
Date—Date
Text level (called "Subobject" in WebGenDB):
RangeFolios—Total/Span/Range/Number Folios
Image level (called "Subobject" in WebGenDB):
FolioNumber—Total/Span/Range/Number Folios
Objects and Subobjects
In WebGenDB-speak, the manuscript as a whole is the "object" and every record belonging to
that object is a referred to as a "subobject."
Near the top of the screen, above the entry fields, there is an Object ID and a SubObject ID for
each piece of the record. These are auto-assigned, system-generated IDs and cannot be edited.
The Object ID represents the object as a whole (i.e. the manuscript); the Subobject IDs are the
unique identifiers for each of the individual subrecords (i.e. Parts, Texts, Images).
To recapitulate the basic aspects:
1. WebGenDB repeats, with some configuration of the labels, the same panel of fields at each of
the four levels of DS hierarchy.
2. The top level of the DS hierarchy is the Manuscript, which in WebGenDB is the Object; the
three descending levels (Part, Text, Image) are Subobjects.
2. WebGenDB requires a title in each of the four panels, and this is the only computer-enforced
requirement.
3. DS-required fields are an obligation resting entirely on the inputter.
Opening the database
Use Internet Explorer.
Go to: />
4
Login by typing Username and Password.
Inputting a New Object (i.e. description of a manuscript)
Note: Be aware that the screens in WebGenDB hibernate after 20 minutes of inactivity; you will
need to login again to reopen the screen; if you have not saved your data by clicking on the Save
button before WebGenDB hibernates, your data will be lost. However, any changes made will be
saved automatically when you navigate away from an inputting screen.
The User Manual will address the features at the bottom of the opening screen at a later point.
5
The top of the first screen after login is:
The dropdown menu for Type only allows one choice: text (it refers to the type of record).
Please choose it. The Title/Caption box is intended to contain the placeholder WebGenDB-title
for the Manuscript level, i.e.: [No Title for Display]; please type that phrase into the box and tap
"Create."
NOTE: Each level below the root level (i.e. the Object or Manuscript) can have as many children
as required but the DS-prescribed hierarchy (manuscript/part/text/image) is not enforced by the
database, rather it is up to the inputter to build the DS-prescribed structural hierarchy manually.
Manuscript level
This will create a new manuscript object in the database. It will be assigned an ObjectID and
SubObjectID (both computer-determined: the Object is a wrapper record that can't be edited; the
SubObject is the root-level record that can be edited in the user interface) and the inputter will be
placed in the object entry screen for the root object to begin data entry.
1.
2.
3.
4.
Object and Subobject IDs assigned automatically.
DS-required fields (but not signaled in WebGenDB).
Dummy or placeholder title, [No Title for Display], to meet WebGenDB requirement.
Dropdown box with Digital Scriptorium as only option.
Existing Metadata area
Below the metadata entry form that we have just seen is the Existing Metadata area; it serves for
proofreading and editing the metadata that was initially entered in the above form; to do this,
6
click on the button, Edit Metadata (which allows editing in all fields), or, alternatively, edit the
metadata in the above form (which may not all be available, e.g. if there are multiple creators).
Be sure to Save frequently, especially if you leave the screen unattended while checking
information.
NOTE: The use of the Add Metadata button will be explained at a later point.
The Three Subobjects
Moving vertically down the hierarchy among the subobjects (to produce a child) or moving
horizontally among the subobjects (to produce a sibling) is handled via the same procedure:
1. Go to Advanced Options in lower left of the screen, fill out the form as necessary; click Add.
2. Go to the Table of Contents (or, navigation tree) in upper left; click on the icon for the new
Subobject. The folder icon indicates that there are records below a given level (i.e. child
records), while the diamond (♦) represents a record with no records below it in the hierarchy (i.e.
without children).
3. Enter the metadata in the form.
4. Click Save (or Save and Exit).
NOTE: The Part, Text, and Image level screens are identical in the WebGenDB interface, i.e.
they contain all fields on single but repeatable screens. Not all fields will be used at a given level.
Some fields will be left blank and will only be filled in at the appropriate level. For example, at
the Part level you would fill in the "Support" field; you would not fill in the "Support" field at the
Text level. It is the responsibility of the inputter to choose the appropriate fields for the level at
which he is entering data.
The tables at the end of this manual list which data is entered at which level; in addition, the data
dictionary provides a level-by-level explanation of each field.
Part
To add a Part: First Step:
Select the "text" type from the pulldown menu (it refers to the type of record).
7
In Label box, the word "text" appears automatically; change that to "Part" (if it helps you
to track your position in the structural hierarchy), or to "[No Title for Display]" (what it
will need to be changed to eventually).
Select the number of parts by entering that number in the "Qty." box. The number of
parts that you specify now will be reflected in the number of empty inputting screens, all
sibling to one another, that will be prepared by the computer. If you specify one new
part, only the one will be constructed at that point, but you can always add subsequent
parts one by one if you choose.
Select the "Add item as child" radio button.
Click on "Add" button when you have made your selections.
To add a Part: Second Step:
In the upper left corner of the screen, at the Table of Contents, click on the newly added diamond
icon for Part in order to obtain the inputting screen.
To add a Part: Third Step:
If you didn't insert the phrase "[No Title for Display]" in the first step, the inputting screen will
appear with the word "Part" in the WebGenDB-title field; change this to [No Title for Display]; if
the phrase is already there, no action is now required for the WebGenDB field for Title. Fill out
the fields on this screen that belong to Part, making sure to put data in the fields that are required
by DS (but not by WebGenDB, so there will be no warning from the program if you neglect to
do so).
8
9
On the screen used for Part:
1. required by DS
2. required by WebGenDB (and enforced)
3. required by DS but instead of adding data, you will make explicit for the sake of two online
search functions, the following two situations:
Is this manuscript dated by its scribe? Yes/No. Here you must input the correct choice;
there is no default.
Is this manuscript a document (financial, legal, administrative)? Yes/No. Here the
default is "No" as represented by the phrase, "Select One"; if you need to choose "Yes,"
select the only option, i.e. "Document."
To add a Part: Fourth Step:
Click Save or Save & Exit.
Text
To add a Text to a Part, follow the same procedures as for adding a Part.
To add a Text: First Step:
Select the "text" type from the pulldown menu.
In Label box, enter "Text."
Select the number of texts to be added at this level by entering that number in the "Qty."
box. The number of texts that you specify now will be reflected in the number of empty
inputting screens, all sibling to one another, that will be prepared by the computer. If you
10
specify one new text, only the one will be constructed at that point, but you can always
add subsequent texts one by one if you prefer.
Select the "Add item as child" radio button.
Click on "Add" button when you have made your selections.
To add a Text: Second Step:
In the upper left corner of the screen, at the Table of Contents, click on the newly added diamond
icon for Text in order to obtain the inputting screen.
To add a Text: Third Step:
The inputting screen will appear with the word "Text" in the WebGenDB-title field; change this
to [No Title for Display] if you do not have an actual title for this subobject to insert into
WebGenDB's Title/Caption field; see the Data Dictionary for the distinction between DS Title
and GenericTitle. Fill out the fields on this screen that belong to Text, making sure to put data in
the fields that are required by DS (but not by WebGenDB, so there will be no warning from the
program if you neglect to do so).
11
[snip]
12
In this sample screen shot, the box labeled as 1 contains data that is required by WebGenDB (the
field for Title in WebGenDB must always contain data; as noted before, it could be the dummy
title, [No Title for Display], or a real title, as here), required by DS (the span of folios), or
recommended when available (author). The box labeled as 2 contains optional information.
To add a Text: Fourth Step:
Click Save or Save & Exit.
Image
To add an Image to a Text, follow the same procedures as for adding a Part or a Text, PLUS an
extra step for the image filename.
To add an Image: First Step
To add an Image to a Text, use the same box on the lower left corner of the database screen that
was used to add the Text and the Part.
Select the "text" type from the pulldown menu.
In Label box, enter "Image."
Select the number of images to be added at this level by entering that number in the
"Qty." box. The number of images that you specify now will be reflected in the number
of empty inputting screens, all sibling to one another, that will be prepared by the
computer. If you specify one new image, only the one will be constructed at that point,
but you can always add subsequent images one by one if you choose.
Select the "Add item as child" radio button.
Click on "Add" button when you have made your selections.
To add an Image: Second Step:
In the upper left corner of the screen, at the Table of Contents, click on the newly added diamond
icon for Image in order to obtain the inputting screen.
13
To add an Image: Third Step:
The inputting screen will appear with the word "Image" in the WebGenDB-title field; change this
to the caption for this particular image. If no caption is desired for this particular image, please
insert the usual dummy title, [No Title for Display], and the computer will accordingly omit it in
the final online version. Fill out the fields on this screen that belong to Image, making sure to
put data in the field that is required by DS, i.e. Folio (but since it is not required by WebGenDB,
there will be no warning from the program if you neglect to do so).
To add an Image: Fourth Step:
Click Save, or Save & Exit if you are entirely finished (but see Step 5).
To add an Image using a filenaming system from your home institution: Fifth Step:
This step requires you to step outside of WebGenDB to prepare an Excel spreadsheet that you
will submit to Berkeley with your images. Its advantage is that it allows you to retain your home
institution's file naming system, and thus to avoid renaming the images that go to Berkeley;
retaining your own image file names will also allow you to refind an image in your own backup
system.
Once Berkeley has imported your imaging metadata from the Excel spreadsheet, your image
filenames will appear in the View Files area for the Object (i.e. Manuscript) in question. To find
that page, click on the View Files button at the top of the inputting screen at the Manuscript
level.
14
This is an example of the View Files screen, with a column for the SubObject ID for the Image
record, the Caption, and the full image file name of which only the segment "7054" and "7055"
are the home institution's file name; the other segments are supplied by Berkeley to represent the
home institution (New York state, New York city, Columbia University, Rare Book & Manuscript
Library, as based on MARC codes) and the letters D, C, B and A representing size of the image.
Excel Spreadsheet for Image Filenames:
Please compile an Excel spreadsheet with the following columns for types of data:
Call number/Shelfmark of the manuscript
Folio number (or location, e.g. Binding) of the image
Caption (if desired; its information usually offers a quick visual verification that the
image described and the image photographed refer to the same item)
Image filename in your home institution's format
Subobject ID for the Image record.
The last two are what the computer needs to build the link between the one image record and the
one image. The first two are human-readable, and may be used as photo order so that your staff
can pull the right manuscript and flag the right opening; the third proposed column (i.e. Caption)
will be used by the photographer to check his work, and by QC checking by library staff.
15
NOTE:
The filenames must be unique within the repository to which they belong.
While only \ is disallowed under a Unix system, please restrict the characters used in the
file name to [a-z, A-Z, 0-9, underscore(_), dash(-), period(.)] to avoid escaping
complications.
Submission of Images to Berkeley:
Please send the TIFF images to Berkeley; they will batch-produce the jpg derivatives to the
required standard. A copy of each TIFF will be placed in dark storage as back-up.
Please send the images on an external hard drive (not on CDs), and include a label with the
desired return address; Berkeley will return the external hard drive to you.
Please notify by email the appropriate staff member(s) at Berkeley that the hard drive is on its
way, and attach the Excel spreadsheet to the email.
Add, Edit, Delete Names of one or multiple "Creators":
At Part level, you may wish to include mention of a scribe, who might or might not already be
present in your institution's database (i.e. not in DS-WebGenDB overall).
If the person's name exists in the "creator" list (including scribes, artists/artistic styles, authors,
other associated names), select the name from the list.
Then, choose the Role from the dropdown list.
If the scribe isn't already present in the "creator" list, click on the link to Create/Edit Creator.
16
The Add/Edit Creator Screen will surface; fill in the new scribe's name (and, if you wish, any
other information that may be useful to you such as Dates, Nationality, etc., but note that this
information will not display to the public on the DS website); click Create & Add More, or
Create & Go Back, or even Cancel, according to the action you want to take.
The new name will now appear in the compiled "creator" list; you then select it in the usual way.
And you add the Role in the usual way.
17
Add a Second "Creator"
For the same Part in the same Manuscript description, you may also wish to add an Artist, which
is another "creator," although you have already used that slot for the Scribe (or you may want to
add a second named Scribe). Therefore, in the lower center position of the inputting screen, go
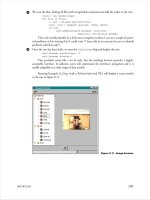
to the Existing Metadata area, and click on Add Metadata. This is the resulting inputting screen:
18
Same procedure: either select an Artist/Artistic style that is already in your institution's database,
or add a new one. Choose the Role. At mid-screen either "Save & Return to Object" or "Save &
Add More Fields." Your second (or third or fourth or whatever) entry for "creator" will look like
this.
19
Because there is only one box for "creator" on the inputting screen, only your most recently
added text will display; however, at the bottom of the screen, the Existing Metadata will show
you all data relevant to the Subobject on which it rests.
At the Text level, the same procedure holds if you need to add another "creator" name; for
example, you may already have an author identified, but you may want to include the name of
the glossator, or the translator, or the dedicatee, and so forth. Here is an example of the basic
Creator=Author part of the inputting screen.
Using the Add Metadata button that is part of the Existing Metadata area, fill out the new form
by selecting an extant name or inserting a new name, and choosing the role. DS uses a general
OtherAssociatedName role to represent any number of textually-based relationships, so you may
want to include a note that explains the nature of the relationship.
Return to the Add Metadata screen to add as many additional elements as required.
20
NOTE: If you add metadata to the record using the Add Metadata screen, you will be able to
proofread it using the Existing Metadata output at bottom of main record screen. However, you
will be able to change it only by using the Edit Metadata button, which provides access to the
complete record.
Delete a Creator:
It may happen that you enter information into a creator field of a particular record, and later you
realize that that particular piece of information belongs in a different field. To place the
information in a new field is simple enough, but to remove it from a creator field involves the
following steps.
Click on the Edit Metadata button.
21
From the list of Creators, go to the end of the list, where there is a blank space; click on it.
From the list of Creator Roles, go to the bottom of the list to the empty space; click on it.
Now that both the Creator and the Role slots are empty, click on Save & Return to Object.
22
To insert a new Subobject among other Subobjects already present:
It may happen that with later examination or study of a manuscript, you realize that what had
seemed to be the first of two Parts in fact contains two Parts itself, or that in a group of four
texts, what had initially been taken as Text N. 1 is instead two different texts, so that you are not
simply adding a new Subobject to the end of the list of those known, but you are inserting a new
one in the middle of a group. The procedure is the same as for adding any new subobject, but
you start with the immediately preceding sibling on the screen (the sibling that you intend to
have display directly before your newly added sibling). Here is a detailed explanation of how
one inserts a new Text between two already extant Texts.
Navigate in the Table of Contents (upper left of the inputting screen) from the display for the top
two levels (Manuscript and Part; this manuscript has two Parts). Note that you can traverse the
tree using the next and previous buttons, or by clicking on the section you wish to see. The red
circle and bold text indicates where you are in the hierarchy and the metadata record for that
section will be displayed simultaneously in the right hand screen.
Go to the level of Part 1, with its two texts.
Click on the icon for the first text (the one that you now realize should have been two separate
texts) so that this first text is displayed on the inputting screen. Using the Advanced Options
dialogue book, request Type as "text," then input the Label information (either "Text" or “[No
Text for Display]") and mark the Quantity as 1; check the radio button to "Add item as sibling."
23
You will see that a new subobject has been added in the same hierarchy as the other two texts
(they align vertically); the new subobject itself has no children so its icon is a diamond, not a
folder.
When you click on that diamond, a new inputting screen, completely empty, opens; the small red
ball alerts you to your present location within the hierarchy:
24
Enter the information that you have available or feel is relevant.
Click Save & Exit; the program will put you back at the original home or Search page.
If you wish to confirm that your newly inserted text has taken its correct position in the
manuscript description, you could return to the description to check the Table of Contents, which
now looks like this:
Moving and reordering records in the Table of Contents (TOC)
It will sometimes be necessary to reorder the sequence or relationships of records for a
Manuscript object in the database. For example, you may decide that a particular Text should be
under a different Part record or that the Images should appear in a different order. To change the
sequence or relationships of a given record, bring that record to the main entry at the Object (i.e.
Manuscript) level or inputting screen, then select the Reorder TOC button in the upper right of
said screen.
25
This will open a new pop-up screen showing the top level object, i.e. with a folder icon for the
manuscript. Expand the object by clicking on the plus (+) sign next to each folder. Each record
has a level number assigned to it to indicate its location in the hierarchy (0 for the Manuscript, 1
for the Part, 2 for the Text, 3 for the Image).
NOTE: These are not the same as the DS hierarchy numbers that progress 1 for the Manuscript,
2 for the Part, 3 for the Text, and 4 for the Image. Beware.
The button in the upper left toggles between "Sibling" and "Child." This toggle button allows a
record to be moved only as a sibling or only as a child. To move a record as a sibling, toggle the
upper left hand button until it says "Sibling." If you wish to move a record as a child, toggle to
"Child." The need might arise if you mistakenly entered data for one level at another level
(which could happen since all three subobject levels use the same inputting screen); otherwise, it
seems unlikely that you might need to change a Text into a Part or into an Image.
NOTE: To exit this screen without saving changes, simply close the window by clicking the X in
the upper right.
Below is the fully opened hierarchy of the manuscript in use as example (it is Plimpton MS 021,
for the record).
To move a subrecord, click on it to drag and drop it in the desired location. In this example, we
are changing the sequence of an Image record. Select the record (thereby highlighting it) and
drag to its new location in the sequence (shown as a dark line), then release.