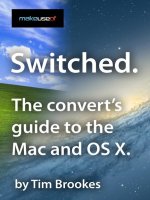
The Mac Manual for beginner Mac user
Bạn đang xem bản rút gọn của tài liệu. Xem và tải ngay bản đầy đủ của tài liệu tại đây (3.72 MB, 117 trang )
The Mac Manual
By Jackson Chung
Edited by Justin Pot
This manual is the intellectual property of
MakeUseOf. It must only be published in its
original form. Using parts or republishing
altered parts of this guide is prohibited without
permission from MakeUseOf.com
Think you’ve got what it takes to write a
manual for MakeUseOf.com? We’re always
willing to hear a pitch! Send your ideas to
; you might earn up
to $400.
Table of Contents
Introduction
What's on your Mac?
Pre-installed Applications
Third-party apps and plugins
Pro Tips
Cheat Sheet
MakeUseOf
Introduction
This ebook was written with the beginner Mac
user in mind. It was intended to help recent
Switchers learn more about the Mac
operating system, to expose them to the best
free applications, to extend their productivity
and to assist them with day-to-day
procedures by revealing useful tips and tricks
from seasoned Mac users.
If you are a Switcher, this ebook will prove to
be incredibly useful as it starts from the very
beginning introducing the applications that
come bundled with every Mac, their functions
and how to use them. Once you're familiar
with what your Mac has to offer and how you
can make the best out of it, we'll begin to talk
about plugins and third-party applications
which will further enhance your workflow.
Along the way, I will share the tips learnt over
the years after I switched to a Mac, providing
you with first hand experience, sharing the
mistakes I made so that you do not need to
go through them yourself.
I genuinely hope that this ebook will make
your transition to Mac a smooth one.
What’s on your Mac?
Some Switchers will buy a Mac without
knowing what it is actually capable of doing.
Sure, you might have heard that a Mac will
help with creativity and/or productivity.
However, your creativity or productivity isn't
going to skyrocket the moment you turn on
your newly-bought Mac. You’ll need to know
how it works in order to make the most out of
your purchase.
So let's return to the basics. I will begin with
some of the applications that come bundled
with every new Mac, explain their functions,
how to use them and where to find them.
Finder
In Windows, if you need to view the contents
of your hard disk, thumb drive, CD or DVD,
you'll would probably double-click on My
Computer. In other words, you're using
Windows Explorer.
Finder is the Mac-equivalent of Windows
Explorer. It allows the user to view the
contents of local drives, networked drives,
optical drives, portable drives, folders, files
and so on. Think of it as a store General
Manager always on, always there,
watching over everyone. Finder manages
applications, files, disks and devices on your
Mac.
There are 3 components to the Finder. These
are probably the most obvious to a new Mac
user:
• The dock
• The menu bar
• The desktop and Finder windows
You can find a representation of the Finder in
each of these locations.
The smiley-faced blue icon on the dock:
The Finder menu bar item:
The Finder window:
The dock
The dock is undeniably one of the main
attractions when a Switcher starts to use a
Mac. I remember the days when the dock’s
‘magnify’ function was on by default. Every
time I walked into an Apple store, I’d roll the
mouse pointer over the dock icons and
watched the dock icons swell up and shrink.
But the dock is so much more than just eye
candy. It’s an ever-accessible venue where
your frequently-used applications can call
“home”.
The dock is divided into 2 sections by a
broken line. The left section of the Dock
houses your applications. Running
applications are represented by a blue dot
under them. The right section may be filled
with anything, from images to bookmarks and
even folders. Since OS X Leopard, these
folders appear as “Stacks” and they spring up
to reveal their contents. The number of items
on the dock is virtually limitless it will
automatically adjust its size to accommodate.
To add an application to the dock, simply click
and drag it to a desired position, then let go.
To remove an application from the dock, drag
it off the dock and let go - it will disappear
into a cloud of smoke - poof!
The dock can also be housed on the left or
right hand side of the desktop. To change its
position, click on the Apple icon in the
menubar, select Dock and ‘Position on
Left/Right’.
Dock Quick Tips
To quickly change the size of the dock,
place the cursor over the broken line which
separates the left and right section of the
dock, click and drag up or down to resize.
To quickly hide the dock, press Command
+ Option + D.
The menu bar
The menu bar is that long bar located at the
top of the screen. From left to right, it
houses the Apple icon, application menus,
menu bar applications, system icons, the time
and finally, Spotlight.
One of the things that you must realize is that
the Mac’s menu bar is dynamic. The menu bar
will change to display the menu of the
foremost application or whichever application
that was last used.
As you can see from the screenshots above,
when Finder was the main application, the
menu bar displayed its menus. As soon as I
switched over to Pages (word processor, part
of the iWork office suite), it dynamically
changed to present Pages’ menus. The active
application is always displayed on the left,
directly next to the Apple icon.
On the extreme right of the menu bar, you’ll
find the relevant system icons i.e. Airport
status, Bluetooth status, displays, sounds
level, languages, battery level (portable Macs
only) and Spotlight.
As I mentioned earlier, there are certain
applications that sit on the menu bar, so
termed “menu bar applications”. I’ll elaborate
on that when we get to the section about
third-party applications.
The desktop and Finder windows
The Finder controls the desktop in such a way
that it will display any connected devices:
hard drives, networked drives, portable
drives, iPods, CDs or DVDs and disk images.
You can easily customize the desktop to print
the amount of disk space available/used, the
number of files in a folder, the size of an
image file, etc.
Simply right-click on the desktop, select
‘Show view options’ and check the box next to
‘Show item info’.
The Finder windows are what pop up every
time you double-click on the hard disk icon on
the desktop. These windows let you browse
your Mac and view files, folder contents,
launch installed applications and gain access
into system files and utilities.
On the left of the Finder window lies the
sidebar. Generally, the sidebar hosts a list of
attached devices, networked drives, a
customizable list of places/locations on your
Mac and a slew of quick search terms that
can easily help you to find your files.
If you are connected to a network with
Windows PCs or other Macs, they will appear
in your Finder sidebar under ‘Shared’.
The sidebar is customizable. You can drag
anything you like onto the sidebar for easy
access.
Likewise, you can also remove any of the
sidebar items to prevent them from showing
up. Just click and hold, then drag them off the
sidebar.
Finder Quick Tip
Your Pictures, Movies, Music, Documents
and Download folders are located within
your Home folder.
Using Finder
Just like Windows Explorer, Finder can be
used to inspect file properties i.e. sizes,
modified or created dates and so on.
There are several ways to do this.
Get Info
Right-click on the file and choose ‘Get Info’
from the contextual menu.
The Get Info window will appear, showing you
the file’s details as well as providing you a
chance to label it with a color, lock the file to
prevent deletion, select the default application
for that particular type of file and control user
permissions.
file once and pressing Command + I. Not to
mention, you can open an unlimited number of
Get Info windows for multiple items, they will
automatically align themselves next to each
other.
Column view
When in a Finder window, you can easily
reveal a file’s basic properties by changing
the view mode to ‘Column’.
Finder Quick Tip
To change the view mode within a Finder
window, press:
• Command + 1 for Icon view
• Command + 2 for List view
• Command + 3 for Column View
• Command + 4 for Cover Flow view
Inspector
If there is ever a need to check the details of
more than one file individually without
manually opening a Get Info window each
time, there’s Inspector.
Inspector is basically a ‘Get Info’ window that
dynamically updates to show you the file
properties of every file that you click on. This
sidesteps the issue of having too many Get
Info windows. Using Inspector, you get one
Get Info window that changes the instant a
new file is selected.
There are 3 ways to invoke the Inspector.
• Pressing Command + Option + I
• Right-click a file, hover the cursor over ‘Get
Info’, press the Option key and watch as ‘Get
Info’ changes to ‘Show Inspector’
• With Finder in focus (the frontmost
application), click on the File menu, hover on
‘Get Info’, press the Option key and again, it
will change to ‘Show Inspector’
Quick Look
First introduced in OS X Leopard, Quick Look
was a breakthrough feature. It would allow a
user to preview the contents of any supported
file instantly. Quick Look has managed to
change the way most Mac users preview their
files. And in Snow Leopard, several new
features have been added to Quick Look’s
arsenal.
Conventionally, if one needed to view a
document, for instance a PDF file, they would
have to double-click on the file to launch
Preview or Adobe Acrobat in order to browse
through the PDF.
Now, all a user needs to do is hit spacebar
while the PDF file is highlighted and Quick
Look will pop up with a preview, instantly.
The same technique applies to audio/video
files, documents, images, mail attachments,
etc.
In Snow Leopard, Apple added the ability to
Quick Look documents and files without
triggering a Quick Look window. Instead, file
icons are now displayed in high resolution (up
to 512 pixels) and are true to their content.
Hovering the cursor over documents
supported by Quick Look triggers specific
controls.
In the screenshots below, the file’s icon has
been enlarged almost to the maximum. As
you can clearly see, it is not a generic Pages
icon but rather a true reflection of the content
within the document. Using the right and left
controls that appear at the bottom, I can
literally flip through the document without
launching Pages.
Still the same document, showing a different
page. Remember, this is a file icon.
