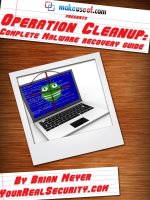
Operation Cleanup: Complete Malware Recovery Guide
Bạn đang xem bản rút gọn của tài liệu. Xem và tải ngay bản đầy đủ của tài liệu tại đây (1.43 MB, 38 trang )
Operation Cleanup:
Complete Malware
Recovery Guide
By: Brian Meyer, YourRealSecurity.com
Edited by Justin Pot
This manual is the intellectual property of
MakeUseOf. It must only be published in its
original form. Using parts or republishing altered
parts of this guide is prohibited without permission
from MakeUseOf.com
Think you’ve got what it takes to write a manual
for MakeUseOf.com? We’re always willing to
hear a pitch! Send your ideas to
; you might earn up to
$400.
Table of Contents
Introduction
Preparation for Removal
The Removal Process
After the Removal Process
Fix Post-Disinfection Problems
Get Expert Analysis
Conclusion
Further Help
MakeUseOf
Introduction
This guide will help you clean your computer of
malware. If you think your computer is infected
with a virus or some other malicious software, you
may want to use this guide. It contains instructions
that, if done correctly and in order, will remove
most malware infections on a Windows operating
system. It highlights the tools and resources that are
necessary to clean your system. Malware is a
general term for any malicious software, including
viruses, trojans, rootkits, spyware and adware.
Many different symptoms indicate a malware
infection. Sometimes, the symptoms can be
difficult to detect. Below is a list of symptoms you
may experience when you are infected with
malware:
• Your computer shows strange error messages or
popups.
• Your computer takes longer to start and runs
more slowly than usual.
• Your computer freezes or crashes randomly.
• The homepage of your web browser has changed.
• Strange or unexpected toolbars appear in your
web browser.
• Your search results are being redirected.
• You start ending up at websites you didn't intend
to go to.
• You cannot access security related websites.
• New icons and programs appear on the desktop
that you did not put there.
• Your desktop background has changed without
your knowledge.
• Your programs won’t start.
• Your security protection have been disabled for
no apparent reason.
• You cannot connect to the internet or it runs very
slowly.
• Your programs and files are suddenly missing.
• Your computer is performing actions on its own.
Disclaimer: This guide is for informational
purposes only and is not a substitute for
professional malware removal. Your use of this
information is at your own risk.
I recommend that you back up all your important
data before attempting to perform the malware
removal process. In the unlikely event that
something goes wrong, you can restore your data.
Do not back up any system files, installers (.exe),
or screensavers (.scr) because they may be
infected by malware.
How do I back up my data?
Note:
1. Several steps may need repeated a number of
times in order to remove all threats.
2. In some cases, the only way to remove a
malware infection is to do a complete reformat and
reinstall of the operating system.
3. You may want to print out or make a copy of
these instructions so that you may easily refer to
them if needed.
Preparation for Removal
Reset Proxy Settings (Internet
Connection Problems)
Some malware infections will turn on a proxy
setting, which can prevent you from accessing the
Internet or downloading tools required for
disinfection. It can also cause redirects. Follow
these instructions to reset the proxy settings:
Go to the Start menu, click Control Panel, and
then double-click Internet Options. Go to the
Connections tab, and click LAN settings.
Uncheck the first box under Proxy Server, and
then click the OK button to close the screen.
Alternatively, you can go to the Start menu, click
Run, type inetcpl.cpl, and then click OK. Then
continue with the instructions given above where
you click the Connections tab.
If you have a malware infection that is blocking
Internet access, disabling the desktop, or
preventing programs from running, you will need
to boot into safe mode. Some malware infections
will not run in safe mode, thus allowing easier
detection and removal.
To access safe mode, restart your computer and
start tapping the F8 key before Windows begins to
load. You will see a black screen with a number of
options. Use the arrow keys to select the Safe
Mode with Networking option, and then press the
Enter key. Once you are in Safe Mode with
Networking, move on to Step 1.
For a detailed tutorial on how to start the computer
in safe mode, visit How to Start in Windows Safe
Mode
If safe mode is disabled or if for some reason you
cannot get into safe mode, skip down to Can't Boot
Into Windows or Safe Mode?
Step 1 - Automatic Preliminary
Rootkit Scan
You need to scan your computer for possible
rootkits before running other anti- malware
software.
TDSSKiller is an anti-rootkit tool from Kaspersky.
It is specially designed to remove malware
belonging to the rootkit family
Rootkit.Win32.TDSS. This rootkit family
downloads and execute other malware, delivers
advertisements to your computer, and blocks
programs from running. It also redirects Google
searches as well as blocks access to security sites.
TDSSKiller is simple to use and requires no
installation.
Download and run TDSSKiller - Download here
or here - Homepage
To run TDSSKiller, follow these instructions:
When the program opens, click the Start scan
button. The scan time is very short (less than a
minute). If the scan completes with nothing found,
click Close to exit. If malicious objects are found,
the default action will be Cure. Click on
Continue. If suspicious objects are found, the
default action will be Skip. Click on Continue. It
may ask you to reboot the computer to complete the
disinfection.
If TDSSKiller does not run, try renaming it. To do
this, right-click on the TDSSKiller icon and select
Rename. Give it a random name with the .com file
extension (e.g. 123abc.com). If you still cannot run
TDSSKiller after renaming it, try running FixTDSS
from Symantec. If FixTDSS does not work, you
will need to use RKill to terminate malicious
processes.
Step 2 - Scan and Clean (On-
demand Scans)
There are many tools that will scan for and remove
various malware infections. Unfortunately, none of
them will detect and remove 100% of all malware;
therefore, it is important to use more than one, in
the hope that their combined detection is enough to
find the problem.
Below are three highly recommended on-demand
scanners. They do an excellent job at detecting
threats and completely removing them.
Important notes:
• Make sure the scanners are updated before you
scan with them.
• After you have downloaded and updated the on-
demand scanners, disconnect your Internet
connection. This will eliminate the possibility of
any further malware installing on your computer.
• Do not use your computer for anything else until
the scanning process has finished.
• Some of these scans may take over an hour to run.
• Do NOT run more than one scan at a time.
• You may need to restart your computer to
complete the removal process.
• If you cannot run any of the scanners below, you
will need to use RKill to
terminate malicious processes.
Download and install Malwarebytes - Download
here or here (malwarebytes.org)
Open Malwarebytes and perform a quick scan.
You can also perform a full system scan, but that is
optional.
Once the scan is complete, remove all found
infections.
Malwarebytes is designed to run best in Windows
normal mode. If you can run it in normal mode,
then you should. If you cannot run it in normal
mode, run it in safe mode. However, once you
have the system running better, you should scan
again in normal mode.
If Malwarebytes will not install, simply rename the
downloaded file (mbam- setup.exe) to
iexplorer.exe or winlogon.exe. Once you rename
it, try running it again. If that does not work, skip
down to SuperAntiSpyware. After you scan with
SuperAntiSpyware, try installing Malwarebytes
again.
Download and run SuperAntiSpyware Portable -
Download here - Homepage
Why, you might ask, am I using the portable
version? Because it requires no installation,
contains the latest definitions, and automatically
gives you a random filename, so malware can’t
block it from running.
Select the Complete Scan option, and then click
the Scan your Computer button to start scanning
your computer.
Download and run Hitman Pro - Download here
(32-bit), (64-bit) - Homepage Requires no
installation.
Hitman Pro requires a working Internet connection
to detect malware.
When the program opens, simply click the Next
button.
Click the Next button again.
The scan should complete within a few minutes
and display a list of threats. Click the Next button
to delete the threats.
Note: TDSSKiller, SuperAntiSpyware, and
Hitman Pro are portable programs, which means
they can run directly from a USB flash drive. You
can take them anywhere and use them on any
computer.
The Office Worker’s 101 Guide to a USB Thumb
Drive
Step 3 - Run a Full Antivirus Scan
If the on-demand scan fails to find anything or if it
finds malware that it can’t delete, it is time to
launch a full antivirus scan.
If you currently have antivirus software installed
on your computer, make sure it is up to date with
the latest virus definitions, and perform a full
system scan with it. Remove or quarantine
everything that it finds.
Before removing anything, make sure it's not a
false positive. “A false positive is when antivirus
software identifies a non-malicious file as a
virus.” In other words, false positives are mistakes
made by an antivirus. If you suspect a file to be a
false positive, go to VirusTotal or Jotti’s malware
scan and upload the file. They will scan the file
with several antivirus engines
If you do not have antivirus software installed, get
it immediately. Avast! and Microsoft Security
Essentials are two highly recommended antivirus
programs. You
should only have one antivirus program running on
your computer.
• Best Free Antivirus Software
After the Removal Process
1. Clean up System Restore
Your "restore points" may contain malware. The
only way to remove the malware is to delete the
restore points. This will remove any old points that
contain malware. You can use Disk Cleanup to
remove all but the most recent restore point.
Follow these instructions to run Disk Cleanup:
Go to Start menu > All Programs > Accessories
> System Tools and then click Disk Cleanup.
Click on the More Options tab and locate the
section near the bottom labeled System Restore.
Click on the Cleanup button.
Here's another way to open Disk Cleanup: Click
the Start button . In the search box, type disk
cleanup, and then, in the list of results, click Disk
Cleanup.
2. Change All Passwords
Some malware infections will steal your personal
data such as passwords, emails, and banking
information. Change all your passwords
immediately, especially if you do any banking or
other financial transactions on the computer.
Password Strength Checker
3. Clean up Temporary Files
After the removal process, you need to remove
your temporary files. Removing your temporary
files will delete the remaining malware files from
the temp folders. It will also free up hard disk
space, which will help to speed up your computer.
If you are experiencing problems like missing files
or folders, skip this step and go on to Fix Post-
Disinfection Problems.
Download TFC (Temp File Cleaner) - Download
here - Homepage If you have CCleaner installed,
you can use that instead, but do not use the registry
cleaner.
Once downloaded, double-click TFC to open it.
TFC will close all open programs when run, so
make sure you have saved all your work before
you begin. Click
the Start button to begin the process. Once it's
finished, it should automatically reboot your
computer. If it does not, manually reboot to ensure
a complete clean.
Fix Post-Disinfection Problems
Once you have removed the malware infection
from your computer, you may experience some
annoying problems. Fortunately, there are easy
ways to fix these problems.
1. Cannot Open or Run Programs
(.exe files)
This problem occurs when your .exe file
associations are broken. This is usually caused by
malware that changes the default file associations
in Windows. Follow these instructions to fix this
problem:
Download exeHelper from one of these two links:
Link 1, Link 2 Double-click on exeHelper to run
the fix. A black window should pop up.