addison - wesley professional dojo, using the dojo javascript library to build ajax applications (2009)
Bạn đang xem bản rút gọn của tài liệu. Xem và tải ngay bản đầy đủ của tài liệu tại đây (1.71 MB, 317 trang )
Dojo
Using the Dojo JavaScript Library
to Build Ajax Applications
James E. Harmon
Upper Saddle River, NJ • Boston • Indianapolis • San Francisco
New York • Toronto • Montreal • London • Munich • Paris • Madrid
Cape Town • Sydney • Tokyo • Singapore • Mexico City
Many of the designations used by manufacturers and sellers to distinguish their prod-
ucts are claimed as trademarks. Where those designations appear in this book, and
the publisher was aware of a trademark claim, the designations have been printed with
initial capital letters or in all capitals.
The author and publisher have taken care in the preparation of this book, but make no
expressed or implied warranty of any kind and assume no responsibility for errors or
omissions. No liability is assumed for incidental or consequential damages in connec-
tion with or arising out of the use of the information or programs contained herein.
The publisher offers excellent discounts on this book when ordered in quantity for bulk
purchases or special sales, which may include electronic versions and/or custom covers
and content particular to your business, training goals, marketing focus, and branding
interests. For more information, please contact:
U.S. Corporate and Government Sales
(800) 382-3419
For sales outside the United States please contact:
International Sales
Visit us on the Web: www.informit.com/aw
Library of Congress Cataloging-in-Publication Data
Harmon, James Earl.
Using the Dojo Javascript library to build Ajax applications / James Earl Harmon.
p. cm.
Includes index.
ISBN 0-13-235804-2 (pbk. : alk. paper) 1. Ajax (Web site development technology)
2. Java (Computer program language) I. Title.
TK5105.8885.A52H37 2008
006.7’8—dc22
2008021544
Copyright © 2009 Pearson Education, Inc.
All rights reserved. Printed in the United States of America. This publication is protected
by copyright, and permission must be obtained from the publisher prior to any prohibited
reproduction, storage in a retrieval system, or transmission in any form or by any means,
electronic, mechanical, photocopying, recording, or likewise. For information regarding
permissions, write to:
Pearson Education, Inc
Rights and Contracts Department
501 Boylston Street, Suite 900
Boston, MA 02116
Fax (617) 671 3447
ISBN-13: 978-0-132-35804-0
ISBN-10: 0-132-35804-2
Text printed in the United States on recycled paper at R.R. Donnelley in Crawfordsville,
Indiana.
First printing June 2008
Associate Publisher
Mark Taub
Acquisitions Editor
Debra Williams Cauley
Development Editor
Michael Thurston
Managing Editor
Kristy Hart
Project Editor
Chelsey Marti
Copy Editor
Language Logistics
Indexer
Lisa Stumpf
Proofreader
Kathy Ruiz
Technical Reviewer
Eric Foster-Johnson
Publishing Coordinator
Kim Boedigheimer
Cover Designer
Gary Adair
Senior Compositor
Gloria Schurick
Contents at a Glance
Foreword xiii
Acknowledgments xv
About the Author xvi
I: A Dojo Tutorial
1 Understanding Dojo: A Tutorial 3
2
Using Dojo for Client-side Validation 25
3
Using Dojo to Work with the Server 35
4
Using Dojo Widgets 51
5
Processing Forms with Dojo 59
II: Dojo Widgets
6 Introduction to Dojo Widgets 67
7
Dojo Form Widgets 91
8
Dojo Layout Widgets 137
9
Other Specialized Dojo Widgets 155
III: Dojo in Detail
10 What Is Dojo? 189
11
Technical Description of Dojo 199
12
Objects and Classes 223
13
Strings and JSON 239
14
Events and Event Handling 249
15
Ajax Remoting 259
16
Working with the DOM 277
17
Testing and Debugging 293
Index 303
Table of Contents
Foreword xiii
Acknowledgments xv
About the Author xvi
I: A Dojo Tutorial
1 Understanding Dojo: A Tutorial 3
1.1 Introduction to the Tutorial 3
1.1.1 Goals for this Tutorial 4
1.1.2 Goals for Using Dojo 4
1.2 A Standard HTML Data Entry Form 5
1.2.1 First and Last Name 6
1.2.2 User Name 7
1.2.3 Email Address 8
1.2.4 Address 8
1.2.5 State 8
1.2.6 City 10
1.2.7 Zip Code 10
1.2.8 Service Date 11
1.2.9 Comments 11
1.3 The Plan for Enhancing the Form 12
1.3.1 Including Dojo in the Form 12
1.3.2 Adding Client-side Validation 13
1.3.3 Adding Server-side Features 13
1.3.4 Using Additional Specialized Dojo Widgets 13
1.3.5 Processing the Form 14
1.4 Getting and Running the Source Code 14
1.5 Tutorial Step 1—Including Dojo 15
1.5.1 Download or Create the Source Files 15
1.5.2 Include the Code for the Dojo Toolkit 19
1.5.3 Include Dojo Style Sheets 20
1.5.4 Review All the Code Changes 21
1.5.5 Run the New Page 22
viii
Contents
2 Using Dojo for Client-side Validation 25
2.1 Validating Form Fields 25
2.2 Tutorial Step 2—Adding Client-side Validation 26
2.2.1 Validate the First Name Field 27
2.2.2 Validating the Last Name Field 30
2.2.3 Validating the User Name Field 31
2.2.4 Validating the Email Address Field 31
2.2.5 Validating the Address Field 32
2.2.6 Validating the City Field 33
2.2.7 Validating the Zip Code Field 33
3 Using Dojo to Work with the Server 35
3.1 Adding Server-side Features 35
3.2 Tutorial Step 3a—Adding Server-side Validation 36
3.2.1 Assign Event Handler Function 36
3.2.2 Make a Call to the Server 38
3.3 Tutorial Step 3b—Retrieving Data from
the Server 43
3.3.1 Select Appropriate Widget for
the City Field 43
3.3.2 Get the Value of State and Send
to the Server 45
4 Using Dojo Widgets 51
4.1 Adding Dojo Widgets to the Page 51
4.1.1 Dijit—The Dojo Widget Module 52
4.2 Tutorial Step 4—Using Dojo Widgets 52
4.2.1 Use the Dojo DateTextBox Widget 53
4.2.2 Use the Dojo Rich Text Editor Widget 55
5 Processing Forms with Dojo 59
5.1 Using Dojo to Process Forms 59
5.2 Tutorial Step 5—Processing the Form 60
5.2.1 Creating a Dojo Form Widget 60
5.2.2 Intercept Form Submission 61
5.2.3 Check That All Form Elements Are Valid 62
5.2.4 Submitting the Form to the Server 63
ix
Contents
II: Dojo Widgets
6 Introduction to Dojo Widgets 67
6.1 What Are Widgets? 67
6.2 What Are Dojo Widgets? 68
6.3 Components of a Dojo Widget 70
6.3.1 Widget HTML 70
6.3.2 Widget Styles 74
6.3.3 JavaScript Component of a Widget 76
6.3.4 Dojo Widget Hierarchy 78
6.3.5 Visual Overview of Dojo Widgets 83
6.3.6 Building Your Own Widgets 90
7 Dojo Form Widgets 91
7.1 Standard Forms and Dojo Form Widgets 91
7.1.1 The dijit.form._FormWidget Class 92
7.2 The Dojo Form Widget Explained 94
8 Dojo Layout Widgets 137
8.1 Understanding Page Layout 137
8.1.1 The dijit.layout._LayoutWidget Class 138
8.2 Explanation of Dojo Layout Widgets 139
9 Other Specialized Dojo Widgets 155
9.1 What Are Specialized Widgets? 155
9.2 Menu Widget 156
9.2.1 dijit.Menu 157
9.2.2 dijit.MenuItem 157
9.2.3 dijit.MenuSeparator 157
9.2.4 dijit.PopupMenuItem 158
III: Dojo in Detail
10 What Is Dojo? 189
10.1 History of JavaScript and AJAX 189
10.2 History of Dojo 191
10.3 Purpose of Dojo 191
x
Contents
10.4 Description of Dojo 192
10.5 What Problems Does Dojo Solve? 193
10.6 Who Should Use Dojo? 194
10.7 Licensing 195
10.8 Competitors and Alternatives 195
10.9 The Future of Dojo 197
11 Technical Description of Dojo 199
11.1 What You Get in the Dojo Download 199
11.2 Organization of Dojo Source Code 201
11.2.1 First-level Directories 201
11.2.2 Digging Deeper into the Dojo Directory 202
11.3 Dojo Modules and Features 203
11.3.1 Naming Conventions and Name Space 204
11.3.2 Dojo Base Module 205
11.3.3 Dojo Core Modules 217
12 Objects and Classes 223
12.1 Objects Explained 223
12.1.1 Creating Objects 224
12.1.2 Encapsulation 224
12.1.3 Object Templates 225
12.1.4 JavaScript Prototypes 227
12.2 Using Dojo to Work with Objects 228
12.2.1 Dojo Function: dojo.declare 229
12.3 Defining a Class 229
12.3.1 Superclasses and Inheritance 231
12.3.2 API for dojo.declare 231
12.3.3 Other Dojo Functions 233
12.3.4 Object Graphs and Dot Notation 234
13 Strings and JSON 239
13.1 Text Strings 239
13.1.1 Dojo Function: dojo.string.pad 240
13.1.2 Usage Example for dojo.string.pad 241
13.1.3 Dojo Function: dojo.string.substitute 241
13.1.4 Usage Example for dojo.string.substitute 243
xi
Contents
13.2 JSON 244
13.2.1 Dojo Function: dojo.toJson 246
13.2.2 Usage Example for dojo.toJson 246
13.2.3 Dojo Function: dojo.fromJson 247
14 Events and Event Handling 249
14.1 Description of the Event Model 249
14.1.1 What Are Events? 250
14.1.2 Additional Dojo Events 251
14.2 Defining and Assigning Event Handlers 252
14.2.1 Using dojo.connect to Assign
Event Handlers 252
14.2.2 Usage Example for Assigning
Event Handlers 253
14.3 Representing an Event as an Object 254
14.4 Using Aspect Oriented Programming in Dojo 256
15 Ajax Remoting 259
15.1 Remoting 259
15.2 Review of XMLHttpRequest (or XHR for Short) 260
15.2 The dojo.xhrGet Function 261
15.3.1 Parameters in Detail 264
15.4 dojo.xhrPost 264
15.4.1 Usage Example—Error Handling 268
15.5 Working with Forms 269
15.5.1 Dojo Function dojo.formToObject 270
15.5.2 Dojo Function dojo.objectToQuery 271
15.5.3 Dojo Function dojo.formToQuery 272
15.5.4 Dojo Function dojo.formToJson 274
15.5.5 Dojo Function dojo.queryToObject 274
16 Working with the DOM 277
16.1 Finding Needles in the DOM Haystack 277
16.2 Dojo Query 278
16.2.1 CSS Selectors 279
16.2.2 Using Selectors in dojo.query 282
16.2.3 Using DOM Elements Found
by dojo.query 283
xii
Contents
16.3 Animation 283
16.3.1 Understanding Animation 283
16.3.2 Dojo Animation Function 285
16.3.3 Standard Animation Effects 286
17 Testing and Debugging 293
17.1 Testing 293
17.1.1 Unit Testing 294
17.1.2 DOH—The Dojo Unit Testing Framework 294
17.1.3 Other Types of Testing 298
17.2 Logging 298
17.2.1 Basic Logging 299
17.2.2 Advanced Logging 300
Index 303
Foreword
If there is one lesson to be learned from the Dojo Toolkit, it is “Be careful what you
wish for!”When we first started Dojo, we had the modest goal of creating a JavaScript
toolkit that would be useful and would prevent expert JavaScript developers from having
to reinvent the wheel.With the buzz and excitement that would soon follow with the
emergence of the term Ajax, we quickly found ourselves as the creators of a toolkit used
by thousands and thousands of developers and millions of users in a very short time.
In the case of any project or company that grows much faster than expected, there are
growing pains along the way. It has taken Dojo nearly 18 months to address and solve
most of the issues caused by its rapid success: performance, comprehension, ease of use,
and documentation. Open source projects are notoriously bad at both marketing and
documentation, and Dojo was initially no exception to the rule.With each release from
Dojo 0.9 to 1.1 and beyond, documentation and API viewing tools have improved sig-
nificantly and are now something we’re proud to have rather than being a blemish to the
project.
Above and beyond source code documentation, demos, and great examples is the
need for great books.When learning something new, the most difficult things to learn
are usually the questions you don’t know how to ask.The vernacular and philosophy of
Dojo is very powerful and efficient but often leaves developers new to Dojo not know-
ing where to get started. Dojo in particular and Ajax in general also have the learning
curve of basically needing to understand a wide range of technologies, from server-side
programming languages to JavaScript, CSS, HTML, and the DOM, plus the browser
quirks and inconsistencies across each.Toolkits such as Dojo go to great lengths to rescue
developers from the most common and egregious of these issues, but developers creating
something new will inevitably run into trouble along the way.
There are numerous opportunities for developers and users of Dojo to solve their
problems and get up to speed, from reading this book to online community support, and
the commercial support provided by companies such as SitePen.
Dojo has thrived and succeeded because of its transparent and open development
process. All code is licensed under the AFL and BSD, licenses which are focused on
adoption rather than control.
Contributions have been received from hundreds of individuals and from companies
such as AOL, Google, IBM, Nexaweb, Renkoo, SitePen, Sun,WaveMaker, and many
more.We have a strict but low-barrier contribution policy that requires all source code
contributions to be made through a Contributor License Agreement, ensuring that usage
of Dojo will not cause legal or IP headaches now or in the future.
And we innovate and experiment more than any other toolkit, introducing features in
DojoX that are far ahead of other toolkits.
I first met James Harmon at a conference when he was giving a talk about Dojo.The
great thing about James’ approach was that he did an amazing job of simplifying the
message. Alex Russell and I have a tendency to beat people over the head with every
feature and every possibility, whereas James was able to distill complex topics down to
easy-to-follow concepts that help people quickly get up to speed with Dojo.
This book takes the same simple approach of clearly explaining how to create web
applications and web sites with Dojo in a manner that should make it easy, even for
developers who are not JavaScript experts, to quickly get up to speed and become
effective with the Dojo Toolkit.
Dylan Schiemann
CEO, SitePen
Cofounder, Dojo Toolkit
Acknowledgments
It seems like a ridiculous conceit to put only my name on the cover of the book. I've
learned that “it takes a village” to write a book and I'd like to acknowledge some of the
members of my village who have been so helpful with their time and encouragement.
First, thanks to my editor, Debra Williams Cauley, who began by not taking “no” for an
answer (in the nicest way, of course) and continued by expertly guiding me through the
process.
Also, thanks to Debra's team at Prentice-Hall, including those I worked with directly,
Chelsey Marti, Chrissy White, Michael Thurston, and all those who toiled behind the
scenes to get this book into the reader's hands. Eric Foster-Johnson also provided invalu-
able suggestions to the text.
No book on Dojo would have been possible without the Dojo Framework itself.
Thanks to all who've contributed to the project and provided me with help and support
along the way, including Dylan Schiemann,Alex Russell, Karl Tiedt, Adam Peller, Becky
Gibson, Sam Foster, Ben Lowery, and James Burke. And to all the other contributors too
numerous to mention that have made Dojo the great framework it is.
Also thanks to my personal network who gave lots of great advice: Ed Lance,Ted
Rafacz, Max Rahder, Steve Meshner, Bob Phifer, and Will Provost.Thanks to my techni-
cal idols, Douglas Crockford, Jesse James Garret, and the guys at Ajaxian.com who got
me interested in Ajax and JavaScript in the first place.
And special thanks to my wonderful wife, Sonia, who helped me carve out the time
to write this book. I couldn't have done it without you.Your constant support is always
an inspiration to me. I love you.
About the Author
James E. Harmon is the President and Senior Instructor at Object Training Group in
Chicago. He is an experienced developer who spent a majority of his career building
large scale online applications at Accenture and for several other Web-centric consulting
firms. He now specializes in training Java Developers to be more productive by using the
latest technologies and frameworks.
The book’s web site is />I
A Dojo Tutorial
1 Understanding Dojo: A Tutorial
2 Using Dojo for Client-Side Validation
3 Using Dojo to Work with the Server
4 Using Dojo Widgets
5 Processing Forms with Dojo
1
Understanding Dojo:
A Tutorial
If you tell me, I’ll soon forget. If you show me, I’ll remember forever.
—Chinese Proverb
In the spirit of the quote that opens this chapter, I believe that a simple demonstration
is one of the best ways to introduce a new technology. So I’m opening this book by pro-
viding a tutorial that will use the Dojo Toolkit to enhance a basic HTML form.This
chapter introduces the tutorial, which continues through Chapter 5,“Processing Forms
with Dojo,” and comprises Part I,“A Dojo Tutorial.”
1.1 Introduction to the Tutorial
Imagine that you are a web developer (which is probably not a stretch if you are reading
this book) and you are being encouraged to add some Ajax features to a site you’re
working on. Maybe the originator of this request is your boss or your boss’s boss, who is
not even sure what Ajax is, let alone what kinds of features might be useful.And maybe
you’re not sure yourself. Imagine that your prior experience has mostly been on the
server-side, developing in Java or some other server-side technology, and your experience
with HTML and JavaScript has been fairly limited.This is the scenario we will explore
over the next several chapters as you are introduced to the Dojo Toolkit.
To further flesh out the scenario, imagine that you’ve heard lots of things about how
powerful the JavaScript programming language can be and that there are a number of
JavaScript libraries and frameworks that can help you take advantage of that power.
You’ve decided to use the Dojo Toolkit because some of the web sites and forums that
you frequent to keep up with the ever-changing IT industry have recommended it. And
you’ve already selected one of the most frequently used pages in your application to be
the first candidate for being “Ajaxified.”
This tutorial walks you through a number of steps to update the page with Ajax fea-
tures.We will enhance the page in a number of small ways that each address a specific
type of issue. Along the way, we’ll see the kinds of features that Ajax allows us to add to
web pages, and we’ll see exactly how to implement those features using the Dojo Toolkit.
1.1.1 Goals for this Tutorial
The primary goal of this tutorial is to show you how to use the Dojo Toolkit to intro-
duce some common Ajax features into your web pages.The tutorial provides instructions
for picking the low hanging fruit. In other words, it focuses on the features that are fairly
easy to implement and yet provide a substantial return in increased usability.This tutorial
is not meant to demonstrate every feature of Dojo, nor is it intended to exhaustively
cover the features that we implement together.You can think of this tutorial as address-
ing the first phase of web site enhancement.
Another main goal of this tutorial is to implement features in the plainest way.Although
most Dojo features can be implemented either declaratively (in HTML markup) or pro-
grammatically (using JavaScript), we’ll first focus on the declarative technique given that
most web server-side developers are more familiar with HTML markup than with
JavaScript. Of course, we will also use some JavaScript as the glue to tie things together.
1.1.2 Goals for Using Dojo
What do we hope to achieve by using Dojo? First and foremost, we expect that our
pages will be more usable.This might manifest itself in a variety of ways.The page
should be faster. It should be better looking. It should be easier to operate by the user. It
should help the user enter the required information properly, and the page should be
easier to navigate.Yet at the same time, we should not violate any of the user-interface
conventions that users have come to expect when accessing web pages.We should make
significant usability gains without sacrificing anything that the user already depends on.
How do we make these gains in usability? Dojo provides enhancements to the exist-
ing HTML form elements that provide additional functionality.These enhancements
should make the current form elements behave in more useful ways.
Performance can be improved either by making things run faster or by making things
appear to run faster.The ideal way to make a process appear faster is to have the process
run while the user is doing something else rather than just having him wait for the process
to complete. Ajax provides the ideal mechanism to support this technique.We’ll use Dojo
to allow a page to make data requests of the server asynchronously while the user is con-
tinuing to work.The page will appear to the user to be faster and more responsive.
Data validation can be improved by bringing the validation of data closer to the entry
of data. Dojo supports the ability to send small validation requests to the server without
requiring an entire form to be submitted.When appropriate, we might even want to adopt
the desktop application paradigm of validating data on a keystroke by keystroke basis.
We also expect our features to be easy to implement.We want to be able to leverage
what we know about HTML, and when we use JavaScript, the programming model should
4
Chapter 1 Understanding Dojo: A Tutorial
be consistent and powerful.We expect to write a lot less code than if we were developing
the functionality by writing it all ourselves. Less code means less opportunity for error. As
you learn Dojo, you can expect that what you learn will continue to be useful as you dig
further into Dojo.And when things do become more complex, you will have tools to aid in
debugging. In short, you can expect Dojo to provide a great programming environment.
Finally, we hope to be constantly surprised by the benefits we derive from using Dojo,
obtained without any extra work on our part. For example, we expect that any features
we add will work the same regardless of what browser our users are using.And we expect
our visual elements to support Web Accessibility and Internationalization standards.
We’ve set quite a high bar for Dojo to cross over.We’re asking for a lot and not
expecting to sacrifice much to obtain it. Can Dojo really deliver? Let’s find out.We start
at the beginning by reviewing the page that will be the basis for our enhancements and
identifying the kinds of problems we hope to solve.
1.2 A Standard HTML Data Entry Form
We begin by selecting a page from our application that will be the target for our Dojo
enhancements (see Figure 1.1).This page comes from a hypothetical Customer Service
application for a nation-wide cable company and allows a customer to create an account
and to request service.The tutorial is going to be pretty vague about the operations of
our “business” because, as you probably guessed, this form is being used to highlight
some specific types of functions that many business applications possess. So, if you can
suspend your disbelief for a little while, let’s review the form.
5
1.2 A Standard HTML Data Entry Form
Figure 1.1
Standard HTML customer entry form
This page has a very basic design—almost no design at all. It uses only a small bit of
styling and is about as plain as you can get.Your pages probably look much better than
this, but we start with this minimal design to keep the examples as simple as possible.
Let’s walk through each of the fields on this form and discuss the usability problems.
A discussion of how Dojo can solve these problems then follows.
1.2.1 First and Last Name
The first data entry field is used to hold the customer’s first name. Straightforward
enough, yet we already have a problem.The label for the field says “First / Last Name:”
and is followed by two text fields for input.Although the user can probably figure out
what the page is asking for, it may be more difficult to understand for screen readers,
which are used by those with visual impairment.
6
Chapter 1 Understanding Dojo: A Tutorial
You could argue that from a usability perspective, this is already a bit confusing. All
the other labels on the page refer to a single text box only, while this label refers to two
text boxes.When a name is separated into two parts, should the last name be entered
before the first name, or the other way round? These are good questions, but we’ll have
to wait for the answers. Remember, we’re just identifying the problems now.We look at
solutions later in the chapter.
Now let’s examine the HTML markup for these fields.
<label for="firstName">First / Last Name: </label>
<input type="text" id="firstName" name="firstName" />
<input type="text" id="lastName" name="lastName" />
You might not have used the <label> tag before, but it can be helpful for improving
your site’s accessibility for the disabled.The tag is useful to screen readers when the label
does not immediately precede the input field, such as when the label is in a different
table cell. It also makes it easier to style all the labels with a single style when using
Cascading Style Sheets (CSS). Another problem is that only one of the fields has a
<label> tag.
Both the first name and last name fields are required. However, in our standard form,
no JavaScript is being used, so how do we make the fields required? There is no HTML
tag or attribute for this, so we’ll depend on the server to do the validation.That means
the user won’t know the fields are required until after submitting the form and receiving
an error message back from the server.
How will the error messages be displayed? Let’s say that the user has entered some
data in the form and pressed the “Submit” button.The browser will make a request to
the server that will then validate the data and return the form back to the browser along
with some error messages. Hopefully the server will also send back the data that the user
entered so they don’t have to re-enter it. Oftentimes, the error page will display all the
error messages near the top of the page.The page with error messages might appear as
shown in Figure 1.2.
7
1.2 A Standard HTML Data Entry Form
Figure 1.2
Typical error messages for a form
1.2.2 User Name
Our application will allow the user to sign in and manage his or her account, so we’re
asking the user to create a user name that will be used for that purpose.We ought to
provide him with some guidance for creating a proper name, but that would require us
to add quite a bit of text to the page, so we’ve decided not to.The form simply asks for
a user name and provides a text field.
The HTML markup for this is quite similar to the “First / Last Name:” fields, just a
<label> and <input type=
"
text
"
> tag as shown here.
<label for="userName">User Name: </label>
<input type="text" id="userName" name="userName" size="20" />
We’ve added a little client-side validation by specifying the size=”20” attribute to
ensure that the user can’t enter a name longer than 20 characters.
A problem with this field involves validation. A user would like to create a short user
name that is easy to remember, but because this is also the goal of every other user, it is
possible that the name might have already been selected. How is the user notified of
this? Again, validation can’t be done until the user submits the page.The server will
check the user name to see if it has already been assigned and, if so, will return a page
that redisplays the form and shows the error message (along with any additional error
messages associated with other fields). It might be helpful also to suggest some alterna-
tives to the user so that he doesn’t keep entering names that have already been taken.
These suggestions should be based on the user’s desired user name.
1.2.3 Email Address
We’d like to communicate with the user through email, so we’ll ask for an address. A
simple text box will be used to let the user enter the email address.
8
Chapter 1 Understanding Dojo: A Tutorial
The HTML markup is shown here and is very similar to the other text fields on the
page.
<label for="email">Email: </label>
<input type="text" id="email" name="email" size="45" />
Again, we’ve enabled some client-side validation by specifying the size of the field.
But is there a way to tell if the email address is valid? There are two types of validation
we could try. First, is the email address in the correct format? For instance, does it con-
tain the “@” symbol? Does it end with a TLD such as “.com”? Second, is it an actual
working email address? Unfortunately, there is no way to determine the latter without
actually creating and sending an email.Though this might be useful for sending the user
a password and letting her validate the user name, it is beyond the scope of what we
want this page to do. So we’ll just focus on confirming that the email address at least
appears to be formatted correctly.
1.2.4 Address
We’ll ask for the first line of the user’s home address and use a regular text box to
capture it.
The HTML is similar to the previous fields.
<label for="address">Address: </label>
<input type="text" id="address" name="address"/>
This field should contain the first line of the customer’s billing address, so we need to
make sure it is entered. It is a required field, but again we’ll have to depend on the server
to perform that validation.
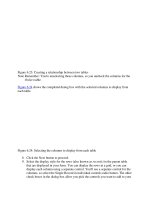
1.2.5 State
We need the user’s state as part of the billing address. Because there are only a limited
number of states, we can use a <SELECT> to provide a pull-down list of states, one of
which can be chosen. A typical example of a pull-down list of states is shown in
Figure 1.3.
Figure 1.3 Pull-down list of states
HTML provides the <SELECT> form element, which can be used to supply a list of
values. A snippet of the markup necessary to create the field is shown here.
<select name="state" >
<option value="AL">Alabama</option>
<option value="AK">Alaska</option>
<option value="AS">American Samoa</option>
<option value="AZ">Arizona</option>
additional state values not shown
</select>
Because there is only a small set of values for state, they can all be shown. For this
field, validation is not a problem, but behavior is. I live in Illinois, and I make frequent
purchases on the Web, so I’m often faced with entering my billing address.When I come
to the state selection field on a form, I first type an “i”, and “Idaho” pops up on the list
because it is the first state that begins with an “i.” Fair enough—even though I don’t live
in Idaho. Next I type an “l” (a lowercase “L”), and “Louisiana” pops up. Now, many fine
people live in Louisiana, but I am not one of them.The problem is that the <SELECT>
tag interprets my typing as two distinct cases of typing the first letter of a word instead
of just one case of typing the first two characters of a single word.When I type “il” I
want to see all the states that begin with the letters “il”, and only Illinois makes that cut.
Unfortunately, this just isn’t how a <SELECT> tag works—it displays “Louisiana” when I
type the “l,” assuming that I’m typing the first letter of the state again.
This isn’t always a problem. Some browser versions do work as we’d like them to
(interpreting the entire string “il” as the first characters of the state), but we need to
have consistent behavior on our page regardless of what browser the page happens to be
running in.
9
1.2 A Standard HTML Data Entry Form
1.2.6 City
This is another required field.We’ll use a text box to capture the value from the user.
10
Chapter 1 Understanding Dojo: A Tutorial
The HTML will be the same as we’ve already seen for the other text fields.
<label for="city">City: </label>
<input id="city" name="city"/>
The basic HTML form will not provide any type of validation for this field.
However, couldn’t we have presented the user with a pull-down list of valid cities like
we did for the state selection? There are only a finite number of cities for each state, but
the number isn’t small.Across the entire United States there are somewhere around
30,000 cities. So simply listing all of the values in our page would have increased the size
of the page, making it slower to load. It is also not correct to list all the cities; we must
list only the cities for the state selected by the user.We would need to create some
JavaScript logic to do that, and we’re trying to avoid JavaScript in our simple form.
The usability of the pull-down list would also be problematic. Because there are so
many cities, many of them would start with the same letter.Typing the first letter of the
city would only get the user to the beginning of a long list.The user would have to
scroll down for quite a while to reach certain values—something that would get pretty
tiresome.
1.2.7 Zip Code
Zip code is the final required field for the billing address.We’ll use a text box to cap-
ture the data from the user.
The HTML is the same as for the other text fields.
<label for="zipCode">Zip Code: </label>
<input type="text" id="zipCode" name="zipCode" size="10" /></br>
Validation is required. Again, we’ll depend on the server for making sure the field has
been entered.The server will return a page containing the form, any data entered by the
user, and any validation error messages that are created. Aside from making the field
required, what other validations might be performed? Just like for the email address,
there are two types of validation. Is the data in the right form? And is the data a valid
value?
Zip codes take two forms in the United States.They can be five numeric digits long
or five digits followed by a dash and then four more digits.This means that the entered
data can either be five characters long or ten characters long. HTML does provide us
with a technique for enforcing a maximum length by using the size attribute. However,
there is no way in HTML to specify a minimum length. Nor is there a way to specify
that a dash is required to separate the two parts of the long style of zip code.The server
can perform all these checks but only after the user has submitted the form.
We could go even further. Like states and cities, the U.S. has a certain finite set of zip
codes.Would we be able to list them in a <SELECT> list? And since we already know the
state and city, could we list just the zip codes that apply? That logic is actually more
complicated than you might think—some cities have multiple zip codes while some zip
codes cross over city boundaries. Also if we expand our geographic reach beyond the
boundaries of the U.S., we’ll discover additional complexities. However, we’ll stay within
the U.S. borders for the sake of keeping our tutorial fairly simple.
We’ve introduced lots of problems with this field. Remember, solutions are suggested
later in the tutorial.
1.2.8 Service Date
Our customers would also like to schedule the start of their cable service, so we pro-
vide a text box where they can enter the starting service date.
11
1.2 A Standard HTML Data Entry Form
The HTML is the same as we have seen before for the other text fields.
<label for="serviceDate">Service Date:</label>
<input type="text" id="serviceDate" name="serviceDate" size="10"/>
What kinds of validation are required for the service date? Of course, it must be a
valid date, but what format should the date be entered in? We’re not giving the user
guidance.This is clearly a problem. Beyond that, the date should be in the future and not
the past.There might even be dates that should be blocked out such as non-business
days.
Another usability problem with this field is that people can’t easily calculate future
dates.What is the date of the day two weeks from now? Do we just add 14 to the cur-
rent date? Not if the current month ends before we reach that date. And what is the date
of the first Monday three weeks from now? It can be very difficult for the user to calcu-
late dates without having a calendar available.
1.2.9 Comments
Finally we come to the last field on the form—Comments.The user can enter free-
form comments describing how she found out about our service and what kinds of
shows she likes—or anything else she might want to tell us.
12
Chapter 1 Understanding Dojo: A Tutorial
This is a multi-line text box that allows the use to enter as much or as little text as
she would like.The HTML is shown here.
<label for="comments">Comments:</label>
<textarea name="comments" rows="3" cols="35" id="comments">
</textarea>
This is not a required field, so no validation is necessary.The HTML form element
<textarea> provides some basic text editing capability. It will automatically wrap words
when the user comes to the end of each line. Once the user enters more text than can
fit in the visible portion of the box, a scroll bar automatically appears on the right-hand
edge of the box to allow up and down scrolling. But that’s the extent of its features.
There are no formatting capabilities.
This completes our review of the original HTML form. Now that we’ve cataloged
the many problems with this form, we can plan our strategy for addressing them with
Dojo.
1.3 The Plan for Enhancing the Form
There is a lot of work to do to address all the problems we’ve identified.We need to
create a plan of attack, and the first task is be to organize our problems into some broad
categories.We’ll start with the simplest changes first and gradually move up to more
complicated ones.The categories are listed here. Each category will be a step of the
tutorial.
1. Including Dojo in the form
2. Adding client-side validation
3. Adding server-side features
4. Using additional specialized Dojo widgets
5. Processing the form
Each topic is described in more detail in the following sections.
1.3.1 Including Dojo in the Form
The first step of the tutorial shows you how to add Dojo to a web page and is contained
here in Chapter 1.
Dojo is a library of functions that we can access either programmatically or declara-
tively.We use it programmatically by writing JavaScript, which makes calls to Dojo func-
tions, or declaratively by calling Dojo using HTML markup. But before we can make
any calls to Dojo, we must make it available to our page. In other words, we must
include Dojo in our web page.This step alone won’t implement any of the many fea-
tures available to us, but without it, we can’t use Dojo at all.
1.3.2 Adding Client-side Validation
The second step of the tutorial focuses on client-side validation and is contained in
Chapter 2,“Using Dojo for Client-side Validation.”
Many of the usability problems we identified were things that could be solved by
providing some validation in the browser. In this step we only address the validation that
doesn’t require communication with the server. Some developers might not even consid-
er these features to be Ajax because there is no server request created. But that would
not be quite accurate. After all, Ajax is a two-sided coin. One side is certainly asynchro-
nous server communication without a page refresh, but the other side of the coin is all
the interactivity and eye candy available by using JavaScript to manipulate the display.
One of the problems we solve in this step is the validation of required data. Rather
than submit the form and asking the server to check that a required field has been
entered, we use JavaScript to test for data before submitting the form.This will make the
application seem faster because the user won’t have to wait for a server response to find
out about bad data.
1.3.3 Adding Server-side Features
The third step of the tutorial focuses on the classic definition Ajax—making calls to the
server without refreshing the page that the user is working on.This topic is covered in
Chapter 3,“Using Dojo to Work with the Server.”
Some of the other problems with our form were caused by forcing a page submit to
validate certain kinds of data. For example, the user name needs to be validated against
existing user names on the server.There is no way to avoid checking the server—that’s
where the data is. But we don’t have to request a whole new page.We can create an Ajax
request just to check the user name, and the server will return just the validation infor-
mation, not an entire new page.This will be quicker and won’t interrupt the user’s flow.
We’ll also make requests to the server to get data based on values entered by the user.
For instance, we can go get a list of cities from the server based on the state selected
from the pull-down list.This step will require some additional scripts on the server to
allow it to respond to these Ajax requests. I’ve created some simple JavaServer Page (JSP)
scripts on the server to allow the examples to work.The scripts are over-simplified but
serve the purpose of demonstrating the features that are discussed in the tutorial.
1.3.4 Using Additional Specialized Dojo Widgets
The fourth step of the tutorial demonstrates some of Dojo’s powerful widgets and is
contained in Chapter 4,“Using Dojo Widgets.”
13
1.3 The Plan for Enhancing the Form