Astm b 331 16
Bạn đang xem bản rút gọn của tài liệu. Xem và tải ngay bản đầy đủ của tài liệu tại đây (84.04 KB, 4 trang )
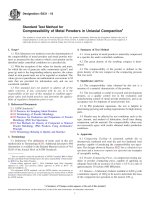
Designation: B331 − 16
Standard Test Method for
Compressibility of Metal Powders in Uniaxial Compaction1
This standard is issued under the fixed designation B331; the number immediately following the designation indicates the year of
original adoption or, in the case of revision, the year of last revision. A number in parentheses indicates the year of last reapproval. A
superscript epsilon (´) indicates an editorial change since the last revision or reapproval.
1. Scope*
4. Summary of Test Method
1.1 This laboratory test method covers the determination of
the compressibility of metal powders and metal powder mixtures as measured by the extent to which a test portion can be
densified under controlled conditions in a specified die.
4.1 A test portion of metal powder is uniaxially compressed
in a specific die under controlled conditions.
4.2 The green density of the resulting compact is determined.
1.2 With the exception of the values for density and mass,
for which the use of gram per cubic centermetre (g/cm3) and
gram (g) units is the longstanding industry practice, the values
stated in inch-pound units are to be regarded as standard. The
values given in parentheses are mathematical conversions to SI
units that are provided for information only and are not
considered standard.
1.3 This standard does not purport to address all of the
safety concerns, if any, associated with its use. It is the
responsibility of the user of this standard to establish appropriate safety and health practices and determine the applicability of regulatory limitations prior to use.
4.3 The compressibility of the powder is defined as the
green density of the test compact at the compacting pressure
that was used.
5. Significance and Use
5.1 The compressibility value obtained by this test is a
measure of a material characteristic of the powder.
5.2 The test method is useful in research and development
projects, as a quality control test in the evaluation and
manufacturing control of metal powder production, and as an
acceptance test for shipment of metal powder lots.
2. Referenced Documents
5.3 In PM production operations, the test is helpful in
determining pressing and tooling requirements for high density
parts.
2.1 ASTM Standards:2
B215 Practices for Sampling Metal Powders
B243 Terminology of Powder Metallurgy
B925 Practices for Production and Preparation of Powder
Metallurgy (PM) Test Specimens
B962 Test Methods for Density of Compacted or Sintered
Powder Metallurgy (PM) Products Using Archimedes’
Principle
E456 Terminology Relating to Quality and Statistics
5.4 Results may be affected by test conditions such as the
type, amount, and method of lubrication, dwell time during
compaction, and die material. The compressibility values may
not necessarily agree with results obtained under production
conditions.
6. Apparatus
3. Terminology
6.1 Compacting Tooling—A cemented carbide die or
alternatively, hardened tool steel die and two hardened steel
punches capable of producing the compressibility test specimen. The designs shown in Practice B925 for a cylindrical test
specimen and a transverse rupture test specimen are examples
of acceptable tooling.
3.1 Definitions—For definitions of terms used in this test
method refer to Terminology B243. Additional descriptive PM
information is available in the Related Material section of Vol
02.05 of the Annual Book of ASTM Standards.
1
This test method is under the jurisdiction of ASTM Committee B09 on Metal
Powders and Metal Powder Productsand is the direct responsibility of Subcommittee B09.02 on Base Metal Powders.
Current edition approved April 1, 2016. Published April 2016. Originally
approved in 1958. Last previous edition approved in 2010 as B331– 10.
DOI:10.1520/B0331-16.
2
For referenced ASTM standards, visit the ASTM website, www.astm.org, or
contact ASTM Customer Service at For Annual Book of ASTM
Standards volume information, refer to the standard’s Document Summary page on
the ASTM website.
6.2 Powder Compacting Press—A compression testing machine or powder compacting press, capable of applying an
adequate load with an accuracy of at least 61.0 % at a rate of
approximately 30 tsi/min (400 MPa/min).
6.3 Balance—A laboratory balance readable to 0.001 g with
a minimum capacity of 100 g to be used to determine the mass
of the compacted test specimen to the nearest 0.01 g.
*A Summary of Changes section appears at the end of this standard
Copyright © ASTM International, 100 Barr Harbor Drive, PO Box C700, West Conshohocken, PA 19428-2959. United States
1
B331 − 16
thick (25.4 in diameter by 7.11 6 0.25 mm thick), as shown in
Practice B925 as Cylindrical Powder Compressibility Test
Specimen.
9.2.1.2 Rectangular Compressibility Test Specimen—A
short rectangular compact 1.250 in. long by 0.500 in. wide by
0.250 6 0.010 in. thick. (31.8 by 12.7 by 6.35 6 0.25 mm),
similar to that which is shown in Practices B925 as Transverse
Rupture Strength Test Specimen—Thin.
6.4 Micrometer—Standard outside micrometers or other
suitable measuring instruments for determining the dimensions
of the green compressibility compacts to the nearest 0.0002 in.
(0.005 mm).
7. Gross Metal Powder Sample
7.1 The gross powder sample is a quantity of powder of
sufficient mass to be split into the required number of powder
test portions. It shall be taken from the lot of powder that is to
be tested in accordance with Practices B215.
9.3 Powder Test Sample:
9.3.1 The thickness of the compressibility test specimen is
critical as the area of die wall contact has a strong effect on the
green density and the thicknesses specified have been determined to give equivalent results between the two powder
compressibility test specimens.
9.3.2 The powder test portion shall be a powder charge of
sufficient mass to produce either a cylindrical test specimen
0.280 6 0.010 in. (7.11 6 0.25 mm) thick or a rectangular test
specimen 0.250 6 0.010 in. (6.35 6 0.25 mm) thick.
9.3.3 For a powder whose compressibility is not known, it
may be necessary to adjust the mass of the powder charge
based upon the thickness obtained in an initial test.
8. Preparation
8.1 This test method contains procedures to be followed for
either lubricated or unlubricated metal powders. Lubrication is
generally necessary to assist in the compaction and ejection of
the compressibility compact.
8.1.1 An alternative way of testing powder not containing a
lubricant is to use an otherwise unlubricated die after thoroughly mixing into the powder a sufficient amount of a suitable
lubricant.
8.2 Lubricated Powders:
8.2.1 Powder mixtures containing a lubricant shall be tested
in the as-received condition.
9.4 Compacting:
9.4.1 Compact and identify three (3) duplicate compressibility test specimens of the shape that has been selected
following the compacting procedure listed in Practice B925.
9.4.2 Be careful to release the load as soon as the maximum
pressure is reached as a pressure dwell of as little as 10 s may
increase compressibility by as much as 0.3 %.
9.4.3 Note the load used, then calculate and record the
compacting pressure based on the pressing area of the selected
compressibility test specimen.
9.4.4 The compressibility compacts may be lightly sanded
on fine emery paper to remove any flash.
8.3 Unlubricated Powders:
8.3.1 The needed lubrication may be supplied either by
lubricating the walls of the die or by mixing a powdered
lubricant into the metal powder to be tested.
8.3.1.1 Die-wall lubrication consists of coating the walls of
the die with a thin film of lubricant prior to each compaction
step following the die-wall lubrication procedure in Practices
B925.
8.3.1.2 Admixed lubrication consists of thoroughly mixing
a small percentage of a powdered lubricant into the gross
sample.
9.5 Measurements:
9.5.1 Determine the mass of each green compressibility test
specimen to the nearest 0.01 g.
9.5.2 Measure the dimensions of each green compressibility
test specimen to the nearest 0.0002 in. (0.005 mm).
8.4 Compressibility test results may vary in accordance with
the method of lubrication, type, and amount of lubricant.
8.5 Compressibility test results may vary depending on the
rate at which the compacting pressure is applied.
8.6 The parties concerned shall agree on the method of
lubrication and the details of the procedure.
10. Calculations
9. Procedure
10.1 Calculate the green density of each powder compressibility test specimen as follows:
10.1.1 For the Cylindrical Test Specimen:
9.1 Testing Methods:
9.1.1 The test for compressibility of metal powder may be
conducted in any of three ways:
9.1.1.1 Method 1—Compressibility defined as the green
density obtained at a selected compacting pressure.
9.1.1.2 Method 2—Compressibility as a graph relating density as a function of at least four compacting pressures.
9.1.1.3 Method 3—Compressibility defined as the compacting pressure required to attain a target green density.
Green Density, D G 5 ~ 0.0777 3
M! ⁄ ~D2
3
T!
(1)
where:
= green density of the cylindrical compressibility test
DG
specimen, g/cm3.
0.0777 = combined conversion factor, in.3 to cm3 and π for
the area calculation.
M
= mass of the green compressibility test specimen, g.
= diameter of the compact, squared, in.2.
D2
T
= thickness of the compact, in.
9.2 Test Specimens for Powder Compressibility:
9.2.1 Either of two compressibility test specimens may be
selected to determine compressibility.
9.2.1.1 Cylindrical Compressibility Test Specimen—A short
cylindrical compact 1.000 in. in diameter by 0.280 6 0.010 in.
10.1.2 For the Rectangular Test Specimens:
Green Density, D G 5 ~ 0.0610
2
3
M! ⁄~L 3
W 3
T ! (2)
B331 − 16
11.4.3 For unlubricated powder tested after a powder lubricant has been admixed, report the type and percentage of the
powder lubricant as well as details of the mixing procedure.
where:
= green density of the rectangular compressibility
DG
test specimen, g/cm3.
0.0610 = conversion factor, in.3, to cm3.
M
= mass of the green compressibility test specimen, g.
L
= length of the compact, in.
W
= width of the compact, in.
T
= thickness of the compact, in.
12. Precision and Bias3
12.1 The following precision values were developed from
data contained in research report RR:B09-1002 collected using
Method 1 of this test standard.
12.1.1 Precision:
12.1.1.1 The within-laboratory repeatability limit, r, as defined by Terminology E456, is estimated to be 0.025 g/cm3.
Duplicate results from the same laboratory should not be
considered different at the 95 % confidence level unless they
differ by more than 0.025 g/cm3.
12.1.1.2 The between-laboratories reproducibility limit, R,
as defined by Terminology E456 is estimated to be 0.07 g/cm3.
Duplicate results from different laboratories should not be
considered different at the 95 % confidence level unless they
differ by more than 0.07 g/cm3.
12.1.2 Bias:
12.1.2.1 No information can be presented on the bias of the
procedures in this test method for measuring metal powder
compressibility because no material having an accepted reference value is available.
12.1.3 Measurement Uncertainty:
12.1.3.1 The precision of this test method shall be considered by those performing the test when reporting metal powder
compressibility results.
10.2 The density of the green powder compressibility test
specimen may also be determined by the water displacement
method of Test Method B962.
11. Report
11.1 Method 1—Report the compressibility in g/cm3 as the
arithmetic average of three density measurements, calculated
to the nearest 0.01 g/cm3, at a given compacting pressure. (for
example 6.00 g/cm3 at 30 tsi (400 MPa)).
11.2 Method 2—Display the compressibility as a graph of
green density as a function of compacting pressure using at
least four (4) determinations.
11.3 Method 3—Alternatively, report the compressibility in
tsi to the nearest 0.5 tsi (10 MPa), as the compacting pressure
required to reach the specified green density. (for example,
30.0 tsi (400 MPa)) for a green density of 6.50 g/cm3)
11.4 Report the compact type, thickness, and method of
lubrication and the die material.
11.4.1 For lubricated powder tested as-received, report the
type and percentage of lubricant, if known.
11.4.2 For unlubricated powder tested using die-wall
lubrication, report the type and amount of lubricant as the mass
percent dissolved in the solvent.
13. Keywords
13.1 compressibility; metal powder
3
Supporting data have been filed at ASTM International Headquarters and may
be obtained by requesting Research Report RR:B09-1002. Contact ASTM Customer
Service at
SUMMARY OF CHANGES
Committee B09 has identified the location of selected changes to this standard since the last issue (B331 – 10)
that may impact the use of this standard. (Approved April 1, 2016.)
(1) Changed sample to test portion on section 1.1.
(2) Updated section 1.2 to meet B09 policy guide.
(3) Replaced sample with portion in section 4.1.
(4) Added comma after type in section 5.4.
(5) Added rate of compaction in section 6.2.
(6) Removed redundant language in section 6.3 and added
description to mass being determined.
(7) Replaced samples with portions in section 7.1.
(8) Deleted section 9.2.2 as it is repeated in section 9.4.2.
(9) Replaced sample with portion in section 9.3.2.
(10) Added SI units to section 9.5.2.
(11) Added “use of” to paragraph 1.2.
(12) Changed Practice B215 to Practices B215 in 7.1.
(13) Changed the conversion factor in Equation 1 from 0.078
to 0.0777.
(14) Changed the conversion factor in Equation 2 from 0.061
to 0.0610.
3
B331 − 16
ASTM International takes no position respecting the validity of any patent rights asserted in connection with any item mentioned
in this standard. Users of this standard are expressly advised that determination of the validity of any such patent rights, and the risk
of infringement of such rights, are entirely their own responsibility.
This standard is subject to revision at any time by the responsible technical committee and must be reviewed every five years and
if not revised, either reapproved or withdrawn. Your comments are invited either for revision of this standard or for additional standards
and should be addressed to ASTM International Headquarters. Your comments will receive careful consideration at a meeting of the
responsible technical committee, which you may attend. If you feel that your comments have not received a fair hearing you should
make your views known to the ASTM Committee on Standards, at the address shown below.
This standard is copyrighted by ASTM International, 100 Barr Harbor Drive, PO Box C700, West Conshohocken, PA 19428-2959,
United States. Individual reprints (single or multiple copies) of this standard may be obtained by contacting ASTM at the above
address or at 610-832-9585 (phone), 610-832-9555 (fax), or (e-mail); or through the ASTM website
(www.astm.org). Permission rights to photocopy the standard may also be secured from the Copyright Clearance Center, 222
Rosewood Drive, Danvers, MA 01923, Tel: (978) 646-2600; />
4
