Biện pháp thi công hệ thống cấp thoát nước
Bạn đang xem bản rút gọn của tài liệu. Xem và tải ngay bản đầy đủ của tài liệu tại đây (1.29 MB, 85 trang )
<span class="text_page_counter">Trang 2</span><div class="page_container" data-page="2">
<b>M</b><i><b>ỤC LỤC/ TABLE OF CONTENTS </b></i>
1. GI<i>ỚI THIỆU CHUNG/ GENERAL INFORMATION ... 4</i>
<i>1.1. Mục đích/ Purpose ... 4 </i>
1.2. Ph<i>ạm vi áp dụng/ Scope of application: ... 4 </i>
1.3. Thu<i>ật ngữ và định nghĩa/ Terminologies and definitions ... 4 </i>
<i>2.</i> N<i>ỘI DUNG/ CONTENTS ... 4</i>
2.1. Công tác chu<i>ẩn bị/ Preparation ... 4 </i>
<i>2.1.1. Bản vẽ/ Drawings ... 4 </i>
<i>2.1.2. Mặt bằng thi công/ Construction ground ... 5 </i>
<i>2.1.3. Điện nước tạm/ Temporary water and power... 5 </i>
<i>2.1.4. Dụng cụ thi công/ Construction tools ... 6 </i>
<i>2.1.5. Vật tư thi công/ Materials ... 6 </i>
<i>2.1.6. Vận chuyển và bảo quản vật tư/ Transport and material storage ... 7 </i>
<i>2.1.7. Nhân lực thi công/ Labor forces for construction ... 7 </i>
2.2. Bi<i>ện pháp thi công/ Method statement ... 7 </i>
<i>2.2.1. Biện pháp thi công đặt chờ ống Sleeve/ Method statement for laying sleeve ... 7 </i>
<i>2.2.2. Biện pháp thi công ống thoát nước/ Construction of drainage pipes ... 12 </i>
<i>2.2.3. Biện pháp thi công ống cấp nước/ Method statement of water supply pipes ... 29 </i>
2.3. Bi<i>ện pháp kỹ thuật đấu nối đường ống/ Technical solution of pipes connection ... 41 </i>
<i>2.3.1. Biện pháp kỹ thuật đấu nối ống thoát nước/ Technical solution for drainage pipes connection ... 41 </i>
<i>2.3.2. Biện pháp kỹ thuật đấu nối ống cấp nước – Ống PPR/ Technical solution for pipe fittings - PPR pipe ... 44 </i>
<i>2.3.3. Biện pháp kỹ thuật đấu nối ống cấp nước – ống thép/ Technical measures on supply pipes - steel pipes... 47 </i>
water-2.4. Giá <i>đỡ, đai treo/ Hangers, brackets ... 56 </i>
2.5. L<i>ắp đặt thiết bị/ Equipment installation ... 58 </i>
<i>2.5.1. Lắp đặt thiết bị vệ sinh/ Sanitary ware installation ... 58 </i>
<i>2.5.2. Lắp đặt bơm/ Pump installation ... 59 </i>
</div><span class="text_page_counter">Trang 3</span><div class="page_container" data-page="3">2.6. K<i>ỹ thuật thi công lắp đặt đường ống, thiết bị trạm XLNT/ Technical construction and </i>
<i>installation of pipes, equipment at sewage purification station ... 61 </i>
<i>2.6.1. Danh mục thiết bị, vật tư trạm XLNT/ The list of devices, materials at sewage purification station... 61 </i>
<i>2.6.2. Biện pháp thi công/ Method statements ... 63 </i>
3. <i>ĐIỀU KHOẢN THỰC HIỆN/ TERMS OF IMPLEMENTATION ... 84</i>
4. H<i>ƯỚNG DẪN/BIỂU MẪU ĐÍNH KÈM/ THE ATTACHED INSTRUCTION/FORM ... 84</i>
5. TÀI LI<i>ỆU THAM KHẢO/ REFERENCES ... 84</i>
<i>6.</i> THEO DÕI S<i>ỬA ĐỔI/ TRACK REVISIONS ... 84</i>
</div><span class="text_page_counter">Trang 4</span><div class="page_container" data-page="4"><b>1. GI</b><i><b>ỚI THIỆU CHUNG/ GENERAL INFORMATION 1.1.</b></i><b>M</b><i><b>ục đích/ Purpose </b></i>
- Đảm bảo lắp đặt theo đúng bản vẽ thiết kế và yêu cầu kỹ thuật của dự án.
<i>Ensure installation in accordance with the design drawings and technical requirements of the project. </i>
- Đảm bảo chất lượng và tối ưu trong quá trình thi công.
<i>Ensure quality and optimization during construction. </i>
<b>1.2. Ph</b><i><b>ạm vi áp dụng/ Scope of application: </b></i>
- Biện pháp thi công này là cơ sở để Ban điều hành cơng trường hồn thiện Biện pháp thi
cơng lắp đặt hệ thống cấp thoát nước theo yêu cầu thực tế của dự án.
<i>This method statement is the basis for the Project Management Board to complete the method of construction and installation of water supply and drainage system according to the actual requirements of the project. </i>
- Áp dụng đối với Phòng Kỹ thuật đấu thầu, Phòng QC, Phòng Bảo hành, Phòng T&C, Ban điều hành công trường.
- <i>Applied to Tender Department, QC Department, Warranty Department, T&C Department and Project Management Board </i>
<b>1.3. Thu</b><i><b>ật ngữ và định nghĩa/ Terminologies and definitions </b></i>
<b>2.1. Công tác chu</b><i><b>ẩn bị/ Preparation 2.1.1.Bản vẽ/ Drawings </b></i>
- Kỹ sư giám sát nhận bản vẽ thi công từ kỹ sư thiết kế, kiểm tra đầy đủ các bản vẽ mặt bằng
và chi tiết lắp đặt điển hình, catalogue đính kèm nếu cần thiết.
</div><span class="text_page_counter">Trang 5</span><div class="page_container" data-page="5">- <i>The supervising engineer shall receive construction drawings from the design engineer, inspecting all the site drawings, typical installation details and attached catalogs if necessary. </i>
- K<i>ỹ sư giám sát nghiên cứu bản vẽ và trao đổi rõ về phương án với kỹ sư thiết kế. </i>
<i>The supervising engineer shall study drawings and discuss the options with design engineers. </i>
- Kỹ sư giám sát giao bản vẽ cho các đội trưởng thi cơng và giải thích các điểm khúc mắc nếu
<i>có. </i>
<i>The supervising engineer will deliver drawings to construction captains and explain the unclear issues. </i>
<i><b>2.1.2.Mặt bằng thi công/ Construction ground </b></i>
- Kỹ sư giám sát, đội trưởng thi công khảo sát mặt bằng, điều kiện thi công.
<i>The supervising engineeer and foreman will survey construction site and conditions. </i>
- Nhận bàn giao mặt bằng từ BQLDA và các nhà thầu liên quan.
<i>Receive ground handover from PMU and the relevant contractors. </i>
- Kiểm tra việc cấp nguồn điện tạm, nước tạm, tới các vị trí thi cơng.
<i>Check the temporary supply source of power and water to the construction sites. </i>
- Điện tạm lấy từ các tủ điện tạm (có tại các tầng).
<i>Temporary power will be taken from temporary power cabinets (available on the floors). </i>
- Cấp nước tạm lấy từ điểm cấp nước tạm có tại các tầng. Nguồn nước tạm lấy nước sạch từ
mạng cấp nước sạch của thành phố.
<i>Temporary water supply from temporary water supply points on each floor. Temporary water supply for clean water is taken from the city's clean water supply network. </i>
- Thoát nước tạm: 4 tầng có một điểm thốt nước (vị trí tại tầng cắt trục thử kín).
<i>Temporary drainage: There is a common drainage point for four floors (location at the floor of air test shaft cutting). </i>
</div><span class="text_page_counter">Trang 6</span><div class="page_container" data-page="6"><i><b>2.1.4.Dụng cụ thi cơng/ Construction tools </b></i>
- Đưa máy móc, thiết bị, dụng cụ đồ nghề, vật tư được duyệt vào công trường - vị trí thi cơng.
<i>Put the approved equipment, devices, tools, kits and materials to construction site. </i>
<i>Hand cutting machine </i>
Hình 2.1.4-5: Máy khoan tay
<i>Hand welding machine </i>
Hình 2.1.4-6: Máy hàn nhiệt
<i>Heat-sealing machine </i>
<i><b>2.1.5.Vật tư thi công/ Materials </b></i>
- Kỹ sư giám sát hướng dẫn cho các đội trưởng chuẩn bị các vật tư thi công, đề xuất cấp vật tư
thi công theo đúng quy trình của Cơng ty.
</div><span class="text_page_counter">Trang 7</span><div class="page_container" data-page="7"><i>The supervising engineeer shall instruct the captains to prepare construction materials, recommending supply of construction materials in accordance with the process of company. </i>
<i><b>2.1.6.Vận chuyển và bảo quản vật tư/ Transport and material storage </b></i>
- Vận chuyển ống và các phụ kiện không được va đập mạnh, không được trầy xước.
<i>Transport of pipes and fittings must not be bumped or scratched. </i>
- Dùng người, hoặc xe nâng, palăng xích, tời để nâng ống và các thiết bị vào vị trí lắp đặt.
<i>Use human, or forklift, chain hoist, winch to lift pipes and equipment to the installation position. </i>
- Vật tư bảo quản ở kho phải có giá đỡ để đặt cao hơn mặt nền, tránh đặt trực tiếp xuống đất
sẽ dẫn đến cong ống và gây trầy xước ống.
<i>Warehouse materials must have racks which are higher than ground, avoiding placing directly to the ground because this will lead to make pipe curved and scratch the pipes </i>
- Vật tư thi công để trên công trường phải sắp xếp gọn gàng theo khu vực, phải có hộp để phụ
kiện, vật tư thao tác trên sàn phải để trên vải bạt, tránh bụi bẩn.
<i>Construction materials on the site must be neatly arranged according to the area, must have boxes for accessories, materials manipulated on the floor must be put on the canvas to avoid dirty. </i>
<i><b>2.1.7.Nhân lực thi công/ Labor forces for construction </b></i>
- Đội trưởng thi công phân chia đội mình thành các nhóm mỗi nhóm tối thiểu 4 người, trưởng
nhóm sẽ hướng dẫn và chỉ đạo cơng nhân thực hiện công việc.
<i>The foreman will divide his team into groups of at least four people, captain will lead and direct the workers to perform the works </i>
<b>2.2. Bi</b><i><b>ện pháp thi công/ Method statement </b></i>
<i><b>2.2.1.Biện pháp thi công đặt chờ ống Sleeve/ Method statement for laying sleeve </b></i>
- Việc thi công lỗ chờ xuyên sàn, xuyên dầm phụ thuộc và thi công song song với việc thi
công đan, buộc thép và đổ bê tông sàn của nhà thầu xây dựng, do vậy Nhà thầu phải cử cán
bộ kỹ thuật luôn bám sát tiến độ thi công phần kết cấu của nhà thầu Xây dựng để kết hợp
trong công tác đặt ống chờ.
</div><span class="text_page_counter">Trang 8</span><div class="page_container" data-page="8"><i>The construction of floor-penetrating or beam-penetrating pocket depends on the construction parallel to the construction of knitting, forcing steel and pouring floor concrete of the construction contractor; therefore, the contractor must appoint technical staffs to always get stick to construction progress of structural section of the construction contractor to incorporate into the laying of sleeve. </i>
- Các bước thực hiện như sau:
<i>The steps are as follows: </i>
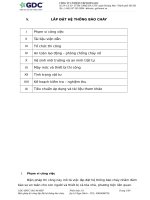
<b>STT No </b>
Gia công vật tư thi công lỗ mở xuyên sàn, dầm.
<i>Fabrication of construction materials for floor-penetrating or beam-penetrating pockets. </i>
Tiến hành cắt kích thước đường ống theo từng vị trí, bịt đầu ống.
<i>Cut the pipe size by each position, cover pipe ends. </i>
Kích thước và đường kính ống sleeve tương ứng với các thiết bị
Thốt xí, thốt sàn khu vệ sinh căn hộ, thốt sàn logia, phịng
rác, thốt chậu bếp, thốt máy giặt: D160, L=240mm.
<i>Lavatory drainage, floor drainage of apartment lavatory, loggia floor drainage, garbage room, kitchen sink drainage, washing machine drainage: D160, L=240mm. </i>
Cấp nước xuyên dầm: D48, L = chiều rộng dầm – 2cm
<b>Hawee </b>
</div><span class="text_page_counter">Trang 9</span><div class="page_container" data-page="9"><b>STT No </b>
<b>Công việc </b>
<b>Works </b>
<b>Nhà thầu </b>
<b>Contractor </b>
<i>Beam-penetrating water supply: D48, L = beam width - 2cm </i>
Thoát nước xuyên dầm: D110, L = chiều rộng dầm – 2cm
<i>Beam-penetrating drainage: D110, L = beam width - 2cm </i>
3
Xác định lấy dấu vị trí lỗ mở theo trục và dầm.
<i>Determine the position of marking pockets by shaft and beam. </i>
Vị trí của các lỗ mở được lấy dấu bằng sơn hoặc bật mực và
ghi đường kính ống cần lắp đặt tại vị trí đó để thuận tiện cho
việc thi cơng lắp đặt tránh tình trạng lắp nhầm ống có đường
kính khác vào vị trí đó.
<i>The position of pocket is marked by paint or toner and record the pipe diameter to be installed at that position to facilitate the installation and construction to avoid the wrong installation of pipes with different diameter to that position. </i>
Dùng máy chuyên dùng, thước để định vị vị trí ống
<i>Use specialized machines and ruler to position the pipe </i>
<b>Hawee </b>
4
Vận chuyển vật tư đã được gia công lên sàn cần thi công theo đúng khối lượng trong bản vẽ thi công đã được phê duyệt.
Tránh tình trạng thừa và thiếu vật tư khi thi công. Khi vận
chuyển không được quăng quật vật tư tránh tình trạng ống bị
vỡ.
<i>Transportation of processed materials to the construction floor in accordance with the volume in approved construction </i>
<b>Hawee </b>
</div><span class="text_page_counter">Trang 10</span><div class="page_container" data-page="10"><b>STT No </b>
5
Thi công lắp đặt lỗ mở xuyên sàn.
<i>Installation of floor-penetrating openings. </i>
Cố định ống vào sàn cốt pha bằng dây thép để sau này tránh
tình trạng khi đổ bê tơng làm xê dịch ống, bịt kín đầu trên ống
bằng băng keo hoặc vải bạt tránh tình trạng bê tơng lọt vào
trong ống khi đổ bê tông sàn.
<i>Fix the pipe to the reinforced floors by steel wire to avoid the displacement of pipes when pouring concrete, sealing the upper ends with tape or canvas to avoid the concrete entering into pipes when pouring floor concrete. </i>
Đầu dưới bịt bằng vải bạt để tránh bê tông lọt vào trong ống.
<i>Lower ends will be sealed by canvas to prevent the concrete from falling into the pipes. </i>
Quấn quanh thân ống lớp mút 5mm. Việc này được làm sau khi
Thi công lỗ mở xuyên dầm.
<i>Construction of beam-penetrating openings. </i>
Ống đặt xuyên dầm có chiều dài nhỏ hơn chiều rộng của dầm
2cm để thuận tiện cho việc thi công luồn ống vào dầm.
<i>Beam-penetrating pipe has the length less than 2cm width to </i>
<b>Hawee </b>
</div><span class="text_page_counter">Trang 11</span><div class="page_container" data-page="11"><b>STT No </b>
<b>Công việc </b>
<b>Works </b>
<b>Nhà thầu </b>
<b>Contractor </b>
<i>facilitate insertion into the beam. </i>
Sau khi luồn ống vào dầm căn chỉnh đúng cao độ so với cốt sàn
cốp pha theo bản vẽ thi công đã được phê duyệt và cố định 1 đầu ống thật chặt vào cốt pha thành dầm và lớp thép dầm bằng
thép 1 li đúng vị trí đã được xác định.
<i>After inserting the pipe into beam, must align correctly the level to formwork floor in accordance with the approved construction drawing and fix one end of pipe firmly into formwork of beam wall and beam steel layer equal to 1mm in the identified position. </i>
Chèn xốp (xốp đã được gia công tại kho công trường của nhà
thầu có đường kính lớn hơn đường kính ống 2cm và được quấn
băng keo thật kín) vào đầu cịn lại tránh tình trạng bê tơng lọt
khi thi cơng đổ bê tông vào khe hở giữa ống và thành dầm gây
ra việc khó thi cơng thơng lỗ mở sau này.
<i>Foam insertion (which has been machined at the contractor's site warehouse with a diameter larger than 2cm in pipe diameter and properly sealed with adhesive tape) on the other end to avoid the falling of concrete when pouring concrete into the gap between pipe and beams, causing to be difficult in construction of openings later on. </i>
7 Đan thép buộc thép lớp 1, 2.
<i>Knitting steel for forcing grade-1,-2 steel. </i>
<b>Xây Dựng </b>
<b>Building contractor </b>
8
Kỹ sư giám sát kiểm tra, nghiệm thu nội bộ.
<i>Supervising engineer shall perform internal inspection and acceptance. </i>
<b>Hawee </b>
</div><span class="text_page_counter">Trang 12</span><div class="page_container" data-page="12"><b>STT No </b>
Mời TVGS, CĐT nghiệm thu.
<i>Invite supervisor consultant and owner to accept. </i>
<b>Hawee </b>
Hình 2.2.1-1: Hình ảnh định vị ống chờ
<i>Picture of positioning sleeve </i>
<i><b>2.2.2.Biện pháp thi cơng ống thốt nước/ Construction of drainage pipes </b></i>
- Theo thiết kế của dự án hệ thống đường ống thoát nước dùng chủng loại ống u.PVC nối
bằng phương pháp dán keo. Biện pháp thi cơng đường ống thốt nhà thầu đưa ra như sau:
<i>According to the design of project of drainage pipeline system using u.PVC pipe connected by gluing method. The method statement of drainage pipe is given by the contractor as follows </i>
</div><span class="text_page_counter">Trang 13</span><div class="page_container" data-page="13"><small>Đặt ống</small>
<small>Đỗ vữa cố định</small>
<small>Lắp đặt ống thoát nhánhKiểm tra</small>
<small>Nghiệm thu lắp đặt</small>
<small>Nghiệm thu thử kín</small>
<small>Kết thúcĐạt</small>
<small>Kiểm tra</small>
<small>Kiểm tra</small>
<small>Kiểm tra</small>
<small>Kiểm traKhơng đạt</small>
<small>ĐạtKhông đạt</small>
<small>Không đạtKhông đạt</small>
</div><span class="text_page_counter">Trang 14</span><div class="page_container" data-page="14"><small>Đặt ống</small>
<small>Đỗ vữa cố định</small>
<small>Lắp đặt ống thoát nhánhKiểm tra</small>
<small>Nghiệm thu lắp đặt</small>
<small>Nghiệm thu thử kín</small>
<small>Kết thúcĐạt</small>
<small>Kiểm tra</small>
<small>Kiểm tra</small>
<small>Kiểm tra</small>
<small>Kiểm traKhơng đạt</small>
<small>ĐạtKhơng đạt</small>
<small>Khơng đạtKhơng đạt</small>
<b>S</b><i><b>ơ đồ Quy trình thi cơng đường ống thốt nước </b></i>
<small>Yes </small>
<small>Acceptance of installationYes </small>
<small>Yes Yes </small>
<small>Yes Yes </small>
<small>No No </small>
<small>No No </small>
<small>No No </small>
<small>No No </small>
<small>Air test acceptance</small>
<small>FinishInstall pipes for shaft </small>
<small>drainage, ventilation</small> <sup>Install branch drainage </sup><sub>pipes </sub><small>Pour fixed mortarInstall bracket of vertical </small>
<small>Lay pipes</small>
<small>Straighten vertical axis</small>
<small>Ground surveyEnter drawings</small>
</div><span class="text_page_counter">Trang 15</span><div class="page_container" data-page="15"><i><b>Diagram of construction process of drainage pipes </b></i>
<i>2.2.2.1.</i> C<i>ố định ống/ Fix the pipe </i>
- Kiểm tra chính xác vị trí các lỗ chờ theo bản vẽ thiết kế.
<i>Accurately check the position of pockets according to design drawing. </i>
- Sau khi định vị vị trí chính xác các lỗ chờ theo bản vẽ thiết kế, vệ sinh lỗ chờ sạch sẽ, đục
tẩy vát mép lỗ chờ.
<i>After correctly positioning the pocket according to design drawings, cleaning it, chiseling and beveling the edge of pocket. </i>
- Ống được gia công và bịt đầu sẵn tại kho gia cơng, thì nhóm cơng nhân sẽ cố định ống và
tạo ván khuôn sau đó đổ lớp vữa tự chảy để cố định ống.
<i>The pipes are machined and threaded at the workshop, the workers will fix the pipes and create formwork and then pour flow mortar to stabilize the pipe. </i>
- (Chú ý: Ống để chờ đặt cao hơn mặt hoàn thiện 25mm).
<i>(Note: Pipe will be placed higher than 25mm to finishing surface). </i>
- Ván khn được cố định vào sàn bằng vít nở (ván khuôn dùng tấm ván gỗ ép).
<i>Formwork is fixed to the floor by expansion screws (formwork using compressed wood panel). </i>
- Cách cố định ống: Sau khi cố định ván khuôn (được gia công đúng bằng đường kính ống),
quấn dây thép xung quanh ống phía dưới và buộc chặt ống buộc vào ván khuôn để ống
không bị trượt xuống trong q trình đổ chống thấm. Phần phía trên sàn vừa đổ lớp vữa vừa điềuchỉnh ống đúng vị trí cần lắp đặt.
<i>How to fix pipe: After fixing the formwork (properly machined according to diameter of pipe), wind the steel wire around the bottom tube and fasten the tube to the formwork so that it will not slide down during the waterproofing. The upper part of the floor has just been poured the mortar, we must adjust pipe to the right installment position. </i>
- Vữa định vị cổ ống dùng bê tông đá 1x2 mác 150 đổ tại chỗ.
<i>Mortar for positioning neck will be used with stone concrete, 1x2 grade 150, pouring place. </i>
</div><span class="text_page_counter">Trang 16</span><div class="page_container" data-page="16">in-- Đổ chống thấm: thuộc phạm vi nhà thầu khác thi công.
<i>Waterproofing: within the scope of other contractors. </i>
Hình 2.2.2.1-1: Minh họa cố định ống
<i>Illustration of fixing pipes </i>
<i>2.2.2.2.</i> L<i>ắp đặt ống nhánh và ống trục/ Installation of branch and shaft pipe </i>
- Sau khi chống thấm ống xuyên sàn và dóng trục, ta tiến hành lắp đặt ống nhánh và ống trục đứng.
<i>After waterproofing for floor-penetrating pipe and aligning the shaft, we will install branch pipe and vertical shaft pipe. </i>
- Trước khi lắp đặt phải vệ sinh sạch sẽ đầu ống sau đó bơi keo kết nối các đoạn ống với nhau. Điều chỉnh độ cân bằng của ống, điều chỉnh độ cao của ống tạo độ dốc bằng thước và nivo
theo đúng bản vẽ sau đó cố định ống vào giá đỡ.
<i>Before installation, clean the ends of pipe and then glue to connect pipe joints together. Adjust the tube balance, adjust the height of pipe to create a slope with ruler and nivo in accordance with the drawings and then fix the pipe to the racks. </i>
- Tiến hành bịt những đầu chờ.
<i>Proceed to cover starter bar. </i>
- Phần lắp đặt từng loại ống xem chi tiết tại Mục 2.3.3.
<i>For installation of each type of pipe, see details in Section 2.3.3. </i>
</div><span class="text_page_counter">Trang 17</span><div class="page_container" data-page="17"><i>2.2.2.3.</i> Nghi<i>ệm thu lắp đặt nội bộ/ Acceptance and internal installation </i>
- Khi các cơng tác thi cơng được hồn thành, ta sẽ tiến hành nghiệm thu nội bộ giữa BĐHCT,
kỹ sư giám sát và tổ đội thi công.
<i>When the construction works are completed, we will conduct internal acceptance between the Project Management Board, supervising engineeer and construction team. </i>
- Cơng tác nghiệm thu phần thốt nước phải tuân thủ theo những nguyên tắc cơ bản sau:
<i>The acceptance of drainage must comply with the following basic principles: </i>
Tồn bộ hệ thống thốt nước được cố định với kết cấu nhà bằng thanh treo, giá đỡ. Các
tuyến ống nhánh lắp đặt (với độ dốc theo bản vẽ thi cơng được duyệt) theo hướng thốt
nước vào trục đứng.
<i>The entire drainage system is fixed to the house structure by hanging bars or racks. The lines of branch pipes are installed (with slope according to the approved construction drawing) along with the drainage direction to vertical shaft. </i>
Các ống trục đứng được lắp đặt chặt chẽ bằng bộ đai ôm và giá đỡ, sau đó mới kết nối
với các đường ống nhánh thốt nước.
<i>The vertical shaft pipes are tightly fitted with a set of cradle and bracket, and then connected to drainage branch pipes. </i>
Kỹ sư giám sát phải kiểm tra lại độ chính xác hình học của tất cả các đầu chờ thoát nước
cho thiết bị. Các vị trí theo tọa độ ngang dọc theo đầu chờ không được sai lệch quá
10mm (đối với đầu chờ lắp thiết bị xí bệt sai lệch tối đa 5mm) so với chỉ định vị trí thiết
bị trong bản vẽ thi công đã được phê duyệt. Trường hợp phát hiện sai lệch, kỹ sư giám
sát phải yêu cầu nhóm trưởng sửa chữa trước khi tiến hành cơng tác thử nghiệm thử kín.
<i>The supervising engineer must check the geometry accuracy of all drainage starter bars for equipment. Placements in horizontal and vertical coordinates by starter bars shall not deviate more than 10 mm (for the starter bars for mounting lavatory equipment, maximum distortion is 5 mm) compared to the specified position of equipment in the approved construction drawing. In the case of distortion detection, the supervisory engineer must ask the foreman to correct problems before conducting air test. </i>
Tất cả các đầu ống trước và sau khi thi cơng đều được bịt kín bằng nút bịt ống tránh dị
vật lọt vào.
</div><span class="text_page_counter">Trang 18</span><div class="page_container" data-page="18"><i>All pre-and post-construction pipe ends will be sealed with a water stop. </i>
Ống uPVC và các phụ kiện được nối với nhau bằng keo dán ống chuyên dụng.
<i>uPVC pipes and fittings are connected by a specialized pipe glue. </i>
Kiểm tra tắc nghẽn: Tiến hành kiểm tra tắc nghẽn của trục bằng cách thả bi sắt nối với
dây cước từ điểm cao nhất.
<i>Check congestion: Check congestion of shaft by releasing iron balls attached to a wire from the highest point. </i>
<i>2.2.2.4.</i> Nghi<i>ệm thu thử kín nội bộ/ Internally air test acceptance </i>
<i>a.Quy định về thử kín/ Provisions on air test </i>
- Sau khi nhận được báo cáo hồn thành cơng việc của đội trưởng thi công. Kỹ sư giám sát
phải trực tiếp kiểm tra lại độ chính xác hình học của tất cả các đầu chờ cho đường thoát
nước. Các vị trí theo tọa độ ngang dọc theo đầu chờ sai lệch tối đa 10mm (đối với đầu chờ
lắp thiết bị xí bệt sai lệch tối đa 5mm) so với chỉ định vị trí thiết bị trong thiết kế và kích
thước thiết bị do nhà sản xuất cung cấp. Trường hợp phát hiện sai lệch, kỹ sư giám sát phải
yêu cầu nhóm trưởng sửa chữa kịp thời trước khi cơng tác thử nghiệm thử kín tiến hành.
<i>After receiving the work completion report of the foreman, the supervising engineer must check the geometry accuracy of all starter bars for drainage pipelines. Placements in horizontal and vertical coordinates by starter bars shall not deviate more than 10 mm (for the starter bars for mounting lavatory equipment, maximum distortion is 5 mm) compared to the specified position in design and device size provided by the manufacturer. In the case of distortion detection, the supervising engineer must ask the foreman to correct problems before conducting air test. </i>
- Toàn bộ các đầu chờ được bịt kín bằng đầu bịt nhựa và giữ nguyên các đầu bịt trong tồn bộ
q trình thi cơng.
<i>All of starter bars are sealed with plastic end seal and remain throughout the construction process. </i>
- Thử kín 4 tầng/1 lần.
<i>Air test for 4 floors/ once. </i>
- Các bước thử kín ống thốt của 4 tầng tiến hành như sau:
</div><span class="text_page_counter">Trang 19</span><div class="page_container" data-page="19"><i>Air test steps of drainage pipe of floor-4 are proceeded as follows: </i>
Bước 1: Sau khi nghiệm thu lắp đặt, phải bịt tất cả các đầu chờ lắp thiết bị tại các tầng
cần thử và bịt đầu ống trục tại tầng thấp nhất. Thực hiện thử kín theo các phương pháp
quy định tại Mục 2.2.2.4-b hoặc Mục 2.2.2.4-c dưới đây.
<i>Step 1: After commissioning, all starter bars are required to be sealed at the floor under test and seal the end of shaft pipe at the lowest floor. Conduct air test according to the methods specified in Section 2.2.2.4-b or Section 2.2.2.4-c below. </i>
Bước 2: Chuẩn bị dây dẫn nước để lấy nước từ đường ống cấp nước tạm của nhà thầu
tại tháp cần thử (lấy từ tầng bên trên tầng cần thử).
<i>Step 2. Prepare water conductor to collect water from the contractor's temporary water supply pipeline at the test tower (taken water from the floor above the floor under test). </i>
Bước 3: Xả nước vào vị trí ống trục (Vị trí quan sát cao hơn ít nhất 3000mm với các điểm cao nhất của đường ống cần thử).
<i>Step 3: Flush water into the shaft pipe position (observation position higher than at least 3000mm with the highest points of the pipeline under test). </i>
Bước 4: Kiểm tra độ sụt nước của đường ống (≤ 1% chiều cao của toàn bộ các tầng cần
thử là đạt yêu cầu). Tiến hành nghiệm thu nội bộ đạt yêu cầu sau đó mời TVGS, CĐT
nghiệm thu. (Theo TCVN 4519-1988, mục 4.13 và Quy chuẩn hệ thống cấp thốt nước
trong nhà và cơng trình, mục 7.11). Nếu có rỏ rỉ, tiến hành xả nước, sửa chữa rồi lại thử
lại từ đầu theo quy trình.
<i>Step 4. Check the water drop of the pipe (≤ 1% of the height of the entire floor under </i>
<i>test). If the internal acceptance is satisfactory, then invite supervising consultant and owner to accept. (According to TCVN 4519-1988, Section 4.13 and the Water Supply and Drainage System Standards for in-house and on site, Section 7.11). If there is leak, flush water, repair and then test again from the beginning according to the process. </i>
Bước 5: Mời BQLDA và TVGS nghiệm thu. Khi nghiệm thu sẽ chụp ảnh vị trí, tầng
cần nghiệm thu (có thể hiện bảng biểu thử). Sau đó niêm phong và chờ 6h sau khi kiểm
tra lại.
</div><span class="text_page_counter">Trang 20</span><div class="page_container" data-page="20"><i>Step 5. Invite PMU and supervising consultant to take over. Upon acceptance, take a photo of the location and floor under test (can show by the test table). Then seal and wait for 6h after re-inspection. </i>
Thời gian thử: 6h.
<i>Time of air test: 6 hours. </i>
Sau khi thử kín và được CĐT, TVGS nghiệm thu (được chấp nhận), nhà thầu tiến hành
xả nước.
<i>After air test and accepted by the owner and supervising consultant, the contractor will discharge water. </i>
Chú ý: Quá trình xả nước phải xả vào nơi quy định, tránh chảy vào sàn bê tơng, vào các
trục kỹ thuật (nối vịi mềm có van để xả vào nơi quy định).
<i>Notices: The process of discharge of water must be into the prescribed place, avoid flowing into concrete floor or into technical shafts (connected to soft hose with the discharge valve into the prescribed place). </i>
<i>b.Thử kín theo phương pháp dùng tấm tôn đặt tại Y thông tắc/ Air test according to the </i>
<i>method of using sheet metal placed in Y position of clearance </i>
- Các bước thử kín bằng phương pháp dùng tấm tơn đặt tại Y thông tắc như sau:
<i>The steps of air test according to the method of using sheet metal placed in Y position of clearance are as follow: </i>
Dùng 2 tấm tôn dày 2.5mm đặt tại vị trí tải Y thơng tắc của trục.
<i>Use two sheet metals of 2.5mm thick located at Y position of clearance of shaft. </i>
Đối với các vị trí thơng hơi chưa có nắp thơng tắc thì ta tiến hành lắp bổ sung để thử
theo phương pháp này.
<i>For ventilated locations without a flip-off cover, additional installation is required to test by this method. </i>
</div><span class="text_page_counter">Trang 21</span><div class="page_container" data-page="21">Hình 2.2.2.4-1: Chi tiết tấm tơn chặn nước thử kín
<i>Details on sheet metal for blocking air test water </i>
Hình 2.2.2.4-2: Hình ảnh minh họa tấm tôn
<i>Illustration of sheet metal </i>
Bơm silicone viền cạnh phía dưới của tấm tơn.
<i>Pump silicone for the bottom rims of the sheet metal. </i>
Đặt từng tấm tôn vào vị trí cửa thăm.
<i>Place each sheet metal into inspection doors. </i>
Bơm tiếp silicone viền cạnh phía trên của tấm tơn và vị trí giáp lai của 2 tấm tơn, u
cầu Silicone phải đảm bảo kín khít.
<i>Pump silicone for the top rims of the sheet metal and the adjoining position of two sheet metals, requiring Silicone to ensure air tightness. </i>
</div><span class="text_page_counter">Trang 22</span><div class="page_container" data-page="22"> Sau khi Silicone đã khô tiến hành đậy chắc chắn nắp thăm lại và tiến hành cho xả nước.
<i>After the silicone has been dried, cover firmly of inspection doors and then flush water. </i>
<b>Construction of air test by water-stop sheet metal at Y-position </b>
</div><span class="text_page_counter">Trang 23</span><div class="page_container" data-page="23">Hình 2.2.2.4-3: Thử kín bằng tấm tơn chặn nước tại vị trí Y thăm
<i>Air test by water-stop sheet metal at Y-position </i>
- Sau đó thực hiện nghiệm thu theo quy định.
<i>Then acceptance as prescribed. </i>
<i>c.Thử kín theo phương pháp dùng bóng hơi/ Air test by air balloon </i>
- Đối với các vị trí thơng hơi chưa có nắp thơng tắc thì ta tiến hành lắp bổ sung để thử theo
phương pháp này.
<i>For ventilated locations without a flip-off cover, additional installation is required to test by this method. </i>
- Chuẩn bị bóng hơi, ống mềm kết nối bóng hơi và máy nén khí.
<i>Preparation of air balloon, flexible pipes to connect air balloon and air compressor. </i>
<b> </b>
Hình 2.2.2.4-4: Minh họa bóng hơi
<i>Illustration of air ball </i>
Hình 2.2.2.4-5: Ống mềm để kết nối với bóng hơi
<i>Flexible pipes connected to air ball </i>
</div><span class="text_page_counter">Trang 24</span><div class="page_container" data-page="24">Hình 2.2.2.4-6: Máy nén khí
<i>Air compressor </i>
<b>Bảng 2.2.4-1: Quy định kích thước của bóng hơi thử kín </b>
<i><b>Regulate the size of air test air ball </b></i>
<b>Đường kính ống sử </b>
<b>dụng (mm) </b>
<i><b>Diameter of used pipe </b></i>
<i><b>air ball (mm) </b></i>
<b>Chiều dài </b>
<b>bóng chưa </b>
<b>bơm </b>
<b>(mm) </b>
<i><b>Length of non-pumped </b></i>
<i><b>air ball (mm) </b></i>
<b>Độ dày </b>
<b>thân bóng (mm) </b>
<i><b>Air ball body thickness </b></i>
- Đưa quả bóng hơi vào vị trí thông tắc của trục.
<i>Put air ball into the clearance position of shafts. </i>
</div><span class="text_page_counter">Trang 25</span><div class="page_container" data-page="25">Hình 2.2.2.4-7: Minh họa thử kín bằng bóng hơi
<i>Illustrate air test by air ball </i>
- Dùng máy nén khí để nén bóng hơi đến áp lực 2,5 kg/cm<small>2</small>.
<i>Use air compressed to compress the ball up to 2.5 kg/ cm <sup> 2 </sup> . </i>
- Sau khi nén bóng hơi tiến hành đổ nước vào trục ống thoát.
<i>After the air ball is compressed, pour water into the shaft of drainpipe. </i>
- Cách thực hiện và kiểm tra tương tự như phương pháp thử bằng phương pháp dùng tấm tơn đặt tại vị trí Y thơng tắc.
<i>The performance and test ways are similar to the test method of using sheet metal placed at Y-position. </i>
<i>2.2.2.5.</i> Nghi<i>ệm thu với BQLDA và TVGS/ Acceptance with PMU and Supervising consultant </i>
<i>a.Giám sát và kiểm tra chất lượng thi công/ Supervision and inspection of construction quality </i>
- Công tác giám sát và kiểm tra chất lượng rất quan trọng, kỹ sư giám sát luôn bám sát và kiểm
tra trong từng giai đoạn. Kiểm tra kích thước, khoảng cách, chất lượng thi công để đảm bảo
chất lượng, tiến độ đã được phê duyệt.
<i>Supervision and quality inspection are very important, the supervising engineer must monitor and inspect in each stage. Inspect size, distance, quality of construction to ensure quality and schedule which has been approved. </i>
- Ngồi cơng tác giám sát của kỹ sư giám sát, chúng tôi cịn bố trí một bộ phận QC độc lập của
công ty để giám sát chất lượng thi công của các tổ đội thi công.
</div><span class="text_page_counter">Trang 26</span><div class="page_container" data-page="26"><i>In addition to the supervision of supervising engineer, we also appoint an independent QC department to supervise the construction quality of construction team. </i>
<i>b.Nghiệm thu nội bộ/ Internal inspection </i>
- Khi các cơng tác thi cơng được hồn thành chúng tôi sẽ tiến hành nghiệm thu nội bộ giữa
BĐHCT, kỹ sư giám sát và tổ đội thi công.
<i>When the construction works are completed, we will conduct internal acceptance between the Project Management Board, supervising engineeer and construction team. </i>
- Cơng tác nghiệm thu phần thốt nước phải tuân thủ theo những nguyên tắc cơ bản sau:
<i>The acceptance of drainage must comply with the following basic principles: </i>
Các tuyến ống được lắp đặt theo cấu trúc: Ống đứng, ống nhánh, ống thông hơi và nắp
thông tắc.
<i>Pipe lines are installed according to the structure: Vertical pipes, branch pipes, ventilation pipes and flip-off cover. </i>
Tồn bộ hệ thống thốt nước được cố định với kết cấu nhà bằng thanh treo, thanh đỡ.
Các tuyến ống nhánh lắp đặt (với độ dốc theo bản vẽ thi cơng được duyệt) theo hướng
thốt nước vào trục đứng.
<i>The entire drainage system is fixed to the house structure by hanging bars or racks. The lines of branch pipes are installed (with slope according to the approved construction drawing) along with the drainage direction to vertical shaft. </i>
Hệ thống thơng hơi trong cơng trình có nhiệm vụ ổn định và cân bằng áp suất trong
mạng thốt nước bằng áp suất khí quyển làm tăng tốc độ và lưu lượng nước vận chuyển
trong tuyến ống, giảm tiếng ồn, thốt các khí độc và mùi hôi không cho xông ngược vào
trong nhà. Thơng hơi cho hệ thống thốt nước tổ chức theo các tuyến riêng. Các ống
trục và nhánh thoát nước được nối với đường ống trục thông hơi.
<i>The ventilation system in the work is responsible for stabilizing and balancing the pressure in the drainage network by atmospheric pressure, which increases the speed and flow of water transported in the pipeline, reduces noise, releases toxic gases and odors, preventing from getting back into the house. Ventilation for drainage system is organized according to individual routes. Drainage pipes and branches are connected to the pipelines of ventilation shaft. </i>
</div><span class="text_page_counter">Trang 27</span><div class="page_container" data-page="27"> Các ống trục đứng được lắp đặt chặt chẽ bằng bộ đai ơm và giá đỡ, sau đó mới đấu nối
vào các đường ống nhánh thoát nước của căn hộ.
<i>The vertical shaft pipes are tightly fitted with a set of cradle and bracket, and then connected to drainage branch pipes of apartment. </i>
Độ cao lắp đặt phụ kiện trên đường ống trục được tính tốn từ cốt chuẩn (Bàn giao từ
nhà thầu xây dựng, hoặc cốt được dẫn từ cốt bàn giao từ nhà thầu xây dựng) và được
kiểm tra theo cốt tầng đảm bảo khi lắp ghép giữa các đường ống trục và đường ống
nhánh thoát nước tầng vào nhau sẽ đạt độ chính xác cao.
<i>The height of installment of the pipe fitting is calculated from the standard cos (handover from the construction contractor, or cos is led from the handover by construction contractor) and inspected by floor cos to ensure the joining between shaft pipelines and drainage branch pipes to each other to able to achieve the high accuracy. </i>
- Tồn bộ các loại ống thốt của các tầng được đón ở phía dưới tức là nằm trong khoảng khơng
giữa trần bê tông và trần kỹ thuật tầng dưới. Do đó nhà thầu sử dụng đai treo ống chuyên
dụng và các thanh treo để cố định các đường thoát tầng. Đai treo được chế tạo sao cho thật
dễ dàng điều chỉnh độ cao thuận lợi cho việc lấy độ dốc.
<i>All drainage pipes of the floors are picked up at the bottom, ie in the space between the concrete ceiling and the bottom technical ceiling. Hence, the contractor uses specialized hangers and suspension bars to fix the escape routes. The suspension straps are made in a manner to be easy to adjust the height of the slope.</i>
Ống trục đứng được lắp đặt chặt chẽ bằng bộ đai ôm, sau đó mới đấu vào các đường ống nhánh thốt nước của Nhà vệ sinh.
<i>The vertical shaft pipes are tightly fitted with a set of cradle and bracket, and then connected to drainage branch pipes of lavatory. </i>
Nhà thầu sử dụng các thiết bị định vị chuyên dụng để xác định các đầu chờ ra thiết bị
sao cho vị trí tâm lỗ ống chờ lắp thiết bị có dung sai cho phép tối đa 5mm so với vị trí
chỉ định ghi trong hồ sơ thiết kế bản vẽ thi công.
<i>The contractor uses specialized positioning devices to determine the starter bars of device so that the center of pocket has a tolerance of up to 5mm compared to the position specified in the design profile of construction drawing. </i>
</div><span class="text_page_counter">Trang 28</span><div class="page_container" data-page="28"> Tất cả các đầu ống trước và sau khi thi công đều được bịt kín bằng nút bịt ống tránh các
vật lạ lọt vào.
<i>All pre-and post-construction pipe ends will be sealed with a water stop. </i>
Ống uPVC và các phụ kiện được nối với nhau bằng keo dán ống chun dụng. Q
trình bơi keo và dán ống xem chi tiết về cách lắp đặt ở phía dưới.
<i>uPVC pipes and fittings are connected by a specialized pipe glue. For gluing process, see details on installation below. </i>
Kiểm tra độ thẳng và hiện tượng tắc nghẽn: Tiến hành kiểm tra độ thẳng và hiện tượng
tắc nghẽn bằng cách dùng một quả cầu nhẵn có đường kính nhỏ hơn đường kính ống
15mm thả vào điểm cao nhất của đường ống.
<i>Inspect straightness and congestion: Inspect straightness and congestion by using a smooth sphere with diameter smaller than 15 mm in diameter and dropping to the highest point of the pipe. </i>
Nếu ống hoặc các phụ kiện ống sau khi thi công bị hỏng phải được cắt bỏ đoạn ống
hỏng, phụ kiện hỏng để thay thế bằng ống và phụ kiện mới khác.
<i>If the pipes or pipe fittings are damaged after the construction, then damaged pipes or fittings should be cut off to replace with new pipes and other new fittings. </i>
<i>c.Nghiệm thu CĐT và TVGS để triển khai các công việc tiếp theo/ Acceptance by the Owners </i>
<i>and Supervising consultant to carry out the next works </i>
- Sau khi hoàn thành tất cả các công việc thi công chúng tôi tiến hành mời TVGS, CĐT
nghiệm thu. Trước khi mời TVGS, CĐT nghiệm thu, các công việc đều đã được nghiệm thu
nội bộ của nhà thầu giữa kỹ sư giám sát và tổ đội thi công đảm bảo thi công đúng theo bản
vẽ thiết kế thi công đã được phê duyệt.
<i>After completing all construction works, we will invite supervising consultant and owner for acceptance. Prior to invite acceptance to the supervising consultant and owner, the works must be internally accepted by the contractor between the supervising engineeer and construction team to ensure the construction in accordance with the approved construction design drawings. </i>
- Nếu có sai sót cần chỉnh sửa, nhà thầu sẽ tiến hành sửa và ghi rõ tiến độ thực hiện theo
Defect list của CĐT, TVGS.
</div><span class="text_page_counter">Trang 29</span><div class="page_container" data-page="29"><i>If any errors need to be corrected, the contractor will proceed to correct and record the implementation progress according to the Defect list of owners, supervising consultant. </i>
<i><b>2.2.3.Biện pháp thi công ống cấp nước/ Method statement of water supply pipes </b></i>
</div><span class="text_page_counter">Trang 31</span><div class="page_container" data-page="31"><b>Sơ đồ quy trình thi cơng đường ống cấp nước </b>
<small>Check </small> <sub>Check </sub><small>Install bracket of </small>
<small>vertical shaft </small>
<small>Check Check Cutting and punching </small>
<small>wall </small>
<small>Install water supply pipe of vertical shaft </small>
<small>Check Check Plastering points </small>
<small>Connect branch pipes to shaft </small>
<small>Acceptance of installation Air test acceptance Finish </small>
<small>No No No </small>
<small>No </small>
<small>Check No </small>
<small>No No No </small> <sub>No </sub><small>No No </small>
<small>Yes </small>
<small>Yes Yes Yes Yes </small>
<small>Install pipeYes </small>
<small>Yes </small>
</div><span class="text_page_counter">Trang 32</span><div class="page_container" data-page="32"><i><b>Diagram of construction process of water supply pipes </b></i>
<i>2.2.3.1.</i> D<i>ẫn cốt, lấy dấu, bật mực vị trí lắp đặt (Vị trí cắt đục, vị trí khoan)/ Cos lead, mark, </i>
<i>toner of installation location (punching position, drilling position) </i>
- Tổ trưởng đọc bản vẽ và điều chỉnh máy đánh dấu Laser, dẫn cốt từ điểm chuẩn đến vị trí thi
cơng.
<i>The foreman will read drawings and adjust the laser marking machine, performing cos lead from the benchmark to construction site. </i>
- Cos hồn thiện nhà vệ sinh, phịng giặt thấp hơn cos phịng khách 15mm, cos hồn thiện
logia thấp thơn cos phòng khách 20mm.
<i>Cos for completion of lavatory, laundry room must be lower than 15mm to living room, cos for completion of loggia must be lower than 20mm to cos of living room. </i>
- Bật mực, lấy dấu các vị trí trên trần để bắt thanh treo ống.
<i>Turn on the ink, mark the ceiling positions to catch the pipe hanging bar. </i>
- Bật mực và đánh dấu vị trí cắt đục tường để lắp đặt ống.
<i>Turn on the ink and mark the wall cutter position to install the tube. </i>
<i>2.2.3.2.</i> C<i>ắt đục tường/ Cut walls </i>
Hình 2.2.3.2-1: Minh họa cắt đục tường
<i>Demonstration of cutting walls </i>
- <i>Đối với trường hợp 1 ống: Mạch cắt trên tường vách rộng hơn đường kính ống 10mm (Cắt </i>
<i>rộng hơn mép ngoài của ống là 5 mm – một bên). </i>
</div><span class="text_page_counter">Trang 33</span><div class="page_container" data-page="33"><i>In case of 1 pipe: Circuit cut on the wall with 10mm wider than the diameter of the pipe (Cutting is wider than the outer edge of the pipe 5 mm - one side). </i>
- Đối với trường hợp 2 ống trở lên: Mạch cắt trên tường vách rộng hơn khoảng cách giữa 2
mép ngoài cùng c<i>ủa các ống 10mm (Cắt rộng hơn mép ngoài của 2 ống ngoài cùng là 5 mm </i>
<i>– một bên). </i>
<i>In case of 2 or more pipes: Circuit cut on the wall with 10mm wider than the distance between the two outer edges of pipes (Cutting is 5mm wider than the outer edge of two outer pipes - one side). </i>
- Yêu cầu phải đóng lưới (để chống nứt vữa khi trát tường) trước khi hồn thiện tường các vị
trí như sau:
<i>It is required to close the mesh (to prevent from cracked mortar when plastering the wall) before finishing the wall with positions as follow: </i>
Vị trí cắt đục, đi hai đường ống trở lên .
<i>Cutting position, go from two or more tubes. </i>
Vị trí các ống giao cắt nhau, vị trí phụ kiện kết nối van.
<i>The position of pipes intersects one another, the position of valve connection fittings. </i>
<i>2.2.3.3.</i> Chôn <i>ống âm tường và lắp đặt giá đỡ/ Recess pipes and install brackets </i>
- Sau khi c<i>ắt đục sẽ thi công ống âm tường (dùng đinh đóng cố định và dây thép buộc ống vào </i>
Tùy theo thực tế thi công tại công trường, có thể có những trường hợp giá đỡ được chế
tạo khác biệt nhằm đảm bảo tính khả thi, an tồn nhưng vẫn đảm bảo kỹ thuật thi cơng.
<i>Depending on the actual construction site, there may be cases where the brackets are made differently to ensure the feasibility, safety but still ensure construction technique. </i>
Tại những vị trí cút, chếch có thể bổ sung giá đỡ gần nhau hơn quy định nhằm đảm bảo
tính cố định của hệ thống.
</div><span class="text_page_counter">Trang 34</span><div class="page_container" data-page="34"><i>At the elbow positions, can provide additional brackets that are closer to each other to ensure the stability of the system. </i>
Hai ống trở lên đi song song có cao độ đáy ống bằng nhau thì dùng chung một bộ giá đỡ
cho nhiều ống.
<i>Two or more parallel pipes with equal height of bottom should use the same bracket for multiple pipes. </i>
Sau đó nhà thầu tiến hành trát hoàn trả bề mặt tường cho bên xây dựng. Đồng thời với
việc hoàn trả bề mặt tường, nhà thầu tiến hành cân chỉnh các họng cấp đầu chờ thiết bị
theo đúng thông số kỹ thuật bằng thước và Nivo.
<i>The contractor then conducts to plaster to return the side wall for construction. And also with the return of the side wall, the contractor performs to calibrate the top level throat waiting for the device according to the specifications of the ruler and Nivo. </i>
<i>2.2.3.4.</i> Nghi<i>ệm thu lắp đặt nội bộ/ Acceptance Internal installation </i>
- Khi các cơng tác thi cơng được hồn thành thì sẽ tiến hành nghiệm thu nội bộ giữa BĐHCT,
kỹ sư giám sát và Tổ đội thi công.
<i>When the construction works are completed, we will conduct internal acceptance between the Project Management Board, supervising engineeer and construction team. </i>
- Công tác nghiệm thu phần cấp nước phải tuân thủ theo những nguyên tắc cơ bản sau:
<i>The acceptance of drainage must comply with the following basic principles: </i>
Các tuyến ống được lắp đặt theo cấu trúc: Ống đứng, ống căn hộ, ống hành lang.
<i>Pipe lines are installed according to the structure: Standpipe, apartment pipe, corridor pipe. </i>
Toàn bộ hệ thống cấp nước được cố định với kết cấu nhà bằng thanh treo, thanh đỡ.
Toàn bộ đường ống phải lắp đặt đúng cao độ theo thiết kế.
<i>The entire drainage system is fixed to the house structure by hanging bars or racks. The entire pipelines must be installed to the right height according to the design. </i>
Các ống trục đứng được lắp đặt chặt chẽ bằng bộ đai ôm và giá đỡ, sau đó mới đấu nối
vào các đường ống nhánh cấp nước vào căn hộ.
</div><span class="text_page_counter">Trang 35</span><div class="page_container" data-page="35"><i>The vertical shaft pipes are tightly fitted with a set of cradle and bracket, and then connected to drainage branch pipes of apartment. </i>
Nhà thầu kiểm tra kích thước đầu chờ thiết bị, dung sai cho phép tối đa 5mm so với vị
trí chỉ định ghi trong hồ sơ thiết kế bản vẽ thi công.
<i>The contractor inspects the equipment's terminal and the tolerance for maximum of 5mm compared to position specified in the file of designing construction drawing. </i>
Tất cả các đầu ống trước và sau khi thi công đều được bịt kín bằng nút bịt ống tránh các
dị vật lọt vào.
<i>All pre-and post-construction pipe ends will be sealed with a water stop. </i>
Ống cấp nước và các phụ kiện làm bằng PPR được nối với nhau bằng phương pháp hàn
nhiệt chuyên dụng. Quá trình lắp đặt ống xem chi tiết về cách lắp đặt ở phía dưới.
<i>Water pipes and fittings made of PPR are connected by means of specialized heat welding. See process of pipe installation for more details about the installation as follow. </i>
<i>2.2.3.5.</i> Nghi<i>ệm thu thử áp nội bộ/ Acceptance of internal installation </i>
- Sau khi lắp đặt hoàn thiện và các nút bịt được lắp vào các đầu chờ thiết bị sẽ tiến hành thử áp
lực (Thử 1 tầng 1 lần - Tất cả các căn hộ) .
<i>After the installation is completed and caps are inserted into terminals of the equipment that will conduct to pressure testing (Test every 1 floor - All apartments). </i>
- Thời gian thử: 12h.
<i>Time of air test: 12h </i>
- Quy trình thử áp lực (nhằm thử độ kín khít của hệ thống ống, phụ kiện và van (nếu có)).
<i>Pressure Test Procedure (to test the tightness of the piping system, fittings and valves (if any). </i>
- Chuẩn bị:
<i>Preparation: </i>
Lắp đặt nút bịt, mặt bích đặc, thiết bị đường ống làm kín hệ thống đường ống khu vực
cần thử.
</div><span class="text_page_counter">Trang 36</span><div class="page_container" data-page="36"><i>Installation of pipe caps, flanges, equipment to cover pipe system of the area needs to be tested. </i>
Nguồn nước phục vụ cho công tác thử áp lực: nguồn nước lấy từ nguồn nước tạm đầu
tầng và bơm vào bể chứa sau đó dùng máy nén áp để bơm vào hệ thống đường ống.
<i>Water source for pressure testing: Water source is taken from the temporary water of the first floor and pumped into the reservoir and then use the compress to pump in to pipe system. </i>
Máy nén áp suất: Bằng nước có cơng suất phù hợp, bơm thử áp bằng piston có thể tăng được 12kg/cm<small>2</small>.
<i>Pressure compressor: By water of suitable capacity, piston pressure tester can increase 12kg/cm<small>2 </small> . </i>
Đồng hồ áp lực (đã được kiểm định) + van bi D15.
<i>Pressure Gauge (Verified) + Ball valves D15. </i>
Biển cảnh báo “ Nguy hiểm đường ống có áp lực cao”.
<i>Warning sign “Be danger of high pressure pipeline”. </i>
- Thử áp lực đường ống:
<i>Testing of pipeline pressure: </i>
Thử áp lực đường ống theo nguyên tắc: PTA = 1.5x Plv
<i>Testing of pipe pressure in principle: PTA = 1.5x Plv </i>
Plv: Áp suất làm việc tại vị trí thử: Plv = 2,5 ÷ 4at
<i>Plv: Working pressure at the test site: Plv = 2,5 ÷ 4at </i>
Giới hạn áp suất thử áp: PTA = 6÷ 8at.
<i>Limit of pressure testing: PTA = 6 ÷ 8at. </i>
Sau khi giảm dần về bằng mức áp suất thử áp. Áp suất được duy trì trong thời gian 12
giờ nếu suy hao áp ≤ 5% áp suất thử thì đạt yêu cầu.
<i>After gradually reducing the pressure. Pressure maintained for 12 hours if pressure attenuation ≤ 5% of testing pressure is that satisfied. </i>
</div><span class="text_page_counter">Trang 37</span><div class="page_container" data-page="37"> Sau khi thử áp và được CĐT, TVGS nghiệm thu (chấp nhận) nhà thầu tiến hành xả
nước và duy trì áp lực 3at (Bao gồm van cổng, đồng hồ) trên hệ thống ống nước đã thử
nhằm kiểm sốt sự rị rỉ của đường ống tránh nhà thầu khác tác động vào hệ thống ống đã nghiệm thu.
<i>After testing and approved (accepted) by the owner, the supervisor that the contractor conducts to discharge and maintain the 3at pressure (including gate valve, meter) on the pipeline to control the leak of pipeline to prevent other contractors from impacting the tested piping system. </i>
<b>Chú ý: Quá trình x</b>ả nước phải xả vào nơi quy định tránh chảy vào sàn bê tông. (Nối vịi
mềm có van để xả vào nơi quy định).
<i><b>Notice: The discharge of water must be into the prescribed place to avoid flowing into </b></i>
<i>the concrete floor. (Connect the soft hose with the valve to discharge into the specified place). </i>
- Tổ chức nghiệm thu công tác thử áp lực:
<i>Organize the acceptance of testing pressure: </i>
Mời BQLDA và TVGS nghiệm thu. Khi nghiệm thu sẽ chụp ảnh vị trí, tầng cần nghiệm
thu (Có thể hiện bảng biểu thử). Sau đó niêm phong và chờ 12h sau kiểm tra lại.
<i>Invite PMU and supervising consultant to take over. Upon acceptance, take a photo of the location and floor under test (can show by the test table). Then seal and wait for 12h after re-inspection. </i>
<i>2.2.3.6.</i> Trám vá hoàn thi<i>ện tường/ Fulfill the wall </i>
- Sau khi thử áp lực đạt yêu cầu tiến hành trám vá hồn thiện tường và tiến hành các cơng tác
tiếp theo.
<i>After the pressure test is passed that should plaster and fulfill the wall, carry out the next tasks. </i>
- Sau khi hoàn thành lắp đặt ống âm tường ta tiến hành trát bằng mặt gạch hoặc khơng vượt
q mốc trát hồn thiện, sau đó đóng lưới (đối với những vị trí đặt 2 ống cạnh nhau trở lên)
và trát hoàn thiện trả mặt bằng.
</div><span class="text_page_counter">Trang 38</span><div class="page_container" data-page="38"><i>After completing the installation of the recessed pipe, we shall apply the plaster or not to exceed the finishing mark, then close the mesh (for the position of placing two pipes or more) and plaster to return the surface. </i>
<i>2.2.3.7.</i> Giám sát và ki<i>ểm tra chất lượng thi công/ Supervision and inspection of construction </i>
<i>quality </i>
- Công tác giám sát và kiểm tra chất lượng rất quan trọng, kỹ sư giám sát luôn bám sát và kiểm
tra trong từng giai đoạn. Kiểm tra kích thước, khoảng cách, chất lượng thi công để đảm bảo
chất lượng, tiến độ đã được phê duyệt.
<i>Supervision and quality inspection are very important, the supervising engineer must monitor and inspect in each stage. Inspect size, distance, quality of construction to ensure quality and schedule which has been approved. </i>
- Ngoài công tác giám sát của kỹ sư giám sát, chúng tơi cịn bố trí một Bộ phận QC độc lập
của công ty để giám sát chất lượng thi công của các tổ đội thi công.
<i>In addition to the supervision of supervising engineer, we also appoint an independent QC department to supervise the construction quality of construction team. </i>
<i>2.2.3.8.</i> Nghi<i>ệm thu nội bộ/ Internal inspection </i>
- Khi các công tác thi công được hồn thành chúng tơi sẽ tiến hành nghiệm thu nội bộ giữa
BĐHDA, kỹ sư giám sát và tổ đội thi công.
<i>When the construction works are completed, we will conduct internal acceptance between the Project Management Board, supervising engineeer and construction team. </i>
- Công tác nghiệm thu phần cấp nước phải tuân thủ theo những nguyên tắc cơ bản sau:
<i>The acceptance of drainage must comply with the following basic principles: </i>
Các tuyến ống được lắp đặt theo cấu trúc: Ống đứng, ống căn hộ, ống hành lang.
<i>Pipe lines are installed according to the structure: Standpipe, apartment pipe, corridor pipe. </i>
Tồn bộ hệ thống thốt nước được cố định với kết cấu nhà bằng thanh treo, thanh đỡ.
Các tuyến ống nhánh lắp đặt (với độ dốc theo bản vẽ thi công được duyệt) theo hướng
thoát nước vào trục đứng.
</div><span class="text_page_counter">Trang 39</span><div class="page_container" data-page="39"><i>The entire drainage system is fixed to the house structure by hanging bars or racks. The lines of branch pipes are installed (with slope according to the approved construction drawing) along with the drainage direction to vertical shaft. </i>
Hệ thống thơng hơi trong cơng trình có nhiệm vụ ổn định và cân bằng áp suất trong
mạng thốt nước bằng áp suất khí quyển làm tăng tốc độ và lưu lượng nước vận chuyển
trong tuyến ống, giảm tiếng ồn, thốt các khí độc và mùi hơi không cho xông ngược vào
trong nhà. Thông hơi cho hệ thống thoát nước tổ chức theo các tuyến riêng. Các ống
trục và nhánh thoát nước được nối với đường ống trục thông hơi.
<i>The ventilation system in the work is responsible for stabilizing and balancing the pressure in the drainage network by atmospheric pressure, which increases the speed and flow of water transported in the pipeline, reduces noise, releases toxic gases and odors, preventing from getting back into the house. Ventilation for drainage system is organized according to individual routes. Drainage pipes and branches are connected to the pipelines of ventilation shaft. </i>
Các ống trục đứng được lắp đặt chặt chẽ bằng bộ đai ôm và giá đỡ, sau đó mới đấu nối
vào các đường ống nhánh thoát nước của căn hộ.
<i>The vertical shaft pipes are tightly fitted with a set of cradle and bracket, and then connected to drainage branch pipes of apartment. </i>
Độ cao lắp đặt phụ kiện trên đường ống trục được tính tốn từ cốt chuẩn (Bàn giao từ
nhà thầu xây dựng, hoặc cốt được dẫn từ cốt bàn giao từ nhà thầu xây dựng) và được
kiểm tra theo cốt tầng đảm bảo khi lắp ghép giữa các đường ống trục và đường ống
nhánh thoát nước tầng vào nhau sẽ đạt độ chính xác cao.
<i>The height of installment of the pipe fitting is calculated from the standard cos (handover from the construction contractor, or cos is led from the handover by construction contractor) and inspected by floor cos to ensure the joining between shaft pipelines and drainage branch pipes to each other to able to achieve the high accuracy. </i>
Toàn bộ các loại ống thốt của các tầng được đón ở phía dưới tức là nằm trong khoảng
không giữa trần bê tông và trần kỹ thuật tầng dưới. Do đó nhà thầu sử dụng đai treo ống
chuyên dụng và các thanh treo để cố định các đường thoát tầng. Đai treo được chế tạo
sao cho thật dễ dàng điều chỉnh độ cao thuận lợi cho việc lấy độ dốc.
</div><span class="text_page_counter">Trang 40</span><div class="page_container" data-page="40"><i>All drainage pipes of the floors are picked up at the bottom, ie in the space between the concrete ceiling and the bottom technical ceiling. Hence, the contractor uses specialized hangers and suspension bars to fix the escape routes. The suspension straps are made in a manner to be easy to adjust the height of the slope. </i>
Ống trục đứng được lắp đặt chặt chẽ bằng bộ đai ơm, sau đó mới đấu vào các đường ống nhánh thoát nước của Nhà vệ sinh.
<i>The vertical shaft pipes are tightly fitted with a set of cradle and bracket, and then connected to drainage branch pipes of lavatory. </i>
Nhà thầu sử dụng các thiết bị định vị chuyên dụng để xác định các đầu chờ ra thiết bị
sao cho vị trí tâm lỗ ống chờ lắp thiết bị có dung sai cho phép tối đa 5mm so với vị trí
chỉ định ghi trong hồ sơ thiết kế bản vẽ thi công.
<i>The contractor uses specialized positioning devices to determine the starter bars of device so that the center of pocket has a tolerance of up to 5mm compared to the position specified in the design profile of construction drawing. </i>
Tất cả các đầu ống trước và sau khi thi công đều được bịt kín bằng nút bịt ống tránh các
vật lạ lọt vào.
<i>All pre-and post-construction pipe ends will be sealed with a water stop. </i>
Ống uPVC và các phụ kiện được nối với nhau bằng keo dán ống chuyên dụng. Q
trình bơi keo và dán ống xem chi tiết về cách lắp đặt ở phía dưới.
<i>uPVC pipes and fittings are connected by a specialized pipe glue. For gluing process, see details on installation below. </i>
Kiểm tra độ thẳng và hiện tượng tắc nghẽn: Tiến hành kiểm tra độ thẳng và hiện tượng
tắc nghẽn bằng cách dùng một quả cầu nhẵn có đường kính nhỏ hơn đường kính ống
15mm thả vào điểm cao nhất của đường ống.
<i>Inspect straightness and congestion: Inspect straightness and congestion by using a smooth sphere with diameter smaller than 15 mm in diameter and dropping to the highest point of the pipe. </i>
- Nếu ống hoặc các phụ kiện ống sau khi thi công bị hỏng phải được cắt bỏ đoạn ống hỏng,
phụ kiện hỏng để thay thế bằng ống và phụ kiện mới khác.
</div>