Sams Teach Yourself Microsoft Expression Web 3 in 24 Hours- P7 pps
Bạn đang xem bản rút gọn của tài liệu. Xem và tải ngay bản đầy đủ của tài liệu tại đây (834.22 KB, 30 trang )
ptg
162
HOUR 10: Bringing Style to Substance with Cascading Style Sheets
A. One em is the width of the letter m that is defined as standard in the browser
the user uses. So 12 em is the width of 12 m’s next to one another, thus the
huge size. Because em is a relative size measurement, there is no correct
answer to this question. Depending on what font you use, a 12 px equivalent is
usually between 0.8 and 1 em. To get the perfect size you need to do a bit of
trial and error. Just remember that when dealing with ems, you should always
use decimals rather than full integers.
Q. I followed the tutorial and applied a class to some text but nothing happened!
A. If you created a class and nothing happened, one of two things went wrong:
Either you didn’t actually create the style (by accidentally pressing Cancel per-
haps?) or the style wasn’t applied to the content. First check if the style is listed
in the Manage Styles panel. If it is, click on the element you wanted to style,
and check the Quick Tag Selector to see if the correct selector or class is applied.
If you created a new class and the selector says only
<p> or <h1>, you need to
apply the class manually by selecting the selector and clicking on the class in
the Apply Styles panel.
Q. When I select the different colors from the drop-down color options, they are
replaced by a weird code starting with # and followed by six letters and num-
bers. What is this?
A. When working with colors in the digital realm, every shade has a distinct
hexadecimal code preceded by #. That way the color is interpreted the same
way by all applications whether it is an image editor, web browser, or word
processor. In CSS, you set colors by using their hexadecimal codes.
Workshop
The Workshop has quiz questions and exercises to help you put to use what you have
just learned. If you get stuck, the answers to the quiz questions are in the next sec-
tion. But try to answer them first. Otherwise you’ll be cheating yourself.
Quiz
1. What part of the document does a CSS style apply to?
2. What happens if several styles with different values for the same attributes are
applied to the content?
From the Library of Lee Bogdanoff
ptg
Workshop
163
Answers
1. CSS styles are applied to the content within their respective tags; that is to say,
a
p style will be applied to any content within the <p> tags, an a style will be
applied to any content within a
<a> tag, and so on. You can also create spans
around content and apply styles to them as well.
2. If several different attribute values are applied to the same content from differ-
ent styles, the browser goes through the cascade and selects the attribute that is
furthest down the line or is most specific. In most cases, this means the style
that is attached to the closest tag.
Exercise
Two other selectors in the default.html page were not styled in the earlier examples:
the paragraph and the blockquote. Use the techniques you learned in this hour to cre-
ate a
p style and a blockquote style, and apply some different attributes to them.
Remember that because the font-family has already been set in the body style, you
don’t need to change it. Try experimenting with background colors, borders, and text
decorations and explore the many different options available under the Font category.
From the Library of Lee Bogdanoff
ptg
This page intentionally left blank
From the Library of Lee Bogdanoff
ptg
Introduction
165
HOUR 11
Getting Boxed In, Part 2:
Knee Deep in CSS
What You’ll Learn in This Hour:
.
How to create and apply classes to individual tags
.
How to use divs to define sections of content
.
How to apply classes and IDs to divs to style sections of content
.
How to use pseudoclasses to give visual cues to the visitor
.
How the box model works and how to use it to create layouts
Introduction
In the last hour, you learned how to use Cascading Style Sheets (CSS) to style text
content. But that’s just one small part of what CSS can do. You realize the true
strength of the CSS styling language only when you use it not only to style individual
elements but also to define different sections within a page that have different styles,
and to create and manage layouts and position content.
CSS lets you build a hierarchy of the styles applied to different portions of your page
so that a paragraph in one part of the page can have a completely different style
from a paragraph in another part of the page. Likewise, CSS can organize content
within the page so that certain content appears to the left or right of other content
even though it is not in a table.
To understand how CSS operates as a layout tool, you first need to understand the
box model. In this hour, you explore the box model to see how it interacts with your
content. Through this knowledge you get a firm understanding of how CSS puts
everything in boxes and how you can use these boxes to create advanced and visu-
ally stunning layouts without destroying the markup.
From the Library of Lee Bogdanoff
ptg
166
HOUR 11: Getting Boxed In, Part 2: Knee Deep in CSS
CSS Classes—Because Not All Content
Should Be Treated Equally
In Hour 10, “Bringing Style to Substance with Cascading Style Sheets,” you learned
how to apply styles to a page using the standard tag selectors such as
p, h1, h2, and
a. But these styles applied to the entire page, so you had to make an inline style to
change the style of just one section of the page. This is an acceptable solution if the
change happens only once, but if you plan to use this special style again somewhere
else in the page, this approach quickly becomes cumbersome. You need a way to
group the content into separate classes so that each section can get its own style even
though the same selectors define them all—enter CSS classes.
Create a Class and Apply It to the Content
A CSS class defines a subsection of the content that has its own set of styles. An
example illustrates this best: Right now there is no clear separation between the
beginning part of the default.html page and the rest of the content. To remedy this,
you can make a class to style this portion of the page:
1. With the default.html page open in Design view, place the cursor inside the
first paragraph to select it. In the Apply Styles task pane, right-click the inline
style you created in Hour 10, and select Remove Inline Style from the context
menu. This returns the paragraph to its original appearance.
2. Click the New Style button and change the Selector name to
.abstract
.
The punctuation mark in front of the name defines this style as a class.
3. In the Font category, set font-family to Times New Roman, Times, serif;
font-size to 1.2em; font-weight to bold; and font-style to italic.
In the Block category, set
text-align to justify.
4. In the Border category, uncheck all the Same for All Boxes and change the
bottom values to solid, 2px, and #000000 (black). Click OK to create the new
style class.
5. To apply the new class to an existing element within the page, place the selec-
tor on the element; in this case the first paragraph, and click the
.abstract
class in the Apply Styles task pane.
When you click the first paragraph after applying the new class, you can see that the
p tag in the Quick Tag Selector has changed to include the new class. It now reads
<p.abstract>, as shown in Figure 11.1.
From the Library of Lee Bogdanoff
ptg
CSS Classes—Because Not All Content Should Be Treated Equally
167
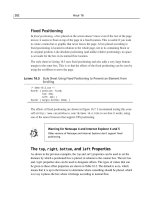
FIGURE 11.1
The .abstract
style applied to
the first para-
graph in
default.html
Using the method described here to apply a new class results in the class being
applied to the last tag in the chain of the selected items. This means that when you
have grouped objects such as lists, you need to pick which tags you want to apply the
class to. If you click one of the list objects on the top of the page and apply the class, it
affects only the selected list item. If you highlight the entire list or select the
<ul> tag
from the Quick Tag Selector, Expression Web 3 applies the class to the list as a whole.
Using CSS Classes to Center an Image
This way of using classes is often preferred when positioning content like images in
pages. You might recall from Hours 6, “Getting Visual, Part 1: Adding Images and
Graphics,” and 7, “Getting Visual, Part 2: Advanced Image Editing, Thumbnails, and
Hotspots,” that the
align attribute is deprecated. And although you can position ele-
ments left and right using the
float attribute, there is no option to position items in
the center of the page. To properly center nontext content with standards-based code,
you need to use CSS. But although you want the option to center your images and
other content, you don’t want to center every image. Making a class to center con-
tent is the perfect solution to this problem.
Before you start, replace the current myCameras.html file with the fresh one from the
lesson files for this hour. You should do this because when you inserted and changed
the properties for the images in Hours 6 and 7, you created a series of styles. This new
file has no styles and gives you a fresh start.
1. With the myCameras.html page open in Design view, click the New Style but-
ton and change the Selector name to
.alignCenter
.
2. In the Box category, uncheck the Margin: Same for All box and set right and
left to auto. (Leave top and bottom empty.)
3. In the Layout category, set display to block. This tells the browser that what-
ever content this class is applied to is to appear as a separate block or box
independent of the rest of the content (that is, on its own line). Click OK to cre-
ate the new class.
From the Library of Lee Bogdanoff
ptg
168
HOUR 11: Getting Boxed In, Part 2: Knee Deep in CSS
FIGURE 11.2
The photo of the
cameras is cen-
tered on the
page using the
.alignCenter
class.
4. Click the image of the cameras thumbnail and click the new .alignCenter
class to apply it.
Save the page and test it in your browser, and you see that with the new
.alignCenter class applied, the image centers itself on its own line in the page, as
shown in Figure 11.2.
The clever thing about using the method to set the left and right margins to auto is
that you leave it to the browser to decide where the center of the page is by telling it
that the two side margins are to be identical.
You can create similar classes for
.alignLeft and .alignRight by setting the
display attribute under the Layout category to inline (to keep the image on the
same line as the text) and setting the
float attribute to left for .alignLeft and
right for .alignRight. That way you don’t have to use the Picture Properties dialog
to position your images, but you can apply classes to them individually instead.
Using Boxes to Separate Content
Using CSS classes in the ways described in the previous section is an excellent way to
apply changes to multiple individual objects throughout a page. But sometimes you
want a whole section of a page to have a different look from the rest. You can use
classes for this purpose, too, but rather than applying them to selectors such as
p, h1,
a, and img, you now apply them to a new tag called <div>.
From the Library of Lee Bogdanoff
ptg
CSS Classes—Because Not All Content Should Be Treated Equally
169
By the
Way
I am not entirely sure what <div> actually means. In my research, I have found
many suggestions, some more vulgar than others, and the one that sounds the
most reasonable to me is that
div is short for divider. But it has recently been
suggested to me that it stands for
division, so I guess the search for the actual
meaning continues.
To understand what the <div> tag does, you need to delve a little deeper into the
inner workings of tags and CSS. When Expression Web 3 applies a tag to content, it
draws an invisible box around the content. You can see a visual representation of this
phenomenon when you hover your mouse over the tags on the Quick Tag Selector
bar, and the corresponding boxes are outlined in Design view. When you create a
style using CSS, you are, in reality, telling the browser to apply a set of variables to
this box and what’s inside it. This is why when you open the New or Modify Style dia-
log, you always have the option to create top, bottom, left, and right borders around
the content even if it is a single word in a sentence. The
<div> and <span> tags create
such boxes that wrap around the content and their tags so that attributes such as
size, background color, and positioning can be applied to the content as a whole. In
short, creating a div and putting content into it is like drawing a box around content
on a page.
Creating a Div and Placing It Around Content
To understand when and how you would use divs to wrap content, you apply the
.abstract class to all the content before the first subheading in default.html. As you
saw in the previous example, adding the
.abstract class to individual sections of the
page causes Expression Web 3 to treat each section as a separate entity (refer to
Figure 11.1). Now you want to create a box that contains both the first paragraph
and the list above it and treat them as a single entity. You use the Toolbox panel to
assist you in the next task. The Toolbox should be visible on the top-right side of the
workspace. If it is not, you can activate it by clicking Panels from the main menu and
selecting Toolbox.
1. With the default.html page open in Design view, drag and drop a <div>
instance (found under HTML, Tags in the Toolbox task pane) into the page and
place it at the end of the first heading. This should create a new empty horizon-
tal box directly under the heading (see Figure 11.3).
2. To move the content into the div, simply highlight the first paragraph and drag
and drop it into the div. For layout purposes, which will make sense later, you
From the Library of Lee Bogdanoff
ptg
170
HOUR 11: Getting Boxed In, Part 2: Knee Deep in CSS
FIGURE 11.3
An empty div can
be dragged from
the Toolbox panel
directly into
Design view and
placed anywhere
within the text.
FIGURE 11.4
The first para-
graph and the
list are now both
contained within
the div selector.
want the list to appear underneath the first paragraph, so select it and drag
and drop it inside the div underneath the text.
Now the first paragraph and the list are both contained within the new div (see
Figure 11.4), and when you place your cursor on either, the Quick Tag Selector shows
that the div comes before any of the other tags in the cascade.
In addition to style classes, you also have style IDs. The ID differs little from the
class—so little, in fact, that many wonder why it exists at all.
Now that we have separated some of the content from the rest of the page, it is time
to make that content appear separated visually and in the code. To do this you use a
different kind of style element called an ID.
From the Library of Lee Bogdanoff
ptg
Introducing ID—Class’s Almost Identical Twin
171
Introducing ID—Class’s Almost Identical
Twin
The ID works in the same way as the class: You can apply attributes to it, apply it to
any tag, and create custom styles that appear only within divs that belong to this ID.
The only difference between the class and the ID is that although you can use the
class many times throughout a page, you can use the ID only once. (Or rather, if you
want your page to remain compliant with web standards, you can use an ID only
once per page—most browsers allow the repeated usage of the same ID in a page
even though it’s technically a breach of the standards.)
So, what is the point of using IDs or having them at all? From a designer and devel-
oper standpoint, the ID is a great tool for separating content and making the code
more readable. As an example, a common practice when designing blogs is to use
IDs to define the main sections of the page and classes to define components that
repeat several times within these sections. For example the front page of my blog
() has an ID called
content that holds all the arti-
cles, and each article is kept in a class called
post. For someone looking at the code,
it is far easier to understand what is going on in large pages if the developer lays out
the code this way.
Creating a Sidebar Using an ID
To make the page layout more interesting, let’s make the new div you just created
into a sidebar that appears on the left side of the screen. To do this, you assign it an
ID called
#sidebar and style that ID to make it float to the left.
1. Click the New Style button in the Apply Styles panel to open the New Style dia-
log. Set the
Selector to #sidebar. (The # symbol prefix tells the browser that
this is an ID.)
2. Under Background set the background-color to #CCCCCC (a light gray) using
the More Colors swatch or by inserting the hex value manually.
3. Under Border leave the Same for all boxes checked and set the borders to
solid, 1px and #808080 (a darker gray).
4. Under Position set the width to 250px. By default the width of a div box is
100%. This sets it manually to a fixed size.
5. Under Layout set float to left. This pushes the box to the far left, letting the
remaining text float around it as you saw with the images earlier. Click OK to
create the new ID.
From the Library of Lee Bogdanoff
ptg
172
HOUR 11: Getting Boxed In, Part 2: Knee Deep in CSS
FIGURE 11.5
With the #side-
bar ID applied,
the div floats to
the left and is
styled with a
gray background
and a border.
To apply the new ID, select the div by clicking the <div> box in the Quick Tag Selec-
tor, and click the new #sidebar ID in the Apply Styles panel. When the #sidebar ID is
applied to the div, the browser creates a gray box around the content and shifts it to
the right, as shown in Figure 11.5.
Using an ID to Center the Page
A common question from new web designers is how to center the contents of a page
using CSS. There is a lot of confusion about how to do this, and most of it results from
the fact that people think of web design tools as word processing applications on
steroids. But, as you have seen, this couldn’t be further from the truth. In the past, a
common way to center the content on a page was to put it in a one-cell table and
center the table using
text-align. This is not an ideal solution because by putting
the content inside a table, you are inadvertently restricting the options for future lay-
out changes and fancy styling. In addition you learned in Hour 9, “Getting Boxed In,
Part 1: Using Tables for Tabular Content,” that tables should be used only for tabular
content, and it would be quite a stretch to argue that all the content of an entire page
is tabular data that should be displayed in one cell!
Even so, the table idea is a good one; it’s just using the wrong type of box. If you paid
close attention to the earlier sections of this hour, you might already have figured out
how to do this using only CSS.
1. Go to Code view and drag and drop a <div> instance found under Tags in the
Toolbox task pane into the page directly before the line that reads
<h1>Welcome
From the Library of Lee Bogdanoff
ptg
Introducing ID—Class’s Almost Identical Twin
173
FIGURE 11.6
Setting the left
and right
margins of the
#wrapper ID
to auto.
to MyKipple.com</h1>
. Go back to Design view and a new box appears at the
top of the page.
2. Create a new style and give it the Selector name
#wrapper
.
3. In the Box category, uncheck the Margin: Same for All box and set left
and right to auto. Leave top and bottom blank (see Figure 11.6).
4. In the Position category, set width to 800px. This will be the total width of the
content on the page. Click OK to create the new ID.
5. In Design view, highlight all the content underneath the new div including the
sidebar, and then drag and drop it into the div you just created at the top of
the page.
6. Select the div tag belonging to the new div from the Quick Tag Selector bar and
click the new
#wrapper ID in the Apply Styles task pane to apply the ID. The
tag changes to
<div#wrapper>. Save and press F12 to preview the page in your
browser. The content of the page should now be restricted to the center of the
page and remain so even if you resize your browser window (see Figure 11.7).
When you apply this ID to your div, Expression Web 3 reduces the width of the div to
800px and tells the browser to place the div within two equally wide margins: one on
the left and one on the right. Naturally, this results in the div box appearing in the
middle of the screen. To position the content to the left or right of the screen, simply
remove the two margin attributes and set
float to left or right instead.
From the Library of Lee Bogdanoff
ptg
174
HOUR 11: Getting Boxed In, Part 2: Knee Deep in CSS
FIGURE 11.7
The #wrapper
ID applied to the
outermost div
reduces the
width of the box
to 800 pixels
and centers the
content in the
browser window.
Creating Custom Styles Within IDs and Classes
When you have content that is contained within a div that has an ID or class, you
can create custom styles that affect only the tags within that class. You do so by mak-
ing the tags a subelement of the class. To do so, create a new style but give the tag a
prefix in the form of the class name. For example you can make a custom version of
the
.abstract class that applies only to content within the #sidebar div. To do so, cre-
ate a new style and give it the selector name
#sidebar .abstract. In the Font cate-
gory, set
font-size to 1em and font-weight to normal. When you click OK to create
the new style, you see that attributes from both of the
.abstract classes are applied
to the content but that the attributes from the
#sidebar .abstract class has prefer-
ence. That is because the more specific style is further down the cascade and closer to
the content.
Watch
Out!
This is the pure CSS method for centering content in the browser. In extremely
rare cases it doesn’t work properly because some older browsers don’t follow or
understand proper CSS code and become confused by the margins set to
auto.
Nevertheless, this is the correct way to perform the task.
From the Library of Lee Bogdanoff
ptg
Classes Within Classes: Micromanaging the Content
175
FIGURE 11.8
A layout using
multiple IDs and
classes to sepa-
rate the content.
IDs are outlined
with a solid line,
and classes are
outlined with a
dashed line.
You can apply this technique to any standard tag of class whether it is a heading,
paragraph, link, blockquote, or something else. If you ever wondered how you can
create several different paragraph styles within one document, now you have the
answer!
Classes Within Classes: Micromanaging
the Content
In the earlier example, you saw that you can create special styles for content within
IDs and classes. There is no limit to how far you can take this technique by applying
multiple IDs, classes, and tags within each other. See the layout in Figure 11.8 as an
example.
In this figure, multiple IDs and classes divide different parts of the content. By under-
standing how to properly name your style selectors, you can micromanage the con-
tent within these IDs and classes for a highly customized look. You do so by creating
selector names that have the relevant IDs, classes, and tags listed with spaces
between them. Here are some examples of different selector names:
.
p styles all paragraphs on the page, both inside and outside the IDs and classes.
.
#wrapper p styles all paragraphs within the wrapper ID.
.
#wrapper #top p and #top p style paragraphs within the top ID only.
.
.header p styles all paragraphs within the header class regardless of ID.
.
#wrapper #top .header p and #top .header p style paragraphs within the
header class inside the top ID only.
From the Library of Lee Bogdanoff
ptg
176
HOUR 11: Getting Boxed In, Part 2: Knee Deep in CSS
Did you
Know?
You can experiment with different selector names by using the boxExample.html
file found in the lesson files for this hour.
Using Classes to Control IDs
To see just how flexible the tag, class, and ID structure is, consider this trick used by
professional designers for quick-and-easy prototyping:
Right now the sidebar floats to the right because the ID contains a float variable. But
you can also use a class and apply it to the ID to do this! Earlier in the hour you were
asked to create two alignment classes called
.alignLeft and .alignRight. If you
haven’t already done so, create the two classes and give them the following attributes:
.
.alignLeft: Set margin-right to 10px and float to left.
.
.alignRight: Set margin-left to 10px and float to right.
Next open the Modify Style dialog for the #sidebar ID by right-clicking the style in the
Apply Styles panel and selecting Modify style from the pop-up menu. In the dialog go
to the Layout category and remove the
float:left attribute. Click OK to save the
change, and the text should no longer wrap around the sidebar.
Now comes the fun part: Place your cursor anywhere inside the sidebar box and select
the
<div#sidebar> box in the Quick Tag Selector to select the whole div. Then go to
the Apply Styles panel and click the
.alignLeft style to apply it. With the applica-
tion the sidebar floats to the left with a nice 10px margin as a buffer against the
other content. Without doing any changes, click the
.alignRight style instead and,
as if by magic, the sidebar jumps to the right with the text floating to the left. This is
because Expression Web 3 won’t let you apply two styles to the same div, so it over-
writes the last one you applied. This way you can quickly see which layout you like
better. And this trick doesn’t just apply to the sidebar—you can do the exact same
thing with images and other elements on the page.
Pseudoclasses
In addition to tags, classes, and IDs, HTML supports something called pseudoclasses.
These specialized versions of selectors come into play when the user interacts with the
page; that is, when the user hovers over or clicks content or a link. There are five such
pseudoclasses, all of which are normally used in conjunction with the
<a> tag:
.
:active refers to an element that is currently active. For example, a link dur-
ing the time the user is holding the mouse button down and clicking it.
From the Library of Lee Bogdanoff
ptg
Pseudoclasses
177
.
:focus refers to an element that currently has the input focus, meaning that it
can receive keyboard or mouse input. To understand focus, think of an input
table with the current cell highlighted—that cell has the focus. When you press
the Tab button, the focus changes to the next cell.
.
:hover refers to an element being hovered over by the mouse pointer.
.
:link refers specifically to an element that is an unvisited hyperlink. Unlike the
preceding pseudoclasses,
:link applies to the a tag only.
.
:visited refers to a link that has already been visited. Like the :link pseudo-
class,
:visited only applies to the a tag.
Use Pseudoclasses to Style Links
If you do not define an a style, browsers will style hyperlink so that :link is set to
blue, :active is set to red, and :visited is set to purple. If you define only an a
style, it overrides all the default settings and the link appears the same regardless of
what the user does. To give the visitor a visual guide to what she is doing, it is a good
idea to style the main pseudoclasses for links within your page. To use pseudoclasses,
all you need to do is attach them directly after the tags in the selector name.
1. With default.html open in Design view, create a new style. In the Selector
area, use the drop-down menu to find
a:active or type a:active.
2. In the Font category, set the color to red (
#FF0000
). Click OK to finalize the
new style.
3. Create a new style and give it the selector name
a:hover
. In the Font category,
check the
underline box under text-decoration. Click OK to finalize the
new style.
4. Create a new style and give it the selector name
a:visited
. In the Font cate-
gory, set the color to gray (
#808080). Click OK to finalize the new style.
You will not see any changes in Design view, but when you save and preview the
page in your browser, you will see that the links on the page are blue when they have
not been visited and are not being hovered over. They have an underline when they
are being hovered over, turn red when you press and hold them, and turn gray if they
have already been visited. Note that because you attached the pseudoclasses to the
general
a style, they are applied to all the instances of the <a> tag in the page includ-
ing the subheadings that work as bookmarks. And because the pseudoclasses are
more specific, they override the
h2 a link as well. If you want the h2 links to have
separate pseudoclasses from the other links on the page, all you have to do is create a
new style with a selector name such as
h2 a:hover
.
From the Library of Lee Bogdanoff
ptg
178
HOUR 11: Getting Boxed In, Part 2: Knee Deep in CSS
Did you
Know?
You can apply the pseudoclasses :active, :focus, and :hover to many tags,
not just links. For example, the
:hover pseudoclass is sometimes used to high-
light sections of lists, tables, and paragraphs to help with readability. When doing
this, it is important to make the nonlink components visually different from the
links to avoid confusing the visitor. The
:hover style applied to nonlink content
commonly changes the background color of the content rather than the font color.
For even more advanced control, you can combine several pseudoclasses by stacking
them. As an example, right now when you hover over a link, it retains the current
color and displays an underline regardless of whether you visited it before. By creat-
ing a separate style with the selector name
a:visited:hover, you can display hov-
ered-over visited links in a different color. Just as with tags, classes, and IDs, you can
attach any styling attribute to pseudoclasses.
Understanding the Box Model
Previously in this hour, you learned that when you attach tags to your content,
Expression Web 3 creates an invisible box around the content. To understand how
the content behaves and how you can style it, you need a firm understanding of the
box model. Fortunately, the clever people in the Expression Web development team
considered this and built a box model reference right into the New and Modify Style
dialogs so that you don’t need to remember how it works.
To get a better understanding of what the box model is and how you use it, let’s take
a closer look at the
#sidebar ID you created in default.html. To do so, right-click the
#sidebar ID in the Apply or Manage Styles task pane, and select Modify Style to
open the Modify Style task pane. The box model reference is located under the Box
category, as shown in Figure 11.9.
All content wrapped inside tags has four main areas. In the center is the content
itself, and surrounding the content is the padding. The padding is the “breathing
space” that separates the content from the next area, the border. The padding retains
the same background color or image as the content. The border is the outer edge of
the box. It can be given any color, be solid, or have a number of different textures.
Outside the border is the margin. The margin works as the buffer area between the
outer edges of the box (the border) and the other content on the page. The margin is
transparent and you cannot give it a distinct color.
You can set the values of each of the four sides of the padding, border, and margin
independently or in groups. To set all four sides of the padding, border, or margin,
check the corresponding Same for All box and enter the desired value in the first box.
From the Library of Lee Bogdanoff
ptg
Understanding the Box Model
179
FIGURE 11.9
The New and
Modify Style
dialogs include a
CSS box model
reference guide
under the Box
category.
▼
To set the values for each side independently, uncheck the Same for All box and set
each value. If you leave any values empty, the default value applies. The default
value is usually 0px.
The tricky part about the box model is the calculation of width and height. Gener-
ally, the width and height of any boxed element are equal to the distance from side
to side or top to bottom of the content area before the padding is applied. The thick-
ness of the padding, borders, and margins add to the total width and height of the
box. This means that if you create a div with a width of 800px, as you did earlier,
and give it a border of 2px on each side and a padding of 10px on each side, the
total width of your div becomes 824px. As a result, if you want to keep the total
width of your div at 800px, you need to subtract both your border width and your
padding width and set the width of your div to 776px. It’s not rocket science, but if
you forget this little piece of information, you could easily end up with content that
doesn’t fit and not understand why.
Try It Yourself
Using the Box Model to Style Content
Now that you know how the box model works, you can use it to create layout ele-
ments that are far more functional than tables. In this example, you change the
appearance of the sidebar default.html page by changing the
#sidebar ID style.
From the Library of Lee Bogdanoff
ptg
180
HOUR 11: Getting Boxed In, Part 2: Knee Deep in CSS
▲
FIGURE 11.10
By utilizing your
knowledge of the
box model, you
can create visu-
ally pleasing lay-
outs without
using graphics or
tables.
1. With default.html open in Design view, right-click the #sidebar ID and select
Modify Style to open the Modify Style dialog.
2. Right now there is no space between the edge of the div box and the text, so
the text appears attached to the left wall. To solve this problem, change the
padding of the div: Under the Box category, uncheck the Padding: Same for All
box and set
padding right and padding left to 10px. This creates some
breathing space between the inner edge of the box (the content) and the bor-
ders. You can use the Preview box to make sure the space is created correctly.
Click OK to apply the changes to the style.
When you save and preview the page in your browser, you can see that the breath-
ing space inside and around the sidebar (previously added with the alignment class)
gives the entire page a much nicer layout (see Figure 11.10). Because the outer
#sidebar ID has a specific width defined and you have now added padding, you
have to reduce the width attribute if you want to keep it at 250px width.
Summary
As you can see, CSS is a powerful tool that goes far beyond merely changing the
color and size of fonts. In this hour, you got a glimpse of how you can use CSS to
create highly complex and visually compelling layouts and how easy it is to make
From the Library of Lee Bogdanoff
ptg
Q&A
181
dramatic changes to the look of the page without destroying the content in the
process. The examples in this hour merely scratch the surface of what is possible
when you use CSS as a layout tool, but they give you a good idea of what you can
do. Finishing this hour, you have better ideas of why having strong CSS skills gives
you an advantage in the web design market and why Expression Web 3 is an excel-
lent tool not only to create but also to learn CSS.
In this hour, you learned how to move beyond simple text styling to create classes
that change the appearance of specific elements within a page. You also learned how
to group sections of the page using divs and how to assign IDs and classes to these
divs to get detailed control of your content. You learned how to set selector names so
that certain styles apply to only certain elements within an ID, class, or subclass, and
how to apply and modify those styles to change the overall look of your page. In
addition, you got an introduction to pseudoclasses and learned how to use them to
style active content within a page to give the visitor a more interactive experience.
Finally, you learned how the box model works and how you can use it to create lay-
outs and style content. In the next hour, you look at the CSS code and learn how to
manipulate the code to achieve the same results you saw in this hour. You also learn
how to completely separate the style from the content by creating standalone style
sheets and how to apply the styles you have already created to other pages you build.
Q&A
Q. I can’t find this Quick Tag Selector bar you keep talking about! Where is it?
A. By default, the Quick Tag Selector is on, but you might have accidentally
turned it off. If it is not visible directly under the tabs at the top of the View
pane, open the View menu from the menu bar and click Quick Tag Selector to
activate it. The Quick Tag Selector has an orange box with a check mark to its
left when it is active.
Q. I changed the name of a style/class/ID I created and now it isn’t applied to
the content. Why is that?
A. If you change the name of a style, class, or ID, you also need to change the
name in the tags that the style, class, or ID that you applied it to. You can do
this by selecting the tag using the Quick Tag Selector and opening the Tag Editor.
Q. I followed the tutorial and created pseudoclasses for my links, but I still can’t
see them in Design view. Am I doing something wrong?
A. Design view displays only the plain link style, not the pseudoclasses. To test the
pseudoclasses you created, you have to preview your page in a browser.
From the Library of Lee Bogdanoff
ptg
182
HOUR 11: Getting Boxed In, Part 2: Knee Deep in CSS
Workshop
The Workshop has quiz questions and exercises to help you put to use what you just
learned. If you get stuck, the answers to the quiz questions are in the next section.
But try to answer them first. Otherwise you’ll be cheating yourself.
Quiz
1. What is the difference between styles, classes, and IDs?
2. Can you apply multiple styles, classes, or IDs to the same item?
3. What is the difference between padding, border, and margin in the Box model?
Answers
1. A style is a set of styling parameters applied to a specific selector such as p, h1,
ul, li, or td. A class is an independent set of styling parameters that can be
applied to any selector and divs and spans. An ID is similar to the class except
each ID can be used only once per page.
2. Yes, you can apply multiple styles, classes, and IDs to an item, but not all at
the same time. To do this, you need to place the different styles, classes, and
IDs in concentric circles around the item. For instance if you want a block of
text to be affected by an ID, a class, and a specific style, you need to place the
content inside a div with the class applied that is surrounded by a div with the
ID applied.
3. The padding is the space between the content and the inner sides of the box.
The border is the demarcating line that separates the inside and the outside of
the box. The margin is the space between the outer sides of the margin and the
surrounding content.
Exercise
Create a new div and place all the content except the main heading and the sidebar
inside it. Create a new class called
.content
and apply it to the div. Use your
knowledge of the box model to position the text so that the space below the sidebar
box is empty.
From the Library of Lee Bogdanoff
ptg
Introduction
183
HOUR 12
Styling with Code: Fully
Immersed in CSS
What You’ll Learn in This Hour:
.
How to read CSS code
.
How inline styles differ from other styles
.
How to apply styles, classes, and IDs to tags in Code view
.
How to create external style sheets and apply them to multiple pages
Introduction
In Hours 10, “Bringing Style to Substance with Cascading Style Sheets,” and 11, “Get-
ting Boxed In, Part 2: Knee Deep in CSS,” you learned how to create styles and apply
them to content in Design view. But that’s just half the story. To fully grasp what Cas-
cading Style Sheets (CSS) is all about, you need to go to the source and learn how to
read the code.
Fortunately CSS code is quite simple to learn, especially when you have Expression
Web 3’s many CSS tools available whenever you get confused. Just as in Design view,
you have full access to the CSS panels when you work in Code view, and all the tools
you used in the past two hours are available for use in the same way.
The main purpose of this hour is to go beyond the basics and learn how styling actu-
ally works and how to create, apply, and modify styles without using the tools every
time. Because the tools Expression Web 3 provides are excellent, they are sometimes
cumbersome to use, especially if you make quick, minor changes and already know
what to do. Other benefits to using Code view are that you have more control when
it comes to the placement and attribution of tags, and you can get a better overview
From the Library of Lee Bogdanoff
ptg
184
HOUR 12: Styling with Code: Fully Immersed in CSS
FIGURE 12.1
Hovering the
mouse pointer
over a style in
the Manage
Styles panel
brings up a
ScreenTip that
displays the
CSS code for
that style.
of what is happening to your code. And you get a much clearer picture of the mean-
ing of the phrase separating the style from the content.
In addition to learning how to read, write, and dissect CSS code, this hour covers how
to create separate style sheets and apply them to multiple files. You also see how easy
it is to move styles from one file to another and apply a style created in one file to
other files without having to re-create it. By the end of this hour, you will have the
necessary tools and understanding to use CSS not only as a styling tool but also as a
platform to create visually stunning websites with clean and concise code that looks
the same across most, if not all, browsers and platforms.
Introducing CSS: The Code Version
In the last two hours, you created a series of styles, classes, and IDs. In this hour, you
inspect and expand on these, so if you didn’t do all the tasks in earlier hours, you
should replace the default.html file and the myCameras.html file with the ones sup-
plied in the lesson files for this hour.
To work, CSS requires two sets of code: the styles and the tags to which the styles are
attached. Let’s take a closer look at the styles as they appear in code form. Expression
Web 3 gives you multiple ways to view the CSS code. By far the easiest way of doing
so is simply to hover over the style in question in the Manage Styles panel. When
you do so, a ScreenTip opens to display the entire style code in a pop-up window (see
Figure 12.1).
With the default.html file open, hovering over the
h1 style gives you the following
output:
h1 {
font-family: Arial, Helvetica, sans-serif;
font-size: 1.4em;
From the Library of Lee Bogdanoff
ptg
Introducing CSS: The Code Version
185
By the
Way
font-weight: bold;
text-transform: uppercase;
color: #333333;
}
This is a typical style. It consists of the style name followed by a set of curly braces.
The braces contain all the actual styling code: Each attribute followed by its respec-
tive values after a colon. A semicolon separates the attributes.
Because of the limited physical width of this book the entire line doesn’t fit on
one single line when printed. Normally if you look at the line in Expression Web 3,
it would appear on one line. Just like in this book, there are times when CSS con-
fined to a single line is arbitrarily divided into multiple lines by the application you
use to look at the code. Even so, the style works the exact same way. The infor-
mation you should walk away with here is that it is the semicolons that define
when a line of code ends, not the line breaks.
As you can see, the CSS code Expression Web 3 generates is easy to read. The only
reason why each attribute is on a separate line is for readability. If you want to, you
could remove all the line breaks and write the entire style on one line, but as you can
see it would be much harder to read:
h1 {font-family: Arial, Helvetica, sans-serif; font-size: 1.4em;
font-weight: bold; text-transform: uppercase; color: #333333;}
Now that you know what the CSS code looks like, the next logical question is,
“Where is it located?” If you paid close attention when you created the styles in the
last two hours, you might already have a good idea. Directly under the Selector box
in the New and Modify Style dialog was the Define In box, which was set to Current
page. That means all the styles you created so far are stored in the same page as the
content—more specifically at the top of the page inside the
<head> tag. The <head>
tag contains functional but nonvisual content and information about the current
page.
To see where the styles are stored, switch to Code view and scroll to the top of the
page. Directly under the
<meta> tags is a tag that says <style type=”text/css”>.
You can find all the styles within this tag (see Figure 12.2).
In Hour 8, “Cracking the Code: Working in Code View,” you were introduced to the
Code View toolbar. Now is a good time to use it. To get an idea of how much code
Expression Web 3 created for you when you created the styles, place your cursor on
any of the lines with CSS code, and click the Select Tag button on the toolbar. This
highlights all the CSS code. Likewise, to highlight the code within one style, you can
use the Highlight Block button. But reading this code can still be quite daunting.
Currently you have 16 styles defined, and many style sheets have hundreds or even
thousands of styles.
From the Library of Lee Bogdanoff
ptg
186
HOUR 12: Styling with Code: Fully Immersed in CSS
FIGURE 12.2
You can find the
CSS code at the
top of the
default.html
page inside the
<head> tag in
Code view.
To find a particular style in Code view, all you need to do is click the style in question
in the Manage Styles panel, and Expression Web 3 highlights the style for you. While
in the Manage Styles panel, you can even use the arrow keys to navigate between
styles for quick-and-easy access to the particular style, class, or ID on which you want
to work.
The Value of Separation
Throughout this book there have been several mentions of the styles being separate
from the content. Now, for the first time, you see what this means in real life: The
style code is quite literally separate from the rest of the content in the page. There are
several reasons for this. First, keeping the styles separate means that style code does
not clutter the content portion of the page. Second, it makes it easier to make changes
to both the styles and the content because they are easily distinguishable. Last, it
means that you don’t have to insert styling code in the page whenever you add new
content.
When you add CSS code to the head of an HTML page, the browser reads it and
applies it to whatever content it finds below. In practical terms, it works kind of like a
coin sorter. If you just dump various coins in a bucket, they have no order. But a coin
sorter sorts, separates, and puts each different coin size in its own collector. In HTML,
the CSS code becomes the different coin slots, and as the content flows through the
filter, the different kinds of content fall into their appropriate slots. So rather than
From the Library of Lee Bogdanoff