Thủ Thuật Windows Office part 25 pps
Bạn đang xem bản rút gọn của tài liệu. Xem và tải ngay bản đầy đủ của tài liệu tại đây (143.36 KB, 5 trang )
My Computer: {20D04FE0-3AEA-1069-A2D8-08002B30309D}
My Documents: {450D8FBA-AD25-11D0-98A8-0800361B1103}
Recycle Bin:{645FF040-5081-101B-9F08-00AA002F954E}
Default IE Icon: {871C5380-42A0-1069-A2EA-08002B30309D}
Double click the Default value in the above keys and enter the text you desire.
Right click on the Desktop
and select Refresh to see the changes.
To undo the changes, just right click on the Default value and select Delete.
Refresh the Desktop to see
that things are back to normal.
How do I restrict a User's Logon hours?
You can only restrict when a user can log on to the system. On a stand alone
computer, there is no way,
currently, to force a user to log off when their hours expire.
1) Open Help and Support and type "logon hours" (without the quotes) in the
search box.
2) Go to Full text matches and click on "Net user". See the examples for setting a
user's logon hours.
Some examples would be:
net user johnsw /time:M-F,08:00-17:00
net user johnsw /time:M-F,8am-5pm
net user marysl /time:M,4am-5pm;T,1pm-3pm;W-F,8:00-17:00
net user johnsw /time:all (this one means this user can always log on)
3) Open a Command Prompt window.
4) Enter the appropriate "net user" command for the user(s) you wish to restrict
access for.
xp_sysrestorepoint.vbs - VB Script to run unattended Restore Point Creation as a
Scheduled Task
This code may be freely distributed/modified.
This script is only intended for Windows® XP.
This VB Script can be run as a Scheduled Task to create an unattended System
Restore Point.
The Restore point will be identified as Automatic Restore Point with the date and
time the script was run.
Usage: Download: xp_sysrestorepoint.vbs and save this file to your hard drive.
Create a new Scheduled Task and point it to the VBS file. After the script runs, it
will leave a dialog
telling you whether or not the Restore Point was successfully created. This script
can be viewed in
Notepad or any text editor, as to the specific Registry key and value that are
updated. For an EXE
version of this utility, click HERE
Where did my Desktop Icons go?
Right click on the Desktop, choose Properties, Desktop tab and click on
"Customize Desktop". Internet Explorer, My Computer,
My Documents and My Network Places can be added or removed here.
If all of your desktop icons are missing, right click on the Desktop, select Arrange
Icons By, then select Show Desktop Icons.
Where is NetMeeting?>
NetMeeting is installed with Windows XP, it is just not obvious that it is. There
are, by default,
no Desktop or Start Menu shortcuts for it. To activate NetMeeting, click Start, Run
and enter CONF.EXE
This will start the NetMeeting Setup wizard. During setup, you'll be prompted to
create Desktop and/or
Quick Launch bar icons.
Disable Windows® Messenger in Windows® XP Pro
If you're running Pro, you can use GPEDIT.MSC to prevent Messenger from
loading. Otherwise, even disabling it
in startup won't cause it to "always" not run. Outlook, OE and some MS web pages
can still make it load.
1) Start, Run and ender GPEDIT.MSC
2) For "per machine" restriction, go to Computer Configuration, Administrative
Templates, Windows Components, Windows Messenger
For "per user" restriction, go to User Configuration, Administrative Templates,
Windows Components, Windows Messenger
3) You can now modify whether it starts initially and/or whether its to run at all.
Note: Outlook and Outlook Express will take longer to open, unless you turn off
Messenger Support.
In Outlook Express its in Tools, Options, General tab. In Outlook its in Tools,
Options, Other.
If you prefer to remove Windows Messenger manually, click Start, Run and enter
the following command:
RunDll32 advpack.dll,LaunchINFSection %windir%\inf\msmsgs.inf,BLC.Remove
Note: This will prevent a long delay when opening Outlook Express if you have
the Contacts pane enabled.
To prevent this, click Start, Run and enter REGEDIT Go to:
HKEY_LOCAL_MACHINE\Software\Microsoft\Outlook Express
Right click in the right pane and select New, Dword value. Give it the name Hide
Messenger Double
click this new entry and set the value to 2.
Hướng dẫn cách cài đặt giao diện tiếng việt cho Windows XP SP2
Vào khoảng tháng 4 Microsoft giới thiệu phiên bản Windows XP với giao diện
tiếng việt được việt hoá một phần.Mọi người có thể download bản LIP về và cập
nhật cho phiên bản XP SP2 nhưng tiếc là nó chỉ cài được cho phiên bản Windows
có bản quyền với những phiên bản có số CD KEY bị liệt vào danh sách đen thì
đừng mơ mà cài được bắt chấp việc bạn là người việt muốn được sử dụng bản
tiếng việt.Với bản thân tôi hay một số người tiền dành cho việc online đã phải dành
dụm tiết kiệm rồi chứ tiền đâu mà để bỏ tiền ra mua XP bản quyền hàng trăm $$$
nhưng trong lòng vẫn luôn mong muốn được nhìn thấy tận mặt “Con thằng Tây lai
Ta” xem nó như thế nào.Do vậy trước khi được tiếp xúc với giao diện tiếng việt
của XP có lẽ câu mà bạn có thể rất ghét là “Hành động
đảo ngược lại”Sao mà câu
nói tiếng việt gì mà ngang phè phè vậy.Tuy nhiên bạn vẫn có thể cài bản LIP với
Windows XP không có bản quyền theo hướng dẫn sau:
Đầu tiên tải bản LIP ở trang chủ của Microsoft tại địa chỉ sau:
/>94863d34e760/LIPSetup.msi
Sau khi đã tải về xong thì công việc cài đặt có thể bắt đầu.
Trước tiên cần phải thay đổi CD KEY vì khi KEY của bạn thuộc danh sách đen thì
không thể cài được.Thông thường khi bạn cài Windows XP ***** thì đã được
Activate sẵn rồi do vậy bạn cần phải Activate lại.Để xuất hiện hộp thoại Activate
Windows có thể làm theo 2 cách sau đây:
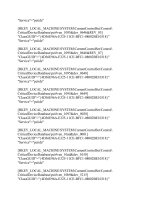
+ Chọn Start > Runchọn regedit sau đó tìm đến khóa sau
HKEY_LOCAL_MACHINE\Software\Microsoft\Windows
NT\CurrentVersion\wpaevents.Bạn nhìn sau khung bên phai thấy mục OOBETimer
b
ạn hãy sửa đổi click phải chon Modify và sửa chữa bất kỳ mục đích là để Activate
lại.Sau đó thoát khỏi regedit chọn
Start > Run gõ vào %systemroot%\system32\oobe\msoobe.exe /a
+ Nếu bạn ngại phải gõ thì tôi cung cấp luôn cho công cụ để làm xuất hiện hộp
thoại Activate Windows bạn có thể tải ở đây:
/>
Sau khi tải về bạn chạy file XPPID.exe để Activate
Khi hộp thoại trên đã xuất hiện bạn lựa chọn “Yes,I want to telephone a customer
service representative to activate Windows”. Như hình sau:
Tiếp theo chon Next.Sẽ đưa bạn đến một hộp thoại khác.Bạn hãy lựa chọn Button
Change Product key.
Hộp thoại Change Product Key xuất hiện bạn điền số CD KEY sau vào (Nhớ phải
điền đúng nhé).Sau đó chọn Button Update.