Lập trình .net 4.0 và visual studio 2010 part 65 pot
Bạn đang xem bản rút gọn của tài liệu. Xem và tải ngay bản đầy đủ của tài liệu tại đây (435.57 KB, 6 trang )
CHAPTER 16 WINDOWS AZURE
435
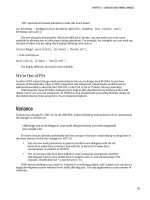
Figure 16-18. Example blob application
If you right-click on the image to examine its URL, notice how the URL is made up of a number of
properties we defined in our ServiceConfiguration: AccountName, pictures container, and the GUID we
used for the ID (this URL is made up of IP:PORT/account/container/blobID) (e.g., http://
127.0.0.1:10000/devstoreaccount1/pictures/4d5eee66-162e-4fb1-afcb-197f08384007).
Accessing REST API Directly
Now that we have worked with the StorageClient, however, I think that it is useful to understand what is
happening behind the scenes. In our previous example we created a container to store our images,
called pictures. We will now create an application to list all the containers in our local Azure Storage by
constructing the raw HTTP request.
How Do We Work with the REST API?
To interface with the Azure Storage REST API, we will construct a request using the WebRequest classes.
We need to do the following:
CHAPTER 16 WINDOWS AZURE
436
1. Make an HTTP request to a URL and port. The following URL, for example, is used to retrieve a
list of containers held in Azure Storage:
http://127.0.0.1:10000/devstoreaccount1/devstoreaccount1?comp=list
2. Set a number of headers in the request.
3. Set the HTTP verb of the request to describe what we are doing (e.g., GET, PUT).
4. Calculate a hash of the headers we added and a hidden key. This ensures no one can modify the
request and allows Azure Storage to authenticate us.
5. Azure Storage will then return our results as XML.
Azure Storage authenticates each user by hashing the headers (using SHA 256) with a shared secret
key. If anyone tampers with a header or the wrong key is used, then the hash will not match what Azure
is expecting and it will return an HTTP 403 error (not authenticated). Note that, for additional security,
Azure messages expire after 15 minutes and will be rejected.
Working with Azure Storage with Raw HTTP Requests
Create a new Console application called Chapter16.AzureRawHttp.
1. Add the following using directive:
using System.Net;
2. Add the following code to the Main() method. This code constructs an HTTP request and sends
it to Azure local storage to list containers:
//Gets a list of containers
string AccountName = "devstoreaccount1";
string AccountSharedKey = "<YOUR_SHARED_KEY";
string Address = "http://127.0.0.1";
string Port = "10000";
//Action to perform e.g. ?comp=list
string QueryString="?comp=list";
string uri = Address + ":" + Port + "/" + AccountName + QueryString;
string MessageSignature = "";
//Build Request
HttpWebRequest Request = (HttpWebRequest)HttpWebRequest.Create(uri);
Request.Method = "GET";
Request.ContentLength = 0;
Request.Headers.Add("x-ms-date", DateTime.UtcNow.ToString("R"));
CHAPTER 16 WINDOWS AZURE
437
//Create signaure of message contents
MessageSignature+="GET\n"; //Verb
MessageSignature+="\n"; //MD5 (not used)
MessageSignature+="\n"; //Content-Type
MessageSignature+="\n"; //Date optional if using x-ms-date header
MessageSignature += "x-ms-date:" + Request.Headers["x-ms-date"] + "\n"; //Date
MessageSignature+="/"+AccountName+"/"+AccountName+QueryString; //resource
//Encode signature using HMAC-SHA256
byte[] SignatureBytes = System.Text.Encoding.UTF8.GetBytes(MessageSignature);
System.Security.Cryptography.HMACSHA256 SHA256 =
new System.Security.Cryptography.HMACSHA256(
Convert.FromBase64String(AccountSharedKey)
);
// Now build the Authorization header
String AuthorizationHeader = "SharedKey " + AccountName + ":"
+ Convert.ToBase64String(SHA256.ComputeHash(SignatureBytes));
// And add the Authorization header to the request
Request.Headers.Add("Authorization", AuthorizationHeader);
//Get response
HttpWebResponse Response = (HttpWebResponse) Request.GetResponse();
using (System.IO.StreamReader sr =
new System.IO.StreamReader(Response.GetResponseStream()))
{
Console.WriteLine(sr.ReadToEnd());
}
Console.ReadKey();
3. Press F5 to run your application.
You should have a response like the following (in my example I have two blob containers: blobs and
pictures):
<?xml version="1.0" encoding="utf-8"?>
<EnumerationResults AccountName="http://127.0.0.1:10000/devstoreaccount1">
<Containers>
<Container>
<Name>b
blobs
</Name>
<Url>http://127.0.0.1:10000/devstoreaccount1/blobs</Url>
<LastModified>Mon, 16 Nov 2009 02:32:13 GMT</LastModified>
<Etag>0x8CC347C240E3FE0</Etag>
</Container>
<Container>
<Name>p
pictures
</Name>
CHAPTER 16 WINDOWS AZURE
438
<Url>http://127.0.0.1:10000/devstoreaccount1/pictures</Url>
<LastModified>Mon, 16 Nov 2009 09:16:40 GMT</LastModified>
<Etag>0x8CC34B4A41BA4B0</Etag>
</Container><Container>
<Name>wad-control-container</Name>
<Url>http://127.0.0.1:10000/devstoreaccount1/wad-control-container</Url>
<LastModified>Mon, 16 Nov 2009 09:16:21 GMT</LastModified>
<Etag>0x8CC34B498B195D0</Etag>
</Container>
</Containers>
<NextMarker />
</EnumerationResults>
If you want to know more about working with the REST API directly, please refer to the SDK
documentation directly, which specifies the format of requests. David Lemphers also has a good series of
articles on working with Azure storage (based on preview versions, so they may be a bit out of date now):
Queues
Queues are an important concept in Azure storage, and they are made up of an unlimited number of
messages that are generally read in the order they are added (Azure documentation says this is not
guaranteed). Messages are removed as they are read, so if you don’t want this to occur make sure you
use the peek method instead.
Messages can be up to 8kb in size each, so if you need more space than this you can use a blob field
and link the two by using the blob’s meta data. Messages added to queues have a default time-out of
seven days (called time to live). After that passes, then they will be destroyed.
We will create a new application to add and read items from a queue:
1. Create a new Azure project called Chapter16.QueueTest with a web role called
Chapter16.QueueTestWebRole.
Open Default.aspx and add the following code inside the form tag:
<asp:TextBox ID="txtMessage" runat="server" Width="300"></asp:TextBox>
<asp:Button ID="cmdAddToQueue" Text="Add" runat="server" />
<asp:Button ID="cmdShowQueue" Text="Show Queue" runat="server" />
<br /><br />
Queue contents:
<br />
<asp:Literal ID="litQueueContents" runat="server"></asp:Literal>
2. Open Default.aspx.cs and add the following using statements:
using Microsoft.WindowsAzure;
using Microsoft.WindowsAzure.StorageClient;
using Microsoft.WindowsAzure.ServiceRuntime;
CHAPTER 16 WINDOWS AZURE
439
3. Add the following code to Default.aspx.cs:
protected void Page_Load(object sender, EventArgs e)
{
cmdAddToQueue.Click += new EventHandler(cmdAddToQueue_Click);
cmdShowQueue.Click += new EventHandler(cmdShowQueue_Click);
}
void cmdShowQueue_Click(object sender, EventArgs e)
{
CloudStorageAccount.SetConfigurationSettingPublisher((configName, configSetter) =>
{
// Provide the configSetter with the initial value
configSetter(RoleEnvironment.GetConfigurationSettingValue(configName));
});
var storageAccount =
CloudStorageAccount.FromConfigurationSetting("DataConnectionString");
CloudQueueClient queueStorage = storageAccount.CreateCloudQueueClient();
CloudQueue queue = queueStorage.GetQueueReference("testqueue");
queue.CreateIfNotExist();
string queueContents = "";
while (queue.PeekMessage() != null)
{
queueContents += queue.GetMessage().AsString + "<BR>";
}
litQueueContents.Text = queueContents;
CloudQueueMessage readMessage = queue.GetMessage();
}
void cmdAddToQueue_Click(object sender, EventArgs e)
{
CloudStorageAccount.SetConfigurationSettingPublisher((configName, configSetter) =>
{
// Provide the configSetter with the initial value
configSetter(RoleEnvironment.GetConfigurationSettingValue(configName));
});
var storageAccount =
CloudStorageAccount.FromConfigurationSetting("DataConnectionString");
CloudQueueClient queueStorage = storageAccount.CreateCloudQueueClient();
CloudQueue queue = queueStorage.GetQueueReference("testqueue");
queue.CreateIfNotExist();
CHAPTER 16 WINDOWS AZURE
440
CloudQueueMessage message = new CloudQueueMessage(txtMessage.Text);
queue.AddMessage(message);
txtMessage.Text = "";
}
4. The last step is to again tell Azure how to access the storage. Open ServiceDefinition.csdef
and add the following inside the ConfigurationSettings block:
<Setting name="DataConnectionString" />
5. Add the following settings in the ServiceConfiguration.cscfg configuration block:
<Setting name="DataConnectionString" value="UseDevelopmentStorage=true" />
6. Press F5 to run the application.
7. You will see a textbox and a button. Enter something like “Message1” in the text box, then click
the “Add” button.
8. Click “Show Queue” to display the contents of the queue. The queue should show your message.
9. Click “Show Queue” again. No items should be returned as they have been read already.
10. Enter another item into the textbox and click Add.
11. Enter a further item into the textbox and click Add.
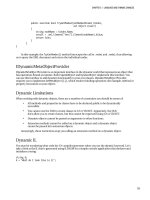
12. Click Show Queue, noting all the items displayed (Figure 16-19).
Figure 16-19. Test queue application