Adobe After Effects 5.0- P7 pps
Bạn đang xem bản rút gọn của tài liệu. Xem và tải ngay bản đầy đủ của tài liệu tại đây (584.21 KB, 30 trang )
175
ADOBE AFTER EFFECTS 5.0
Classroom in a Book
5 Using the color swatch or eyedropper, select black. Then click OK.
Adding and formatting a line of text
Now that you have a layer, you can apply the Basic Text effect to it. Using this effect, you’ll
create a long line of type and apply simple text formatting.
1 In the Timeline window, select the Text Solid layer and choose Effect > Text > Basic
Te xt.
2 In the Basic Text dialog box, set the following options:
• In Font, select Myriad.
• In Style, select Bold.
• Under Direction, select Horizontal, and under Alignment, select Center.
3 Still in the Basic Text dialog box, type the following seven words, adding three spaces
after each word to separate them:
film video animation web multimedia dvd television
Be sure to type three spaces after the word television.
4 Select the text, including all the spaces, and press Ctrl + C (Windows) or
Command + C (Mac OS) to copy the text.
5 Move the cursor to the end of the text (after the final three spaces) and press Ctrl + V
(Windows) or Command + V (Mac OS) to paste the copied text so that you have a total
of 14 words.
AE_CIB.book Page 175 Monday, October 8, 2001 12:08 PM
LESSON 5
176
Working with Text and Numbers
6 If you want to preview the font and style before closing the dialog box, select the Show
Font option, if it is not already selected. When you are ready to continue, click OK.
In the Composition window, a line of red type now appears across the solid layer.
If you need to edit the text after you close the Basic Text dialog box, click the underlined
word Options in the Effect Controls window, next to the name Basic Text. Then you can make
any adjustments to the options. Click OK when you are satisfied with the text appearance.
Setting properties for text along a line
Next, you’ll apply more changes to the text, adjusting the color and other settings for
appearance and placement. You’ll make these changes in the Effect Controls window,
which opens as soon as you close the Basic Text dialog box and contains all the Basic Text
controls. You won’t change the Position because the default setting (the center of the
layer) is what you want to use.
1 In the Effect Controls window for Basic Text, expand Fill and Stroke controls by
clicking the small arrow next to the words Fill and Stroke.
AE_CIB.book Page 176 Monday, October 8, 2001 12:08 PM
177
ADOBE AFTER EFFECTS 5.0
Classroom in a Book
2 In Display Options, select Fill Only.
3 In Fill Color, use the color picker or eyedropper to select white.
4 In Size, scrub or type 20. This is smaller than the default setting, so the text shrinks in
the Composition window.
5 In Tracking, scrub or type –40, being careful to include the minus sign.
Because the tracking value is negative, the text squeezes together at the center of the layer.
As you change settings in the Effect Controls window, After Effects updates the view in
the Composition window so that you see the results immediately.
Animating the text line by setting keyframes
The next task is to animate the Basic Text effect settings so that the type grows outward
from the center of the layer. You do this by setting Tracking keyframes in the Effect
Controls window, but you’ll examine the resulting keyframes in the Timeline window. As
a finishing touch, you’ll apply the Easy Ease In keyframe assistant. This feature slows
down the movement of the text as it nears the final Tracking keyframe.
1 With the current-time marker at 0:00, click the Tracking stopwatch in the Effect
Controls window to set a keyframe with the current Tracking value.
2 In the Timeline window, select the Text Solid layer and press E to open the effect
applied to that layer: Basic Text. Expand the Basic Text properties so that you can see the
keyframe for Tracking at 0:00.
3 Press End to move the current-time marker to 1:29.
4 In the Effect Controls window, scrub or type 30 to set Tracking. The type expands to
the length of the Text Solid layer.
AE_CIB.book Page 177 Monday, October 8, 2001 12:08 PM
LESSON 5
178
Working with Text and Numbers
5 Press the spacebar or 0 on the numeric keypad to preview the animation. The type
grows outward from the center of the layer as the Tracking value increases.
6 In the Timeline window, select the Tracking keyframe at 1:29, making sure that it is the
only selected keyframe. Then choose Animation > Keyframe Assistant > Easy Ease In.
The keyframe itself changes shape, indicating a change in keyframe interpolation.
7 Preview the animation again. The type now slows down slightly as it reaches its fully
expanded state. When you are ready to continue, save the project.
If you want to see the results of applying the Easy Ease In, look at the velocity graph in the
Timeline window. To do this, expand the Tracking property under Basic Text. By default,
the graph is a straight line, representing a constant rate of change. After you use Easy Ease
In, the velocity line curves, flattening out as it approaches the second keyframe to indicate
deceleration of the Tracking change. For more information about keyframe assistants and
keyframe interpolation, see topics listed under “Fine-tuning Animation” in After Effects
online Help.
AE_CIB.book Page 178 Monday, October 8, 2001 12:08 PM
179
ADOBE AFTER EFFECTS 5.0
Classroom in a Book
Adjusting opacity
Next you’ll set Opacity keyframes to dissolve the text solid in two ways. First, you have the
text fade in at the beginning of the animation. Then, as the characters reach full expansion
and begin to move off screen, you’ll make them dissolve again and disappear. This creates
a smoother animation.
1 With the current-time marker at 0:00 in the Timeline window, select the Text Solid
layer and press Shift + T to open Opacity without closing the Basic Text effect properties.
2 For the Opacity value, scrub or type 0 (zero).
3 Click the Opacity stopwatch to set a keyframe.
4 Move the current-time marker to 0:04 and change the Opacity to 100%. You have
created a four-frame dissolve.
5 Move the current-time marker to 1:16 and set another 100% Opacity keyframe by
clicking the keyframe check box in the A/V Features panel. The Opacity stays at 100%
from 0:04 to 1:16.
Keyframe check box
6 Press End to move the current-time marker to 1:29, and change Opacity to 0% to create
a 14-frame dissolve.
7 Preview the animation. The text now fades up as it begins to expand and fades out as
it reaches its full length. When you are ready to continue, save the project.
AE_CIB.book Page 179 Monday, October 8, 2001 12:08 PM
LESSON 5
180
Working with Text and Numbers
Adding motion blur
To add a finishing touch to this text animation, you’ll turn on the Motion Blur switch for
the text layer. Motion blur simulates a realistic camera blur based on a shutter angle (set
on the Advanced tab of the Composition Settings dialog box) and the speed of the moving
layer.
As you work, you can use the Enable Motion Blur button (the button on the right of the
group of five buttons above the panels in the Timeline window) to make the results visible in
Composition window previews. However, leaving this option selected can dramatically slow
down After Effects performance, so it’s best to deselect this button after you preview.
1 In the Timeline window, select the Text Solid layer.
2 Click the Switches/Modes bar to open the Switches panel if it is not already open, and
select the Motion Blur switch. A checkmark appears, indicating that motion blur will be
applied to the layer when you render this composition.
Motion Blur switch
AE_CIB.book Page 180 Monday, October 8, 2001 12:08 PM
181
ADOBE AFTER EFFECTS 5.0
Classroom in a Book
3 Select the Enable Motion Blur button to display the motion blur in the Composition
window.
Enable Motion Blur button
4 Preview the animation, using Best quality, Full resolution, and 100% magnification, if
possible—even if this means you see only a small part of the composition. The motion
blur is not visible in the Composition window at lower quality or resolution settings.
5 Deselect the Enable Motion Blur button and save the project.
Motion blur is especially helpful to the appearance of this element because the text layer
is moving so quickly. As you set up the rendering process, you’ll choose the appropriate
settings for the motion blur.
Rendering the text line element
You have finished building the first text element, so it’s time to render the composition.
This render takes only a few seconds on most systems.
1 Close the Composition, Timeline, and Effect Controls windows for the Text Line
Comp.
2 In the Project window, select the Text Line Comp, and then choose Composition >
Make Movie.
3 In the Output Movie To dialog box, type TextLine.mov as the name and specify the
_mov folder in the AE_CIB job folder. Then click Save.
4 In the Render Queue, click the underlined words Current Settings to open the Render
Settings dialog box, and then set the following options:
• In Quality, select Best.
AE_CIB.book Page 181 Monday, October 8, 2001 12:08 PM
LESSON 5
182
Working with Text and Numbers
• In Resolution, select Full.
• In Time Span, select Length of Comp.
• Under Time Sampling, in Motion Blur, select On For Checked Layers to render motion
blur for any layers with checkmarks for the Motion Blur switch.
5 Click OK to return to the Render Queue.
6 In the Output Module pop-up menu, select Custom to open the Output Module
Settings dialog box, and then set the following options:
• In Format, select QuickTime Movie.
• Select Import into Project When Done.
• Click Format Options.
7 In the Compression Settings dialog box, select Animation and Millions of Colors+.
Make sure that the slider is set to Best, and then click OK.
8 In the Output Module Settings dialog box, review the settings: Channels is now set to
RGB + Alpha, indicating that this item will be rendered with an alpha channel. Depth is
set to Millions of Colors+, and Color is set as Premultiplied (Matted). When you are ready
to continue, click OK.
9 Save the project one more time, and then click Render.
When the render is complete, close the Render Queue and double-click TextLine.mov in
the Project window to view the rendered movie.
AE_CIB.book Page 182 Monday, October 8, 2001 12:08 PM
183
ADOBE AFTER EFFECTS 5.0
Classroom in a Book
Because this element is so wide, press Alt (Windows) or Option (Mac OS) as you double-
click the movie to open it in the After Effects Player window rather than the QuickTime Player
window. Then you can use the magnification controls to resize the window to fit your screen.
If you need to make any changes, reopen the Text Line Comp and make those adjust-
ments. Remember to save those changes and render the composition again, using the
same render settings.
Creating the second element: text circles
The next element is the circular text element you previewed in the TextCircle_final.mov
sample movie. This element is made up of three rings of text that expand, rotate, and then
fade into dots. You’ll create this element using several solid layers and the Path Text effect.
Yo u’ll do the entire composition without any source files, so you don’t need to import
anything.
Building the composition
The first step in building this element is to create a new composition.
1 In the Project window, click the New Composition icon
().
2 In the Composition Settings dialog box, type Text Circle Comp to name the compo-
sition.
3 In both Width and Height, type 800.
4 In Pixel Aspect Ratio, select Square Pixels.
5 In Frame Rate, type 29.97.
6 (Optional) In Resolution, select Half or lower, as needed for your system.
AE_CIB.book Page 183 Monday, October 8, 2001 12:08 PM
LESSON 5
184
Working with Text and Numbers
7 In Duration, type 500 to specify five seconds, and then click OK.
Creating a solid for circle text
Next you’ll create a new black solid layer.
1 With the current-time marker at 0:00, choose Layer > New > Solid.
2 In the Solid Settings dialog box, type Circle Text Solid to name the solid.
3 Click Make Comp Size to automatically set the Width and Height at 800.
4 Use the color swatch or the eyedropper to select black, if necessary. Then click OK.
The layer appears as a black square in the Composition window frame, and is listed as
Circle Text Solid in the Timeline window layer stack.
AE_CIB.book Page 184 Monday, October 8, 2001 12:08 PM
185
ADOBE AFTER EFFECTS 5.0
Classroom in a Book
Adding and formatting circle text
Applying the Path Text effect to the Circle Text Solid is similar to the work you did with
the text lines element: You’ll enter the text and apply basic text formatting.
1 In the Timeline window, select the Circle Text Solid layer, and choose Effect > Text >
Path Text.
2 In the Path Text dialog box, type the same seven words you used earlier, making sure
to add three spaces after each word:
film video animation web multimedia dvd television
3 In Font, select Myriad.
4 In Style, select Bold, and then click OK.
The text appears in red, starting along a curved path.
Note: In this composition, seven words are all you want so you do not copy and paste the text
as you did with the Text Line Comp.
Setting text properties for text in circles
In the following steps, you’ll adjust the Path Text effect controls to create the desired path
shape, path size, text color, and character spacing.
1 In the Effect Controls window for Path Text, expand Path Options to see those controls.
2 In Shape Type, select Circle. In the Composition window, the type now runs along a
circular path.
3 In the Effect Controls window, expand the Control Points properties.
4 In Tangent, scrub or type 188 and 578.
AE_CIB.book Page 185 Monday, October 8, 2001 12:08 PM
LESSON 5
186
Working with Text and Numbers
5 In Vertex, scrub or type 400 and 400.
6 Select the Reverse Path option to align the type from left to right along the interior edge
of the circle.
7 Expand Fill and Stroke, and then in Options select Fill Only.
8 In Fill Color, select white, using either the eyedropper or the color picker.
For more information about Path Text controls, see “Path Text” in After Effects online
Help and the effects PDF files on the After Effects application CD.
Animating the text circle by setting keyframes
Next, you’ll animate the size and spacing of the text by setting Size and Tracking
keyframes.
1 Move the current-time marker to 0:00.
2 In the Effect Controls window under Path Text, expand the Character properties and
scrub or type to set both Size and Tracking to
0. The type disappears.
AE_CIB.book Page 186 Monday, October 8, 2001 12:08 PM
187
ADOBE AFTER EFFECTS 5.0
Classroom in a Book
3 Click the stopwatches for Size and for Tracking to set keyframes.
4 Move the current-time marker to 2:15.
5 In the Effect Controls window, scrub or type to set Size at 21 and Tracking at 18. The
type appears larger and evenly spaced (tracked) along the circular path. After Effects
creates a second pair of Size and Tracking keyframes when you change the values.
6 Move the current-time marker to 3:29.
7 In the Effect Controls window, change Size to 0 and Tracking to 100. The type expands
along the path as the characters shrink in size to small dots and then disappear.
8 With the Path Text layer still selected in the Timeline window, press U to reveal all the
keyframes. Review the keyframes and then collapse the layer properties again.
9 Save the project and preview the animation.
Reduce Quality and Resolution if you have trouble seeing all of the frames in a RAM
preview. For more information, see “Allocating RAM to After Effects” on page 2.
AE_CIB.book Page 187 Monday, October 8, 2001 12:08 PM
LESSON 5
188
Working with Text and Numbers
Now you have a line of type that expands to form a circle over the duration of the compo-
sition. Once the circle is complete, the type rotates more quickly as the characters reduce
and dissolve.
Duplicating the text layer and adjusting layer In points
Yo u’ll now add two more layers of circular type to your composition. Rather than redoing
all the previous steps to create the new layers, you do this the easy way: by duplicating the
layer you have just created and changing a few settings in each new layer. In this
procedure, you’ll also change the In points so that each layer begins at a different frame
in the composition timeline.
1 In the Timeline window, select the Circle Text Solid layer and choose Edit > Duplicate
twice, or press Ctrl + D (Windows) or Command + D (Mac OS) twice. You now have
three identical layers in the stack.
2 Move the Layer 2 In point to 0:15 by doing one of the following:
• Drag the layer duration bar (being careful to select the shaded area, not either of the end
points) so that the left end is at 0:15, using the Info palette as your guide.
• Click the double-arrow button () at the bottom of the Timeline window to open the
In/Out panel and then type 15 for the Layer 2 In point value.
• Select Layer 2, move the current-time marker to 0:15, and press [ (left bracket key).
3 Select Layer 1 and set its In point to 1:00 using one of the methods described in step 2.
Text layer In points
You have three text layers that enter the composition at 15-frame intervals.
AE_CIB.book Page 188 Monday, October 8, 2001 12:08 PM
189
ADOBE AFTER EFFECTS 5.0
Classroom in a Book
Changing the Path Text keyframes
Currently, the three layers are positioned directly on top of one another in the compo-
sition. Now, you’ll separate the layers in space by increasing the diameters of the circle
paths in the duplicated layers. You’ll also adjust the Size and Tracking keyframes to make
each layer animation slightly different from the other two.
1 With Layer 2 selected, press F3 to open the tab for that layer in the Effect Controls
window.
2 Expand both Path Options and Control Points (if necessary), and then scrub or type
to set the Tangent coordinates at 168, 613. This path is now slightly larger than the path
in Layer 1. Leave Layer 2 selected.
3 Press U to open all the effect keyframes for Layer 2.
4 In the Timeline window, move the current-time marker to 3:00 and change both Size
and Tracking to 22 for Layer 2. Because the current-time marker is positioned over
existing keyframes when you do this, you are setting new values for these keyframes.
5 Move the current-time marker to 4:14 and make sure that the Size value is 0 and the
Tr acking value is 100.
6 Repeat the process described in steps 1-5 for Layer 1, but use the following settings:
• Set the Tangent coordinates at 140, 645.
• For step 4, move the current-time marker to 3:15 and set both Size and Tracking to 24.
• For step 5, move the current-time marker to 4:29.
7 Preview the animation and save the project.
Now you should see three animated rings of text that expand in succession and then speed
up as they shrink into dots. For more information on the Path Text effect, see After Effects
online Help and the Effects.pdf file on your After Effects 5.0 applications CD.
Applying motion blur to all text circle layers
Yo u’ll apply motion blur to these layers, as you did for the Text Line element earlier in this
lesson. Motion blur adds a realistic blur to the Circle Text layers as they spin; it is most
noticeable when they speed up towards the end of the composition.
1 Press Ctrl + A (Windows) or Command + A (Mac OS) to select all three text circle
layers.
AE_CIB.book Page 189 Monday, October 8, 2001 12:08 PM
LESSON 5
190
Working with Text and Numbers
2 In the Switches panel, select a Motion Blur switch for any layer to turn on all three
switches, indicated by checkmarks.
3 Select the Enable Motion Blur button.
4 Preview the animation, using Full resolution, Best quality, and 100% magnification—
even if you can only see a small section in the Composition window. The motion blur is
not visible at lower quality and resolution settings.
5 Deselect the Enable Motion Blur button, and then save the project.
AE_CIB.book Page 190 Monday, October 8, 2001 12:08 PM
191
ADOBE AFTER EFFECTS 5.0
Classroom in a Book
Rendering the Text Circle Comp
The element is complete and ready for rendering. On most systems, this rendering takes
only a few minutes.
1 Close the Composition, Timeline, and Effect Controls windows for the Text Circle
Comp.
2 In the Project window, select the Text Circle Comp, and then choose Composition >
Make Movie.
3 In the Output Movie To dialog box, type TextCircle.mov as the name and specify the
_mov folder inside the AE_CIB job folder. Then click Save. The Render Queue opens with
the Text Circle Comp set as the second item in the Queue (the Text Line Comp rendered
earlier is the first item).
4 Under Text Circle Comp, click the words Current Settings to open the Render Settings
dialog box and then set the following options:
• In Quality, select Best.
• In Resolution, select Full.
• In Time Span, select Length of Comp.
• Under Time Sampling, in Motion Blur, select On For Checked Layers to render motion
blur for any layers with checkmarks for the Motion Blur switch.
5 Click OK to return to the Render Queue.
AE_CIB.book Page 191 Monday, October 8, 2001 12:08 PM
LESSON 5
192
Working with Text and Numbers
6 In the Output Module pop-up menu, select Custom to open the Output Module
Settings dialog box, and then set the following options:
• In Format, select QuickTime Movie.
• Select Import into Project When Done.
• Click Format Options.
7 In the Compression Settings dialog box, select Animation and Millions of Colors+.
Make sure that the slider is set to Best, and then click OK.
8 In the Output Module Settings dialog box, review the settings: Channels is now set to
RGB + Alpha, indicating that this item will be rendered with an alpha channel. Depth is
set to Millions of Colors+, and Color is set as Premultiplied (Matted). When you are ready
to continue, click OK.
9 Save the project one more time, and then click Render.
When the render is complete, close the Render Queue and double-click the
Te xtCircle.mov item in the Project window to view the rendered movie.
Press Alt (Windows) or Option (Mac OS) when you double-click the item to open it in
the After Effects Player window rather than the standard QuickTime Player window. Then
you can use the magnification controls to reduce the size of the window to fit your screen.
If you need to make any changes, reopen the Text Circle Comp and make those adjust-
ments. Remember to save those changes and render the composition again, using the
same render settings.
Creating the third element: numbers
The last element is the one you previewed in the Numbers_final.mov sample movie. It
consists of several layers of flashing numbers that you’ll create with the Numbers effect.
Yo u’ll then apply the Fast Blur effect and use simple expressions to increase the blurring
of the numbers as they appear to get closer to the camera. You’ll build this element entirely
within After Effects so you don’t need to import any source files.
Building the composition
You start by creating a new composition.
1 Choose Composition > New Composition.
AE_CIB.book Page 192 Monday, October 8, 2001 12:08 PM
193
ADOBE AFTER EFFECTS 5.0
Classroom in a Book
2 In the Composition Settings dialog box, type Numbers Comp to name the compo-
sition.
3 In Preset, select NTSC D1 Square Pix, 720 x 540. After Effects automatically fills in the
next four settings:
• Width: 720
• Height: 540
• Pixel Aspect Ratio: Square Pixels
• Frame Rate: 29.97
4 (Optional) In Resolution, select Half or lower, as needed for your system.
5 In Duration, type 600, for six seconds, and then click OK.
Creating a solid for the Numbers effect
Next you’ll create a new solid layer that is black and the same dimensions as the compo-
sition. Later, you’ll apply the Numbers effect to this layer.
1 Move the current-time marker to 0:00 and choose Layer > New > Solid.
2 In the Solid Settings dialog box, select the following settings for your solid:
• Type Numbers 1 to name the solid.
• Click Make Comp Size to automatically set Width to 720 and Height to 540.
• Under Color, select black, and then click OK.
A black solid layer appears in the Composition window and a Numbers 1 layer appears in
the Timeline window.
Adding and formatting numbers
Now you’re ready to apply the Numbers effect to the solid layer. The Numbers effect
generates the random numbers that make up this element so you don’t need to type any
numbers but you do assign basic text characteristics to the numbers.
1 In the Timeline window, select the Numbers 1 layer and choose Effect > Text >
Numbers.
2 In the Numbers dialog box, set the following options:
• In Font, select Myriad.
AE_CIB.book Page 193 Monday, October 8, 2001 12:08 PM
LESSON 5
194
Working with Text and Numbers
• In Style, select Roman.
• Leave Direction set to Horizontal.
• In Alignment, select Center, and then click OK.
Red numbers appear in the Composition window at the center of the solid layer.
Setting properties for the numbers
Again, you’ll use the Effect Controls window to specify options for the numbers.
1 In the Effect Controls window, under Numbers, expand the Format controls, and
change the following options:
• In Type, select Number (the default setting).
• Select the Random Values option.
• In Value/Offset/Random Max, scrub or type 1000.
• In Decimal Places, scrub or type 10.
2 Expand the Fill and Stroke controls, and change the following options:
• In Display Options, select Fill Over Stroke.
• For both Fill Color and Stroke Color, select white.
• In Stroke Width, scrub or type 1.5.
• In Size, scrub or type 1000.
3 In Tracking, scrub or type 86.
AE_CIB.book Page 194 Monday, October 8, 2001 12:08 PM
195
ADOBE AFTER EFFECTS 5.0
Classroom in a Book
4 Make sure that Proportional Spacing is selected.
Note: The number characters are very large at this point and may not be visible in the
Composition window. They will reappear after you do more work with the numbers.
Animating the numbers by setting keyframes
Yo u’ll now set keyframes so that the numbers vary in size and spacing. This time, you’ll
use both the Effect Controls window and the Timeline window to do your work.
1 With the current-time marker at 0:00, click the Size and Tracking stopwatches in the
Effect Controls window to set keyframes.
2 In the Timeline window, select the Numbers 1 layer. Press E and then expand the
Numbers properties to see the keyframes.
3 Move the current-time marker about 10 to 20 frames forward on the timeline. The
exact position is not important. Then scrub or type the Size and Tracking values, using
arbitrary numbers. For example, you could set Size to 30 and Tracking to 150.
4 Continue moving the current-time marker forward along the timeline and changing
the Size and Tracking values at about 10- to 20-frame intervals. Exact amounts are not
important, but the more dramatic the change in values, the more interesting your
animation will be. Continue adding keyframes until the end of the timeline (5:29).
5 Save the project and preview the animation. If you are not satisfied, make adjustments
to the Size and Tracking keyframes and preview the animation again. When you are ready
to continue, save your changes again.
AE_CIB.book Page 195 Monday, October 8, 2001 12:08 PM
LESSON 5
196
Working with Text and Numbers
Now you have a randomly generating line of numbers in your Composition window. The
rapid change in Size and Tracking creates the flashing appearance. This layer is the first of
three that will make up this element.
Applying the Fast Blur effect and creating an expression
In the sample movie, you saw the numbers get more blurry as they grew larger. To create
this look, you’ll apply a blur effect to the numbers layer. You’ll also apply a simple
expression to link the amount of blur to the number size. Because the automatically
generated expression creates too much blur, you’ll then edit the expression to reduce the
blur.
1 In the Timeline window, select the Numbers 1 layer, and then choose Effect > Blur &
Sharpen > Fast Blur. In the Effect Controls and Timeline windows, the Fast Blur effect
appears below the Numbers effect.
2 In the Timeline window, expand the Fast Blur and Numbers properties. You may need
to scroll or resize the window to see all the properties.
3 Under Fast Blur, select the word Blurriness, and then choose Animation > Add
Expression.
AE_CIB.book Page 196 Monday, October 8, 2001 12:08 PM
197
ADOBE AFTER EFFECTS 5.0
Classroom in a Book
4 In the Timeline window, drag from the Blurriness pick whip () to the Numbers effect
Size value. When the dark rectangle appears around the word Size, release the mouse
button. The expression appears under the timeline with an active cursor after the final
parenthesis.
5 Being careful not to leave any spaces, type /10 in the expression to indicate that this
value will be divided by 10. The entire expression is now:
effect(“Numbers”).param(“Size”)/10
6 Click anywhere outside the expressions text box and then collapse the properties
outline for the Numbers 1 layer.
7 Preview the animation and save the project.
You won’t turn on the Motion Blur switch because the expression will create all the blur
you need for this composition.
AE_CIB.book Page 197 Monday, October 8, 2001 12:08 PM
LESSON 5
198
Working with Text and Numbers
Duplicating and renaming the numbers layer
Next, you’ll duplicate the Numbers 1 layer to create two more numbers layers for this
element. After Effects duplicates all the original keyframes and the expression in the new
layers.
1 Select the Numbers 1 layer and press Ctrl + D (Windows) or Command + D (Mac OS)
twice to create a total of three identical layers.
2 In the Timeline window, select Layer 2 and press Enter (Windows) or Return (Mac OS)
and type Numbers 2 for the name. Then press Enter (Windows) or Return (Mac OS) to
enter the new name.
3 Select Layer 3, and rename it Numbers 3, using the same process as in step 2.
Randomizing the number display
Now you’ll shuffle the keyframes you created earlier for Size and Tracking. This makes the
layers change size and tracking at different times and in different orders.
1 Choose Edit > Select All, or press Ctrl + A (Windows) or Command + A (Mac OS) to
select all three numbers layers.
2 Press U to open all of the layer properties that have keyframes or expressions. The Size,
Tr acking, and Blurriness controls appear under each layer. All of the layer keyframes also
appear and are at the same time positions because these layers are duplicates.
AE_CIB.book Page 198 Monday, October 8, 2001 12:08 PM
199
ADOBE AFTER EFFECTS 5.0
Classroom in a Book
3 For Layer 2, draw a marquee around one pair of the Size and Tracking keyframes and
drag them to another point on the timeline. It doesn’t matter which pair of keyframes you
select or where you drag them on the timeline. For example, you might select the Size and
Tr acking keyframes at 2:00 and drag them to 5:00.
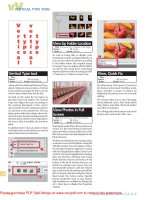
Drawing a marquee to select keyframes (above) and dragging keyframes (below)
4 Repeat step 3 for most (or all) the Size and Tracking keyframes for the Numbers 2 layer,
creating an arrangement that is distinctly different from the original set (in Layer 1).
AE_CIB.book Page 199 Monday, October 8, 2001 12:08 PM