Thủ thuật Sharepoint 2010 part 04 pdf
Bạn đang xem bản rút gọn của tài liệu. Xem và tải ngay bản đầy đủ của tài liệu tại đây (371.83 KB, 6 trang )
Lists and Libraries in SharePoint 2010
21
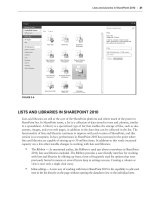
FIGURE 26
LISTS AND LIBRARIES IN SHAREPOINT 2010
Lists and libraries are still at the core of the SharePoint platform and where much of the power in
SharePoint lies. In SharePoint terms, a list is a collection of data stored in rows and columns, similar
to a spreadsheet. A library is a specialized type of list that enables the storage of files, such as doc-
uments, images, and even web pages, in addition to the data that can be collected in the list. The
functionality of lists and libraries continues to improve with each version of SharePoint, and this
version is no exception. In fact, performance in SharePoint 2010 has increased to the point where
lists and libraries are capable of storing up to 50 million items. In addition to this vastly increased
capacity are a few other notable changes to working with lists and libraries:
The Ribbon — As mentioned earlier, the Ribbon is used just about everywhere in SharePoint
2010, lists and libraries included. The Ribbon provides a user-friendly interface for working
with lists and libraries by offering up front a host of frequently used list options that were
previously buried in menus or several layers deep in settings screens. Creating a column or
view is now only a single click away.
Inline editing — A new way of working with lists in SharePoint 2010 is the capability to edit each
item in the list directly on the page without opening the datasheet view or the individual item.
22
CHAPTER 2 the NeW aNd imProved User exPerieNce
Tabular Views — This allows individual checkboxes to appear beside list items, enabling users
to select multiple items at once to perform bulk operations, such as deleting list items or per-
forming bulk check-in and check-out of documents in a library.
Along with these new features, the same components that make lists and libraries in SharePoint so
powerful, such as columns and views, also return. In the following sections, we cover some of the new
features in more detail. We also look at some of the returning features, and how the new interface
makes interacting with lists and libraries a little different from what you might be accustomed to.
Creating Lists and Libraries
In SharePoint 2010, the process of creating lists and libraries is almost identical to the process of
creating a new site, as the two processes share the same interface now (as long as the client machine
has Silverlight installed). To get started, navigate to the All Site Content page, which can be accessed
from the Site Actions menu or from the Quick Launch menu on most types of sites. Click the Create
button in the toolbar to start the creation process.
You can immediately filter the types of list and library templates available by List or Library or fur-
ther refine the search by clicking a category. Once you select the type of list or library you want to
create, you can simply give the list a name and create it, or click the More Options button to open
the additional options: giving the list a description and choosing whether the list’s name will appear
in the Quick Launch. These settings can always be changed later.
The various list templates available are actually nothing more than lists with pre-configured columns
and views. You’ll learn about creating your own views later in this chapter, in the “Creating Views”
section. In addition, these list templates are also based on content types, which are actually collec-
tions of columns stored at the root site level and then pulled down and copied into the newly created
list. You can find more details about content types in Chapter 16.
Of course, if none of the list templates provided meet your needs, then you can easily build a custom
list instead. A custom list provides only one column called Title, which all lists contain. From there,
you can build out your list with columns and views.
Working with Lists
Once you have created your list, it’s time to start working with it. Overall, the major functions of
working with a list aren’t that much different than in SharePoint 2007, but you now have more ave-
nues for list management. The Ribbon is displayed as soon as the list is created, providing you with
options for nearly every task you will need to accomplish when working with a list. In addition, the
list’s name appears in the Quick Launch by default (unless you set this option to No during the list
creation process), and you also have a link to add a new item directly on the page.
Adding content is as simple as clicking a link on the page. Clicking the Add New Item link will open
a pop-up, enabling you to quickly enter a new item into the list. When you are finished adding your
item, click OK and the page will refresh, with your new item showing.
If you need to collect more information for each item in the list, you can create new columns simply
by clicking the Create Column button in the Ribbon under the List tab. Filling out the Create Column
screen (shown in Figure 2-7) and clicking OK will add a new column to the list.
Lists and Libraries in SharePoint 2010
23
FIGURE 27
Datasheet View
A good way to quickly work with large quantities of data in a list, or to add data to the list quickly,
is to utilize the Datasheet view. The Datasheet view opens the list in a view that very closely resem-
bles the Excel interface, allowing you to quickly move between the cells of information and update
or change them, or add new items to the list. Items added in the Datasheet view still must meet the
parameters set in the Create Column screen, such as whether a cell is required. In addition, some
information cannot be edited in the Datasheet view. Another thing to keep in mind is that only the
current view of the list will open in the Datasheet view. This view can be a little intimidating to
some users, and it can be easy to do real damage to a carefully constructed list
Inline Editing
Microsoft offers some improvements to the list editing experience with SharePoint 2010. First up is
inline editing. As we stated earlier in this chapter, inline editing enables you to edit individual lines
in a list without having to open the Edit Item window or switch to the Datasheet view. Inline editing
is done directly on the list page. It is actually a component of the view displaying the list, and isn’t
on by default. Enabling inline editing is a simple process. To enable it for your current view, click
the Modify View button in the Ribbon, scroll down to the section called Inline Editing, expand this
section, and then check the box to Allow Inline Editing. Click OK to save the change to the view,
and you’ve just enabled inline editing. (Views are covered in more depth later in this chapter.) To
use inline editing, click the small Edit icon that now appears to the left of each line in the list as
24
CHAPTER 2 the NeW aNd imProved User exPerieNce
you hover the mouse cursor over it (see Figure 2-8). The fi elds in each column for the line item will
become editable. Make your changes, then click the Save icon where the Edit icon was. There is also
a Cancel icon to close inline editing if you want to discard your changes.
FIGURE 28
Tabular Views
Next up is Tabular view. You may have noticed that in most lists a checkbox appears to the left of
each line item as the mouse is hovered over. Tabular view lets you check multiple line items, thereby
enabling actions to be performed in bulk on the selected items. Most commands are unavailable
when multiple items are checked, as many item-related commands in a list can only be performed
individually; however, multiple items can be deleted at the same time using the Tabular view feature.
Additional options become available when working with Tabular view in libraries, which is covered
in the “Using the Ribbon with Lists” section later in this chapter.
Another feature that has been carried over from SharePoint 2007 but implemented more subtly in
this version is the list item drop-down menu. Hovering over an item in the list will highlight the
entire line in a border, and display a drop-down menu next to the text in the Title column. Clicking
the drop-down will bring up a few options, all but one of which are available on the Ribbon. The
only item that doesn’t have a corresponding Ribbon button is Compliance Details. Selecting this will
open a window that displays any compliance information that may be associated with the list item.
Compliance Details is a new option in SharePoint 2010 that lists the associated
information and settings applied to a document. This is part of the new Records
Management features included with SharePoint 2010, and is a way for users
and administrators to easily see what retention policies and settings (if any) have
been applied to the document.
Lists and Libraries in SharePoint 2010
25
Aside from the lists we’ve already described, several other types of list templates are also available
for use on a SharePoint site. Here are a few notable list types in SharePoint 2010:
Discussion Board — A list used as a full-fledged discussion board
Links — A simple list of links to other web pages or documents
Tasks — Can be used by a team or an individual to track progress of a project
Project Tasks — Similar to the Tasks list, but provides a Gantt chart, which can be opened in
Microsoft Project for additional tracking capabilities
External List — Enables you to browse data from an external list within the SharePoint
interface
Survey — Use to create a survey to collect information from others in the organization
Using the Ribbon with Lists
As you work with your list, you’ll notice that the Ribbon’s items and tabs change when work-
ing with the various list components. When a new list is created, the Ribbon displays two tabs by
default, List and Items.
The List tab contains items relevant to working with the list as a whole; columns and views are cre-
ated from this menu, views can be changed, users can set up alerts for the list, and the list settings
page can even be accessed from here, which opens up a page with more options for working with the
list. Other options include viewing the list as an RSS feed if this functionality has been enabled for
the site and list, exporting the list into an Excel spreadsheet, syncing to SharePoint Workspace, as
well as other options for opening the list in SharePoint Designer and InfoPath to further customize it.
The Items tab contains buttons and options for working with individual list items. From this tab
you can add new items, edit existing items, delete items, and manage item-level permissions. There
are also options for using workflows in the list, as well as the capability to attach a file to a list item.
You can use the tagging and “I like it” features from the Item tab as well.
Although all the buttons are visible at any given time, some buttons are not available, or enabled, in
some scenarios. This is part of the contextual nature of the Ribbon — when an item can’t be used,
it is grayed out. When an action is performed that allows the Ribbon item to be used, it will again
become available to click.
For example, when the Item tab is initially selected, the only button available on the Ribbon is New
Item. Everything else is grayed out. Hovering over the Ribbon will present the user with a descrip-
tion of the item but also provide a message saying that the control is unavailable. However, checking
the box next to an item or clicking on an item’s line in the list (without clicking the item’s Title link)
will make more of the Item tab’s buttons available. When using Tabular view, you may also notice
that just about every option in the Ribbon becomes unavailable if more than one item is selected. The
only options available are New Item and Delete. The capability to delete multiple items at once is in
itself a handy feature.
26
CHAPTER 2 the NeW aNd imProved User exPerieNce
As you work with the various types of lists, you’ll notice that the Ribbon displays different options.
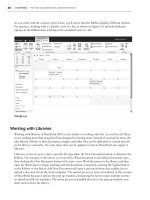
For instance, working with a Calendar view of a list, as shown in Figure 2-9, provides different
options in the Ribbon than working with a standard view of a list.
FIGURE 29
Working with Libraries
Working with libraries in SharePoint 2010 is very similar to working with lists. As you’ll recall, librar-
ies are nothing more than specialized lists designed for storing items. Instead of creating list items, the
idea behind a library is that documents, images, and other files can be uploaded or created directly
in the library. Generally, the same ideas that can be applied to lists in SharePoint also apply to
libraries.
Libraries can be set up to create a specific file type when the New Document button is clicked in the
Ribbon. For example, if the library is set up with a Word document as the default document type,
then clicking the New Document button will create a new Word document in the library and then
open the Word client to begin working with the document. Conversely, clicking the Upload button
in the Ribbon or the link to Add New Document will open a pop-up window that enables you to
upload a document from the client computer. The upload process is more streamlined in this version
of SharePoint because it utilizes the pop-up window, eliminating the need to open multiple screens
to upload and fill out metadata. The entire process is handled directly in the pop-up window; you
don’t need to leave the library.


