Thủ thuật Sharepoint 2010 part 05 pps
Bạn đang xem bản rút gọn của tài liệu. Xem và tải ngay bản đầy đủ của tài liệu tại đây (306.83 KB, 7 trang )
26
CHAPTER 2 the NeW aNd imProved User exPerieNce
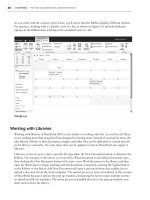
As you work with the various types of lists, you’ll notice that the Ribbon displays different options.
For instance, working with a Calendar view of a list, as shown in Figure 2-9, provides different
options in the Ribbon than working with a standard view of a list.
FIGURE 29
Working with Libraries
Working with libraries in SharePoint 2010 is very similar to working with lists. As you’ll recall, librar-
ies are nothing more than specialized lists designed for storing items. Instead of creating list items, the
idea behind a library is that documents, images, and other files can be uploaded or created directly
in the library. Generally, the same ideas that can be applied to lists in SharePoint also apply to
libraries.
Libraries can be set up to create a specific file type when the New Document button is clicked in the
Ribbon. For example, if the library is set up with a Word document as the default document type,
then clicking the New Document button will create a new Word document in the library and then
open the Word client to begin working with the document. Conversely, clicking the Upload button
in the Ribbon or the link to Add New Document will open a pop-up window that enables you to
upload a document from the client computer. The upload process is more streamlined in this version
of SharePoint because it utilizes the pop-up window, eliminating the need to open multiple screens
to upload and fill out metadata. The entire process is handled directly in the pop-up window; you
don’t need to leave the library.
Lists and Libraries in SharePoint 2010
27
Single fi le upload isn’t the only upload option that has gotten a facelift. The multiple fi le upload has
also been improved, adding drag and drop functionality to SharePoint libraries. To upload multiple
fi les, you can either click the Upload button’s drop-down and select Multiple File Upload, or click the
Upload button and select the link on the upload pop-up to Upload Multiple Files. Then simply drag
your fi les into the space indicated and click OK. Once the fi les are uploaded, click Done. If the drag and
drop functionality isn’t convenient, you can also browse for the fi les using a standard fi le-browsing
Windows interface. Figure 2-10 shows the Upload Multiple Documents pop-up window.
FIGURE 210
The multiple fi le upload interface is available when the Microsoft Offi ce clients
are installed on the computer accessing the SharePoint site. The drag-and-drop
functionality is available when using the Offi ce 2010 suite of clients. In fact,
the improved multiple fi le upload interface will also work with SharePoint 2007
when using Offi ce 2010 on your computer.
Several types of libraries are available, such as a document library (which is the most commonly
used type) and a picture library. The picture library is notable in that it doesn’t actually use the
Ribbon interface, but instead continues to use the menu-driven interface from SharePoint 2007.
Using the Ribbon with Libraries
The Ribbon used in libraries utilizes many of the same buttons as the Ribbon that appears when
working with a list. There are some key differences, however. The major difference between the List
and Library Ribbon is in the Connect & Export group. The List commands in this group enable you
to use the list to work with other programs such as Excel, Visio, Outlook, and Project. There are
fewer commands in the Library tab’s Connect & Export group. You can still connect the document
28
CHAPTER 2 the NeW aNd imProved User exPerieNce
library to external clients, but there is also an icon to open the document library as a regular Windows
Explorer window, as shown in Figure 2-11. This can be extremely handy when importing a large
number of items into a SharePoint document library. Keep in mind, however, that when you are
uploading multiple documents, either through Explorer view or through the multiple file upload
interface, no metadata can be assigned to the files until after they are already uploaded.
FIGURE 211
The Documents tab is quite different from a list’s Items tab. The options here enable you to check
in and check out documents for editing, edit and view the properties of a document, check the ver-
sion history of a document, set unique permissions for a document, download copies of files in the
library to your computer, and set up and use workflows, along with several other options. You’ll
also notice that the New Folder option is available as long as the option to allow folders to be cre-
ated is enabled.
The Check In and Check Out options enable you to check out a document (or multiple documents)
to yourself to prevent others from editing the document while you work on it. This helps keep docu-
ments in sync as people work on them and prevents users from overwriting one another’s work.
The Edit Document button in the Open & Check Out group will open the selected document in the
associated client application. (Not all document types can be opened from SharePoint and saved
back into SharePoint. In some instances, a document may need to be opened, saved to the local
machine, and re-uploaded into SharePoint as a new version.)
In the Manage section of the Ribbon, the View Properties button and Edit Properties button enable
you to view and edit the selected item, respectively. The View Properties button may cause some ini-
tial confusion, as it actually refers to the action of viewing the properties of the selected document
and not looking at properties of the current view. Also in the Manage section is the capability to set
unique permissions on a document, and the option to delete a document.
When using Tabular view, most of the Ribbon items disappear, leaving only a couple of options
available for working with the selected documents, such as Check Out (or Check In if the selected
documents are checked out) and Delete. This new functionality makes working with many docu-
ments at once much easier than in previous versions.
Lists and Libraries in SharePoint 2010
29
Columns = Metadata
Columns can still be created in a SharePoint list and/or library, just as in previous versions; and
because you can create columns in your list, you can associate metadata with each list item.
Basically, metadata is data about data. When uploading a document to a library, certain informa-
tion is automatically collected about the document, such as who uploaded it, when it was created,
and when it was last modified. This information about the document is the document’s metadata.
The same holds true when creating new items in a list.
Additional custom metadata can be added to a list or library in the form of columns. Columns refer
to the extra type of information being collected about an item in a list or library. Creating a column
enables you to collect and store additional information in the list about each item. To create a
column, simply click the Create Column button in the Ribbon under the List tab (or Library tab
if working with a library). The Create new column screen can also be accessed from the List or
Library Settings screen.
You can create many different types of columns in order to collect metadata for items in a list or
library. Table 2-1 outlines the various types of columns available in SharePoint 2010.
TABLE 21 SharePoint 2010 Column Types
COLUMN TYPE DESCRIPTION
Single Line of Text Allows users to enter a custom value for the column, up to 255 characters.
Multiple Lines of Text Allows users to enter multiple lines for a custom value for the column.
Additional options allow for rich text editing.
Choice (menu to
choose from)
Allows users to select pre-determined options from a drop-down menu,
radio buttons, or checkboxes, which allow for multiple selections.
Number Allows only numbers to be entered. Options include configuring decimal
places, maximum and minimum allowed values, and whether the number
should show as a percentage.
Currency Similar to the number column. Displays the number entered as the selected
type of currency.
Date and Time Allows users to enter a date and optionally a time using a date picker. Date
and time columns can be useful when creating Calendar views or used as
filtering options.
Lookup This column can be used to look up values from another list or library in the
same site. Not all types of columns can be used with the lookup column.
Yes/No (check box) A simple checkbox that can be used to indicate that a condition is true or
not based on whether the box is checked. When filtering with a yes/no col-
umn, the value of the check is either a 1 (for yes, or checked) or 0 (for no,
not checked).
continues
30
CHAPTER 2 the NeW aNd imProved User exPerieNce
COLUMN TYPE DESCRIPTION
Person or Group This column is essentially a “people picker” column that enables users and
groups from the site to be looked up.
Hyperlink or Picture Allows users to enter a URL to a site (internal or external) or an image in
the site, depending on whether the option is selected to format the URL as
a link or a picture.
Calculated This column uses values from other columns in the same list in an equa-
tion to produce a value. The equations used in calculated columns are very
similar to the types of equations used in Excel.
External Data A new column for SharePoint 2010 that allows external content types to
be browsed and used as metadata in a list. External content types must be
enabled by an administrator before this column is available.
Managed Metadata Also new to SharePoint 2010, this allows values from a managed metadata
term store to be browsed and selected. (See Chapter 16 for more about
managed metadata.)
When creating a new column, it’s important to look at the Additional Column Settings section below
the column type selector. This section varies according to the type of column that’s chosen, allowing
various settings to be applied to further refi ne the type of data being collected. In addition, each col-
umn type can be confi gured to require that users enter something into the column, ensuring that the
type of information that needs to be collected by an organization is being collected. Once the column
is created, it can be populated with the corresponding type of data. Tagging list items with all this
metadata can come in handy when working with fi ltering and creating views of the data, which is
covered in more depth later in the chapter. Additionally, metadata can be searched, making it easy to
fi nd information in lists and libraries in this way.
This section has been referring to columns, but when you are adding a new item
to a list or editing the properties of a document, you will notice that what you
create as a column actually displays as a fi eld to collect the information. In fact,
they are one and the same. When viewing the entire list, the fi elds containing the
information you entered are displayed in a column, but when working with an
individual item, the information collected in the column is simply displayed as a
fi eld for usability purposes.
TABLE 21: SharePoint 2010 Column Types
(continued)
Lists and Libraries in SharePoint 2010
31
Working with Folders
Inevitably, one of the first questions many users ask when they begin working with SharePoint lists
and libraries for the first time is, “Can’t I just put my stuff in a folder in SharePoint?” The answer is
yes, but with some caveats. Users love folders. They’re familiar with the concept, their entire com-
puter has documents and images all filed away in specific folders throughout the hard drive, and they
probably have dozens more folders hanging out on a file share on a server somewhere too. However,
folders have inherent drawbacks, such as ending up with duplicate files and multiple versions of the
same file scattered throughout a department on several users’ machines, as well as on a file share.
Keeping track of a single document becomes a task in itself (although SharePoint can help mitigate
this mess). Unfortunately, users have been trained over the years to organize things in folders, so as
an administrator, you need to understand that it’s only natural for users to ask about organizing their
documents within folders when moving to SharePoint. It’s your job to help them understand why they
ought to use metadata instead to organize their content.
While your natural reaction might be to “encourage” them either by osmosis or by using a ruler
over the knuckles, you can probably do better than that. Try to explain to users how metadata helps
them get better search results and how tagged content, coupled with custom views, gives them more
flexibility. When they bury content in folders it is hard to get a view of all the content at once; for
example, maybe you want to see all of the expense reports. With metadata it is easy to create a view
that shows all expense reports.
This isn’t to say that folders don’t have their place in SharePoint 2010. They can come in handy in
many situations. In fact, just about every type of list and library supports using folders. Some of these
lists enable the use of folders by default (such as a document library), while others need the option
enabled before folders can be created (such as a custom list). Folders can also be useful when you need
to work with permissions on a set of documents or items in a library. Although individual items can
be assigned unique permissions, it can quickly become a nightmare managing permissions on dozens
of documents in the same library. Instead of managing the permissions on each document individually,
documents that require the same permissions can be grouped together in a folder, which can have its
own set of permissions. This makes permission management much easier. To enable or disable the use
of folders in a list or library, click the List/Library Settings button in the Ribbon, under the Library
tab. Click the Advanced Settings link, and select Yes or No to make the “New Folder” command
available (see Figure 2-12).
FIGURE 212
32
CHAPTER 2 the NeW aNd imProved User exPerieNce
In addition, using folders can help scale a document library or list. Say, for example, that you have a
particularly large document library, and your organization is using the large list throttling feature to
only allow views of 2,000 items at a time. You could create several folders and divide the documents
up between the folders, skirting around the 2,000-item per view limit imposed on the site without
having to create custom views. In most cases, however, creating views based on metadata still offers
more flexibility in terms of browsing through the content. For more information on large list throt-
tling see Chapter 3.
Creating Views
SharePoint 2010 still offers the option to create different views of lists and libraries. Views are simply
a way to reorganize and structure the data stored in a SharePoint list or library in meaningful ways.
Multiple views can be created on a list or library, and can be used to group, sort, and filter the data.
Sorting and filtering data is possible because of the list’s metadata. For example, you could create
a view that shows all documents that were last modified by a particular user. Similarly, you could
create a view that groups all items in a list that meet the same criteria based on information entered
into a column.
Types of Views
You can create several types of views for any given list:
Standard view — This is the most commonly used type of view. It presents the data in the list
in the standard row and column format. You choose which columns you would like to dis-
play, the order in which they should appear, how they display, and how many items show at
once, among other options. You can also group and filter data based on information in each
column.
Datasheet view — This is similar to the Standard view, but it opens the list in the Datasheet
by default. Like the Standard view, you can choose which columns are displayed and in
which order. You don’t have quite as many options for formatting the view as with a
Standard view, however.
Calendar view — This view displays the items in the list in a calendar format. Not all lists
can utilize the Calendar view, however. Calendar views must be based on some kind of start-
ing time, so a date and time column is necessary to use this view.
Gantt view — Along the same lines as the Calendar view, this view also requires a starting
time to work. This builds the list into a chart to track events or progress over a period of time.
Access view — This opens the Access client to work with the values in the list outside of
SharePoint.
Custom view in SharePoint Designer — This opens SharePoint Designer 2010 to create cus-
tom views that can be modified and styled, such as with conditional formatting.
Standard view, with Expanded Recurring Events — This option appears when creating new
views based on the Calendar list template and is basically a Standard view that shows all
occurrences of a recurring event.


