Tài liệu Photoshop cs5 by Dayley part 4 ppsx
Bạn đang xem bản rút gọn của tài liệu. Xem và tải ngay bản đầy đủ của tài liệu tại đây (335.85 KB, 9 trang )
Part I: Getting Started with Adobe Photoshop CS5
32
Deactivate
This menu option is one that is absolutely imperative for you to know. When you install
Photoshop on your computer and activate it, Adobe keeps a record of it. After you have done this
twice (with the single-user application, at any rate), Adobe doesn’t allow you to activate your prod-
uct and you can’t use it. This obviously keeps you from passing your copy of Photoshop to your
friends, neighbors, and your cousin’s boyfriend’s sister-in-law.
Adobe’s anti-piracy feature becomes a problem, however, if you are restructuring your system or
purchasing a new computer. In order to reinstall Photoshop on a new system, you need to deacti-
vate it on the old one. Go to the Help menu and choose Deactivate. Doing so allows you to activate
your software the next time you install it.
Understanding Panels
The panels in Photoshop are really mini-applications with their own windows, controls, and
menus. You rely heavily on the Photoshop panels to do most of the editing. Photoshop has many
panels, each of which provides its own set of functionality. The purpose of this section is to famil-
iarize you with how panels work in general and how to organize them.
Panels tend to take up quite a bit of the workspace, so efficient management helps with how easy it is to
get things done. Because panels tend to take up quite a bit of space in the work area, Photoshop allows
them to be visible, collapsed into an icon, or hidden. To hide or unhide a panel, select the panel from
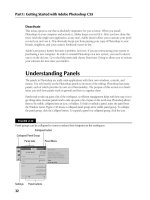
the Window menu. Figure 2.10 shows a collapsed panel group and a visible panel group. To collapse
the panel group, click the Collapse button. To expand a panel in a collapsed group, click the icon.
FIGURE 2.10
Panel groups can be collapsed to icons to reduce their footprint on the workspace.
Collapsed Panel Group
Panel tabs
Collapsed button
Panel Menu
Settings Panel buttons
06_584743-ch02.indd 3206_584743-ch02.indd 32 5/3/10 10:15 AM5/3/10 10:15 AM
Chapter 2: Understanding the Photoshop Workspace
33
Note
You typically only have a small number of panels that pertain to your current workflow open at a time. This
makes finding the panels you need much easier. n
A panel group is one or more panels that are connected to each other. To add a panel to a group,
drag the panel or icon onto the group. To remove a panel from a group, drag the panel out of the
group. Organizing panel groups is really no different that organizing the items on your desktop.
You can decide which panels go in which groups. The bottom line is, if you know where to find a
panel, you can use it much faster.
The panel groups have the following basic components, as noted in Figure 2.10:
l
Panel tabs: The panel tabs are used to select which panel is visible in the group and to
drag panels out of the group.
l
Collapse button: This button collapses the panel to an icon to reduce the footprint in the
work area.
l
Settings: The settings area contains the controls used by the panel to perform various
tasks. Each panel has different settings.
l
Panel menu: All panels have a menu that pops out when you click the menu button in
the top-right corner. The panel menus usually include additional features that are not
included in the main settings area. If you can’t find something, it is probably in the panel.
l
Panel buttons: Panels often have buttons on the bottom that do things such as add or
delete items or perform common tasks needed by the panel.
Another way to organize panel groups is to dock them either together or to the sides of the
Photoshop workspace. Panel groups can be docked by dragging the groups to the side or bottom
of another group. They can be docked to the side of the workspace by dragging them until the
mouse is on the workspace edge.
The functionality of each individual panel is far too much to cover in a single chapter, so the pan-
els are covered in various chapters throughout the book. Figure 2.11 shows the icons for each of
the panels, and the following list describes them and where they are covered in the book to give
you a quick guide:
l
Swatches: Provides a simple way to manage sets of colors that you use in different docu-
ments. See Chapter 4.
l
Color: Allows you to quickly select any color in the possible ranges that Photoshop sup-
ports. See Chapter 4.
l
Styles: Allows you to manage the style sets that can be applied by various tools when
painting or applying filters. See Chapters 10 and 16.
l
Brush: Provides a robust interface that allows you to define different types of brush quali-
ties and behaviors that are used by Brush tools. See Chapter 16.
l
Brush Presets: Allows you to easily manage sets of brushes that can be used by the vari-
ous Brush tools. See Chapter 16.
06_584743-ch02.indd 3306_584743-ch02.indd 33 5/3/10 10:15 AM5/3/10 10:15 AM
Part I: Getting Started with Adobe Photoshop CS5
34
FIGURE 2.11
Photoshop provides several panels that each act as individual utilities. These panels can be viewed by
selecting them from the Window menu or clicking their icons.
Swatches
Color
Styles
Brushes
Brush Presets
Clone Source
3D
Animation (Timeline)
Character
Paragraph
Character Styles
Paragraph Styles
Mini Bridge
Tool Presets
Notes
Measurement Log
History
Actions
Navigator
Masks
Adjustments
Layer Comps
Info
Histogram
Paths
Channels
Layers
l
Clone Source: Provides a dynamic interface to control the source used by the Clone tools
to heal areas of photos and remove unwanted items. See Chapter 15.
06_584743-ch02.indd 3406_584743-ch02.indd 34 5/3/10 10:15 AM5/3/10 10:15 AM
Chapter 2: Understanding the Photoshop Workspace
35
l
3D: Provides a powerful interface that allows you to manipulate 3D objects and lighting.
See Chapters 22, 23, and 24.
l
Animation (Timeline): Provides a timeline-based utility that adds animation to images.
See Chapter 26.
l
Character: Provides options to quickly format character styles, fonts, and spacing of tex-
tual elements in images. See Chapter 18.
l
Paragraph: Provides options to quickly format paragraph styles and spacing of textual ele-
ments in images. See Chapter 18.
l
Character Styles: Allows you to create and save character style settings that allow you to
keep text consistent between documents. See Chapter 18.
l
Paragraph Styles: Allows you to create and save paragraph style settings that allow you to
keep text consistent between documents. See Chapter 18.
l
Mini Bridge: Provides a portion of the functionality of Bridge that allows you to quickly
select and organize images files. See Chapter 6.
l
Layers: Allows you to select, create, edit, and mange layers. This is one of the most com-
mon panels you’ll use. See Chapter 10.
l
Channels: Allows you to view and manage each of the different color channels in an
image as well as create additional channels such as alpha channels. See Chapter 11.
l
Paths: Allows you to manage and utilize vector paths in images. See Chapter 17.
l
Histogram: Provides a simple-to-understand view of the overall distribution of color and
levels in an image. See Chapter 4.
l
Info: Allows you to view color and other information about individual pixels in the image
by hovering the mouse over them. See Chapter 4.
l
Layer Comps: Allows you to easily create, manage, and view multiple versions of a layout
in a single Photoshop file. See Chapter 10.
l
Adjustments: Allows you to apply several adjustments to a layer in an image. See
Chapters 10 and 13.
l
Masks: Provides a simple interface to create masks from selections and vector data. Masks
shield areas of an image when certain effects are applied. See Chapter 10.
l
Actions: Allows you to record and then reapply a series of commands that perform com-
mon tasks such as applying filter settings. See Chapter 5.
l
History: Provides access to the history states of the document that are recorded each time
the document is changed. See Chapter 5.
l
Navigator: Provides a simple interface that allows you to quickly zoom in on areas of an
image. The interface includes a slider control at the bottom that zooms in on the image. It
also displays a miniature of the images with a red rectangle that you can move to pan to a
specific area of the image, as shown in Figure 2.12.
l
Measurement Log: Keeps track of measurements as discussed earlier in this chapter.
06_584743-ch02.indd 3506_584743-ch02.indd 35 5/3/10 10:15 AM5/3/10 10:15 AM
Part I: Getting Started with Adobe Photoshop CS5
36
FIGURE 2.12
The Navigator panel allows you to quickly zoom in on the image in the document win-
dow and then pan to specific locations.
l
Notes: Allows you to view and manage notes that are created by the Note tool. This is dis-
cussed later in this chapter.
l
Tool presets: Allows you to quickly view and select presets for the tool that is currently
selected in the Toolbox.
Understanding the Tools in the Toolbox
The Toolbox, shown in Figure 2.13, provides easy access to all the tools that you use to interact
directly with pixels in the document window. To enable or disable the Toolbox, select
Window ➪ Tools from the main menu.
Most of the tools shown in the Toolbox expand by holding down the mouse button over them to
reveal several other tools, as shown in Figure 2.13. From the expanded tool menus, you can select
other tools. The icon of the currently selected tool is displayed in the Toolbox, and the cursor
changes to reflect the current tool as well.
Note
As you select different tools in the Toolbox, the tool option menu bar changes to reflect specific options for the
new tool. The settings in the tool option menu define the behavior of the tool selected in the Toolbox and
extend the capabilities of what you can do. The changes you make to the tools settings are the same the next
time you return to the tool, so you can usually use multiple tools and keep the same settings when you return
to the tool. n
Just as with panels, the tools in the Toolbox are covered in various sections throughout the book.
The purpose of this section is to familiarize you with the organization of the Toolbox and what
kind of tools you can find there.
06_584743-ch02.indd 3606_584743-ch02.indd 36 5/3/10 10:15 AM5/3/10 10:15 AM
Chapter 2: Understanding the Photoshop Workspace
37
FIGURE 2.13
Photoshop provides several tool sets in the Toolbox, and the tool sets can be expanded to reveal additional
tools.
Shape Selection tools
Brush tools
Lasso Selection tools
Quick Selection tools
Crop and Slice tools
Eye Dropper/Ruler/Note/Count tools
Healing tools
Stamp tools
History Brush tools
Eraser tools
Gradient/Paint Bucket tools
Blur/Sharpen/Smudge tools
Dodge/Burn/Sponge tools
Path Creation tools
Text tools
Path Selection tools
Shape tools
3D Object tools
3D Camera tools
Hand/Rotate View tools
Move tool
Edit in Quick Mask mode
Background/Foreground
Zoom tool
06_584743-ch02.indd 3706_584743-ch02.indd 37 5/3/10 10:15 AM5/3/10 10:15 AM
Part I: Getting Started with Adobe Photoshop CS5
38
Tip
A great feature in Photoshop is the ability to quickly select and even temporarily switch tools on the fly. In
many of the tool sets, you see a letter on the right side of the tools. Pressing that letter on the keyboard selects
that tool set. Holding down the Shift key while pressing the letter on the keyboard toggles through the different
tools in the tool set. You can temporarily switch tools by holding down the letter key for the tool while you use
it, and when you release the key, Photoshop reverts to the original tool. For example, if you hold down the V
key when another tool is selected, Photoshop temporarily changes to the Move tool and you can move objects.
When you are finished moving items, release the V key and the tool reverts to the original tool. n
The following list describes each of the tool sets in the Toolbox briefly and where you can find
more information about them in this book:
l
Move tool: Only one tool allows you to move items in the document window, and this is
it. It allows you to move several items, including guides, objects and shapes in shape lay-
ers, and text objects.
l
Shape Selection tools: These tools allow you to quickly select areas of the document
using rectangle, ellipse, row, and column shapes. See Chapter 9.
l
Lasso Selection tools: These tools allow you to quickly select areas of the document by
using the mouse to draw a lasso around them. See Chapter 9.
l
Quick Selection tools: These tools can intelligently select areas of the document by
detecting areas that are similar to those selected by the mouse. See Chapter 9.
l
Crop and Slice tools: The Crop tool lets you select an area of the document to keep and
remove the area around it. See Chapter 3. The Slice tools are used for creating clickable
hot areas for Web images. See Chapter 30.
l
Eye Dropper/Ruler/Note/Count tools: This tool set is a catchall. The Eyedropper tool is
used to select foreground colors directly from pixels in the image. See Chapter 4. The
Ruler tool is used to measure areas in an image. The Note tool allows you to add notes to
an image that help you retain things such as to-do editing lists with the image. The Count
tool allows you to count and log items in the image, which can be useful if you are work-
ing with medical images. The Ruler, Note, and Count tools were discussed earlier in the
menus section of this chapter.
l
Healing tools: The Healing tools provide quick ways to apply brush strokes that can heal
areas of an image, from removing dust and scratches to removing red eye. See Chapter 15.
l
Brush tools: The Brush tools allow you to apply painting techniques to repair, enhance,
and create images. See Chapter 16.
l
Stamp tools: The Clone Stamp tool allows you to select an area of the image and then
stamp or brush that area into other parts of the image or even other documents. See
Chapter 15. The Pattern Stamp tool allows you to apply a style pattern to an image using
brush strokes. See Chapter 16.
l
Eraser tools: The Eraser tools allow you to quickly remove pixel data from an image. See
Chapter 16.
06_584743-ch02.indd 3806_584743-ch02.indd 38 5/3/10 10:15 AM5/3/10 10:15 AM
Chapter 2: Understanding the Photoshop Workspace
39
l
History Brush tools: The History Brush tools are used to repair and enhance areas of an
image by painting data from previous editing states of the image. For example, you could
change the image to grayscale and then use brush strokes to add color to specific areas.
See Chapter 5.
l
Blur/Sharpen/Smudge tools: The Blur and Sharpen tools allow you to use brush strokes
to blur or sharpen specific areas of an image. The Smudge tool allows you to use brush
strokes to smudge existing pixels into each other. See Chapter 16.
l
Gradient/Paint Bucket tools: The Gradient tool allows you to paint a gradient pattern
onto an image. The Paint Bucket tool allows you to apply a paint color to sections of an
image. See Chapter 16.
l
Dodge/Burn/Sponge tools: The Dodge and Burn tools allow you to use brush strokes to
lighten or darken areas of an image. The Sponge tool allows you to use brush strokes to
remove or add color saturation in areas of an image. See Chapter 16.
l
Path Creation tools: The Path Creation tools allow you to create vector paths by creating
lines between anchor points. See Chapter 17.
l
Path Selection tools: The Path Selection tools allow you to select and manipulate vector
paths by adjusting the anchor points. See Chapter 17.
l
Text tools: The Text tools allow you to add textual elements to images. See Chapter 18.
l
Shape tools: With the Shape tools, you can easily create and manipulate simple geometric
vector shapes and lines as well as custom vector shapes. See Chapter 17.
l
3D Object tools: These tools allow you to create and manipulate 3D objects. See Chapters
22, 23, and 24.
l
3D Camera tools: These tools let you to manipulate camera views when working with 3D
elements. See Chapters 22, 23, and 24.
l
Hand/Rotate View tools: Using the Hand tool, you can grab onto the image and pan by
dragging the mouse. This is available only when you are zoomed in on the image, but it’s
very useful for navigating around your image. The Rotate View tool allows you to rotate
the canvas in the document window by dragging with the mouse. If you hold down the
Shift key while rotating the canvas, the rotation occurs in 15-degree increments. Rotating
the canvas can be useful if you need to align elements in the image with the vertical or
horizontal axis of the display screen for editing.
l
Zoom tool: The Zoom tool allows you to use the mouse to drag a specific rectangle to
zoom in on the image. You also can zoom in at 100 percent increments by simply clicking
the document with the mouse. You can zoom out at 100 percent increments by holding
down the Shift key while clicking the document. The options menu for the Zoom tool
provides several buttons to resize the document view based on actual pixels, print size,
and screen size.
If you have OpenGL Drawing enabled then you can use the Scrubby Zoom option in the
Zoom tool options menu. When you enable Scrubby Zoom, then you can click and drag
the mouse to the left and right on the image to zoom in and out.
06_584743-ch02.indd 3906_584743-ch02.indd 39 5/3/10 10:15 AM5/3/10 10:15 AM
Part I: Getting Started with Adobe Photoshop CS5
40
l
Background/Foreground: The background/foreground area of the Toolbox allows you to
see and modify the current background and foreground colors. The foreground color is
used by several tools to paint onto the image. The background color is used by several
tools when removing pixels from the image. See Chapter 4.
Tip
Pressing D on the keyboard resets the foreground and background colors to Black and White, respectively.
Pressing X on the keyboard swaps the foreground and background colors. n
The foreground is represented by the front square and the background by the back
square. The color of each is changed by clicking the square to launch a color chooser. The
two can be switched by clicking the curved line with arrows on each end. To revert to the
default of black and white, click the small black and white icon.
l
Edit in Quick Mask mode: This toggles between Normal and Quick Mask mode. The
Edit in Quick Mask mode option allows you to tweak selections using the brush tool to
paint the exact shape. See Chapter 9.
Tip
You can activate the Quick Mask mode using the Q key whenever you have an active selection in the
document. n
Using Presets
As you become more familiar with options available for different tools panels in Photoshop, you
realize that it takes a while to get some tool settings and panels optimized for what you need them
to do. If you have to do that over and over, it can become very time consuming. That’s where pre-
sets come into play.
A preset is simply a set of saved settings that can be easily reloaded to make the tool behave the
exact same way each time the preset is used. Presets are organized into sets that can be loaded for
each tool or panel and then easily selected. You will work with presets throughout the book, but
this section is designed to familiarize you with what presets are and the tools that you use to select
and manage them.
Selecting tool presets
The simplest way to select tool presets is from the Preset menu option that’s in every tool options
bar, as shown in Figure 2.14. For the Crop tool, you see presets for each of the standard photo
sizes. Selecting one of the presets configures the Crop tool to crop the image to the specific size
without changing the settings manually.
06_584743-ch02.indd 4006_584743-ch02.indd 40 5/3/10 10:15 AM5/3/10 10:15 AM
