Tài iệu Photoshop cs5 by Dayley part 69 pps
Bạn đang xem bản rút gọn của tài liệu. Xem và tải ngay bản đầy đủ của tài liệu tại đây (613.27 KB, 6 trang )
Chapter 15: Using Cloning and Healing to Restore Digital Images
485
Utilizing the Clone Source panel
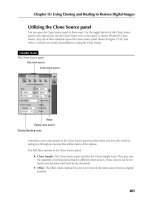
You can open the Clone Source panel in three ways: Use the toggle button for the Clone Source
panel in the options bar, use the Clone Source icon in the panel, or choose Window ➪ Clone
Source. Any one of these methods opens the Clone Source panel shown in Figure 15.26, and
with it, a whole new world of possibilities in using the Clone Stamp.
FIGURE 15.26
The Clone Source panel
Flip clone source
Scale clone source
Overlay Blending mode
Reset
Rotate clone source
I introduce you to the options in the Clone Source panel and then show you how they work by
taking you through an exercise that utilizes many of the options.
You find these options in the Clone Source panel:
l
Clone Sample: The Clone Source panel includes five Clone Sample icons. They give you
the capability of setting and storing five different clone sources. These sources can be cre-
ated in any document and used in any document.
l
Offset: The offset values indicate how far you’ve moved the clone source from its original
position.
22_584743-ch15.indd 48522_584743-ch15.indd 485 5/3/10 10:36 AM5/3/10 10:36 AM
Part IV: Enhancing, Correcting, and Retouching
486
l
Flip the clone source: You can flip the clone source vertically or horizontally using the
rotating arrows next to the Width and Height percentages.
l
Set the scale of the clone source: This option is incredibly useful, especially when you
are cloning specific objects from one file into another. Often the clone source needs to be
resized to fit into the new document appropriately. Type a percentage or use the scrubby
slider that appears when you hover over the W or H. Be sure to use the link icon to main-
tain the aspect ratio, or not, as you choose.
l
Rotate the clone source: Type a rotation degree or use the scrubby slider to rotate
your source.
l
Reset Transform: Use this button to change the settings of the Clone Source panel back
to default.
l
Frame Offset: When you are cloning from one frame to another frame using a video file,
the frame offset indicates how many frames you are from the clone source.
l
Lock Frame: This locks the clone source in a video file to the original frame it was created
on. With this option unselected, as you move frame to frame cloning a video, your clone
source also moves the same number of frames, so the frame offset is consistent. If you
want to use the original frame, even while you move through different frames, select
Lock Frame.
l
Show Overlay: This creates an overlay with the clone source so you can preview the
changes you are making with the Clone Stamp.
l
Overlay Opacity: This sets the opacity of the overlay. The default setting of 50 percent
allows you to clearly see the background at the same time as the clone source and in most
cases determine where to place your first stroke.
l
Overlay Blending mode: If you find it hard to distinguish between the overlay and the
original image, you can set the blending mode of the overlay to lighten or darken it so it is
more easily distinguishable.
l
Clipped: By default, the clone source overlay is clipped to the area indicated by your
Brush tool. This is great for fix-ups where you aren’t cloning specific items, but you’ll find
yourself toggling this option back and forth frequently as you work with specific objects.
l
Auto Hide: This option shows the overlay when your mouse button is released and hides
the overlay as you paint in cloned areas.
l
Invert: This inverts the overlay so it is easier to distinguish from the background image.
Tip
If you are planning to use the Clone Source panel frequently, or at least for an extended period of time, you
might want to dock it with the main panels to keep it out of your work area. Drag it into place and drop it
when you see a blue highlight indicating it is linked to the other panels in the main area. n
Now that you’ve had a rundown of what these options are, I show you a real-world example that
demonstrates the usefulness and scope of the Clone Source tools. In this example, I use a video file
instead of an image, not because it’s necessary, but simply to demonstrate that image files are not
the only files that can be changed with the powerful Photoshop tools.
22_584743-ch15.indd 48622_584743-ch15.indd 486 5/3/10 10:36 AM5/3/10 10:36 AM
Chapter 15: Using Cloning and Healing to Restore Digital Images
487
Figure 15.27 is a frame of a 3D video I created years ago. The photo in the file is very outdated,
and I want to replace it with a newer one. The Clone Stamp is just the tool I need.
FIGURE 15.27
I can use the options in the Clone Source panel to change the photo in this video frame.
On the Web Site
The video for this exercise is available on the Web site as Figure 15-27.avi, but if you prefer to do this exercise
with an image file, the JPEG of this frame is available as Figure 15-27.jpg. You also can find the clone source
file saved as Figure 15-28. This file has a skew transformation to make it proportional to the falling frame and a
bevel and emboss effect added to give it dimension inside the frame. These changes weren’t strictly necessary,
but they make the switch more realistic. You learn how to make these changes in Part VI. n
Follow these steps to use the options found in the Clone Source panel:
1. Open the file you are using for a clone source.
My file is shown in Figure 15.28.
2. Select the Clone Stamp tool from the Toolbox.
3. Open the Clone Source panel, and select the first Clone Source icon.
4. Alt/Option-click inside the clone source file to set your clone source.
5. Open the file you want to clone into.
I used the video file shown in Figure 15.27. If you want to use the video file, use frame
0;00;07;08.
Note
If you use the video file, Photoshop asks you if you want to correct the aspect ratio when you open it. Click
Yes. You are informed that the aspect correction is for preview purposes only. Click OK. n
22_584743-ch15.indd 48722_584743-ch15.indd 487 5/3/10 10:36 AM5/3/10 10:36 AM
Part IV: Enhancing, Correcting, and Retouching
488
FIGURE 15.28
I use this photo to replace the photo in the video.
6. Deselect the Clipped option in the Clone Source panel, revealing the full overlay, as
shown in Figure 15.29.
If the opacity of your overlay is too high, reduce it so that you can see through to the
underlying image. Wow! The image is much larger than the video file.
FIGURE 15.29
Resizing this file is definitely a must!
22_584743-ch15.indd 48822_584743-ch15.indd 488 5/3/10 10:36 AM5/3/10 10:36 AM
Chapter 15: Using Cloning and Healing to Restore Digital Images
489
7. Resize the clone source so it fits into the photo frame.
It took me a bit of trial and error, but I’ll clue you in: I set my Width and Height at
2.8 percent.
8. Rotate the clone source so it lines up with the photo frame.
I set my angle at −22.2 degrees.
9. Select the Invert option.
Now that the photo file lines up so well with the original and they are both a bit pixi-
lated, it is harder to see the overlay. Selecting the Invert option makes it easier to line
them up.
10. Clone in the new image.
After you’ve lined them up, click to anchor the clone source and make as many passes as
needed to clone in what you want. In this case, I cloned the entire source image, so I
cheated and made my clone brush huge so I could accomplish the clone in just one click,
as you can see in Figure 15.30. With other images, you may have to be much more pre-
cise, but our next exercise demonstrates that.
Note
You need to deselect the Invert option to see your results. n
FIGURE 15.30
Using the Clone Source panel made this clone not only possible but also a very simple
process.
22_584743-ch15.indd 48922_584743-ch15.indd 489 5/3/10 10:36 AM5/3/10 10:36 AM
Part IV: Enhancing, Correcting, and Retouching
490
Using the Clone and Healing Brushes
Together for Optimal Effect
Now that you have a feel for how the Clone Stamp and Healing Brushes work, I show you a couple
of examples of advanced techniques that are frequently used, so you can see not only the steps that
make up the process, but how using the Clone Stamp and Healing Brush tools together create the
best effects.
I start with an old photograph that has missing areas and scratches and move on to arguably the
hardest cloning technique, head swapping.
Fixing damaged photos
Most of us treasure old photos of long-gone loved ones. Being able to scan them and preserve them
digitally is wonderful. Being able to correct them digitally is even better. Figure 15.31 shows an old
photo with a scratch and a discolored area that need to be repaired.
FIGURE 15.31
Old photos are a good test of the power of the Clone Stamp and Healing Brush tools.
22_584743-ch15.indd 49022_584743-ch15.indd 490 5/3/10 10:36 AM5/3/10 10:36 AM
