Tài iệu Photoshop cs5 by Dayley part 72 doc
Bạn đang xem bản rút gọn của tài liệu. Xem và tải ngay bản đầy đủ của tài liệu tại đây (347.3 KB, 7 trang )
Part V: Painting, Paths, Shapes, and Text
506
l
Saturation: This applies the blend by creating the resulting pixel using the luminance and
hue of the base pixel but the saturation of the paint brush pixel. This reduces the blend to
affect only the saturation of the base pixels.
l
Color: This applies the blend by creating the resulting pixel using the luminance of the
base pixel but the hue and saturation of the paint brush pixel. This limits the blend so it
doesn’t affect the brightness of the base pixels.
l
Luminosity: This applies the blend by creating the resulting pixel using the hue and satu-
ration of the base pixel but the luminance of the paint brush pixel. This allows you to
apply it so it affects only the brightness of the base pixels.
Painting with painting tools
Painting tools, shown in Figure 16.1, paint by applying new color to the pixels in a specific region
under the tool. This is a pretty basic concept that has been around for decades. Photoshop
enhances the paint technique by allowing you to select specific brush styles, sizes, and settings that
control how pixels are painted in almost unlimited ways.
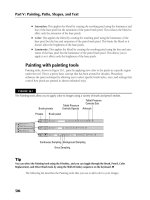
FIGURE 16.1
The Painting tools allow you to apply color to images using a variety of brush and pencil strokes.
Presets
Brush presets
Brush panel
Tablet Pressure
Controls Opacity
Airbrush
Tablet Pressure
Controls Size
Background SamplingContinuous Sampling
Once Sampling
Tip
You can select the Painting tools using the B hotkey, and you can toggle through the Brush, Pencil, Color
Replacement, and Mixer Brush tools by using the Shift+B hotkey sequence on the keyboard. n
The following list describes the Painting tools that you use to add color to your images:
24_584743-ch16.indd 50624_584743-ch16.indd 506 5/3/10 10:37 AM5/3/10 10:37 AM
Chapter 16: Painting and Brushes
507
l
Brush and Pencil tools: The Brush and Pencil tools work basically the same way with one
distinct difference. Brush tool strokes have a soft edge that is created by anti-aliasing the edges
of the stroke so the edge blends slightly with the surrounding document. Pencil tool strokes
have a crisp, hard edge that is not blended with the surrounding document. Figure 16.2 shows
an example of the Brush and Pencil tool strokes applied with the same brush style.
FIGURE 16.2
The Brush applies the stroke with soft edges, and the Pencil tool applies the stroke with
hard edges.
Brush tool stroke
Pencil tool stroke
Even though the concept is simple, the Brush and Pencil tools provide an incredible range
of results. Using the Brush and Pencil tools, you can configure the following settings in the
tool menus that control how the Brush and Pencil strokes are applied to the image:
l
Presets: As with all presets in Photoshop, the Presets option allows you to quickly
save the tools settings and then load and select them later.
l
Brush Preset Picker: The Brush Preset Picker drop-down box allows you to select the
style of brush to use for the tool. You also can set the size and hardness of the brush.
The size of the brush determines the area of pixels that are affected by the brush
stroke, and the hardness of the brush determines the intensity of the stroke. When
painting, harder brushes mean more color is added; when editing, harder brushes
mean that a more dramatic effect is applied.
Note
The settings that you apply using the Brush panel add to or override the settings you set in the Brush Preset
Picker menu. You likely want to use a combination between selecting the brush using the Brush Preset Picker
option, the Brush panel, and the Brush Presets panel. n
Using the Brush Preset Picker side menu, you can manage the set of brushes listed.
You can rename and remove brushes, load different sets of brushes, and even manage
the appearance of the lists, as shown in Figure 16.3.
24_584743-ch16.indd 50724_584743-ch16.indd 507 5/3/10 10:37 AM5/3/10 10:37 AM
Part V: Painting, Paths, Shapes, and Text
508
FIGURE 16.3
The Brush Preset Picker menu options allow you to quickly select a brush and set the
size and hardness. You also can manage the list of brush styles that are displayed.
l
Brush panel: Selecting the Toggle the Brush Panel option displays the Brush panel
that allows a variety of options to control every aspect of the brush behavior. The
Brush panel needs much explanation and is covered later in this chapter.
l
Mode: This specifies the blending mode used to apply the brush stroke to the pixels
below. The blending mode can have a major impact on how the brush strokes look.
Instead of just applying the brush stroke to the pixels below, Photoshop blends the
pixel data in the brush stroke with the pixel data in the selected layer, based on the
blend mode algorithm. Blend modes are covered in more detail later in this chapter.
l
Opacity: This allows you to specify the opacity of the painting tool. A larger amount of
opacity means the underlying pixels are affected more by the painting stroke. A value of
100% means that all pixels are affected; 0% means that none of the pixels are affected.
l
Tablet Pressure Controls Opacity: When this option is set, the pressure on the sty-
lus tip defines the percentage of opacity involved when painting. This is a great option
to fine-tune your strokes using a more realistic effect, if you have a stylus pen.
24_584743-ch16.indd 50824_584743-ch16.indd 508 5/3/10 10:37 AM5/3/10 10:37 AM
Chapter 16: Painting and Brushes
509
l
Flow: The Flow option controls the rate that the tool effect is applied to the pixels
below. A value of 100% means that the pixels are affected immediately. Adjusting the
flow lower applies the effect more slowly, allowing you to move the brush before the
full effect of the tool is applied to the underlying pixels. Using this option, you can
give your stroke effect a more realistic look just as if you were painting at different
speeds with a real brush.
l
Airbrush: When this option is selected, the stroke is applied in gradual tones to the
image. This option typically works better when used in conjunction with a reduced
flow setting.
l
Auto Erase: This allows you to use the Pencil tool to paint over areas containing the
foreground color using the selected background color. When this option is selected
and the cursor is over the foreground color when you begin dragging, the area is
painted with the background color. When this option is selected and the cursor is not
over the foreground color when you begin dragging, the area is painted with the fore-
ground color.
l
Tablet Pressure Controls Size: When this option is selected, the stylus pressure
overrides the brush or pencil size when painting.
l
Color Replacement Tool: The Color Replacement tool works similar to the Brush tool
except that it applies the paint, specified by the foreground color in the Toolbox, only to a
specified color. This is a great way to replace one color in the image with another without
affecting the surrounding pixels. A sample color is selected, and as the Color Replacement
tool is applied, Photoshop analyzes the pixels below the tool, determines which pixels
match the sample color, and paints only those pixels. Only the pixels that match the sam-
pled color are replaced, as shown in Figure 16.4.
Using the Color Replacement tool, you can configure the following settings in the Tool
menu, shown in Figure 16.1, that control how the Color Replacement strokes are applied
to the image:
l
Continuous Sampling: When this option is selected, the Color Replacement tool con-
tinuously samples the pixel directly beneath it to determine what color of pixels to
paint. When this option is set, it behaves close to the Brush tool, depending on the
other settings.
l
Once Sampling: When this option is selected, the color to replace is determined by
the pixel directly below the tool when you first click and begin to drag the mouse.
This option is great for quickly selecting the color to replace directly from the image.
l
Background Sampling: When this option is selected, the color to paint is determined
by the background color in the Toolbox.
l
Limits: This allows you to set the limit of erasing to Discontiguous, Contiguous, or
Find Edges. Discontiguous replaces the pixels wherever they occur. Contiguous
replaces only the pixels that are immediately adjacent to the first selected pixel. Find
Edges replaces pixels while trying to keep the edges in the image distinct.
24_584743-ch16.indd 50924_584743-ch16.indd 509 5/3/10 10:37 AM5/3/10 10:37 AM
Part V: Painting, Paths, Shapes, and Text
510
l
Tolerance: This specifies the tolerance to use when determining whether a pixel
matches the sample color and should be replaced.
l
Anti-alias: When this option is selected, Photoshop uses anti-aliasing to soften the
edges around the pixels being replaced.
l
Mixer Brush tool: The Mixer Brush tool is a bit different from the Painting tools and is
covered in a later section in this chapter.
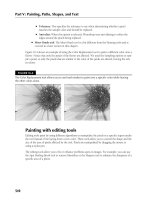
Figure 16.4 shows an example of using the Color Replacement tool to paint a different color onto a
flower. Notice that only the petals of the flower are affected. We used the Sampling options to sam-
ple a petal, so only the pixels that are similar to the color of the petals are altered, leaving the oth-
ers alone.
FIGURE 16.4
The Color Replacement tool allows you to use brush strokes to paint over a specific color while leaving
the other colors alone.
Painting with editing tools
Editing tools paint by using different algorithms to manipulate the pixels in a specific region under
the tool instead of the laying down a new color. These tools allow you to control the shape and the
size of the area of pixels affected by the tool. Pixels are manipulated by dragging the mouse or
using a stylus pen.
The editing tools allow you to fix or enhance problems spots in images. For example, you can use
the Spot Healing Brush tool to remove blemishes or the Sharpen tool to enhance the sharpness of a
specific area of a photo.
24_584743-ch16.indd 51024_584743-ch16.indd 510 5/3/10 10:37 AM5/3/10 10:37 AM
Chapter 16: Painting and Brushes
511
The following sections discuss the editing tools that you use to paint edits on photos in Photoshop.
Healing tools
The Healing tools shown in Figure 16.5 allow you to quickly fix problem areas of photos, such as
scratches, red-eye, or even the removal of unwanted objects. These tools are covered in detail in
Chapter 15, so we don’t cover them here.
Cross-Ref
For a more detailed explanation of how to use the Healing tools to edit photos, see Chapter 15. n
FIGURE 16.5
The Healing tools allow you to use brush strokes to quickly fix and remove problems areas in photographs.
Clone Stamp and Pattern Stamp tool
The Clone Stamp tool shown in Figure 16.6 allows you to quickly fix problem areas of photos,
such as scratches and unwanted objects, by using other areas of the photo as a source to replace
pixels using a Stamp brush. This tool is covered in detail in Chapter 15, so we don’t cover it here.
Cross-Ref
For a more detailed explanation of how to use the Clone Stamp tool to edit photos, see the section on cloning
in Chapter 15. n
The Pattern Stamp tool works similar to the brush tool except that it paints a pattern instead of a
color. The options for the Pattern Stamp tool include the following:
l
Pattern Picker: Allows you to select a pattern to paint from the drop-down menu.
l
Aligned: When this option is enabled, the pattern in each new brush stroke is aligned
with the previous brushstroke. This allows you to keep the pattern aligned as you paint
multiple strokes.
l
Impressionist: Softens the pattern to give it an artistic effect rather than a crisp pattern.
24_584743-ch16.indd 51124_584743-ch16.indd 511 5/3/10 10:37 AM5/3/10 10:37 AM
Part V: Painting, Paths, Shapes, and Text
512
FIGURE 16.6
The Clone Stamp tool allows you to use a stamp effect to quickly fix and remove problems areas in
photographs.
Pattern Picker
History tools
The History tools shown in Figure 16.7 allow you to use brush effects to paint previous edit states
of the document onto the current state. This allows you to use a painting effect to reveal effects
from previous edit states. This tool is covered in more detail in Chapter 5, so we don’t cover it here.
Cross-Ref
For a more detailed explanation of how to use the History tools to revive effects from previous states, see
Chapter 5. n
FIGURE 16.7
The History tools allow you to use a paint brush to paint data from a previous edit state of the document
onto the current state, thus restoring effects to specific areas of the image.
Eraser tools
The Eraser tools, shown in Figure 16.8, are designed to do just that—erase pixels from the image.
However, the Eraser tools provide several settings that provide lots of flexibility when removing
pixels. Eraser tools apply to the selected layer in the Layers panel, so you can restrict the erasing to
a specific layer.
Tip
You can select the Eraser tool using the E hotkey, and you can toggle through the Eraser tools by using the
Shift+E hotkey sequence on the keyboard. n
24_584743-ch16.indd 51224_584743-ch16.indd 512 5/3/10 10:37 AM5/3/10 10:37 AM
