Web Publishing with PHP and FileMaker 9- P9 ppt
Bạn đang xem bản rút gọn của tài liệu. Xem và tải ngay bản đầy đủ của tài liệu tại đây (195.92 KB, 15 trang )
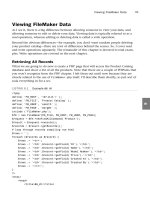
Drill Down Pages
So, that’s it for the view links. Let’s look at the view page:
<?php
define( ‘FM_HOST’, ‘127.0.0.1’ );
define( ‘FM_FILE’, ‘Product Catalog’ );
define( ‘FM_USER’, ‘esmith’ );
define( ‘FM_PASS’, ‘m4rg0t’ );
include (‘FileMaker.php’);
$fm = new FileMaker(FM_FILE, FM_HOST, FM_USER, FM_PASS);
$record = $fm->getRecordById(‘Product’, $_GET[‘recid’]);
$id = $record->getField(‘ID’);
$name = $record->getField(‘Name’);
$model_number = $record->getField(‘Model Number’);
$price = $record->getField(‘Price’);
$created_at = $record->getField(‘Created At’);
$created_by = $record->getField(‘Created By’);
?>
<html>
<head>
<title>06_05</title>
</head>
<body>
<table border=”1”>
<tr>
<th>ID</th>
<td><?php echo $id; ?></td>
</tr>
<tr>
<th>Name</th>
<td><?php echo $name; ?></td>
</tr>
<tr>
<th>Model Number</th>
<td><?php echo $model_number; ?></td>
</tr>
<tr>
<th>Price</th>
<td><?php echo $price; ?></td>
</tr>
<tr>
<th>Created At</th>
<td><?php echo $created_at; ?></td>
</tr>
CHAPTER 6 Viewing FileMaker Data
110
<tr>
<th>Created By</th>
<td><?php echo $created_by; ?></td>
</tr>
</table>
</body>
</html>
In my opinion, this is an example of where FileMaker.php really shines. After you have
an internal record ID, it’s really easy to work with a record. This page is pretty simple.
Here are the key lines, starting from the top:
Make your FileMaker connection object:
$fm = new FileMaker(FM_FILE, FM_HOST, FM_USER, FM_PASS);
Use the getRecordById() method of the FileMaker connection object to get a reference to
the record object in question, and store the reference in the
$record variable:
$record = $fm->getRecordById(‘Product’, $_GET[‘recid’]);
NOTE
Note that, in practice, it would be considered good form to check first that
$_GET[‘recid’] actually existed and contained a value.
The
$record variable will now contain a record object for the record in question. Next,
use the
getField() method to pull the values out of the record by field name:
$id = $record->getField(‘ID’);
$name = $record->getField(‘Name’);
$model_number = $record->getField(‘Model Number’);
$price = $record->getField(‘Price’);
$created_at = $record->getField(‘Created At’);
$created_by = $record->getField(‘Created By’);
All that’s left is to burp out the variables in the context of the HTML template:
<html>
<head>
<title>06_05</title>
</head>
<body>
<table border=”1”>
<tr>
<th>ID</th>
<td><?php echo $id; ?></td>
Viewing FileMaker Data
111
6
</tr>
<tr>
<th>Name</th>
<td><?php echo $name; ?></td>
</tr>
<tr>
<th>Model Number</th>
<td><?php echo $model_number; ?></td>
</tr>
<tr>
<th>Price</th>
<td><?php echo $price; ?></td>
</tr>
<tr>
<th>Created At</th>
<td><?php echo $created_at; ?></td>
</tr>
<tr>
<th>Created By</th>
<td><?php echo $created_by; ?></td>
</tr>
</table>
</body>
</html>
Summary
We covered a lot of ground in this chapter, so let’s recap. Regarding FileMaker.php,
you learned:
. To include
FileMaker.php in your PHP pages to get access to the features of the
FileMaker API for PHP
. How to create a new FileMaker connection object
. How to use the
newFindAllCommand() method of the FileMaker connection object
. How to use the addSortRule() method of the FileMaker request object
. How to use the newFindCommand() method of the FileMaker connection object
. How to use the addFindCriterion() method of the FileMaker request object
. How to use the getRecords() method of the FileMaker result object
. How to use the getField() method of the FileMaker record object
. How to use the getRecordId() method of the FileMaker connection object
CHAPTER 6 Viewing FileMaker Data
112
And, in terms of pure PHP, you learned:
. How to use the and operator in an if statement
. How to use the define construct to create constants
. That trying to use a variable or array element that does not exist will trigger a PHP
warning
This chapter was devoted to viewing FileMaker data. In the next chapter, I will build on
these concepts to show you how to build pages that will allow users to alter your
FileMaker data.
Summary
113
6
This page intentionally left blank
IN THIS CHAPTER
. Introduction
. Creating Records
. Deleting Records
. Editing Records
CHAPTER 7
Altering FileMaker Data
Introduction
In this chapter, I show you how to create web pages
capable of altering data that is stored in your FileMaker
database. When I say alter, I mean:
. Creating records
. Deleting records
. Editing records
Naturally, you are not going to want the general public
doing these sorts of things to your product catalog.
However, it might make a lot of sense to allow members of
your workgroup to perform these actions.
A fairly common setup is to have these sorts of pages
published only on your company intranet, as opposed to
the public Internet. By definition, your company intranet
would not be accessible to the general public, so only
company employees would be able to access it in the
first place.
I will presume this “intranet” scenario for the duration of
the chapter.
Creating Records
If you want to allow employees to create new records via a
web browser, the first thing you need to do is give them a
web page with a New Product button to click. See Figure
7.1 for an example of how it will look in a browser.
FIGURE 7.1 The New Product button provides navigation to the New Product page.
Here is a modified example of the product list code from Chapter 6, “Viewing FileMaker
Data.” The only difference is that this example has a bit of HTML appended near the
bottom:
<?php
define( ‘FM_HOST’, ‘127.0.0.1’ );
define( ‘FM_FILE’, ‘Product Catalog’ );
define( ‘FM_USER’, ‘esmith’ );
define( ‘FM_PASS’, ‘m4rg0t’ );
require_once (‘FileMaker.php’);
$fm = new FileMaker(FM_FILE, FM_HOST, FM_USER, FM_PASS);
if(isset($_GET[‘search’]) and $_GET[‘search’] != ‘’) {
$search = $_GET[‘search’];
$request = $fm->newFindCommand(‘Product’);
$request->addFindCriterion(‘Name’, $search);
} else {
$search = ‘’;
$request = $fm->newFindAllCommand(‘Product’);
}
if(isset($_GET[‘sortby’]) and $_GET[‘sortby’] != ‘’) {
$request->addSortRule($_GET[‘sortby’], 1);
}
$result = $request->execute();
$records = $result->getRecords();
$rows = ‘’;
foreach ($records as $record) {
$rows .= ‘<tr>’;
$rows .= ‘<td><a href=”06_05.php?recid=’.$record->getRecordId().
➥’”>view</a></td>’;
$rows .= ‘<td>’.$record->getField(‘ID’).’</td>’;
$rows .= ‘<td>’.$record->getField(‘Name’).’</td>’;
$rows .= ‘<td>’.$record->getField(‘Model Number’).’</td>’;
CHAPTER 7 Altering FileMaker Data
116
$rows .= ‘<td>’.$record->getField(‘Price’).’</td>’;
$rows .= ‘<td>’.$record->getField(‘Created At’).’</td>’;
$rows .= ‘<td>’.$record->getField(‘Created By’).’</td>’;
$rows .= ‘</tr>’;
}
?>
<html>
<head>
<title>07_01</title>
</head>
<body>
<form action=”07_01.php” method=”get”>
<p>
Product Name Search:
<input type=”text” name=”search” />
<input type=”submit” value=”Go” />
</p>
</form>
<table border=”1”>
<tr>
<th>View</th>
<th><a href=”07_01.php?search=<?php echo $search ?>
➥&sortby=ID”>ID</a></th>
<th><a href=”07_01.php?search=<?php echo $search ?>
➥&sortby=Name”>Name</a></th>
<th><a href=”07_01.php?search=<?php echo $search ?>
➥&sortby=Model+Number”>Model Number</a></th>
<th><a href=”07_01.php?search=<?php echo $search ?>
➥&sortby=Price”>Price</a></th>
<th><a href=”07_01.php?search=<?php echo $search ?>
➥&sortby=Created+At”>Created At</a></th>
<th><a href=”07_01.php?search=<?php echo $search ?>
➥&sortby=Created+By”>Created By</a></th>
</tr>
<?php echo $rows; ?>
</table>
<form action=”07_02.php” method=”get”>
<p><input type=”submit” value=”New Product”></p>
</form>
</body>
</html>
Creating Records
117
7
These three lines near the bottom are the only change:
<form action=”07_02.php” method=”get”>
<p><input type=”submit” value=”New Product”></p>
</form>
All I have done here is tack on a tiny form that points to a different page, in this case
named
07_02.php as you can see in the action attribute of the form tag. It’s really just
navigation to the page that allows the user to create a new record. See Figure 7.2 for an
example of what the new record page looks like in a browser.
CHAPTER 7 Altering FileMaker Data
118
FIGURE 7.2 The New Product page allows users to add products to the database.
Here is the code in the
07_02.php page:
<?php
define(‘FM_HOST’, ‘127.0.0.1’);
define(‘FM_FILE’, ‘Product Catalog’);
define(‘FM_USER’, ‘esmith’);
define(‘FM_PASS’, ‘m4rg0t’);
$message = ‘’;
if (isset($_POST[‘action’])) {
if ($_POST[‘action’]==’Cancel’) {
$message = ‘<p>Action cancelled. Record was not created.</p>’;
} elseif ($_POST[‘action’]==’Save’) {
require_once (‘FileMaker.php’);
$fm = new FileMaker(FM_FILE, FM_HOST, FM_USER, FM_PASS);
$request = $fm->newAddCommand(‘Product’);
$request->setField(‘Name’, $_POST[‘name’]);
$request->setField(‘Model Number’, $_POST[‘model_number’]);
$request->setField(‘Price’, $_POST[‘price’]);
$request->execute();
$message = ‘<p>Record was created.</p>’;
}
}
?>
<html>
<head>
<title>07_02</title>
</head>
<body>
<?php echo $message; ?>
<form action=”07_02.php” method=”post”>
<table border=”1”>
<tr>
<th>Name</th>
<td><input type=”text” name=”name” /></td>
</tr>
<tr>
<th>Model Number</th>
<td><input type=”text” name=”model_number” /></td>
</tr>
<tr>
<th>Price</th>
<td><input type=”text” name=”price” /></td>
</tr>
</table>
<p>
<input type=”submit” name=”action” value=”Save” />
<input type=”submit” name=”action” value=”Cancel” />
</p>
</form>
</body>
</html>
Let’s take it from the top. The first new line you come across is this:
$message = ‘’;
What I am doing here is initializing the $message variable to an empty string because I
don’t know at this point in the script if I’m going to have a message for the user or not.
Ultimately, I’ll be echoing out the
$message variable in the HTML template portion of the
page. Setting the variable to an empty string protects me from the possibility of echoing
out a nonexistent variable later on, which would cause a PHP warning.
Next, I check to see whether the user has submitted a
POST request to this page this time
around:
if (isset($_POST[‘action’])) {
Creating Records
119
7
As you have seen in previous examples, this page can behave differently depending on
how it was requested. If this page was requested by the user clicking the New Product
button on page
07_01.php, the $_POST[‘action’] array element will not be set, for two
reasons:
. That form used the
GET method, so the POST array won’t exist.
. There were no elements in that form named action.
However, if the user requested this page from this page, there will be a POST array. That’s
because the form on this page—which we will look at in a second—uses the
POST method,
and there will be a
POST element named action because the form has an input named
action.
Actually, the form on this page has two inputs named action. Here they are:
<input type=”submit” name=”action” value=”Save” />
<input type=”submit” name=”action” value=”Cancel” />
Because the user can only click one button at a time, the $_POST[‘action’] array element
is going to either evaluate to Save, or Cancel. In the code, I opted to check for Cancel
first:
if ($_POST[‘action’] == ‘Cancel’) {
$message = ‘<p>Action cancelled. Record was not created.</p>’;
Previously, I initialized the $message variable to an empty string just in case it didn’t get
set elsewhere in the script. If the user clicks the Cancel button, the
$message variable does
get set, as you can see here. So, as the page continues to load and makes its way down to
the HTML template section, this Cancel message is echoed out to the browser.
Of course, the user doesn’t have to click Cancel. The user could have clicked Save, which
would have triggered the code block beginning with this line:
} elseif ($_POST[‘action’]==’Save’) {
This Save section is really the meat of this example, so I will take it line by line. First, I
include
FileMaker.php. I could have done that at the top, but I only need it if the user is
actually saving the new record, so I stuck it in the Save block:
require_once (‘FileMaker.php’);
Then, as usual, I create my connection to FileMaker:
$fm = new FileMaker(FM_FILE, FM_HOST, FM_USER, FM_PASS);
CHAPTER 7 Altering FileMaker Data
120
Here’s something new. This is where I call the newAddCommand() method of the FileMaker
connection object. The
newAddCommand() method requires that you give it a layout
name—
Product, in this case.
$request = $fm->newAddCommand(‘Product’);
Then, all you have to do is use the setField() method of the $request to tell it which
field values to assign to each field. To do so, you just pull them out of the submitted
POST
superglobal array:
$request->setField(‘Name’, $_POST[‘name’]);
$request->setField(‘Model Number’, $_POST[‘model_number’]);
$request->setField(‘Price’, $_POST[‘price’]);
NOTE
Sending data to the database directly from the
$_POST superglobal array is generally
considered a security risk. Please refer to Appendix B, “Security Concerns,” for more
information on this topic.
After you have that done, just execute the
$request:
$request->execute();
Doing so creates the record in FileMaker and sets the field values as you instructed. The
only thing left to do is notify the user:
$message = ‘<p>Record was created.</p>’;
This finally brings us to the HTML template portion of the page. It is all just plain HTML,
with the exception of this line, where I am echoing out the
$message variable:
<?php echo $message; ?>
This is why I initialized the $message variable to an empty string. If this was the first
page load and there was no message for the user, PHP would throw an error when it got
to this line.
Deleting Records
Back in Chapter 6, I added a column of view links to the product list page. In very similar
fashion, I am now going to add delete links to the product list page. The finished product
will look similar to Figure 7.3.
Deleting Records
121
7
CHAPTER 7 Altering FileMaker Data
122
FIGURE 7.3 The delete links provide navigation to the Delete Product page.
Here is the underlying code for this version of the page. There are only two key lines that
I will review after the example:
<?php
define( ‘FM_HOST’, ‘127.0.0.1’ );
define( ‘FM_FILE’, ‘Product Catalog’ );
define( ‘FM_USER’, ‘esmith’ );
define( ‘FM_PASS’, ‘m4rg0t’ );
require_once (‘FileMaker.php’);
$fm = new FileMaker(FM_FILE, FM_HOST, FM_USER, FM_PASS);
if(isset($_GET[‘search’]) and $_GET[‘search’] != ‘’) {
$search = $_GET[‘search’];
$request = $fm->newFindCommand(‘Product’);
$request->addFindCriterion(‘Name’, $search);
} else {
$search = ‘’;
$request = $fm->newFindAllCommand(‘Product’);
}
if(isset($_GET[‘sortby’]) and $_GET[‘sortby’] != ‘’) {
$request->addSortRule($_GET[‘sortby’], 1);
}
$result = $request->execute();
$records = $result->getRecords();
$rows = ‘’;
foreach ($records as $record) {
$rows .= ‘<tr>’;
$rows .= ‘<td><a href=”07_02.php?recid=’.$record->getRecordId().’”>
➥view</a></td>’;
$rows .= ‘<td>’.$record->getField(‘ID’).’</td>’;
$rows .= ‘<td>’.$record->getField(‘Name’).’</td>’;
$rows .= ‘<td>’.$record->getField(‘Model Number’).’</td>’;
$rows .= ‘<td>’.$record->getField(‘Price’).’</td>’;
$rows .= ‘<td>’.$record->getField(‘Created At’).’</td>’;
$rows .= ‘<td>’.$record->getField(‘Created By’).’</td>’;
$rows .= ‘<td><a href=”07_04.php?recid=’.$record->
➥getRecordId().’”>delete</a></td>’;
$rows .= ‘</tr>’;
}?>
<html>
<head>
<title>07_03</title>
</head>
<body>
<form action=”07_03.php” method=”get”>
<p>
Product Name Search:
<input type=”text” name=”search” />
<input type=”submit” value=”Go” />
</p>
</form>
<table border=”1”>
<tr>
<th>View</th>
<th><a href=”07_03.php?search=<?php echo $search ?>
➥&sortby=ID”>ID</a></th>
<th><a href=”07_03.php?search=<?php echo $search ?>
➥&sortby=Name”>Name</a></th>
<th><a href=”07_03.php?search=<?php echo $search ?>
➥&sortby=Model+Number”>Model Number</a></th>
<th><a href=”07_03.php?search=<?php echo $search ?>
➥&sortby=Price”>Price</a></th>
<th><a href=”07_03.php?search=<?php echo $search ?>
➥&sortby=Created+At”>Created At</a></th>
<th><a href=”07_03.php?search=<?php echo $search ?>
➥&sortby=Created+By”>Created By</a></th>
<th>Delete</th>
</tr>
<?php echo $rows; ?>
</table>
</body>
</html>
I am sure you spotted the delete lines already, but here they are anyhow. The first one is
in the PHP:
$rows .= ‘<td><a href=”07_04.php?recid=’.$record->getRecordId().’”>
➥delete</a></td>’;
Deleting Records
123
7
If you compare this delete line to the view line a few lines above it, you will see that they
are very similar. In both cases, I am creating a hyperlink that will send the record ID of
the clicked product to another page. The only real difference is that the delete link calls a
different page.
Clicking a delete link opens a confirmation page asking whether the user is sure that he
wants to delete the clicked product (see Figure 7.4).
CHAPTER 7 Altering FileMaker Data
124
FIGURE 7.4 Clicking on a delete link prompts the user to confirm the action.
Here is the code:
<?php
define( ‘FM_HOST’, ‘127.0.0.1’ );
define( ‘FM_FILE’, ‘Product Catalog’ );
define( ‘FM_USER’, ‘esmith’ );
define( ‘FM_PASS’, ‘m4rg0t’ );
require_once (‘FileMaker.php’);
$fm = new FileMaker(FM_FILE, FM_HOST, FM_USER, FM_PASS);
$record = $fm->getRecordById(‘Product’, $_REQUEST[‘recid’]);
if (!isset($_POST[‘action’])) {
$page_content = ‘Are you sure you want to delete ‘.$record->getField(‘Name’).’?’;
$page_content .= ‘<form action=”07_04.php” method=”post”>’;
$page_content .= ‘<input type=”hidden” name=”recid” value=”’.$_REQUEST[‘recid’]
➥.’” />’;
$page_content .= ‘<p>’;
$page_content .= ‘<input type=”submit” name=”action” value=”Delete” />’;
$page_content .= ‘<input type=”submit” name=”action” value=”Cancel” />’;
$page_content .= ‘</p>’;
$page_content .= ‘</form>’;
} else {
if ($_POST[‘action’] == ‘Delete’) {
$record->delete();
$page_content = ‘<p>Record was deleted.</p>’;