Web Publishing with PHP and FileMaker 9- P12 pps
Bạn đang xem bản rút gọn của tài liệu. Xem và tải ngay bản đầy đủ của tài liệu tại đây (249.53 KB, 15 trang )
The rest of the page is pretty humdrum compared to all that. We have to remember to
close our table, form, and PHP tags, and then output the HTML template exactly like the
last page example.
$portal_html .= ‘</table>’;
$portal_html .= ‘</form>’;
?>
<html>
<head>
<title>08_02</title>
</head>
<body>
<table border=”1”>
<tr>
<th>ID</th>
<td><?php echo $id; ?></td>
</tr>
<tr>
<th>Name</th>
<td><?php echo $name; ?></td>
</tr>
<tr>
<th>Model Number</th>
<td><?php echo $model_number; ?></td>
</tr>
<tr>
<th>Price</th>
<td><?php echo $price; ?></td>
</tr>
<tr>
<th>Created At</th>
<td><?php echo $created_at; ?></td>
</tr>
<tr>
<th>Created By</th>
<td><?php echo $created_by; ?></td>
</tr>
</table>
<?php echo $portal_html; ?>
</body>
</html>
Creating Related Records
155
8
Altering Related Records
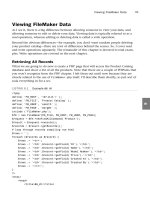
Let’s modify the web page to allow users to edit or delete related records in the portal by
adding two hyperlinks to the third column. See Figure 8.15 for an example of the page
displayed in a browser.
CHAPTER 8 Working with Related Data (Portals)
156
FIGURE 8.15 Users now have navigation to edit or delete pages for related inventory
records.
The concept here is almost identical to the edit and delete links that we covered in
Chapter 7, “Altering FileMaker Data.” There, we added edit and delete links to the
product list page. Here, we are adding those same links to the portal.
Here is the completed code:
<?php
define(‘FM_HOST’, ‘127.0.0.1’);
define(‘FM_FILE’, ‘Product Catalog’);
define(‘FM_USER’, ‘esmith’);
define(‘FM_PASS’, ‘m4rg0t’);
require_once (‘FileMaker.php’);
$fm = new FileMaker(FM_FILE, FM_HOST, FM_USER, FM_PASS);
$record = $fm->getRecordById(‘Product’, $_GET[‘recid’]);
if (isset($_POST[‘new_portal_row’])) {
$new_row = $record->newRelatedRecord(‘Inventory’);
$new_row->setField(‘Inventory::Location’, $_POST[‘location’]);
$new_row->setField(‘Inventory::Quantity’, $_POST[‘quantity’]);
$result = $new_row->commit();
$record = $fm->getRecordById(‘Product’, $_GET[‘recid’]);
}
$id = $record->getField(‘ID’);
$name = $record->getField(‘Name’);
$model_number = $record->getField(‘Model Number’);
$price = $record->getField(‘Price’);
$created_at = $record->getField(‘Created At’);
$created_by = $record->getField(‘Created By’);
$portal_records = $record->getRelatedSet(‘Inventory’);
$portal_html = ‘<form action=”08_02.php?recid=’ .
➥
$record->getRecordId() . ‘“ method=”post”>’;
$portal_html.= ‘<table border=”1”>’;
$portal_html.= ‘<tr>’;
$portal_html.= ‘<th>Location</th>’;
$portal_html.= ‘<th>Quantity</th>’;
$portal_html.= ‘<th> </th>’;
$portal_html.= ‘</tr>’;
foreach($portal_records as $portal_record) {
$portal_html.= ‘<tr>’;
$portal_html.= ‘<td>’ . $portal_record->getField(‘Inventory::Location’)
➥
. ‘</td>’;
$portal_html.= ‘<td>’ . $portal_record->getField(‘Inventory::Quantity’)
➥
. ‘</td>’;
$portal_html.= ‘<td>’;
$portal_html.= ‘<a href=”08_04.php?recid=’.$portal_record->getRecordId().’”>
➥
edit</a>’;
$portal_html.= ‘ ’;
$portal_html.= ‘<a href=”08_05.php?recid=’.$portal_record->
➥
getRecordId().’”>delete</a>’;
$portal_html.= ‘</td>’;
$portal_html.= ‘</tr>’;
}
$portal_html.= ‘<tr>’;
$portal_html.= ‘<td><input type=”text” name=”location” value=”” /></td>’;
$portal_html.= ‘<td><input type=”text” name=”quantity” value=”” /></td>’;
$portal_html.= ‘<td><input type=”submit” name=”new_portal_row”
➥
value=”Save” /></td>’;
$portal_html.= ‘</tr>’;
$portal_html.= ‘</table>’;
$portal_html.= ‘</form>’;
?>
<html>
<head>
<title>08_03</title>
</head>
<body>
<table border=”1”>
<tr>
Altering Related Records
157
8
<th>ID</th>
<td><?php echo $id; ?></td>
</tr>
<tr>
<th>Name</th>
<td><?php echo $name; ?></td>
</tr>
<tr>
<th>Model Number</th>
<td><?php echo $model_number; ?></td>
</tr>
<tr>
<th>Price</th>
<td><?php echo $price; ?></td>
</tr>
<tr>
<th>Created At</th>
<td><?php echo $created_at; ?></td>
</tr>
<tr>
<th>Created By</th>
<td><?php echo $created_by; ?></td>
</tr>
</table>
<?php echo $portal_html; ?>
</body>
</html>
Here is the completed code with descriptions inline. It begins with the usual suspects:
<?php
define(‘FM_HOST’, ‘127.0.0.1’);
define(‘FM_FILE’, ‘Product Catalog’);
define(‘FM_USER’, ‘esmith’);
define(‘FM_PASS’, ‘m4rg0t’);
require_once (‘FileMaker.php’);
$fm = new FileMaker(FM_FILE, FM_HOST, FM_USER, FM_PASS);
$record = $fm->getRecordById(‘Product’, $_GET[‘recid’]);
Here is the code block that handles any incoming requests for the creation of a new
portal row. It’s identical to the preceding example.
if (isset($_POST[‘new_portal_row’])) {
$new_row = $record->newRelatedRecord(‘Inventory’);
$new_row->setField(‘Inventory::Location’, $_POST[‘location’]);
$new_row->setField(‘Inventory::Quantity’, $_POST[‘quantity’]);
CHAPTER 8 Working with Related Data (Portals)
158
$result = $new_row->commit();
$record = $fm->getRecordById(‘Product’, $_GET[‘recid’]);
}
This section is also identical to the prior examples. We are just grabbing the field values
from the Product record so we can output them in the HTML template section at the end
of the page.
$id = $record->getField(‘ID’);
$name = $record->getField(‘Name’);
$model_number = $record->getField(‘Model Number’);
$price = $record->getField(‘Price’);
$created_at = $record->getField(‘Created At’);
$created_by = $record->getField(‘Created By’);
Next, I am prepping for the foreach loop by compiling the open HTML for the portal
form and table. I get the related set, open the form and table tags, and load the header
HTML.
$portal_records = $record->getRelatedSet(‘Inventory’);
$portal_html = ‘<form action=”08_02.php?recid=’ . $record->getRecordId()
➥
. ‘“ method=”post”>’;
$portal_html.= ‘<table border=”1”>’;
$portal_html.= ‘<tr>’;
$portal_html.= ‘<th>Location</th>’;
$portal_html.= ‘<th>Quantity</th>’;
$portal_html.= ‘<th> </th>’;
$portal_html.= ‘</tr>’;
Here is the start of the foreach loop that creates the guts of the portal HTML.
foreach($portal_records as $portal_record) {
$portal_html.= ‘<tr>’;
$portal_html.= ‘<td>’ . $portal_record->getField(‘Inventory::Location’)
➥
. ‘</td>’;
$portal_html.= ‘<td>’ . $portal_record->getField(‘Inventory::Quantity’)
➥
. ‘</td>’;
$portal_html.= ‘<td>’;
The following line is new to this example, but should look familiar because I used a
similar technique in Chapter 7 for the View Product page. I am using the
getRecordId()
method to pull the internal record ID out of the portal record object so I can include it in
the URL that points to the edit page. We will look at the edit page in the next example.
$portal_html.= ‘<a href=”08_04.php?recid=’.$portal_record->getRecordId()
➥
.’”>edit</a>’;
Altering Related Records
159
8
This line just inserts a nonbreaking space between the edit link and the delete link:
$portal_html.= ‘ ’;
Here is the delete link. It’s just like the edit link except that it points to a different page
and is displayed as “delete,” of course.
$portal_html.= ‘<a href=”08_05.php?recid=’.$portal_record->getRecordId()
➥
.’”>delete</a>’;
These lines close out the td, tr, and foreach loop:
$portal_html.= ‘</td>’;
$portal_html.= ‘</tr>’;
}
Next, we have the code that draws the new related record row. It’s identical to the
previous example.
$portal_html.= ‘<tr>’;
$portal_html.= ‘<td><input type=”text” name=”location” value=”” /></td>’;
$portal_html.= ‘<td><input type=”text” name=”quantity” value=”” /></td>’;
$portal_html.= ‘<td><input type=”submit” name=”new_portal_row”
➥
value=”Save” /></td>’;
$portal_html.= ‘</tr>’;
Now, just close the table, the form, the PHP block, and output the HTML template exactly
like before.
$portal_html.= ‘</table>’;
$portal_html.= ‘</form>’;
?>
<html>
<head>
<title>08_03</title>
</head>
<body>
<table border=”1”>
<tr>
<th>ID</th>
<td><?php echo $id; ?></td>
</tr>
<tr>
<th>Name</th>
<td><?php echo $name; ?></td>
</tr>
<tr>
<th>Model Number</th>
CHAPTER 8 Working with Related Data (Portals)
160
<td><?php echo $model_number; ?></td>
</tr>
<tr>
<th>Price</th>
<td><?php echo $price; ?></td>
</tr>
<tr>
<th>Created At</th>
<td><?php echo $created_at; ?></td>
</tr>
<tr>
<th>Created By</th>
<td><?php echo $created_by; ?></td>
</tr>
</table>
<?php echo $portal_html; ?>
</body>
</html>
Editing a Related Record
Editing a related record is exactly the same as editing any other record. That being the
case, this example is going to be the same as the Edit Record example in Chapter 7 except
that it will be pointed at an Inventory record instead of a Product record. See Figure 8.16
for an example of the page displayed in a browser.
Editing a Related Record
161
8
FIGURE 8.16 The edit page for an inventory record.
Here is the completed code:
<?php
define(‘FM_HOST’, ‘127.0.0.1’);
define(‘FM_FILE’, ‘Product Catalog’);
define(‘FM_USER’, ‘esmith’);
define(‘FM_PASS’, ‘m4rg0t’);
require_once (‘FileMaker.php’);
$fm = new FileMaker(FM_FILE, FM_HOST, FM_USER, FM_PASS);
$message = ‘’;
if (isset($_POST[‘action’]) and $_POST[‘action’] == ‘Save’) {
$edit = $fm->newEditCommand(‘Inventory’, $_REQUEST[‘recid’]);
$edit->setField(‘Location’, $_POST[‘location’]);
$edit->setField(‘Quantity’, $_POST[‘quantity’]);
$edit->execute();
$message = ‘<p>Your changes have been saved</p>’;
}
$record = $fm->getRecordById(‘Inventory’, $_REQUEST[‘recid’]);
$location = $record->getField(‘Location’);
$quantity = $record->getField(‘Quantity’);
?>
<html>
<head>
<title>08_04</title>
</head>
<body>
<?php echo $message; ?>
<form action=”08_04.php” method=”post”>
<input type=”hidden” name=”recid” value=”<?php echo $record->getRecordId();
➥
?>” />
<table border=”1”>
<tr>
<th>Location</th>
<td><input type=”text” name=”location”
➥
value=”<?php echo $location; ?>” /></td>
</tr>
<tr>
<th>Quantity</th>
<td><input type=”text” name=”quantity”
➥
value=”<?php echo $quantity; ?>” /></td>
</tr>
</table>
<input type=”submit” name=”action” value=”Save” />
</form>
</body>
</html>
And here it is again with the few minor changes called out.
<?php
define(‘FM_HOST’, ‘127.0.0.1’);
define(‘FM_FILE’, ‘Product Catalog’);
CHAPTER 8 Working with Related Data (Portals)
162
define(‘FM_USER’, ‘esmith’);
define(‘FM_PASS’, ‘m4rg0t’);
require_once (‘FileMaker.php’);
$fm = new FileMaker(FM_FILE, FM_HOST, FM_USER, FM_PASS);
$message = ‘’;
if (isset($_POST[‘action’]) and $_POST[‘action’] == ‘Save’) {
Note that, here, we are now pointing the first parameter of the newEditCommand() at the
Inventory layout and the
setField() methods have been updated to be appropriate to
the Inventory table.
$edit = $fm->newEditCommand(‘Inventory’, $_REQUEST[‘recid’]);
$edit->setField(‘Location’, $_POST[‘location’]);
$edit->setField(‘Quantity’, $_POST[‘quantity’]);
$edit->execute();
$message = ‘<p>Your changes have been saved</p>’;
}
Pointing at the Inventory layout in this getRecordById() method:
$record = $fm->getRecordById(‘Inventory’, $_REQUEST[‘recid’]);
Pulling values for the fields of the Inventory table:
$location = $record->getField(‘Location’);
$quantity = $record->getField(‘Quantity’);
?>
The only significant change to the HTML section is that we are outputting fields appropri-
ate to the table that we are working with.
<html>
<head>
<title>08_04</title>
</head>
<body>
<?php echo $message; ?>
<form action=”08_04.php” method=”post”>
<input type=”hidden” name=”recid” value=”<?php $record->getRecordId(); ?>” />
<table border=”1”>
<tr>
<th>Location</th>
<td><input type=”text” name=”location”
➥
value=”<?php echo $location; ?>” /></td>
</tr>
<tr>
<th>Quantity</th>
Editing a Related Record
163
8
<td><input type=”text” name=”quantity”
➥
value=”<?php echo $quantity; ?>” /></td>
</tr>
</table>
<input type=”submit” name=”action” value=”Save” />
</form>
</body>
</html>
Deleting a Related Record
I hate to sound like a broken record, but deleting a related record is exactly the same as
deleting any other record. That being the case, this example is going to be the same as the
Delete Record example in Chapter 7 except that it will be pointed at an Inventory record
instead of a Product record. See Figure 8.17 for an example of the page displayed in a
browser.
CHAPTER 8 Working with Related Data (Portals)
164
FIGURE 8.17 When a user clicks the delete link on an inventory portal row, a confirmation
page opens.
Here is the completed code:
<?php
define( ‘FM_HOST’, ‘127.0.0.1’ );
define( ‘FM_FILE’, ‘Product Catalog’ );
define( ‘FM_USER’, ‘esmith’ );
define( ‘FM_PASS’, ‘m4rg0t’ );
require_once (‘FileMaker.php’);
$fm = new FileMaker(FM_FILE, FM_HOST, FM_USER, FM_PASS);
$record = $fm->getRecordById(‘Inventory’, $_REQUEST[‘recid’]);
if (!isset($_POST[‘action’])) {
$page_content = ‘Are you sure you want to delete the ‘.$record->getField
➥
(‘Location’).’ inventory record?’;
$page_content .= ‘<form action=”08_05.php” method=”post”>’;
$page_content .= ‘<input type=”hidden” name=”recid” value=”’.$record->
➥
getRecordId().’” />’;
$page_content .= ‘<p>’;
$page_content .= ‘<input type=”submit” name=”action” value=”Delete” />’;
$page_content .= ‘<input type=”submit” name=”action” value=”Cancel” />’;
$page_content .= ‘</p>’;
$page_content .= ‘</form>’;
} else {
if ($_POST[‘action’] == ‘Delete’) {
$record->delete();
$page_content = ‘<p>Record was deleted.</p>’;
} else {
$page_content = ‘<p>Action cancelled. Record was not deleted.</p>’;
}
}
?>
<html>
<head>
<title>08_05</title>
</head>
<body>
<?php echo $page_content; ?>
</body>
</html>
This page begins like all the others:
<?php
define( ‘FM_HOST’, ‘127.0.0.1’ );
define( ‘FM_FILE’, ‘Product Catalog’ );
define( ‘FM_USER’, ‘esmith’ );
define( ‘FM_PASS’, ‘m4rg0t’ );
require_once (‘FileMaker.php’);
$fm = new FileMaker(FM_FILE, FM_HOST, FM_USER, FM_PASS);
Point the getRecordById() method at the Inventory layout:
$record = $fm->getRecordById(‘Inventory’, $_REQUEST[‘recid’]);
If the action element of the $_POST superglobal array has not been set, the user is viewing
the page for the first time, so prompt the user to confirm the deletion and include Cancel
and Delete buttons:
if (!isset($_POST[‘action’])) {
$page_content = ‘Are you sure you want to delete the ‘.$record->getField
➥
(‘Location’).’ inventory record?’;
$page_content .= ‘<form action=”08_05.php” method=”post”>’;
$page_content .= ‘<input type=”hidden” name=”recid” value=”’.$record->
➥
getRecordId().’” />’;
$page_content .= ‘<p>’;
$page_content .= ‘<input type=”submit” name=”action” value=”Delete” />’;
$page_content .= ‘<input type=”submit” name=”action” value=”Cancel” />’;
$page_content .= ‘</p>’;
$page_content .= ‘</form>’;
Deleting a Related Record
165
8
If the action element of the $_POST superglobal array has been set, the following code
after the
else will execute.
} else {
Did the user click the Delete button?
if ($_POST[‘action’] == ‘Delete’) {
Yes, she did, so call the delete() method of the record object to remove the record from
the database and set the messaging appropriately.
$record->delete();
$page_content = ‘<p>Record was deleted.</p>’;
} else {
If the user clicked the Cancel button, the following line will execute and then both if
blocks and the PHP block will be closed:
$page_content = ‘<p>Action cancelled. Record was not deleted.</p>’;
}
}
?>
There is not much to talk about in this HTML template section because all of the interest-
ing HTML is loaded into the
$page_content variable. I am just creating a bare-bones
HTML document and echoing out the guts of the page.
<html>
<head>
<title>08_05</title>
</head>
<body>
<?php echo $page_content; ?>
</body>
</html>
Summary
With this chapter on related data, the power of FileMaker and FileMaker.php is really
starting to emerge. As we have learned, it is very easy to create relationships between
tables, to add portals to layouts, and to access that related data on the web in a way that
is consistent and intuitive. We will see this trend continue in the chapters to come.
CHAPTER 8 Working with Related Data (Portals)
166
IN THIS CHAPTER
. Introduction
. Embedding Images in a
Container Field
. Storing Images as URLs
CHAPTER 9
Working with Images
Introduction
Because you are reading this book, it is probably safe to
assume that you intend to build a database that will be
accessed via FileMaker Pro and a web browser. Furthermore,
it is likely that this database will be accessed by multiple
users. That being the case, as I see it, there are only two
useful ways to store images in your FileMaker database:
embedding images in a container field and storing image
uniform resource locators (URLs) in a text field. Each has
its pros and cons.
Embedding Images in a Container Field
Pros
. FileMaker users can easily insert images into a
container field.
. Images are immediately available to all FileMaker
users.
. The developer doesn’t have to do any file
manipulation.
Cons
. FileMaker database size will probably increase
significantly.
. FileMaker performance will probably degrade
significantly.
. Accessing images from the web is complicated.
Thoughts
If you have a lot of FileMaker Pro users, if the images in question are small, and if you are
not allowing image uploads via the web, this might be a good option for you.
Storing Image URLs in a Text Field
Pros
. FileMaker database size will not increase significantly.
. FileMaker performance will not degrade.
Cons
. FileMaker users can’t insert images into a container field.
. FileMaker users will need to view images in a Web Viewer rather than a container
field (requires FileMaker Pro 8.5 or greater).
. The developer will have to write some sort of custom file manipulation code to
move images from the FileMaker Pro user’s desktop to a shared file server.
Thoughts
If your images are large, if you are going to allow file uploads from a web browser, or if
you need to perform any image processing (resizing, for example), this might be your
best bet.
Recommendation
In my humble opinion, the flexibility provided by the second option far outweighs the
advantages of the first option. However, I realize that there are sometimes compelling
reasons to opt for embedding your images in FileMaker, so I will cover both techniques.
Embedding Images in a Container Field
When embedding images in a container field, we first need a container field. To add a
container field to the database, open the Product Catalog file with FileMaker Pro. Log in
as Admin and perform the following actions:
1. Select Manage, Database from the File menu. The Manage Database dialog box
opens.
2. Select the Fields tab, if it’s not already selected.
3. Select the Product table from the table pop-up, if it’s not already selected.
4. Type
Thumbnail in the Field Name field.
5. Select Container from the Type pop-up menu.
CHAPTER 9 Working with Images
168
6. Click the Create button to create the Thumbnail field. Your results should look
similar to Figure 9.1.
7. Click the OK button to dismiss the Manage Database dialog box.
Embedding Images in a Container Field
169
9
FIGURE 9.1 The Thumbnail container field has been added to the Product table.
Depending on your application preferences, the new field might or might not have been
added to the Product layout. Before moving on, we need to make sure it’s there.
1. Navigate to the Product layout.
2. If the Thumbnail field is visible, skip the rest of these instructions. Don’t worry if it
is not sized or placed as shown in Figure 9.2.
3. If the Thumbnail field is not on the layout, click the t-square icon in the status area
to enter Layout mode.
4. Select Field from the Insert menu. The Specify Field dialog box opens.
5. Select the Thumbnail field in the field list by clicking it once.
6. Click the OK button to add the Thumbnail field to the Product layout.
7. Resize and reposition the Thumbnail field to look like Figure 9.2.
8. Click the pencil icon in the status area to return to Browse mode.