Simple Computer Tune-up: Speed Up Your PC- P26 potx
Bạn đang xem bản rút gọn của tài liệu. Xem và tải ngay bản đầy đủ của tài liệu tại đây (299.44 KB, 5 trang )
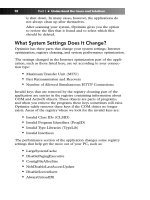
Figure 10-7: Five HKEY registry keys
5. A new column of registry keys appears. Double-click
Software.
6. A long column of registry keys appears. Scroll down until
you find Microsoft, and then double-click it.
7. Another long list of registry keys appears. Scroll down and
double-click Windows.
8. Double-click the CurrentVersion registry key.
9. Double-click the Explorer registry key.
10. Click the Advanced registry key (see Figure 10-8).
Figure 10-8: Accessing the Advanced registry key
11. Click the Edit drop-down menu located in the upper-left
corner of the Windows Registry Editor.
12. Select New.
13. Select DWORD Value.
14. In the right window pane, a new registry value appears.
Rename it EnableBalloonTips (see Figure 10-9).
Chapter 10: Customizing Windows for Your Personal Preferences 107
16_068557 ch10.qxp 12/13/06 6:15 PM Page 107
Please purchase PDF Split-Merge on www.verypdf.com to remove this watermark.
Figure 10-9: Renaming the registry value
15. After renaming the value, double-click it to open it.
16. Under the Value Data heading, make sure there is a 0.
17. Click the OK button.
18. Exit the Registry Editor by clicking the X button in the
upper-right corner.
19. If you change your mind and want to allow the balloon tips
to appear, all you have to do is repeat these steps to locate
the EnableBalloonTips registry key. Open it, delete the 0,
and type
1 in its place.
Stop Highlighting New Software
Whenever you install new software, its name will automatically
become highlighted in your Start menu’s list of programs.The pur-
pose of doing this is to help you quickly find your new software in
case you need to configure it. If you prefer not to see this highlight-
ing, you can easily turn it off as follows:
1. Click the Start button in the lower-left corner of Windows.
2. Click the Control Panel. (If you don’t see this option, your
Start menu is in classic mode. In that case, click Settings,
and then select the Control Panel.)
3. If the Control Panel is in category view, click the Appearance
and Themes category, and then click the Taskbar and Start
Menu icon. If the Control Panel is in classic view, simply
double-click the Taskbar and Start Menu icon.
4. A window opens. Click the Start Menu tab.
5. Click the Customize button.
6. Another window opens. Click the Advanced tab.
108 Part III • Bonus Material
16_068557 ch10.qxp 12/13/06 6:15 PM Page 108
Please purchase PDF Split-Merge on www.verypdf.com to remove this watermark.
7. Under the Start Menu Settings heading, remove the check-
mark from the Highlight Newly Installed Programs box.
8. Click the OK button.
9. You are returned to the previous window. Click the Apply
button.
10. Click the OK button.
Turn Off Error Reporting
When Windows XP crashes or hits a snag, it usually displays an error
message and asks for permission to report the problem to Microsoft
via the Internet.To prevent these messages from appearing, turn off
the error-reporting feature:
1. Right-click the My Computer icon on your desktop. If
this icon is not available, click the Start button in the lower-
left corner of Windows and right-click My Computer. If
you can’t find the My Computer icon anywhere, do the
following:
a. Right-click in the empty space on your desktop.
b. Select Properties.
c. A window opens. Click the Desktop tab.
d. Near the bottom of the window, click the Customize
Desktop button.
e. Another window will open. On the General tab,
beneath the words Desktop Icons, place a checkmark
in the My Computer box.
f. Click the OK button.
g. You are returned to the previous screen. Click the
Apply button.
h. Click the OK button.
i. The My Computer icon appears on your desktop.
Double-click it.
2. Select Properties.
3. A window opens. Click the Advanced tab.
4. Click the Error Reporting button located in the lower-right
corner of this window.
Chapter 10: Customizing Windows for Your Personal Preferences 109
16_068557 ch10.qxp 12/13/06 6:15 PM Page 109
Please purchase PDF Split-Merge on www.verypdf.com to remove this watermark.
5. Select the option to Disable Error Reporting. If you still
want to be notified when serious errors occur, put a check-
mark in the But Notify Me When Critical Errors Occur
box. If you want to disable all types of error reporting so
that you never see any error messages, remove the check-
mark from this box.
Disable Step-by-Step Searches
Windows has an internal search companion that enables you to
quickly locate files, folders, or programs on your computer. By
default, this search engine takes you through a step-by-step process
designed to refine your searches and make them more successful.
Some computer users prefer to disable this feature to make their
searches more streamlined and fast. Here’s how:
1. Click the Start button in the lower-left corner of Windows.
2. Click Search.
3. The Windows Search Companion opens. Use the scroll bar
to locate Change Preferences, and then click it.
4. Scroll down and click Change Files and Folders Search
Behavior.
5. Click the Advanced button.
6. Click the OK button.
Disable the Search Characters
Another aspect of the Search Companion is the animated characters
that provide entertainment during your searches. If you prefer, you
can disable these characters:
1. Click the Start button in the lower-left corner of Windows.
2. Click Search.
3. The Windows Search Companion opens. Use the scroll bar
to locate Change Preferences, and then click it.
4. Click the Without an Animated Screen Character option.
The character will make a humorous exit and disappear.
5. If you change your mind and want to bring back the ani-
mated character, follow the previous steps, but this time
click With an Animated Screen Character.
110 Part III • Bonus Material
16_068557 ch10.qxp 12/13/06 6:15 PM Page 110
Please purchase PDF Split-Merge on www.verypdf.com to remove this watermark.
Show Inactive Icons
If you have a large number of programs installed on your computer,
you might have noticed that the right corner of Windows is jam-
packed with icons that are actually shortcuts to your programs.To
keep this area clean,Windows XP automatically hides the icons for
any programs that have not been used recently. If you prefer to have
these icons remain visible at all times, you must disable the feature
known as Hide Inactive Icons. Here’s how:
1. Click the Start button in the lower-left corner of Windows.
2. Click the Control Panel. (If you don’t see this option, your
Start menu is in classic mode. In that case, click Settings,
and then select the Control Panel.)
3. If the Control Panel is in category view, click the Appearance
and Themes category, and then click the Taskbar and Start
Menu icon. If the Control Panel is in classic view, simply
double-click the Taskbar and Start Menu icon.
4. A window opens. Click the Taskbar tab.
5. Remove the checkmark from the Hide Inactive Icons box.
6. Click the Apply button.
7. Click the OK button.
Re-Sync the Windows Clock
If the clock in the lower-right corner of Windows ever displays the
wrong time, you can synchronize it with an atomic clock on the
Internet— which will ensure that your computer displays the precise
time every time.
Note
This feature is not available on computers that belong to a network
“domain” (usually domains are found in offices or other business settings).
To reset your clock:
1. Connect to the Internet.
2. Double-click the clock located in the lower-right corner of
Windows. The Date and Time Properties window opens,
displaying a clock and a calendar.
Chapter 10: Customizing Windows for Your Personal Preferences 111
16_068557 ch10.qxp 12/13/06 6:15 PM Page 111
Please purchase PDF Split-Merge on www.verypdf.com to remove this watermark.