Joomla cho người mới bắt đầu part 29 ppsx
Bạn đang xem bản rút gọn của tài liệu. Xem và tải ngay bản đầy đủ của tài liệu tại đây (1.84 MB, 10 trang )
Chapter 11
[ 287 ]
Not every template contains this same set of parameters. Template builders
can decide to add parameters—or to leave them out. If you're using another
template you'll probably have other (and oen less) parameters. This doesn't
limit your opons though. You can sll edit the template properes by looking
under the hood and change the CSS or HTML code. We'll look into this later in
this chapter.
Downloading and installing a new template
Of course, the templates that ship with Joomla! are just a few examples of the possible
designs. Do you need a dierent layout or do you want a more aracve design? There
are tons of templates available on the Web.
Physically, a Joomla! template is a bunch of les. When you download a
template, these les are packed together in a compressed format (usually a
ZIP le). Joomla! provides you with a powerful one-click-method to upload
and unpack the ZIP le, installing all of the required template les on the web
server, ready for use.
Time for action – step 1: Downloading and activating a
new template
For your site redesign, you've hit upon a great looking template on the Web. Let's download
and install it:
1. Navigate to www.bestofjoomla.com and enter the Joomla! Templates secon.
In the Search box, enter Lighrame.
2. On the results page, the Lighrame template (tem_lighrame) is shown. Click
on the Download buon to download the template ZIP le to your computer.
Download at Wow! eBook
WWW.WOWEBOOK.COM
Creang an Aracve Design: Working with Templates
[ 288 ]
3. Unpack the ZIP le you've downloaded; the template le tem_lightframe.zip
is itself encased in a larger ZIP le along with some documentaon les.
4. Navigate to Extensions | Install/Uninstall. Browse to the tem_lightframe.zip
le. Select it and click on Upload File & Install. If all goes well, you'll see a message:
Install Template Success.
5. To set the new template as the defa ult one fo r the site, nav igate to Extensions |
Template , select the desired template, and click on the Default buon
(a yellow star) in the toolbar.
Basically, this is all it takes to start using a new template. Click on Preview to have a look at
the frontend of the website:
Download at Wow! eBook
WWW.WOWEBOOK.COM
Chapter 11
[ 289 ]
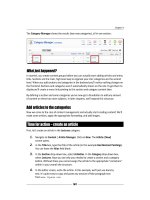
What just happened?
Installing a template works much the same way as installing an extension. Clicking on the
Upload File & Install buon, in fact, automates the process of unpacking the les contained
in the template ZIP le and storing them in a subfolder of the templates folder, located at
the root of a Joomla! site.
You've successfully installed and acvated a new template. However, the transformaon isn't
complete. There are sll a few empty spaces in the template: you'll noce that the Main
Menu doesn't show. Let's x that.
Time for action – step 2: Getting the Main Menu module
to display
The new template doesn't use the exact same module posions as Joomla!'s
default templates. In this case, the menu module is sll assigned to the le posion.
As the LightFrame template doesn't have a le-hand side column, this posion isn't
available—which means Joomla! doesn't get any instrucon to do anything with the
menu module. Let's assign the menu module to the appropriate posion. In this parcular
template, this posion is called mainmenu:
1. Navigate to Extensions | Module Manager. Click on the Main Menu module.
Change its posion to mainmenu.
Download at Wow! eBook
WWW.WOWEBOOK.COM
Creang an Aracve Design: Working with Templates
[ 290 ]
2. The menu will now display in the correct posion, but it won't funcon properly.
That's because the template uses a horizontal drop-down menu, requiring some
specic menu module sengs. Adjust these as follows:
a. Navigate to Extensions | Module Manager | Main Menu and set the Module
Style parameter to List.
b. Set Always Show Sub Menu Item to Yes.
c. In the Advanced Parameters, remove any Module Class Sux (the default
template uses the _menu class sux; this new template doesn't).
3. Click on Save and click on Preview. The drop-down menu now displays ne:
What just happened?
By installing and acvang the LightFrame template, you've changed the overall design of
the site. The template features a horizontal drop-down menu (controlled by CSS code). To
get it to display and funcon properly, you've tweaked the menu module sengs to match
the new template properes.
Remember, the menu module Parameters allow you to tweak the presentaon
of the menu. By seng the parameters you can determine the menu posion
or its horizontal or vercal orientaon. For an overview of the opons, see the
secon Exploring menu module sengs in Chapter 8 on navigaon.
Download at Wow! eBook
WWW.WOWEBOOK.COM
Chapter 11
[ 291 ]
Have a go hero – ll those module positions!
Module posions dier from template to template. This means aer you've installed a new
template you'll most likely have to check if all exisng modules are sll visible and if they're
assigned to the desired posions. You've just done this for the Main Menu, but there are
some more empty spaces in the template indicang module posions without content.
To get things right you'll rst have to nd out the names of the module posions that are
available. Aer that, you can ll these with the desired modules.
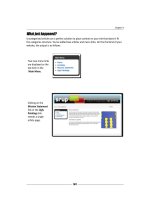
Find out which positions are available
How do you know which posions the template designer has made available in a specic
template? Many templates come with some sort of documentaon; in that case, you're likely
to nd an overview of module posions there. If not, there's an alternave way: navigate to
Extensions | Template Manager, select the template, and click on Edit. If you now click on
the Preview buon (the buon with the magnifying glass, not the Preview link just above it),
you'll see a special template preview with all posions and their posion names displayed in
pink leers: header, right, footer, and so on.
Download at Wow! eBook
WWW.WOWEBOOK.COM
Creang an Aracve Design: Working with Templates
[ 292 ]
Assign content to empty positions
The overview of menu posions shows a few empty boxes:
1. At the top, below the menu, you'll noce a posion called header. It's sll blank.
You can place any module here, such as a newsash, a banner, or maybe a short
message (using the Custom HTML module, that you've seen in the secon Creang
a custom HTML block from Chapter 10). In the following screenshot, we've added
a short welcome message using a Custom HTML module that's assigned to the
header posion:
2. If you scroll down, you can see there's another posion that's sll blank: User3.
There's no content (no module) assigned to it. That's good because we've sll got
an orphan module le from our original SRUP site design: the horizontal About
SRUP menu module. To show this in the User3 posion, navigate to Extensions |
Module Manager | About SRUP and select Posion: user3. The menu will now
display in the box below the main content:
3. If you want the Search box (that was visible in the original template) to appear
again, assign it to any of the available template posions. For example, to show it in
the right-hand side column, navigate to Extensions | Module Manager | Search and
select Posion: right.
Download at Wow! eBook
WWW.WOWEBOOK.COM
Chapter 11
[ 293 ]
Customizing a template: Tweaking CSS styles
Many Joomla! users are perfectly happy using templates out of the box. However, oen a
template needs just a few tweaks to make it t your needs.
In the beginning of this chapter you learned that Cascading Style Sheets (CSS) take care of
your website's look and feel. If you want to change way the site looks, you'll edit the styles
in its CSS le (or CSS les, as the template designer may have chosen to split the necessary
code in dierent stylesheet les).
If you're not familiar with CSS and what it does, have a look at the basic explanaon in
the following secon. Aer that, we'll see how tweaking CSS code works. Later in this
chapter you'll nd some useful resources explaining CSS in more detail (see Expanding
your CSS knowledge).
Understanding the very basics of CSS
Before we try this out on our example site and customize the template we've just installed,
let's have a look at the basics of CSS coding. In Joomla!, HTML and CSS codes are contained
in separate documents. This way, several web pages (HTML documents) can be linked to the
same CSS stylesheet. That's a huge advantage in terms of customizability. By updang a few
lines in just one stylesheet you change the looks of several pages (without having to touch
the underlying HTML).
Joomla! provides a simple text editor to open up the CSS le (or les) the template uses
and to modify the code. This is great for making some quick changes to the template. Don't
worry if you're new to this because basic CSS code isn't dicult to understand. Typically, the
rules in a CSS stylesheet look like this:
h1 {
color: red;
font-weight: bold;
}
This rule applies to the h1 element (a top level heading) in the HTML document. It tells your
browser to style this heading by seng the text color to red and the font-weight to
bold. CSS rules always are enclosed in curly braces. The lines that are part of a CSS rule
("declaraons" such as color:red;) are always separated by semicolons.
Download at Wow! eBook
WWW.WOWEBOOK.COM
Creang an Aracve Design: Working with Templates
[ 294 ]
If you want to change the background color of all h1 headings to blue, you adjust the h1
style rule in the CSS le and replace the original value (that is, red):
h1 {
color: blue;
font-weight: bold;
}
Here's another example of a CSS style rule:
.contentheading {
color: red;
font-weight: bold;
}
This style has its own class name, .contentheading. In this example, the properes red
and bold will be applied to any element in the HTML page with the .contentheading
class. Assigning this class name to a heading or paragraph will make the browser render the
text red and bold.
That's it—this concludes your ve-minute crash course in CSS. If you want to dive deeper
into CSS, you'll learn more about some great Web resources on this subject later on. For
now, let's go and experiment!
Tweaking template CSS, part one: Changing site colors
There are two changes you'll usually want to make when adapng a template: changing
the main colors of the site and replacing the default logo. Let's apply both changes to the
template you've just installed.
Time for action – adjusting the template colors
The template you just installed looks clean and fresh, but the logo and colors of the
LightFrame template don't match with the new corporate identy of your client. Let's adjust
the template colors and get it to look just right:
1. Navigate to Extensions | Template Manager. Select Lighrame and click on Edit.
2. In the next screen, click on Edit CSS, select the template template_css.css
le, and click on Edit again. You're taken to the editor of the Template Manager:
Download at Wow! eBook
WWW.WOWEBOOK.COM
Chapter 11
[ 295 ]
3. To change the background color of the page nd the BODY style denion. Change
it as follows. The highlighted code below is changed to a dierent value; enter
whitesmoke as the color name:
BODY (
margin: 0;
padding: 0; text-
align: center; back-
ground:whitesmoke; )
4. To change the background color of the main content area to white, nd the style
denion that starts with .content, #content-inside. Change the background
value to white:
.content, #content-inside {
padding:14px;
border:5px solid white;
background:white;
}
Download at Wow! eBook
WWW.WOWEBOOK.COM
Creang an Aracve Design: Working with Templates
[ 296 ]
5. To change the background color of the right-hand side column to white, nd the
style denion that starts with #right .moduletable. Change the background
color value to white:
#right .moduletable,
#right .moduletable_text,
#right .moduletable_menu {
border:5px solid white;
background:white; margin-
bottom:2em; padding:6px;
}
6. To change the background color of the big white box below the menu and the footer
to grey, nd the style denion that starts with #footerbg. Change the background
value to grey:
#footerbg {
Background:grey;
padding:2em; pad-
ding-top:1.5em; }
7. To change the background color of the big white box below the menu and the
footer to grey, nd the style denion that starts with #whitebar. Change
the background value to grey:
#whitebar {
background:grey;
height:130px;
height:100px; mar-
gin-bottom:2em; }
8. To see the results, click on Apply and then click on Preview.
Download at Wow! eBook
WWW.WOWEBOOK.COM