101 QUICK AND EASY SECRETS FOR USING YOUR DIGITAL PHOTOGRAPHS- P8 ppsx
Bạn đang xem bản rút gọn của tài liệu. Xem và tải ngay bản đầy đủ của tài liệu tại đây (219.11 KB, 5 trang )
Figure 1.14 shows you the Camera Raw dialog box for GIMP. The options are a bit ambiguous,
as shown in the figure, but if you slide your cursor over any button, there’s pop-up text to tell
you what it will do.
Many photo management programs have photo editing built into them. Many use slider and
button features with which to tweak hue/saturation, exposure, exposure compensation, and
most options to change photos to black and white or sepia tones. The possibilities for tweaking
your photos appear to be endless. At blibs.com, you can create animation and reflections in your
photos. In iPhoto (for Mac), you can use editing options (click on the pencil at the bottom
of the window), such as crop, straighten, enhance, red eye, and effects, and sliders to adjust
exposure, highlights/shadows, and hue/saturation. There are also controls for noise reduction
and special effects. Finally, there’s Windows Live, a free program for Windows in which you can
crop, fix light levels, and adjust colors. Download it from download.live.com/photogallery.
Preparing Your Photos for Use ■ 21
Figure 1.14 The GIMP Camera Raw dialog box.
Resizing Your Photos for Different Uses
Whether you want to print out a wall-sized photo (a full-resolution photo or an enlarged
photo) or insert a thumbnail (a very small photo around 8 KB) into a website, resizing the
photo probably will be part of the job. Most of the time when you resize, you’ll want to make a
picture smaller. A good size to make a picture for the Internet is from 50 to 150 KB (as a JPEG
file). The Internet only handles JPEG, GIF, and PNG files; most of the time, JPEGs are the
name of the game for uploading files to websites.
If you try to make a picture bigger, it’s best to get a program that works with Photoshop to do
the job. Photoshop alone doesn’t do a great job with this task. There’s a Photoshop plug-in
program called Genuine Fractals by onOne Software that does a great job of enlarging photos.
If you’re going to print using a workflow in Photoshop/Photoshop Elements, print from a TIFF
file of about 24 MB. (Resolution and image size are used to calculate file size. Don’t go under
200 dpi with the image size you want. If it goes under 200 dpi, you won’t get a sharp print at the
image size you want. You’ll have to make your image smaller.) Make sure the size is a bit smaller
than the paper on which you are printing. If you try to print larger-size files, the processing time
for a consumer-type computer will be lengthy, and the photo won’t look that much different
than when it’s printed at about 24 MB.
Creating a workflow means tweaking the image you see on the monitor to closely match the
one you’ll see in print. There are entire books on workflow for Photoshop. One such book is
Photoshop CS4 Workflow: The Digital Photographer’s Guide (Sybex, 2008). If you don’t want to
use a workflow (if you’re not making gallery-quality prints), and you want to print out photos,
most printers/image processing software will let you do this automatically, after you choose
from an assortment of paper options and print qualities in the Print dialog box.
For the purposes of this book, we’ll work in inches when thinking about resizing a photo. To
resize in Photoshop, you navigate to Image > Image Size (File > Resize > Image Size in Elements).
A dialog box such as the one you see in Figure 1.15 will come up.
The most important box to check or uncheck in this dialog box is Resample Image. When
Resample Image isn’t checked, you can change the values of Width, Height, or Resolution, and
Photoshop/Elements will proportion the photo accordingly without changing the file size (the
number you see right next to where it says Pixel Dimensions at the top of the box). When
Resample Image is checked, Photoshop will resize the image according to the values that you’ve
put in for the width and height of the document size. When Resample is checked, the photo’s file
size will change. Because most of the time you’ll want to make a file smaller, you’ll choose Bicubic
Sharper. The values will be up to you. Just remember that the resolution for most web photographs
is 72 pixels/inch. For most print jobs, you’ll want a resolution from 200 to 300 pixels/inch.
22 ■ Preparing Your Photos for Use
Finally, Scale Styles has to do with layer styles. This setting, checked or unchecked, will have no
effect on your resizing.
When you’re working with programs other than Photoshop/Elements, resizing is a similar
process. For example, to resize photos in iPhoto, you navigate to File > Export. The Export
Photos dialog box will come up. If you open the Kind drop-down menu, you’ll have a choice
of photo formats. Navigate to JPEG and choose Small if you’re going to use the images on the
Internet or Full Size if you are going to print them. You have choices for the quality and size for
exporting your files. The smallest file you can make is about 8 KB—that’s if you choose a small,
low-quality photo. The sizes go up from there.
Using a Memory Card Reader to Transfer Photos
There are a couple of ways to share photos by moving them from one electronic device to
another. One of the most common ways people move pictures from their camera to their
computer is by connecting the two directly using a USB cable. The images move very slowly
through this connection, especially if the files are large (such as a Raw photo from a 12-MP
camera). A faster way would be to use a memory card reader. Most digital cameras (and some
cell phones; see the upcoming “From Phone to Computer” sidebar) have memory cards (also
called SD cards or CompactFlash cards) that you can remove from the device. A memory card
reader can read a memory card once the reader is connected to a computer. The reader reads
files quickly, which means the transfers are fast—faster than if just a USB cable was connected
from the camera to the computer.
Preparing Your Photos for Use ■ 23
Figure 1.15 The Image Size dialog box.
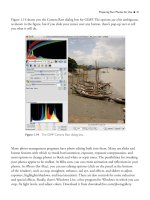
To use a memory card reader, you first have to take it out of the device you want to be read. I’ll
use an example of a Canon dSLR camera. You would first have to turn off the camera. Then
push on the arrow on the right side of the camera to open the compartment where the memory
card is located. You take out the card by pushing gently on it and then pulling it out. Next, you
insert the memory card into the memory card reader (see Figure 1.16). Finally, you connect the
reader to the USB port of your computer. The installed software on your computer usually
detects the camera, and a window will pop up on your computer, asking whether you want to
download the images. Or the camera may appear on your desktop as a mass storage device,
enabling you to click and drag the files to your computer.
Sometimes you’ll want to move photos from one
computer to another. You can use a USB flash drive
for this. A USB flash drive should not be confused
with an SD or a CompactFlash card, which is a
memory card for a camera. The USB flash drive is a
removable and rewritable device weighing less than
2 ounces (56g), with storage capacities that run
from 64 MB to 32 GB or more.
To move images from one computer to another
on a Mac, all you do is insert the flash drive into
the USB port of one computer, double-click on the
drive icon that comes up, and click and drag the
images or folders you want into the drive window
that comes up.
In Windows, after the flash drive is inserted into the USB port, copy the images or folders by
right-clicking on them and selecting Copy. Then right-click on the flash drive and select Paste.
To dismount the drive on a Mac, drag the drive icon to the Trash. In Windows, right-click on
the flash drive and then select Safely Remove USB Mass Storage Device.
Next, you move the flash drive to the other computer and insert it into the USB port. When
the drive comes up on this computer, you can double-click on it (select Open when prompted
in Windows) and then click and drag the images to the desktop. Finally, dismount the flash
drive as described in the preceding paragraph.
24 ■ Preparing Your Photos for Use
Figure 1.16 Using a memory card reader is
a fast way to get photos from one device to
another.
Preparing Your Photos for Use ■ 25
FROM PHONE TO COMPUTER
You can connect most cell phones to your computer with a USB cable. After you connect
your phone to the computer with a USB cord, a disk drive will come up on your desktop.
If you double-click on the disk drive (if it’s a Blackberry phone, the folder will say Blackberry),
you’ll find the Pictures folder inside.To move the pictures, all you do is select them from the
Pictures folder and click and drag them to the desktop. Another way to move your images
from your cell phone to your computer is to use a memory card reader.
Note, though, that some cell phones disable the feature that enables you to move images from
the phone to your computer.They’d rather have you email them so they can charge you for
sending the emails.
NOTE
After you remove the USB flash drive from your computer, put it in its “house”—a place
where it’s stored—so you won’t lose it.