101 QUICK AND EASY SECRETS FOR USING YOUR DIGITAL PHOTOGRAPHS- P14 potx
Bạn đang xem bản rút gọn của tài liệu. Xem và tải ngay bản đầy đủ của tài liệu tại đây (499.89 KB, 5 trang )
❈
Perfect Picture School of Photography. Picture Perfect offers four-, six-, and eight-week
classes with such course names as High Energy Fashion Photography, Documentary
Photography, and All about Color. They also offer four- and six-week digital darkroom
classes that use such programs as Photoshop and Elements, as well as teach how to create
HDR (High Dynamic Range) photos.
Many of these classes have the instructors critique the photos you take or edit. For more about
photo critiquing, see the sidebar below.
Sharing Your Photos with Family and Friends ■ 51
Figure 3.4 A BetterPhoto gallery.
CRITIQUING A PHOTOGRAPH
If you’ve ever had someone tell you something you could do better in a photograph and you
didn’t exactly like it, take heart.Welcome to the wonderful world of photo critiquing. If you’re
going to take an online photography class, you’ll get a slew of your photos critiqued by profes-
sionals. Sound intimidating? It’s not, really. Having your photos critiqued can be really helpful.
52 ■ Sharing Your Photos with Family and Friends
There are four things you can do with a photo after it has been critiqued. If some minor
corrections are warranted, you can make the changes you need in Photoshop. If the photo is
just bad both compositionally and technically, you can toss it. But I know that can be really hard
if you like the subject matter. For example, I have a photograph of women in the Caribbean
walking with bags on top of their heads with no hands holding them up. It’s a lousy photo—
too soft and with too many harsh shadows and subjects that were just too far away from the
lens to come out well. I haven’t tossed that photo.What I did was crop it tightly, shrink it
down, and put it on my blog on the Internet.The last thing you can do with a photo after
it has been critiqued and evaluated poorly is to go out and reshoot.
While these are all possibilities for what you can do with critiqued photos, the most important
part of being critiqued is to learn for the next time.
Consider critiquing the photo in Figure 3.5.You can evaluate it by its composition—meaning
whether the photo invokes strong feelings—its technicalities, and, finally, things you like and
don’t like about the photo.
Figure 3.5 What’s wrong with this photo?
Becoming a Member of the CityDailyPhoto.com Blog Group
If you’re one to have an outing with your camera on a daily basis, then City Daily Photo could
be the place for you. CityDailyPhoto.com is a place to register a blog that features a photo a day
from any city around the world. There are just a couple of rules you have to abide by to register.
❈
You can only post one photo a day.
❈
The blog can be about only one city.
❈
The title of your blog has to include the city’s name.
❈
All photo captions need to include English text.
There’s a great benefit to signing up with the CityDailyPhoto.com website—your blog will
instantly receive many more hits. (For blogs and hits, see Chapter 6, “Photo Blog Heaven.”)
Every day you post a picture, it’s put up on the front page of the CityDailyPhoto.com website
with a link to your blog. If you have an eye-catching picture, many people who are visiting the
CityDailyPhoto.com website will click on the link to your blog. It didn’t take me long to get
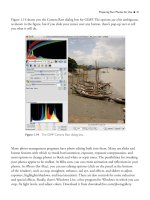
more than 200 hits a day when I put up Palm Springs Daily Photo (see Figure 3.6).
Since you make a commitment to providing one photo a day from your city, you’ll become an
active photographer. You’ll get in the habit of bringing your camera with you wherever you go
and experimenting with different shooting techniques on a daily basis. You’ll also have to get
into the habit of downloading the photo onto your computer and then posting to your blog.
Sharing Your Photos with Family and Friends ■ 53
Okay, I’ll go ahead and critique it. Some might think that the muddy water takes away from the
photo. It can be cleaned up by cropping out some of it. If you did that, you’d lose the grass,
which adds to the image both by adding a contrasting color to the frame and in the interaction
between the turtle and the blade of grass.That blade of grass looks as if it’s in danger of being
bitten, which is good thing.You wonder if the turtle will end up eating it.Technically, the photo
needs some work.There are a few blown highlights (the sunspots on the water); some would
say they like it, and others not. I like that the eyes of the animal are sharp. If you want one
thing sharp in your subjects, it is best if it’s the eyes. Finally, I don’t like, again, the dirty look to
the photo. I might want to clean it up a little in Photoshop by changing the color tones a bit.
Making a Family Tree Website with Photos
TribalPages.com lets you build an incredible family tree website for free. All you do is sign up
(no email confirmation required) and get started building your website right away. The sites are
quite nice, too, with drop-down menu bars and a pleasant color scheme. In fact, the site’s so
good that I had to ask myself whether it will be around in the not-too-distant future. The
answer to my question (an indirect answer) is on their first page. The site has more than
300,000 members, some of whom pay for premium status (which runs from $2 to $4/month),
which I believe is a good omen for their future.
When you sign up for TribalPages.com, the site assigns you a URL on the order of
yourname.tribalpages.com. My URL is bamberg.tribalpages.com.
54 ■ Sharing Your Photos with Family and Friends
Figure 3.6 An example of a Daily Photo blog.
To make the website (see Figure 3.7 for an example) or add to it, you log in and click Edit.
In the next window, click on List of Names in the My Website category. From there, input your
name first. After you’re finished, you’ll see the beginning of your family tree, with your name in
the middle. To add photos, click on the camera next to your name and then click on Upload
Photos. Click on Browse in the next window, navigate to the photo you want posted on the
website, and then click on Upload. In the next window, click Done.
When you’ve finished inputting a few names and images and you go to the URL of your web-
page, you’ll be pleasantly surprised to find the images in a slideshow on your site’s homepage.
Sharing Your Photos with Family and Friends ■ 55
Figure 3.7 You can make your own family tree website at TribalPages.com.
NOTE
When you click on the name of person, he or she will appear first on the family tree.