101 QUICK AND EASY SECRETS FOR USING YOUR DIGITAL PHOTOGRAPHS- P19 doc
Bạn đang xem bản rút gọn của tài liệu. Xem và tải ngay bản đầy đủ của tài liệu tại đây (327.52 KB, 5 trang )
Photography and Paper Scrapbooking
Paper scrapbooking is one of America’s favorite pasttimes. When you paper scrapbook, you
can start out simple and work your way up to more complex projects. All you’ll need to start are
your photos (sorted by theme), a ruler, colored paper, acid-free adhesive (to prevent yellowing
of images/tape with age), and stencils. To attach your images to the page, use tiny pieces of
acid-free, double-stick tape.
Scrapbooks are either 12×12 inches or 8
1
⁄2 ×11 inches. If you want a quick and easy scrapbook,
you may be overwhelmed by the choices when you get to the scrapbooking store or when you
buy online. There are fancy cutters, adhesives, die-cutting systems, paper punches, rubber
stamps, and other crafting tools. When shopping, stick with items that you know how to use.
Remember, the goal for a scrapbook is to have many pages, so start out simple, and as you get
the hang of it, try new tools. Stickers and other embellishments with your photos on a nice
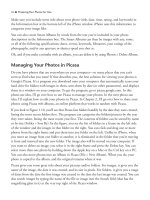
background sheet work fine. Figure 5.1 shows a scrapbook page I made in about an hour.
It costs about $2 (for the stickers and paper) to make.
Here are some pointers about the page:
❈
Tilt the pictures. Notice how corresponding pictures in the bottom and top rows are tilted
opposite from one another. I did that so there would be better balance on the page.
❈
Build paper frames for your pictures. However, this was not necessary on the old pictures
I used because they were printed with frames.
❈
Have at least a little bit of text on the page. In the case of “Florida,” one word is worth
a thousand pictures. The word reminds people that the pictures were taken in Florida.
❈
Use textured background paper of uniform color (which is usually less than $1 a sheet).
You don’t want to have a cluttered background. Many papers have very busy backgrounds.
To be sure, some like this and can get away with it if the foreground and background colors
complement each other, but personally I don’t care for it.
❈
Don’t overdo the stickers. A couple on a page is enough.
❈
Overlap images artfully. Notice how the top and bottom rows of images overlap differently
for additional balance in the page.
Finally, choose acid-free everything. You want the memories to last generations!
76 ■ Scrapbooking Bug Gotcha?
NOTE
Don’t use too much tape to attach a photo to a scrapbook page.That way, you can take the
picture off for another use without damaging it.
Downloading Free Digital Kits for Your Photos
There are websites where you can get free digital scrapbooking kits, which include varied assort-
ments of digital kits, embellishments, alphabets, and templates. Templates, or quick pages—the
ones where you just slip in your picture—usually cost a nominal amount—a few dollars or so.
If you’re not sure what the words mean regarding the content of the digital kits, see the upcoming
“Digital Scrapbooking Terms” sidebar.
Scrapbooking Bug Gotcha? ■ 77
Figure 5.1 Scrapbooking old Florida photos.
❈
ScrapbookScrapbook.com. Their claim is that they have more than 3,000 printables.
To find the freebies, go to www.scrapbookscrapbook.com/themes.html. Most are down-
loaded as easily printable PDF files.
❈
DigiFree. DigiFree (digifree.blogspot.com) scans blogs for free stuff for scrapbookers.
Each day it lists blogs that are giving away stuff. If you scroll down the blog archive on the
bottom left of the window, you’ll find links to posts about past free stuff. Some posts lure
you to their site, only to find out that you were looking at previews of available digital kits
that cost money. The files are usually in Photoshop’s PSD format or are zip files that can be
unzipped with StuffIt or WinZip.
❈
Scrapping with IkeaGoddess. Scrapping with IkeaGoddess (ikeagoddess.blogspot.com)
offers links to a batch of blogs, each offering free quick pages (templates). Once you get
to one of these blogs and click Download for the template you like, you’ll be taken to
4shared.com, a free file-sharing site. Don’t worry about catching viruses—each download
on this site has been checked for the pesky little buggers.
❈
Scrapbook Flair. Scrapbook Flair (www.scrapbookflair.com) has a wide selection of
templates. Just go to their website and click on Templates under the Free Download heading,
which is on the bottom left of the window. The templates are PTF files that are handled by
free software the site puts out. Sorry Mac users, the program only works in Windows.
❈
ShabbyPrincess. ShabbyPrincess (shabbyprincess.com) has free kits. To get to them, click
on Downloads in the upper-left part of the homepage. There are a dozen or so kits.
❈
Digital Scrapbook Pages. Digital Scrapbook Pages (digitalscrapbookpages.com/digitals)
has inexpensive templates in PSD format. Navigate to Categories > Templates/Sketches.
There are hundreds to choose from.
78 ■ Scrapbooking Bug Gotcha?
NOTE
When you’re inserting photos into a quick page, use a high-resolution photo and shrink it
down (Edit > Free Transform and then click and drag the image until its size is changed)
instead of using a low-resolution image and enlarging it.Your picture will be much sharper if
you do the former.
NOTE
On almost all digital scrapbooking sites, there are notes that kits are for personal use only.
If you put up a scrapbook page that contains elements from a scrapbooking site, give that site
credit in the post.
Scrapbooking Bug Gotcha? ■ 79
DIGITAL SCRAPBOOKING TERMS
You might find a few words in this scrapbooking chapter that are unfamiliar. In this sidebar, I’ll
familiarize you with some words that are used in digital scrapbooking.
❈
Embellishments. These are little things you can put all over a scrapbook page (much like
stickers and other cutouts in hard-copy scrapbooks)—anything from frogs jumping to
bright bows and ribbons. Embellishments usually match other elements of the page in style
and color. See Figure 5.2.
❈
PNG file. Pronounced ping, this file is like a digital cutout. In part of these types of files,
there are no pixels, and these parts turn out transparent after you insert them into a
digital scrapbook page. An example of the contents would be a flower with a transparent
background. For an example of a transparent background, see the “Getting Rid of Your
Background” sidebar in Chapter 9,“Personal Accessories.”
❈
Digital kits. These usually come as zip files, which, when downloaded on your computer,
are usually automatically unzipped. Once the files are unzipped, you’ll find a folder filled with
digital scraps from alpha sets (letters and numbers) to papers (background textures).
❈
Templates or quick pages.These are premade scrapbook page files with layers embedded,
into which you can add your photographs.They are usually in Photoshop’s PSD format.
Figure 5.2 Embellishments are the extras you see in the lower-right
corner of this scrapbook page. Page courtesy of Heather Landry.
Trying Digital Scrapbooking
After you’ve got some of the free stuff (digital kits, alphabets, papers, and embellishments), go
for the big kahuna—a digital scrapbook photo page. You can basically do the same thing with
digital cutouts as you can with paper cutouts.
In order to construct a digital scrapbook, you have to either scan your prints or use the photos
you have in your computer. You just have to be a bit tech-savvy.
You’ll need a program with which to make a digital scrapbook. The best bet for your money is
Photoshop Elements. You can also use Photoshop, Corel Paint Shop Pro, or Print Shop.
If you have Photoshop or Elements, you can pick and choose from the items in digital kits and
put them on your scrapbook page. All you have to do is create a new layer (Layer > New >
Layer) for each new item you add to your scrapbook page. Open the picture you want to add
to your scrapbook page and then choose the Move tool (the first tool in the Tools palette in
Photoshop) and move the picture from the open file to the scrapbook page. From there, you
can resize or tilt the image by selecting it and navigating to Edit > Free Transform and then
clicking and dragging the edges to make the image the size and orientation you want. To view
the Layers palette to identify the layers you’ve made, navigate to Window > Layers.
The scrapbook page shown in Figure 5.3 contains scanned images, alphabets (the letters for
Bryce and Mom), thumbnails of flags from Google images and a background from a digital kit.
It contains the following layers:
Four embellishment layers (the clipart of the small flag images)
Frame around image of Bryce and Mom
Frame around image of Bryce
Picture of Bryce and Mom
Picture of Bryce
B
R
Y
C
E
&
M
O
M
Flag stripes
Background (flag stars)
80 ■ Scrapbooking Bug Gotcha?