101 QUICK AND EASY SECRETS FOR USING YOUR DIGITAL PHOTOGRAPHS- P32 potx
Bạn đang xem bản rút gọn của tài liệu. Xem và tải ngay bản đầy đủ của tài liệu tại đây (287.4 KB, 5 trang )
Personal Accessories ■ 141
5. Choose Select > Inverse.
6. Click Delete on your keyboard. Figure 9.3 shows my image after clicking Delete.
Voila! You have your image cut out with a transparent background!
Figure 9.2 Bowl picture before deleting the
background in Photoshop.
Figure 9.3 The bowl sign with the background
deleted.
NOTE
There will be two layers in this file. Don’t flatten the image. If you do, your background will
turn white. (The squares that indicate it’s transparent will go away.) Save the file as a PNG file
(which will convert the two layers to one)—a file type that handles images with transparent
backgrounds with a one-layer non-flattened image. PNG files are compatible with many online
platforms, such as Zazzle.
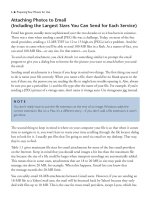
Making Business Cards with Your Photos at MOO.com
To be sure, you can make business cards at Zazzle.com ($16.95 for 100 business cards with the
same image), but there’s another site that lets you make each business card in a pack with a dif-
ferent picture ($21.99 for 50 cards).
You can upload photos from your computer or use the ones that you have on Flickr, Facebook,
or Etsy. The business cards are printed on two sides—one side with your photo on it, and the
other side with details of your business (text).
On MOO.com’s homepage, you click on Choose a Product to Make and then in the next win-
dow, Make Business Cards. In the next window, click Upload Your Images (JPEG, PNG, GIF,
or PDF). The site recommends that images be 300 dpi. Finally, click on Upload Your Images to
MOO. In the selection box that comes up, you’ll then do the usual picking of photos that you
want from your computer. After you’ve selected your images (use the Shift/Command/Ctrl key
to select multiple images, depending on your computer), click on Select. Your images will be
uploaded right away.
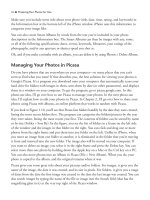
After your images are uploaded (which will take a few minutes), click on Next Step. The new
window will slowly display the front (image side) of the business card. The window will also
contain how many cards of each picture will be in your pack. For example, I uploaded 16 cards,
and the site calculated that I would get three of each card in each pack I ordered. Figure 9.4
shows how the sample cards are displayed in the window. You can click Edit This Card to rotate
or enlarge the picture on the card. You can also click and drag the picture around in the window.
After you preview your images, click Next Step. This is the window where you can add text
(and a logo or another image if you want). You can choose a layout for the text side of the card
(which also has an option for putting another small image on it). After you do, the appropriate
entry boxes for text will be displayed. Just type in your name, address, phone number, and so
on. When you’re finished, click Next Step.
In the new window that comes up, you pick your paper. You have a choice of a Classic or Green
card. The MOO Classic card is smooth, sturdy paper with a matte laminate on both sides. The
MOO Green card is uncoated, so the image will be less bright. After that choice, click Next
Step. A preview of your business cards will come up. Check to see that everything is okay and
then click Next Step. Check off the number of cards you want and then click Add to Cart.
142 ■ Personal Accessories
Burning Your Photos onto a Gift CD
Why not find and burn your best photos to make a gift CD for a friend or family member?
In Windows Vista, all you have to do to burn a CD or DVD is pop one into the CD/DVD
recorder. After you do, a dialog box will come up. Click Burn Files to Data Disc. Next, a Burn a
Disc dialog box comes up. Type a name for your disc and then click Next. An empty disc folder
will then come up. Open a folder of images you want to burn to the CD/DVD and click and
drag the images inside into the disc folder.
On a Mac, all you have to do to burn a CD or DVD is to insert it into the CD/DVD drive. Click
OK in the prompt that comes up. Your CD will appear on the desktop. Open it by double-
clicking on it. A blank window will appear. Click and drag the folders and files you want to burn
to the disc. You’ll see aliases in the window (folders/image files with arrows next to their icons).
These connect the files to the originals so the originals aren’t moved. Click Burn at the top of
the window. In the dialog that comes up, give the disc a name, enter a speed (the maximum),
and uncheck the Save Burn Folder To option. (Check it if you want the aliases saved.) Click Burn.
For more about CDs and DVDs, see “Storing Your Photos and Backups Properly” in Chapter 1.
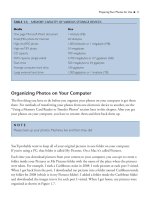
Personal Accessories ■ 143
Figure 9.4 Your business-card images are previewed at MOO.com.
Creating a Greeting Card Online
After searching the Internet and making cards on a couple of sites, I’ve found MOO.com and
Snapfish.com to offer great features in their online photo greeting-card makers.
Here’s the skinny on these two sites. MOO.com has greeting cards by the pack. (A pack of
10 folded cards with envelopes is $24.99.) Like the business cards described in the “Making
Business Cards with Your Photos at MOO.com” section, you can opt for a different image on
every card.
To access the greeting-card maker, click on Choose a Product to Make on the homepage. Then
click on Make Greeting Cards. The next window gives you options to make 10 or 25 greeting
cards. To make the greeting cards, click on Start Uploading Images. Again, as with the business
cards, you can opt to choose images from your Flickr account. Once you upload your image(s),
a new window will come up where there are templates (choose between landscape and portrait)
you can select for the front of your card. You can opt to have your entire image be the template
in this window. After you click on Next Step, a new window will come up where you design the
front of the card. You can add any text you want to the front of the card. Figure 9.5 shows a
card where I typed in Happy Birthday to make a birthday card. When you’re finished, click on
Save and Make Another and then click on Next Step again. A new window will come up where
you make the middle of the card. After you’re finished typing in the text for that, click Next
Step again to personalize the back of the card. After that, you pick an envelope (white ones are
free; color ones cost extra). Finally, they ask you how many packs you want, and then you go to
payment.
Snapfish.com (www.snapfish.com/storecards2) has greeting cards in packs with 20 and more.
The more you buy, the cheaper each card is. The cards are around $17 for 20 non-folded cards
without envelopes.
The first thing you do at Snapfish to create a card is pick a template from dozens that appear
on more than 12 pages on the site. After you click on one, you’re taken to a new window
where you choose your size and layout and the kind of paper you want. After you select these,
click on Create This Card. In the left side of the window that comes up, upload your photo.
144 ■ Personal Accessories
NOTE
Your image will appear at the top of window; you have to click and drag it onto the card for it
to appear.
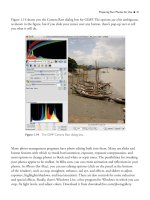
A dialog box will come up, where you
navigate on your computer to the
photo you want on the card. Follow
the prompts, and you’ll be taken to
the window where you customize your
card. Your photo will appear on the
right side of the window. You have to
click and drag that photo onto the
card. Then you can add text at the
bottom of the card if you like. Next,
click on Save Card and then Order
Card. Figure 9.6 shows a preview of
the card.
Personal Accessories ■ 145
Figure 9.5 MOO.com has cards where you customize the front, the inside, and the back.
Figure 9.6 Snapfish.com has cards where you only customize the front.