Windows Admin Scripting Little Black Book- P17 pot
Bạn đang xem bản rút gọn của tài liệu. Xem và tải ngay bản đầy đủ của tài liệu tại đây (406.71 KB, 10 trang )
The Win32_CDROMDrive class allows you to query CD-ROM information through WMI. To collect CD-ROM
information on a system using WMI, proceed as follows:
1. Create a new directory to store all files included in this example.
2. Download and install the latest version of Windows Script Host, from www.microsoft.com
, to the new
directory.
3. Select Start|Run and enter “cscript scriptfile.vbs”.
Here, scriptfile is the full path and file name of a script file that contains the following:
Set CDSet = GetObject("winmgmts:").InstancesOf
("Win32_CDROMDrive")
For each CD in CDSet
WScript.Echo "Name: " & CD.Name & VBlf & _
"Drive: " & CD.Drive & VBlf & _
"Status: " & CD.Status
Next
Note
The highlighted code above must be placed on one line.
Collecting Drive Information
The Win32_LogicalDisk class allows you to query disk information through WMI. To inventory disks on a system
using WMI, proceed as follows:
1.
2. Download and install the latest version of Windows Script Host, from
Create a new directory to store all files included in this example.
www.microsoft.com
, to the new
directory.
3. Select Start|Run and enter “cscript scriptfile.vbs”.
Here, scriptfile is the full path and file name of a script file that contains the following:
Set DiskSet = GetObject("winmgmts:").InstancesOf
("Win32_LogicalDisk")
For each Disk in DiskSet
Select Case Disk.DriveType
Case 0
DType = "Unknown"
Case 1
DType = "No Root Directory"
Case 2
DType = "Removable Disk"
Case 3
DType = "Local Disk"
Case 4
DType = "Network Drive"
Case 5
DType = "Compact Disc"
Case 6
DType = "RAM Disk"
End Select
WScript.Echo "Drive: " & Disk.DeviceID & VBlf & _
"Name: " & Disk.Description & VBlf & _
"Type: " & DType & VBlf & _
"File System: " & Disk.FileSystem & VBlf & _
"Size: " & Disk.Size & VBlf & _
"Free Space: " & Disk.FreeSpace & VBlf & _
"Compressed: " & Disk.Compressed
Next
Note
The highlighted code above must be placed on one line.
Collecting Memory Information
The Win32_LogicalMemoryConfiguration class allows you to query memory information through WMI. To collect
memory information on a system using WMI, proceed as follows:
1. Create a new directory to store all files included in this example.
2. Download and install the latest version of Windows Script Host, from www.microsoft.com
, to the new
directory.
3. Select Start|Run and enter “cscript scriptfile.vbs”.
Here, scriptfile is the full path and file name of a script file that contains the following:
Set MemorySet = GetObject("winmgmts:").InstancesOf
("Win32_LogicalMemoryConfiguration")
For each Memory in MemorySet
1.
WScript.Echo "Total: " & _
Memory.TotalPhysicalMemory/1024 & VBlf & _
"Virtual: " & Memory.TotalVirtualMemory/1024 & VBlf & _
"Page: " & Memory.TotalPageFileSpace/1024
Next
Note
The highlighted code above must be placed on one line.
Collecting Modem Information
The Win32_POTSModem class allows you to query modem information through WMI. To collect modem information
on a system using WMI, proceed as follows:
Create a new directory to store all files included in this example.
2. Download and install the latest version of Windows Script Host, from www.microsoft.com
, to the new
directory.
3. Select Start|Run and enter “cscript scriptfile.vbs”.
Here, scriptfile is the full path and file name of a script file that contains the following:
Set ModemSet = GetObject("winmgmts:").InstancesOf
("Win32_POTSModem")
For each Modem in ModemSet
WScript.Echo "Name: " & Modem.Name & VBlf & _
"Port: " & Modem.AttachedTo & VBlf & _
"Type: " & Modem.DeviceType & VBlf & _
"Status: " & Modem.Status
Next
Note
The highlighted code above must be placed on one line.
Collecting Monitor Information
The Win32_DesktopMonitor class allows you to query information on computer monitors through WMI. To collect
monitor information on a system using WMI, proceed as follows:
1. Create a new directory to store all files included in this example.
2. Download and install the latest version of Windows Script Host, from www.microsoft.com
, to the new
directory.
3. Select Start|Run and enter “cscript scriptfile.vbs”.
Here, scriptfile is the full path and file name of a script file that contains the following:
Set MonitorSet = GetObject("winmgmts:").InstancesOf
("Win32_DesktopMonitor")
For each Monitor in MonitorSet
WScript.Echo "Name: " & Monitor.Name & VBlf & _
"Height: " & Monitor.ScreenHeight & VBlf & _
"Width: " & Monitor.ScreenWidth & VBlf & _
"Status: " & Monitor.Status
Next
Note
The highlighted code above must be placed on one line.
Collecting Mouse Information
The Win32_PointingDevice class allows you to query mouse, track-ball, touch screen, touch pad, and other pointing
device information through WMI. To collect pointing device information on a system using WMI, proceed as follows:
1. Create a new directory to store all files included in this example.
2. Download and install the latest version of Windows Script Host, from www.microsoft.com
, to the new
directory.
3. Select Start|Run and enter “cscript scriptfile.vbs”.
Here, scriptfile is the full path and file name of a script file that contains the following:
Set MouseSet = GetObject("winmgmts:").InstancesOf
("Win32_PointingDevice")
For each Mouse in MouseSet
WScript.Echo "Name: " & Mouse.Name & VBlf & _
"Manufacturer: " & Mouse.Manufacturer & VBlf & _
"Type: " & Mouse.HardwareType & VBlf & _
"Buttons: " & Mouse.NumberofButtons & VBlf & _
"Status: " & Mouse.Status
Next
Note
The highlighted code above must be placed on one line.
Collecting Network Adapter Information
The Win32_NetworkAdapter class allows you to query information on network adapters through WMI. To collect
Network Interface Card (NIC) information on a system using WMI, proceed as follows:
1. Create a new directory to store all files included in this example.
2. Download and install the latest version of Windows Script Host, from www.microsoft.com
, to the new
directory.
3. Select Start|Run and enter “cscript scriptfile.vbs”.
Here, scriptfile is the full path and file name of a script file that contains the following:
Set NICSet = GetObject("winmgmts:").InstancesOf
("Win32_NetworkAdapter")
For each NIC in NICSet
WScript.Echo "Name: " & NIC.Name & VBlf & _
"Type: " & NIC.AdapterType & VBlf & _
"Speed: " & NIC.Speed & VBlf & _
"MAC: " & NIC.MACAddress & VBlf & _
"Addresses: " & NIC.NetworkAddresses
Next
Note
The highlighted code above must be placed on one line.
Collecting Operating System Information
The Win32_OperatingSystem class allows you to query various operating system information through WMI. To
collect CD-ROM information on a system using WMI, proceed as follows:
1. Create a new directory to store all files included in this example.
2. Download and install the latest version of Windows Script Host, from www.microsoft.com
, to the new
directory.
3. Select Start|Run and enter “cscript scriptfile.vbs”.
Here, scriptfile is the full path and file name of a script file that contains the following:
Set OSSet = GetObject("winmgmts:").InstancesOf
("Win32_OperatingSystem")
For each OS in OSSet
WScript.Echo "OS: " & OS.Caption & VBlf & _
"Build: " & OS.BuildNumber & VBlf & _
"Version: " & OS.Version & VBlf & _
"Service Pack: " & OS.CSDVersion & VBlf & _
"ProdID: " & OS.SerialNumber & VBlf & _
"Install Date: " & OS.InstallDate & VBlf & _
"Last Bootup: " & OS.LastBootUpTime
Next
Note
The highlighted code above must be placed on one line.
Collecting Printer Information
The Win32_Printer class allows you to query printer information through WMI. To collect printer information on a
system using WMI, proceed as follows:
1. Create a new directory to store all files included in this example.
2. Download and install the latest version of Windows Script Host, from www.microsoft.com
, to the new
directory.
3. Select Start|Run and enter “cscript scriptfile.vbs”.
Here, scriptfile is the full path and file name of a script file that contains the following:
Set PrinterSet = GetObject("winmgmts:").InstancesOf
("Win32_Printer")
For each Printer in PrinterSet
WScript.Echo "Name: " & Printer.Name & VBlf & _
"Location: " & Printer.Location & VBlf & _
"Share: " & Printer.ShareName & VBlf & _
"Status: " & Printer.Status
Next
Note
The highlighted code above must be placed on one line.
Collecting Processor Information
The Win32_Processor class allows you to query processor information through WMI. To collect processor
information on a system using WMI, proceed as follows:
1. Create a new directory to store all files included in this example.
2. Download and install the latest version of Windows Script Host, from www.microsoft.com
, to the new
directory.
3. Select Start|Run and enter “cscript scriptfile.vbs”.
Here, scriptfile is the full path and file name of a script file that contains the following:
Set ProSet = GetObject("winmgmts:").InstancesOf
("Win32_Processor")
For each Pro in ProSet
WScript.Echo "Name: " & Pro.Name & VBlf & _
"Speed: " & Pro.MaxClockSpeed & VBlf & _
"Cache: " & Pro.L2CacheSize & " Cache" & VBlf & _
"Processor ID: " & Pro.ProcessorId
Next
Note
The highlighted code above must be placed on one line.
Collecting Sound Card Information
The Win32_SoundDevice class allows you to query sound card information through WMI. To collect sound card
information on a system using WMI, proceed as follows:
1. Create a new directory to store all files included in this example.
2. Download and install the latest version of Windows Script Host, from www.microsoft.com
, to the new
directory.
3. Select Start|Run and enter “cscript scriptfile.vbs”.
Here, scriptfile is the full path and file name of a script file that contains the following:
Set SoundSet = GetObject("winmgmts:").InstancesOf
("Win32_SoundDevice")
For each Sound in SoundSet
WScript.Echo "Card: " & Sound.ProductName & VBlf & _
"Manufacturer: " & Sound.Manufacturer
Next
Note
The highlighted code above must be placed on one line.
Collecting Tape Drive Information
The Win32_TapeDrive class allows you to query tape drive information through WMI. To collect tape drive
information on a system using WMI, proceed as follows:
1. Create a new directory to store all files included in this example.
2. Download and install the latest version of Windows Script Host, from www.microsoft.com
, to the new
directory.
3. Select Start|Run and enter “cscript scriptfile.vbs”.
Here, scriptfile is the full path and file name of a script file that contains the following:
Set TapeSet = GetObject("winmgmts:").InstancesOf
("Win32_TapeDrive")
For each Tape in TapeSet
WScript.Echo "Name: " & Tape.Name & VBlf & _
"Hardware Compression: " & Tape.Compression & VBlf & _
"Needs Cleaning: " & Tape.NeedsCleaning & VBlf & _
"Status: " & Tape.Status
Next
Note
The highlighted code above must be placed on one line.
Collecting Video Card Information
The Win32_VideoController class allows you to query video card information through WMI. To collect video card
information on a system using WMI, proceed as follows:
1. Create a new directory to store all files included in this example.
2. Download and install the latest version of Windows Script Host, from www.microsoft.com, to the new
directory.
3. Select Start|Run and enter “cscript scriptfile.vbs”.
Here, scriptfile is the full path and file name of a script file that contains the following:
Set VideoSet = GetObject("winmgmts:").InstancesOf
("Win32_VideoController")
For each Video in VideoSet
WScript.Echo "Card: " & Video.Description & VBlf & _
"Current: " & Video.VideoModeDescription
Next
Note
The highlighted code above must be placed on one line.
Chapter 10: Security
In Brief
As sad as I am to admit this, the attitude of most administrators is “security through obscurity.” This expression
means that the best way of dealing with security holes is ignoring them, hoping no one will find them, and praying
they will go away. Unfortunately, this attitude never works. It seems nowadays there is a new virus or security hole
being publicized daily. The days of merely running FDISK /MBR or deleting PWL files are over. Viruses and intruders
are more sophisticated than ever. In this chapter, you will learn about the Windows security architecture and how to
decrease the chances of unauthorized entry.
Hackers and Crackers
If you can think of system security as a war, then hackers and crackers are your opponents. Before you go into
battle, it’s always good to know a little about your opponents. Here is the truth about a common myth: Hackers never
intentionally damage data. Hackers are knowledgeable computer users whose pure goal is to solve problems and
continually learn about the inner workings of operating systems, applications, and transmission methods. Although
their methods of obtaining information may be questionable, they tend to create tools to identify or improve upon
system weaknesses. Hackers like to document and publicly share their information with all who are willing to learn.
Hackers usually receive bad press because people don’t understand the difference between the terms “hackers” and
“crackers.”
Crackers are knowledgeable computer users whose goal is to break into systems and damage or steal data. They
tend to reverse-engineer programs and illegally use them for even more illicit purposes. Cracking techniques usually
do not involve skillful or complicated methods, but rather crude methods such as stealing files from trash bins or
tricking other users into handing them information. Examples of crackers are users who sniff the network for
passwords, pirate software, write Trojan horse programs or viruses, or crash the network with broadcasts or email
bombs.
Tip
For more information about hackers and crackers, visit www.hackers.com
.
The Infamous Rainbow Series
In order to protect the nation’s interest against the attacks of crackers, the National Computer Security Center
(NCSC) was born. The NCSC was created by the National Security Agency (NSA) to aggressively evaluate computer
system security. NCSC works with various cooperating computer and telecommunication companies to ensure that
their services are meeting the country’s security requirements.
Note
The NSA is part of the Department of Defense (DOD).
The “Rainbow Series” is a collection of publications, created by the NCSC to evaluate various aspects of computer
security. The cover of each report varies in color, hence the name “Rainbow Series.” Over 30 security reports are
available from
www.radium.ncsc.mil
. Here is a brief overview of the three key Rainbow books that were used in
Windows NT C2 compliance testing.
The Orange Book
The Orange Book is an NCSC publication called Department of Defense Trusted Computer System Evaluation
Criteria. This is the publication that sets the standards for C2 security.
The Red Book
The Red Book is an extension of the Orange Book. Its title is Trusted Network Interpretation of the Trusted Computer
System Evaluation Criteria, and it covers the security of networks (LANs/WANs).
The Light Blue Book
The Light Blue Book is an extension of the Orange Book. Its title is A Guide to Understanding Identification and
Authentication in Trusted Systems, and it discusses the security of user identification and authentication.
Tip
You can visit www.radium.ncsc.mil/tpep/library/rainbow/index.html to download or view all of the
rainbow books.
C2 Security
C2 is a collection of security policies defined by the NCSC publication Trusted Computer System Evaluation Criteria
(TCSEC), known as the Orange Book. The basic guidelines of the C2 standard are:
All users must have a unique logon easily identifiable in audits.
Deleted files must not be readable.
Security auditing must be included.
The contents of memory must not be readable after a process has terminated.
The system must be able to control resource access by granting or denying individual users or groups.
The system must be protected from external tampering.
Using C2CONFIG
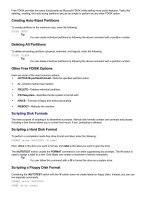
C2CONFIG (C2 Configuration) is an NT resource kit utility designed to analyze and modify system security to comply
to C2 security standards. C2CONFIG is a graphical utility that analyzes your system and allows you to easily modify
system settings through a file menu. Figure 10.1 shows the C2CONFIG screen.
Figure 10.1: The Windows NT Resource Kit Utility C2CONFIG.
Note
C2CONFIG is an NT resource kit utility and is not meant to be run on Windows 2000.
Windows Authentication Protocols
Authentication is the process of validating a known user account and password and is the most important aspect of
system security. Authentication happens every time you log on or access a network resource. Depending on your
flavor of Windows, an authentication protocol specifies how account and password validation and resource access
are to be handled.
Challenge Handshake Authentication Protocol
Windows NT uses a challenge/response scheme called Challenge Handshake Authentication Protocol (CHAP) to
ensure that only authenticated users can access resources. These exchanges are encrypted based on the account
password to prevent unauthorized users from intercepting them. When a user logs on, the password is stored as an
encrypted registry entry called the hash. The process of translating a password into a hash is called a one-way hash
because you supposedly cannot extract the password from the hash (more on this later in the section “Using the
SYSKEY Utility”). A hash encrypts its information using a predefined mathematical algorithm.
LAN Manager Authentication
Windows NT also includes the less secure LAN Manager authentication protocol that Windows 3.x and 9x use.
Passwords are not case sensitive, so before the password is encrypted and stored in the hash, it is first transformed
to all uppercase. This password scheme is less secure than that of Windows NT. The security risk increases when
these systems are allowed to communicate on unregulated mediums, such as the Internet.
A security downfall of both the Challenge/Response and LAN Manager protocols is the lack of a random salt value
when encrypting and storing passwords to the hash. A random salt value is a random number that is incorporated
into the encrypted password version stored in the hash. Several other operating systems already use salt values in
their encryption schemes (I’ll give you a hint; one of them rhymes with Unix). Because both NT password schemes
do not use random salt values, intruders can use simple passwords and analyze them against the hash to decrypt
other stored passwords on a system (more on this later).
Kerberos v5
Windows 2000 uses the more secure Kerberos v5 authentication protocol, while still supporting the LAN Manager
authentication protocol. Kerberos was originally created by Massachusetts Institute of Technology (MIT) and
provides faster authentication access times and a more secure authentication process. As opposed to LAN Manager,
which uses shared passwords, Kerberos uses a shared cryptographic key that is used to encrypt and decrypt
transmitted data. This is more secure than the earlier Windows authentication protocols because the password is
never transmitted over the network.
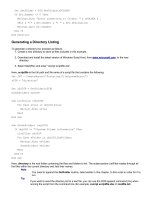
Security Configuration and Analysis Tool
Windows NT uses many utilities, such as User Manager, Server Manager, and Policy Editor, to control system
security. With the birth of NT Service Pack 4, the Microsoft Security Configuration and Analysis tool (MSSCE)
provides a centralized method to analyze or modify a system’s security settings. Figure 10.2
shows this tool. MSSCE
is a Microsoft Management Console (MMC) snap-in that allows you to create or use security templates to apply to
your environment. These security settings are stored in configuration files and can be applied to all the machines in
your environment.
Figure 10.2: The Security Configuration and Analysis tool.
Predefined Security Templates
The MSSCE includes several predefined templates in the %WINDIR%\Security\Templates directory. The security
templates included with the MSSCE are:
Basicdc.inf—Default domain controller