Tự học HTML và CSS trong 1 giờ - part 35 doc
Bạn đang xem bản rút gọn của tài liệu. Xem và tải ngay bản đầy đủ của tài liệu tại đây (706.42 KB, 10 trang )
ptg
margin-bottom: 5px;
}
label {
display: block;
float: left;
width: 150px;
text-align: right;
font-weight: bold;
margin-right: 10px;
}
input.submit {
margin-left: 160px;
}
</style>
</head>
<body>
<h1>Please Log In</h1>
<form action=”/form-processing-script” method=”post”>
<div>
<label for=”username”>Username</label>
<input type=”text” name=”username” />
</div>
<div>
<label for=”password”>Password</label>
<input type=”password” name=”password” />
</div>
<div>
<input type=”submit” class=”submit” value=”Log In” />
</div>
</form>
</body>
</html>
At one time, it was rare to see forms that were laid out without the use of tables, but
tables are no longer necessary thanks to CSS. Let’s look at the style sheet for the form.
First, I added 5 pixels of margin to the bottom of the <div> elements to space out the
form elements a bit. Then, I used CSS to align the form fields vertically and right-align
the labels. You can only apply widths to block-level elements, so I set the display prop-
erty on the labels to block. Then I used float: left and a width of 150 pixels to get
the form fields to move to the right of the labels. Setting the text-align property to
316
LESSON 10: Designing Forms
,
Download from www.wowebook.com
ptg
right for the labels moves them to the right side of the 150-pixel box I put them in.
Then I just added a 10-pixel margin to create some space between the labels and the
form fields and bolded the label text. To get the Submit button, which has no label, to
line up with the other form fields, I added a 160-pixel right margin. That’s 150 pixels for
the label and 10 pixels for the margin I added to the labels. That took a little work, but I
think the final page shown in Figure 11.2 looks good.
Using the <form> Tag
317
11
▲
,
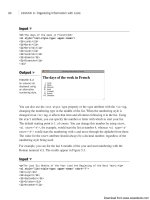
FIGURE 11.2
A simple form.
To complete the exercise, let’s test the form to see whether the form produces the data
we expect. Here’s what the data that’s sent to the server looks like:
username=someone&password=somepassword
It’s pretty measly, but you can see that the names assigned to each field are tied to the
values entered in those fields. You can then use a program to use this data to process the
user’s request.
Using the <form> Tag
To accept input from a user, you must wrap all your input fields inside a <form> tag.
The purpose of the <form> tag is to indicate where and how the user’s input should be
sent. First, let’s look at how the <form> tag affects page layout. Forms are block-level
elements. That means when you start a form, a new line is inserted (unless you apply the
display: inline CSS property to the form tag).
Form controls must appear inside another block level element
inside the
<form> element to be considered valid. A <div>, <p>,
or
<table> will all do the trick, as will other block level elements,
such as the
<fieldset> tag, which I talk about a bit further on.
NOTE
Download from www.wowebook.com
ptg
Take a look at the following code fragment:
Input ▼
<p>Please enter your username <form><input /> and password
<input /></form> to log in.</p>
You might think that your entire form would appear on a single line based on the preced-
ing markup. As shown in Figure 11.3, the opening and closing <form> tags act like open-
ing and closing paragraph tags.
318
LESSON 10: Designing Forms
Output .
FIGURE 11.3
A line break
inserted by an
opening <form>
tag.
The two most commonly used attributes of the <form> tag are action and method. Both
of these attributes are optional. The following example shows how the <form> tag is typi-
cally used:
<form action=“someaction” method=“get or post”>
content, form controls, and other HTML elements
</form>
action specifies the URL to which the form is submitted. Again, remember that for the
form to be submitted successfully, the script must be in the exact location you specify
and must work properly.
If you leave out the action attribute, the form is submitted to the current URL. In other
words, if the form appears on the page and you leave
off the action attribute, the form will be submitted to that URL by default. This proba-
bly doesn’t seem very useful, but it is if your form is generated by a program instead of
residing in an HTML file. In that case, the form is submitted back to that program for
processing. One advantage of doing so is that if you move the program on the server, you
don’t have to edit the HTML to point the form at the new location.
Download from www.wowebook.com
ptg
Although most forms send their data to scripts, you also can make the action link to
another web page or a mailto link. The latter is formed as follows:
<form action=“mailto:” method=“post”>
This attaches the form data set to an email, which then is sent to the email address listed
in the action attribute.
Using the <form> Tag
319
11
To test your forms, I recommend using the get method and leav-
ing out the
action attribute of the form tag. When you submit the
form, the values you entered will appear in the URL for the page
so that you can inspect them and make sure that the results are
what you expected.
The method attribute supports two values: get or post. The method indicates how the
form data should be packaged in the request that’s sent back to the server. The get
method appends the form data to the URL in the request. The form data is separated
from the URL in the request by a question mark and is referred to as the query string. If
I have a text input field named searchstring and enter Orangutans in the field, the
resulting would look like the following:
/>The method attribute is not required; if you leave it out, the get method will be used. The
other method is post. Instead of appending the form data to the URL and sending the
combined URL-data string to the server, post sends the form data to the location speci-
fied by the action attribute in the body of the request.
TIP
DO use the POST method when data on
the server will be changed in any way.
DO use the
GET method if the form just
requests data like search forms, for
example.
DO use the
GET method if you want to
bookmark the results of the form
submission.
DON’T use the GET method if you do
not want the form parameters to be
visible in a URL.
DON’T use the
GET method if the form
is used to delete information.
DO DON’T
Download from www.wowebook.com
ptg
The general rule when it comes to choosing between post and get is that if the form will
change any data on the server, you should use post. If the form is used to retrieve infor-
mation, using get is fine. For example, suppose that you’re writing a message board pro-
gram. The registration form for new users and the form used to publish messages should
use the post method. If you have a form that enables the user to show all the posts
entered on a certain date, it could use the get method.
One other less frequently used attribute of the <form> tag is enctype. It defines how
form data is encoded when it’s sent to the server. The default is application/x-www-
form-urlencoded. The only time you ever need to use enctype is when your form
includes a file upload field (which I discuss a bit later). In that case, you need to specify
that the enctype is multipart/form-data. Otherwise, it’s fine to leave it out.
That about does it for the <form> tag, but you’ve really only just begun. The <form> tag
alone is just a container for the input fields that are used to gather data from users. It just
indicates where the data should go and how it should be packaged. To actually gather
information, you’re going to need items called form controls.
Using the <label> Tag
Whenever you enter text that describes a form field, you should use the <label> tag, and
use the for attribute to tie it to the control it labels. To create a label, begin with the
opening label tag and then enter the for attribute. The value for this attribute, when pre-
sent, must match the id or name attribute for the control it labels. Next, enter text that
will serve as the label and then close the element with the end label tag, as in the fol-
lowing:
Input ▼
<label for=“control4”>Who is your favorite NFL Quarterback?</label>
<input type=“text” name=“favqb” id=“control4” />
Figure 11.4 shows this text control with a label assigned to it.
320
LESSON 10: Designing Forms
Download from www.wowebook.com
ptg
If you include your form control within the label element, as shown in the following
code, you can omit the for attribute:
<label>User name <input type=“text” name=“username” /></label>
The <label> tag doesn’t cause any visible changes to the page, but you can style it using
CSS, as you saw in the example login form earlier. One common styling approach people
use is to apply a special style to the labels of required fields. For example, you may
declare a style rule like this:
label.required { font-weight: bold }
You can then set the class for the labels for all the required fields in your form to
“required,” and the labels for those fields will appear in boldface.
Creating Form Controls with the
<input> Tag
Now it’s time to learn how to create the data entry fields form. The <input> tag enables
you to create many different types of form controls.
Form controls are special HTML tags used in a form that enable you to gather informa-
tion from visitors to your web page. The information is packaged into a request sent to
the URL in the form’s action attribute.
The input element consists of an opening tag with attributes, no other content, and no
closing tag:
<input attributes />
The key point here is using the right attributes to create the form control you need. The
most important of these is type, which specifies what kind of form control to display.
For all controls, except Submit and Reset buttons, the name attribute is required. It
Creating Form Controls with the <input> Tag
321
11
Output .
FIGURE 11.4
You can assign
labels to any form
control. Note that
they’re displayed
with the control.
Download from www.wowebook.com
ptg
associates a name with the data entered in that field when the data is sent to the server.
The rest of this section describes the different types of controls you can create using the
input element.
Creating Text Controls
Text controls enable you to gather information from a user in small quantities. This con-
trol type creates a single-line text input field in which users can type information, such as
their name or a search term.
To create a text input field, create an input element and choose text as the value for the
type attribute. Make sure to name your control so that the server script can process the
value:
Input ▼
<label for=”petname”>Enter your pet’s name</label>
<input type=”text” name=”petname” />
Figure 11.5 shows this text control, which tells the user what to type in.
322
LESSON 10: Designing Forms
Output .
FIGURE 11.5
A text entry field.
You can modify the appearance of text controls using the size attribute. Entering a num-
ber sets the width of the text control in characters:
<input type=“text” name=“petname” size=“15” />
To limit the number of characters a user can enter, add the maxlength attribute to the text
control. This doesn’t affect the appearance of the field; it just prevents the user from
entering more characters than specified by this attribute. If users attempt to enter more
text, their web browsers will stop accepting input for that particular control:
<input type=“text” name=“petname” size=“15” maxlength=“15” />
Download from www.wowebook.com
ptg
To display text in the text control before the user enters any information, use the value
attribute. If the user is updating data that already exists, you can specify the current or
default value using value, or you can prompt the user with a value:
<input type=“text” name=“petname” size=“15” maxlength=“15” value=“Enter Pet
Name” />
In this case, Enter Pet Name appears in the field when the form is rendered in the web
browser. It remains there until the user modifies it.
Creating Form Controls with the <input> Tag
323
11
When you’re using the value attribute, using a value that’s larger
than the size of the text control can confuse the user because the
text will appear to be cut off. Try to use only enough information to
make your point. Ensure that any
value is less than or equal to
the number of characters you specified in
size.
Creating Password Controls
The password and text field types are identical in every way except that the data entered
in a password field is masked so that someone looking over the shoulder of the person
entering information can’t see the value that was typed into the field.
CAUTION
You don’t have to limit your use of the password control to just
passwords. You can use it for any sensitive material that you feel
needs to be hidden when the user enters it into the form.
To create a password control, create an input element with the type set to password. To
limit the size of the password control and the maximum number of characters a user can
enter, you can use the size and maxlength attributes just as you would in a text control.
Here’s an example:
Input ▼
<label for=”userpassword”>Enter your password</label> <input type=“password”
name=“userpassword”
size=“8” maxlength=“8” />
Figure 11.6 shows a password control.
TIP
Download from www.wowebook.com
ptg
324
LESSON 10: Designing Forms
Output .
FIGURE 11.6
A password form
field.
When data entered in a password field is sent to the server, it is
not encrypted in any way. Therefore, this is not a secure means of
transmitting sensitive information. Although the users can’t read
what they are typing, the
password control provides no other secu-
rity measures.
Creating Submit Buttons
Submit buttons are used to indicate that the user is finished filling out the form. Setting
the type attribute of the form to submit places a Submit button on the page with the
default label determined by the browser, usually Submit Query. To change the button
text, use the value attribute and enter your own label, as follows:
<input type=“submit” value=“Send Form Data” />
CAUTION
Your forms can contain more than one Submit button.
If you include a name attribute for a Submit button, the value that you assign to the field
is sent to the server if the user clicks on that Submit button. This enables you to take dif-
ferent actions based on which Submit button the user clicks, if you have more than one.
For example, you could create two Submit buttons, both with the name attribute set to
“action”. The first might have a value of “edit” and the second a value of “delete”. In
your script, you could test the value associated with that field to determine what the user
wanted to do when he submitted the form.
NOTE
Download from www.wowebook.com
ptg
Creating Reset Buttons
Reset buttons set all the form controls to their default values. These are the values
included in the
value attributes of each field in the form (or in the case of selectable
fields, the values that are preselected). As with the Submit button, you can change the
label of a Reset button to one of your own choosing by using the
value attribute,
like this:
<input type=“reset” value=“Clear Form” />
Creating Form Controls with the <input> Tag
325
11
Reset buttons can be a source of some confusion for users.
Unless you have a really good reason to include them on your
forms, you should probably just avoid using them. If your form is
large and the user clicks the Reset button when he means to click
the Submit button, he isn’t going to be pleased with having to go
back and reenter all of his data.
Creating Check Box Controls
Check boxes are fields that can be set to two states: on and off (see Figure 11.7). To cre-
ate a check box, set the input tag’s type attribute to checkbox. The name attribute is also
required, as shown in the following example:
Input ▼
<label>Check to receive SPAM email <input type=“checkbox” name=“spam” /></label>
CAUTION
Output .
FIGURE 11.7
A check box field.
To display the check box as checked, include the checked attribute, as follows:
<input type=“checkbox” name=“year” checked=“checked” />
Download from www.wowebook.com