Tự học HTML và CSS trong 1 giờ - part 43 pot
Bạn đang xem bản rút gọn của tài liệu. Xem và tải ngay bản đầy đủ của tài liệu tại đây (1.26 MB, 10 trang )
ptg
So what’s happening here?
n
The first rule sets the margin and padding of the <body> to 0. This is an important
first rule for layout because browsers typically add one or the other (or both) to any
web page.
n
The #sitenav rules in Listing 13.2 are used to turn the ordered list of links into a
horizontal navigation bar.
n
The #main section is set to position: relative to become the containing block
around the #content, #sidebar, and #footer sections.
n
The #main section is also given a large padding on the right, 12em. This is where
the #sidebar will be located.
n
Absolute positioning is used to move the #sidebar into the margin, out of its place
in the normal flow of content. It is positioned 1 em to the left of the right edge of
its containing block (#main) by right: 1em, and 1 em down from the top edge of
the containing block by top: 1em.
Figure 13.4 shows the results of linking this style sheet to the HTML file from Listing 13.1
396
LESSON 13: Advanced CSS: Page Layout in CSS
FIGURE 13.4
Positioning proper-
ties define the
rough outline of
the page.
It’s still quite rough, but you can see the different sections moved into place. You should
note the silver bars above and below the header. Where did they come from, and why?
Download from www.wowebook.com
ptg
The silver bars are the result of the background color set on the <body> showing through.
They are formed because of the default margin properties set on the <h1> and <h3> head-
ings used on the page. Remember that margins are outside of the border of an element’s
box, and the background-color property on a box colors only the interior content, not
the margin. This applies even when you have a <div> wrapped around a heading, such as
<h1>. The margin extends beyond the edge of the <div>’s background-color.
To fix this, we explicitly set the heading margins to zero on the heading tags. Listing
13.3 is a style sheet that not only does that, but also assigns colors, fonts, and other styles
on the site. The teal, purple, white, and yellow colors were chosen to reflect not only the
original design of the website, but also the actual colors used at the Dunbar school audi-
torium, too.
LISTING 13.3 A Style Sheet for Colors and Fonts
/* dunbar-colors-13.3.css */
body { font-family: Optima, sans-serif; }
a:link { color: #055; }
a:visited { color: #404; }
#header { text-align: center;
color: white; background-color: #055; }
#header h1, #header h2
{ margin: 0; }
#header h1 { color: #FFFF00; font-size: 250%; }
#header h2 { font-weight: normal; font-style: italic; }
#sitenav { color: white; background-color: #404; }
#sitenav ol { font-size: 90%; text-align: center; }
#sitenav li { margin-left: 1em;
border-left: 1px solid #DD0; }
#sitenav li a:link, #sitenav li a:visited
{ color: white; text-decoration: none; }
#sitenav li a:hover
{ color: #DDDD00; }
#main { background-color: #055; }
#content { background-color: white; padding: 1em 5em; }
#content h3 { margin-top: 0; }
#content p { font-size: 90%; line-height: 1.4; }
#sidebar h3 { font-size: 100%; color: white; margin: 0;
font-weight: normal; padding: 0.125em 0.25em;
background-color: #404; }
Laying Out the Page
397
13
Download from www.wowebook.com
ptg
LISTING 13.3 Continued
#sidebar ol { background-color: white; border: 2px solid #404;
border-top: 0; margin: 0 0 1em 0;
padding: 0.125em 0.25em; }
#sidebar li { font-size: 85%;
display: block; padding: 0.125em 0; }
#sidebar li a:link, #sidebar li a:visited
{ text-decoration: none; color: #055; }
#sidebar li a:hover { color: #404; }
#footer { background-color: #404; color: white;
padding: 0.5em 5em; }
#footer p { margin: 0em; font-size: 85%; }
#footer p a:link, #footer p a:visited
{ color: #DDDD00; }
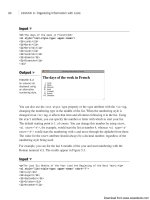
Figure 13.5 shows the HTML file from Listing 13.1 with both the layout style sheet from
Listing 13.2 and the colors and fonts style sheet from Listing 13.3.
398
LESSON 13: Advanced CSS: Page Layout in CSS
FIGURE 13.5
Fonts and colors
help define the
website’s look.
As you can see, the styled page in Figure 13.5 looks quite different from the unstyled
version in Figure 13.3.
Reordering Sections with Positioning Styles
The page in Figure 13.5 looks okay, but let’s say that you got this far into the web design
process and you suddenly decide that you want to have the site navigation bar located on
top of the headline, rather than below it.
Download from www.wowebook.com
ptg
You could go in and change your HTML source around. This would work, but it would
introduce a problem. The order of the HTML in Listing 13.1 is sensible—the name of
the site is given first, and then the navigation menu. This is how users of non-CSS
browsers such as Lynx will read your page, and also how search engines and screen read-
ers will understand it as well. Moving the title of the page after the list of links doesn’t
make much sense.
Instead, you can use CSS positioning properties to reformat the page without touching
the HTML file. Listing 13.4 is a style sheet to do exactly that.
LISTING 13.4 Moving One Section Before Another
/* dunbar-move-13.4.css */
#header { padding: 1.25em 0 0.25em 0;
position: relative;
background-color: #404; }
#sitenav { position: absolute;
top: 0; right: 0;
border-bottom: 1px solid #DDDD00;
width: 100%;
background-color: #055; }
What’s happening here?
n
The #header section encloses the #sitenav in the HTML source, so by setting it to
position: relative, it now becomes the containing block for the site navigation
links.
n
Padding is added to the top of the #header section. This is where subsequent rules
will place the site navigation menu; the padding reserves the space for it.
n
Absolute positioning properties align the top-right corner of the #sitenav section
with the top-right corner of its containing block, the #header.
n
Giving a width of 100% to the #sitenav ensures it will reach across the full width
of its containing block, which is, in this case, as wide as the browser display win-
dow.
n
Finally, colors are swapped on the #header and the #sitenav to make them fit in
better with the overall design in their new locations, and a yellow border is added
to the bottom of the navigation links.
Figure 13.6 shows the effects of these changes.
Laying Out the Page
399
13
Download from www.wowebook.com
ptg
▼
FIGURE 13.6
The navigation
menu is now
above the page
headline.
400
LESSON 13: Advanced CSS: Page Layout in CSS
Task: Exercise 13.1: Redesign the Layout of a Page
You just learned how to move the site navigation menu around. What if you want to
make further changes to the page? Try these steps to get familiar with how easy it is to
change the layout with CSS:
1. Download a copy of the source code for editing. The file dunbar.html contains the
complete HTML page, and dunbar-full.css has all the style rules listed in this
chapter combined into a single style sheet.
2. Move the sidebar to the left side of the page instead of the right. To do this, you
need to make space for it in the left gutter by changing the padding rule on the
#main section to
#main { padding: 0 2em 2em 12em; }
3. Then change the positioning offset properties the #sidebar. You don’t even have to
change the rule for the top property; just replace the property name right with
left.
4. Reload the page. You should now see the menu bar on the left side of the screen.
5. Next, move the #footer section. Even though the id of the <div> is “footer”,
there’s nothing magical about that name that means it needs to be at the bottom of
the page. Place it on the right side, where the sidebar used to be located. First clear
some space:
#main { padding: 0 12em 2em 12em; }
,
Download from www.wowebook.com
ptg
6. Then reposition the footer with these rules:
#footer { position: absolute;
top: 1em; right: 1em;
width: 10em;
padding: 0; }
#footer p { padding: 0.5em; }
7. Reload the page. The #footer is now no longer a footer, but a third column on the
right side of the page.
The Floated Columns Layout Technique
You can also lay out a web page by using the float property rather than positioning
properties. This method is a little bit more complex but is favored by some designers
who prefer the versatility. In addition, floated columns can be written with fewer <div>
tags and in some cases deal better with side columns that are shorter than the main text.
Listing 13.5 is a style sheet demonstrating how you can float entire columns on a
page with CSS. This is a replacement for the dunbar-layout-13.2.css style sheet in
Listing 13.2. The new style sheet places the menu bar on the left instead of the right,
just for variety’s sake—there’s nothing inherently left-biased about floated columns (or
right-biased about positioning).
LISTING 13.5 Float-Based Layouts in CSS
/* dunbar-float-13.5.css */
body { margin: 0; padding: 0; }
#sitenav ol { padding: 0; margin: 0;
display: inline; }
#sitenav li { display: inline; padding-left: 1em;
margin-left: 1em; border-left: 1px
solid black; }
#sitenav li:first-child
{ padding-left: 0; border-left: none;
margin-left: 0; }
/* This is what positions the sidebar: */
#main { padding: 0 2em 2em 12em; }
#content { float: left; }
#sidebar { float: left; width: 10em;
position: relative;
right: 11em; top: 1em;
margin-left: -100%; }
#sidebar ol { margin: 0 0 1em 0; }
Laying Out the Page
401
13
,
▲
Download from www.wowebook.com
ptg
What does this style sheet do?
n
The first section just duplicates the site navigation bar code from Listing 13.2 so
that the entire style sheet can be replaced by this one.
n
Starting at the second comment, the code for positioning the columns appears. The
first rule sets the #main section to have a wide gutter on the left, which is where we
will be placing the sidebar.
n
Both the #content and #sidebar sections are set to float. This means that they line
up on the left side of the #main section, just inside the padding.
n
A width is given to the #sidebar of 10em.The size was chosen because that allows
1 em of space around it, after it is placed inside the 12 em gutter set by the
padding rule on #main.
n
A negative margin is set on the left side of the #sidebar, which actually makes it
overlay the #content section. Relative positioning is then used, via the right and
top rules, to push the sidebar into the correct place in the gutter.
Figure 13.7 shows this style sheet applied to the HTML file in Listing 13.1, along with
the colors and fonts style sheet in Listing 13.3 and the style sheet from Listing 13.4,
which relocated the site navigation menu.
402
LESSON 13: Advanced CSS: Page Layout in CSS
FIGURE 13.7
The sidebar is
positioned as
floating content.
Download from www.wowebook.com
ptg
The Role of CSS in Web Design
As a web developer, skilled in HTML, CSS, and possibly other web languages and tech-
nologies, you have a web development process. Even if you haven’t planned it out for-
mally, you’ve got a method that works for you, whether it’s as simple as sitting down and
designing whatever strikes your fancy or as complex as working in a multideveloper cor-
porate development system for a large employer.
Adding CSS to your repertoire has made you an even better web developer than before;
your skill set has expanded and the types of designs you can create are nearly limitless.
The next step is to integrate your CSS skills into your web development process. I’m not
going to tell you exactly how you’ll do that—people have their own methods—but I’ll
help you think about how you can go about using CSS in your web designs.
In a few cases, you might develop your style sheets completely separately from your
HTML pages. More commonly, you’ll use an iterative process, where you make changes
to the style sheet, then changes to the HTML page, and then go back to the style sheet
for a few more tweaks until you’re satisfied with the results. The adaptive nature of style
sheets makes it easy to create these kinds of changes, and you may find yourself continu-
ing to perfect your styles even after you post your content on the Web.
The Role of CSS in Web Design
403
13
You might not be starting with a blank slate and an uncreated
website when you begin using CSS. Redesigns are common in
web development, and you may want to take advantage of a new
site design to convert to a CSS-based presentation. It can some-
times be harder, but it’s certainly possible to keep the same look
and feel of your site when converting it to use CSS. If you’re using
a content management system (CMS) that automatically gener-
ates your website from a database, converting to style sheets may
be a snap. CSS is very compatible, on a conceptual level, with the
idea of templates as used by content management systems.
As mentioned at the start of this lesson, CSS design involves balancing a number of fac-
tors to arrive at the best compromise for your site and its users. Questions will arise as
you work with CSS on any site, and you’ll need to answer them before you go on. Here
are several of these key questions to help you plan your site:
NOTE
Download from www.wowebook.com
ptg
n
Will you use Cascading Style Sheets, and if so, to what effect? You certainly
aren’t required to use CSS, even after reading this entire book. You can create web-
sites that are usable, accessible, attractive, and effective without a single CSS prop-
erty anywhere in evidence. However, using CSS will make your site more flexible
and easier to maintain and will give you access to presentation effects you couldn’t
get through HTML alone.
n
What “flavor” of HTML will you use? HTML5 has a lot of exciting new fea-
tures, but if you’re concerned about older browsers that don’t yet understand
HTML5, you may want to stick with XHTML.
n
Which browsers will you support? By “support,” I mean investing the effort to
work around the quirks of certain older browsers. There are a number of
workarounds for these temperamental browsers, plus ways to exclude certain
browsers from viewing styles. But if you are designing just for CSS-enabled
browsers, such as recent Firefox, Safari, or Opera versions, those workarounds
become less important.
n
Are you using positioning CSS for layout? It’s relatively easy to use CSS for for-
matting text, controlling fonts, and setting colors. Using it for layout is trickier,
especially with inconsistent browser support among some of the older versions.
n
Will you use embedded or linked style sheets? Here, I’ll give you advice: Use
linked style sheets whenever you can. Some of the examples in this book may use
embedded style sheets, but that’s mainly because it’s easier to give you one listing
than two.
The preceding list isn’t exhaustive; you’ll encounter more choices to make when design-
ing and using CSS, but you should have learned enough by now to answer them.
Style Sheet Organization
The way you organize your style sheet can affect how easy it is for you to use and main-
tain your CSS, even if the effects are not evident in the presentation. This becomes even
more critical if you’re in a situation where someone else may have to use your styles in
the future. You may work with an organization where multiple people will be working on
the same site, or perhaps when you move on to another job your successor will inherit
your style sheets.
To make a great style sheet, be organized and clear in what you’re doing, and above all,
use comments. Web developers often overlook comments in CSS, but if you have to
come back later and try to figure out why you did something, they’re invaluable.
Comments can also be used to group related styles together into sections.
404
LESSON 13: Advanced CSS: Page Layout in CSS
Download from www.wowebook.com
ptg
Reasonable names for class and id attributes can make your style sheet easier to read;
choose names for these important selectors that reflect the functions of the elements. If
you can, avoid selectors based solely on appearance characteristics, such as the boldtext
or redbox classes. Instead, try something descriptive of why you’ve chosen those styles,
such as definition or sidebar. That way, if you change your page styles later, you
won’t have to rewrite your HTML. There are few things as confusing as a rule like the
following:
.redbox { color: blue; background-color: white; }
In what way is that box red? Well, it probably was red in some prior incarnation of the
style rules, but not now.
When you list your rules in your style sheet, do them in a sensible order. Generally
speaking, it’s best to start with the body rules first and then proceed down from there, but
because the cascade order matters only in case of conflict, it’s not strictly necessary to
mirror the page hierarchy. What’s more important is that you locate the rules that apply
to a given selector and to discern which styles should be applied.
An example of bad style sheet organization is shown in Listing 13.6. This is part of the
style sheet from a high-quality website, but with the rules in a scrambled order. How
hard is it for you to figure out what is going on here?
LISTING 13.6 A Randomly Organized Style Sheet
#sidebar0 .section, #sidebar1 .section { font-size: smaller;
border: 0px solid lime; text-transform: lowercase;
margin-bottom: 1em; }
gnav a:link, #nav a:visited, #footer a:link, #footer
a:visited { text-decoration: none; color: #CCCCCC; }
#nav .section, #nav .shead, #nav .sitem, #nav h1 { display:
inline; }
#sidebar1 { position: absolute; right: 2em; top: 3em;
width: 9em; } a:link { color: #DD8800; text-decoration: none; }
#main { } a:hover { color: lime; }
#nav .shead, #nav .sitem { padding-left: 1em; padding-right:
1em; }
#nav { position: fixed; top: 0px; left: 0px; padding-top:
3px; padding-bottom: 3px; background-color: #333333; color:
white; width: 100%; text-align: center; text-transform:
lowercase; }
#nav .section { font-size: 90%; } #layout { padding: 1em; }
body { background-color: white; color: #333333; font-family:
Verdana, sans-serif; margin: 0; padding: 0; }
#nav h1 { font-size: 1em; background-color: #333333; color:
white; } a:visited { color: #CC8866; text-decoration: none; }
The Role of CSS in Web Design
405
13
Download from www.wowebook.com