Tự học HTML và CSS trong 1 giờ - part 55 pdf
Bạn đang xem bản rút gọn của tài liệu. Xem và tải ngay bản đầy đủ của tài liệu tại đây (639.77 KB, 10 trang )
ptg
▼
Task: Exercise 17.4: Nesting Framesets
The next step in the process is to split the right frame area into two horizontal frames.
You achieve this effect by placing a second <frameset> block inside the base <frame-
set> block. When one <frameset> block is nested inside another, the nested block must
replace one of the <frame> tags in the outside frameset. In this case, you’ll replace the
line that loads the temporary
dummy.html page (which doesn’t really exist).
To split the right frame into two frame areas, you replace the dummy
<frame> tag with
an embedded <frameset> block. This embeds the new frameset inside the area defined
for the <frame> tag it replaces. Inside the <frameset> tag for this new block, you need to
define a rows attribute, as shown in the complete code:
<!DOCTYPE html>
<html>
<head>
<title>Why I’m Away</title>
</head>
<frameset cols=”125,*”>
<! this loads the choices page into the left frame >
<frame src=”choice.html”>
<frameset rows=”60,*”> <! the frame for column 2 >
<frame src=”away.html”> <! has been replaced >
<frame src=”reason1.html”> <! with an embedded >
</frameset> <! frameset block >
</frameset>
</html>
The embedded rows frameset defines two rows, the first being 60% of the height of the
embedded frame area and the second taking up all the remaining space in the embedded
frame area. In addition, two <frame> tags are embedded inside the <frameset> block to
define the contents of each column. The top frame loads away.html, and the bottom
frame loads reason1.html.
516
LESSON 17: Working with Frames and Linked Windows
When used inside an embedded frameset, any percentage sizes
are based on a percentage of the total area of the embedded
frame, not on a percentage of the total screen.
Save the finished HTML document to your hard drive as frameset.html. Test it in your
browser.
NOTE
▲
Download from www.wowebook.com
ptg
Creating Complex Framesets
517
▼
Task: Exercise 17.5: Using Named Frames and Hyperlinks
If you were to load your frameset.html page into a frames-compatible browser at this
stage, you would see a screen similar to the one shown in Figure 17.15. Some of the text
sizes and spacing might differ slightly, but the general picture would be the same.
Although it looks right, it doesn’t work right yet. If you click any of the hyperlinks in the
left frame, the frames-compatible browser will attempt to load the contents of the file
you select into the left frame. What you want it to do is to load each document into the
larger right frame.
Earlier in this lesson, you learned about the target attribute, which loads different pages
into a different browser window. To make the frameset work the way it should, you need
to use a slight variation on the target attribute. Instead of the target pointing to a new
window, you want it to point to one of the frames in the current frameset.
You can achieve this by first giving each frame in your frameset a frame name or win-
dow name. To do so, include a name attribute inside the <frame> tag, which takes the fol-
lowing form:
<frame src=“document URL” name=“frame name”>
Therefore, to assign a name to each of the frames in the frameset.html document, you
add the name attribute to each of the <frame> tags. Your frameset page now looks like the
following, with the additions indicated with the shaded background:
<!DOCTYPE html>
<html>
<head>
<title>Why I’m Away</title>
</head>
<frameset cols=”125,*”>
<! this loads the choices page into the left frame >
<frame src=”choice.html” name=”left”>
<frameset rows=”60,*”> <! the frame for column 2 >
<frame src=”away.html” name=”top”> <! has been replaced >
<frame src=”reason1.html” name=”main”> <! with an embedded >
</frameset> <! frameset block >
</frameset>
</html>
This source code names the left frame “left”, the top-right frame “top”, and the bot-
tom-right frame “main”. Next, resave the updated frameset.html file, and you’re just
about finished with the example.
17
▲
Download from www.wowebook.com
ptg
▼
Task: Exercise 17.6: Linking Documents to Individual Frames
After you’ve named the frames, you have to fix the links in the choice.html page so that
they load the target pages in the main frame rather than the left frame.
You might recall that the target attribute was used with the <a> tag to force a document
to load into a specific window. You’ll use the same attribute to control into which frame
a document is loaded.
In this exercise, you want to load a page in the main (bottom-right) frame whenever you
click a hyperlink in the left frame. Because you’ve already named the bottom-right
frame “main”, all you need to do is add target=“main” to each tag in the choice.html
document. The following snippet of HTML source code demonstrates how to make this
change:
<p><a href=“reason1.html” target=“main”>Reason 1</a></p>
<p><a href=“reason2.html” target=“main”>Reason 2</a></p>
<p><a href=“reason3.html” target=“main”>Reason 3</a></p>
<p><a href=“reason4.html” target=“main”>Reason 4</a></p>
<p><a href=“reason5.html” target=“main”>Reason 5</a></p>
<p><a href=“reason6.html” target=“main”>Reason 6</a></p>
Alternatively, you could use the <base target=“value”> tag because every tag in the
choice.html document points to the same frame. In that case, you wouldn’t need to
include target=“main” inside each <a> tag. Instead, place the following inside the
<head> </head> block of the document:
<base target=“main”>
With all the changes and new documents created, you should now load frameset.html
into your frames-compatible browser and view all your HTML reference documents by
selecting from the choices in the left frame.
518
LESSON 17: Working with Frames and Linked Windows
After you get all your links working properly, you might need to go
back and adjust the size of the rows and columns as defined in
the
<frameset> tags to get the layout exactly right. Remember,
the final appearance of a frameset is still determined by the size
of the screen and the visitor’s operating system.
TIP
▲
Download from www.wowebook.com
ptg
Creating Complex Framesets
519
▼
Task: Exercise 17.7: Adding Your noframes Content
Although you have a frameset that works perfectly now, there’s another feature you need
to add to it. Remember, some people who visit your frames page won’t be using frames-
compatible browsers. The following addition to the frameset page creates some content
that they’ll see when they open the frameset.
Once again, open the frameset.html page. At this point, your code looks like the fol-
lowing:
<!DOCTYPE html>
<html>
<head>
<title>Why I’m Away</title>
</head>
<frameset cols=”125,*”>
<!— this loads the choices page into the left frame —>
<frame src=”choice.html” name=”left”>
<frameset rows=”60,*”> <! the frame for column 2 >
<frame src=”away.html” name=”top”> <! has been replaced >
<frame src=”reason1.html” name=”main”> <! with an embedded >
</frameset> <! frameset block >
</frameset>
</html>
Immediately after the last </frameset> tag and before the final </html> tag, insert the
following <noframes> </noframes> element and content:
Input ▼
<noframes>
<body>
<h1>I’m Away from My Desk, because </h1>
<ul>
<li>Reason 1 - <a href=”reason1.html”>I forgot my lunch at home.</a></li>
<li>Reason 2 - <a href=”reason2.html”>I’m flirting by the water
cooler.</a></li>
<li>Reason 3 - <a href=”reason3.html”>None of your business.</a></li>
<li>Reason 4 - <a href=”reason4.html”>I’m out to lunch.</a></li>
<li>Reason 5 - <a href=”reason5.html”>The boss just called me in his
office.</a></li>
<li>Reason 6 - <a href=”reason6.html”>I just got fired.</a></li>
</ul>
</body>
</noframes>
17
,
Download from www.wowebook.com
ptg
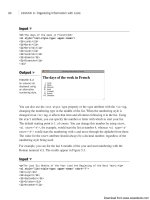
When a user who isn’t using a frames-compatible browser navigates to the frameset,
she’ll see the page that’s similar to the one shown in Figure 17.16.
520
LESSON 17: Working with Frames and Linked Windows
,
Output .
FIGURE 17.16
This page appears
when users view
the frameset with
a browser that
isn’t frames-
compatible.
▲
Magic
target Names
Now that you’ve learned what the target attribute does in a frameset, you should know
you can apply some special target names to a frameset.
You can assign four special values to a target attribute, two of which (_blank and self)
you’ve already encountered. Netscape called these values magic target names. They’re
case-sensitive. If you enter a magic target name in anything other than lowercase, the
link will attempt to display the document in a window with that name, creating a new
window if necessary. Table 17.2 lists the magic target names and describes their use.
TABLE 17.2 Magic target Names
target Name Description
target=“_blank” Forces the document referenced by the <a> tag to be loaded
into a new unnamed window.
target=“_self” Causes the document referenced by the <a> tag to be loaded
into the window or frame that held the
<a> tag. This can be
useful if the
<base> tag sets the target to another frame but a
specific link needs to load in the current frame.
target=“_parent” Forces the link to load into the <frameset> parent of the cur-
rent document. If the current document has no parent, how-
ever,
target=“_self” will be used.
target=“_top” Forces the link to load into the full web browser window, replac-
ing the current
<frameset> entirely. If the current document is
already at the top, however,
target=“_self” will be used. More
often than not, when you create links to other sites on the
Web, you don’t want them to open within your frameset. Adding
target=“_top” to the link will prevent this from occurring.
Download from www.wowebook.com
ptg
Inline Frames
The main advantage of inline frames is that is that you can position them anywhere on a
web page, just as you can other elements like images or Flash movies. You can incorpo-
rate content from another page or even another site into a page in a seamless way
through the use of inline frames. Inline frames, which are specified using the <iframe>
tag, are commonly the means by which “widgets” offered by popular websites are incor-
porated into other websites. For example, sites like Twitter and Facebook offer widgets
that you can incorporate into your own site that are implemented using inline frames.
Here’s a brief run-through of how to create floating frames. First, you define them using
the <iframe> tag. Like images, these frames appear inline in the middle of the body of
an HTML document (hence the i for inline). The <iframe> tag supports attributes like
src, which contains the URL of the document to be displayed in the frame, and height
and width, which control the size of the frame.
Table 17.3 lists the attributes of the <iframe> element.
TABLE 17.3 Key Attributes
Attribute Description
width Specifies the width, in pixels, of the floating frame that will hold the
HTML document.
height Specifies the height, in pixels, of the floating frame that will hold the
HTML document.
src Specifies the URL of the HTML document to be displayed in the frame.
name Specifies the name of the frame for the purpose of linking and
targeting.
frameborder Indicates whether the frame should display a border. A value of 1
indicates the presence of a border, and a value of 0 indicates no
border should be displayed.
marginwidth Specifies the margin size for the left and right sides of the frame in
pixels.
marginheight Specifies the size of the top and bottom margins in pixels.
noresize Indicates that the frame should not be resizable by the user (Internet
Explorer extension).
scrolling As with the <frame> tag, indicates whether the inline frame should
include scrollbars. (This attribute can take the values
yes, no, or auto;
the default is
auto.)
vspace Specifies the height of the margin (Internet Explorer extension).
hspace Specifies the width of the margin (Internet Explorer extension).
Inline Frames
521
17
Download from www.wowebook.com
ptg
TABLE 17.3 Continued
Attribute Description
longdesc The URL for a page containing a long description of the contents of the
iframe.align. As with the <img> tag, specifies the positioning of the
frame with respect to the text line in which it occurs. Possible values
include
left, middle, right, top, and bottom, which is the default
value.
absbottom, absmiddle, baseline, and texttop are available as
Internet Explorer extensions. Deprecated in favor of CSS.
Because you know how to use both regular frames and inline images, using the <iframe>
tag is fairly easy. The following code displays one way to use the Away from My Desk
pages with a floating frame. In this example, you begin by creating a page with a red
background. The links that the user clicks appear on a single line, centered above the
iframe. For clarity, I’ve placed each of the links on a separate line of code.
Following the links (which target the floating frame named “reason”), the code for the
floating frame appears within a centered <div> element. As you can see in the HTML
below, the floating frame will be centered on the page and will measure 450 pixels wide
by 105 pixels high:
Input ▼
<!DOCTYPE html>
<html>
<head>
<title>I’m Away From My Desk</title>
<style type=”text/css” media=”screen”>
body { background-color: #ffcc99; }
</style>
</head>
<body>
<h1>I’m away from my desk because </h1>
<p style=”text-align: center”>
<a href=”reason1.html” target=”reason”>Reason 1</a> |
<a href=”reason2.html” target=”reason”>Reason 2</a> |
<a href=”reason3.html” target=”reason”>Reason 3</a> |
<a href=”reason4.html” target=”reason”>Reason 4</a> |
<a href=”reason5.html” target=”reason”>Reason 5</a> |
<a href=”reason6.html” target=”reason”>Reason 6</a>
</p>
<div style=”margin: 0 auto; width: 450px;”>
<iframe name=”reason” src=”reason1.html” style=”width: 450px; height:
105px”></iframe>
</div>
</body>
</html>
522
LESSON 17: Working with Frames and Linked Windows
Download from www.wowebook.com
ptg
Figure 17.17 shows the result.
Opening Linked Windows with JavaScript
523
17
Output .
FIGURE 17.17
An inline (or float-
ing) frame.
Opening Linked Windows with JavaScript
Pop-up windows are used all over the Web. They are often used to display advertise-
ments, but they can be used for all sorts of other things, as well, such as creating a sepa-
rate window to show help text in an application or to display a larger version of a graph
that’s embedded in a document. You’ve seen how you can use the target attribute to
open a link in a new window, but that approach isn’t flexible. You can’t control the size
of the window being displayed, nor which browser interface controls are displayed.
Fortunately, with JavaScript you can take more control of the process of creating new
windows. You’ve already learned that one of the objects supported by JavaScript is win-
dow. It refers to the window that’s executing the script. To open a new window, you use
the open method of the window object. Here’s a JavaScript function that opens a window:
function popup(url) {
mywindow = window.open(url, ‘name’, ‘height=200,width=400’);
return false;
}
The function accepts the URL for the document to be displayed in the new window as an
argument. It creates a new window using the window.open function, and assigns that new
window to a variable named mywindow. (I explain why we assign the new window to a
variable in a bit.)
The three arguments to the function are the URL to be displayed in the window, the
name for the window, and a list of settings for the window. In this case, I indicate that I
want the window to be 400 pixels wide and 200 pixels tall. The name is important
because if other links target a window with the same name, either via the window.open()
function or the target attribute, they’ll appear in that window.
Download from www.wowebook.com
ptg
At the end of the function, I return false. That’s necessary so that the event handler used
to call the function is stopped. To illustrate what I mean, it’s necessary to explain how
this function is called. Instead of using the target attribute in the <a> tag, the onclick
handler is used, as follows:
<a href=“whatever.html” target=”_blank” onclick=“popup(‘whatever.html’)”>Pop
up</a>
Ordinarily, when a user clicks the link, the browser calls the function and then goes right
back to whatever it was doing before, navigating to the document specified in the href
attribute. Returning false in the popup() function tells the browser not to continue what
it was doing, so the new window is opened by the function, and the browser doesn’t fol-
low the link. If a user who had JavaScript turned off visited the page, the link to what-
ever.html would still open in a new window because I included the target attribute, too.
In the preceding example, I specified the height and width settings for the new window.
There are several more options available as well, which are listed in Table 17.4.
TABLE 17.4 Settings for Pop-Up Windows
Setting Purpose
height Height of the window in pixels.
width Width of the window in pixels.
resizable Enable window resizing.
scrollbars Display scrollbars.
status Display the browser status bar.
toolbar Display the browser toolbar.
location Display the browser’s location bar.
menubar Display the browser’s menu bar (Not applicable on Mac OS X.).
left Left coordinate of the new window onscreen (in pixels). By
default, pop-up windows are placed slightly to the right of the
spawning window.
top Top coordinate of the new window onscreen (in pixels). By
default, pop-up windows are placed slightly below the top of the
spawning window.
When you specify the settings for a window, you must include them in a comma-
separated list, with no spaces anywhere. For the settings that allow you to enable or
disable a browser interface component, the valid values are on or off. Here’s a valid list
of settings:
status=off,toolbar=off,location=off,left=200,top=100,width=300,height=300
524
LESSON 17: Working with Frames and Linked Windows
Download from www.wowebook.com
ptg
Here’s an invalid list of settings:
status=off, toolbar=off, location=false, top=100
Including spaces (or carriage returns) anywhere in your list will cause problems. It’s also
worth noting that when you provide settings for a new window, the browser automati-
cally assumes a default of off for any on/off settings that you don’t include. So, you can
leave out anything you want to turn off.
Here’s a complete example that uses JavaScript to create a new window:
<!DOCTYPE html>
<html>
<head>
<title>Popup example</title>
<script type=”text/javascript”>
function popup(url) {
var mywindow = window.open(url, ‘name’, ‘height=200,width=400’);
return false;
}
</script>
</head>
<body>
<h1>Popup Example</h1>
<p>
<a href=”popup.html” onclick=”popup(this.href)”>Launch popup</a>
</p>
</body>
</html>
When a user clicks the Launch popup link, a new 200x400 pixel window appears with
the contents of popup.html.
The unobtrusive approach is to skip the onclick attribute entirely and bind the popup()
function to the link in your JavaScript code. First, change the link on the page to look
like this:
<a href=“popup.html” id=”launchpopup”>Launch popup</a>
Then you should edit the <script> tag so that it looks like this:
<script type=”text/javascript”>
function popup(url) {
var mywindow = window.open(url, ‘name’, ‘height=200,width=400’);
return false;
}
window.onload = function () {
var link = document.getElementById(“launchpopup”);
link.onclick = function () {
return popup(this.href);
Opening Linked Windows with JavaScript
525
17
Download from www.wowebook.com