Exxhange SQL And IIS- P30 pps
Bạn đang xem bản rút gọn của tài liệu. Xem và tải ngay bản đầy đủ của tài liệu tại đây (424.67 KB, 5 trang )
Managing Recipients in Exchange 2007 • Chapter 3 117
SOME INDEPENDENT ADVICE
If you specify an expansion server for a particular distribution group, you should
always make sure it’s well documented because the group will then depend on this
specifi ed server to deliver messages. This means that if you someday fi nd out you
want to replace your existing hub transport server with a new one, and that
particular hub transport server has been explicitly assigned as an expansion server for
one or more distribution groups, those groups will no longer be able to deliver
messages to the respective members.
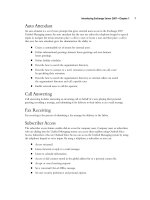
Figure 3.36 The Advanced Tab
118 Chapter 3 • Managing Recipients in Exchange 2007
Under the Advanced tab, you also have the option of hiding the group from the Exchange
Global Address Lists (GAL) and specify that any out-of-offi ce messages should be sent to the
originator (the sender of the message) instead of the group. Lastly, you have the option of specifying
whether delivery reports should be sent or not. If you choose to have them sent, you can select
whether they should be sent to the message originator or the group manager specifi ed under the
Group Information tab. Note that if you decide to send delivery reports to the group manager, a
group manager must be selected under the Group Information Managed By fi eld or you will receive
a warning message telling you to do so.
The last tab is Mail Flow Settings, where you can confi gure the maximum group receiving size
in KB as well as defi ning who should be allowed to send messages to the group.
SOME INDEPENDENT ADVICE
Larger “All User” based distribution groups should always have a limited number
of allowed senders defi ned because these groups tend to encompass your entire
organization and can get you in trouble if everyday messages can be delivered to
everyone in your company.
NOTE
When accessed via the Exchange Management Console, the property pages are
identical for Mail Universal Distribution groups and Mail Universal Security groups,
so there’s no reason to go through the tabs under the Properties page of a Mail
Universal Security group.
Creating a New Distribution Group
To create a new distribution group, click the New Distribution Group link in the Action pane,
bringing up the New Distribution Group Wizard shown in Figure 3.37. The fi rst page is the
Introduction page, where you need to specify whether you want to create a new distribution group
or mail-enable an existing security group. If you choose to mail-enable an existing group, click the
Browse button and you will be presented with a GUI picker, where all security groups that haven’t
been mail-enabled will be listed. For the purposes of this example, we’ll select New group, then
click Next.
Managing Recipients in Exchange 2007 • Chapter 3 119
Figure 3.37 The Introduction Page in the New Distribution Group Wizard
On the Group Information page shown in Figure 3.38, we’ll have to specify whether we want to
create a new mail-enabled distribution group or a mail-enabled security group. We’ll then need to
specify the OU in which the group should be created in Active Directory and fi nally give it an
appropriate name and alias. The alias is automatically fi lled in and duplicated with whatever you used
for a name; however, it can still be changed without altering the name.
120 Chapter 3 • Managing Recipients in Exchange 2007
NOTE
As already mentioned, the only difference between mail-enabled distribution groups
and mail-enabled security groups is the ability for security groups to be used to
assign permissions to user objects in Active Directory.
Figure 3.38 Selecting the Type of Distribution Group That Should Be Created
Managing Recipients in Exchange 2007 • Chapter 3 121
Let’s click Next, which will bring us to the New Distribution Group page, where you should
verify the information in the Confi guration Summary pane. Once it’s verifi ed, click New and fi nally
click Finish.
To create or modify existing distribution groups via the EMS, use the New-DistributionGroup and
Set-DistributionGroup CMDlets. An example of creating a distribution group might look like the
following:
New-DistributionGroup -Name “New Group” -OrganizationalUnit
syngress.local/users -SamAccountName “New-Group” -Type security
Creating a New Dynamic Distribution Group
Dynamic distribution groups, which were known as query-based distribution groups in Exchange
2003, provide the same type of functionality as ordinary distribution groups, but instead of
manually adding members to the group’s membership list, you can use a set of fi lters and conditions
that you predefi ne when creating the group to derive its membership. When a message is set to
a dynamic distribution group, Exchange queries the Active Directory for recipients matching the
specifi ed fi lters and conditions. The primary advantage of using dynamic distribution groups
over ordinary distribution groups is that dynamic groups lower the administrative burden, since
you don’t have to maintain any distribution group membership lists. If we should mention any
disadvantage of using dynamic distribution groups, it is that this type of group puts more load on
the Global Catalog servers in your Active Directory forest. This is based on the fact that each time
a message is sent to a dynamic distribution group, Exchange will have to query them based on the
criteria defi ned in the group.
You create a new dynamic distribution group by clicking New Dynamic Distribution Group
in the Action pane under the Distribution Group subnode of the Recipient Confi guration work
center node.
This will bring up the New Dynamic Distribution Group Wizard shown in Figure 3.39.
Here you specify the OU in which the group should be created and give the group a meaningful
name. When you have done so, click Next.