Electric Circuits, 9th Edition P9 pot
Bạn đang xem bản rút gọn của tài liệu. Xem và tải ngay bản đầy đủ của tài liệu tại đây (691.54 KB, 10 trang )
r
\,s,
_imi» » mi
CHAPTER CONTEN
3.1 Resistors in Series p. 58
3.2 Resistors in Parallel p. 59
3.3 The Voltage-Divider and Current-Divider
Circuits p. 61
3.4 Voltage Division and Current Division p. 64
3.5 Measuring Voltage and Current p. 66
3.6 Measuring Resistance—The Wheatstone
Bridge p. 69
3.7 Delta-to-Wye (Pi-to-Tee) Equivalent
Circuits p. 72
1 Be able to recognize resistors connected in
series and in parallel and use the rules for
combining series-connected resistors and
parallel-connected resistors to yield equivalent
resistance.
2 Know how to design simple voltage-divider and
current-divider circuits.
3 Be able to use voltage division and current
division appropriately to solve simple circuits.
4 Be able to determine the reading of an ammeter
when added to a circuit to measure current; be
able to determine the reading of a voltmeter
when added to a circuit to measure voltage.
5 Understand how a Wheatstone bridge is used to
measure resistance.
6 Know when and how to use delta-to-wye
equivalent circuits to solve simple circuits.
56
Simple Resistive Circuits
Our analytical toolbox now contains Ohm's law and Kirchhoffs
laws.
In Chapter 2 we used these tools in solving simple circuits.
In this chapter we continue applying these tools, but on more-
complex circuits. The greater complexity lies in a greater number
of elements with more complicated interconnections. This chap-
ter focuses on reducing such circuits into simpler, equivalent cir-
cuits.
We continue to focus on relatively simple circuits for two
reasons: (1) It gives us a chance to acquaint ourselves thoroughly
with the laws underlying more sophisticated methods, and (2) it
allows us to be introduced to some circuits that have important
engineering applications.
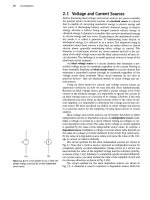
The sources in the circuits discussed in this chapter are lim-
ited to voltage and current sources that generate either constant
voltages or currents; that is, voltages and currents that are invari-
ant with time. Constant sources are often called dc sources. The
dc stands for direct current, a description that has a historical basis
but can seem misleading now. Historically, a direct current was
defined as a current produced by a constant voltage. Therefore, a
constant voltage became known as a direct current, or dc, voltage.
The use of dc for constant stuck, and the terms dc current and dc
voltage are now universally accepted in science and engineering
to mean constant current and constant voltage.
Jf Jl
Practical Perspective
A Rear Window Defroster
The rear window defroster grid on an automobile is an exam-
ple of a resistive circuit that performs a useful function. One
such grid structure is shown on the left of the figure here. The
grid conductors can be modeled with resistors, as shown on
the right of the figure. The number of horizontal conductors
varies with the make and model of the car but typically ranges
from 9 to 16.
How does this grid work to defrost the rear window? How
are the properties of the grid determined? We will answer
these questions in the Practical Perspective at the end of this
chapter. The circuit analysis required to answer these ques-
tions arises from the goal of having uniform defrosting in
both the horizontal and vertical directions.
57
58 Simple Resistive Circuits
3.1 Resistors in Series
U
| <
RA
Figure 3.1 A Resistors connected in series.
In Chapter 2, we said that when just two elements connect at a single
node, they are said to be in series. Series-connected circuit elements carry
the same current. The resistors in the circuit shown in Fig. 3.1 are con-
nected in series. We can show that these resistors carry the same current
by applying Kirchhoffs current law to each node in the circuit. The series
interconnection in Fig. 3.1 requires that
h = '1
-i
2
= i
3
= £
4
= -t
5
= -i
6
= i
7
,
(3.1)
Figure 3.2 A Series resistors with a single unknown
current /
v
.
which states that if we know any one of the seven currents, we know them
all.
Thus we can redraw Fig. 3.1 as shown in Fig. 3.2, retaining the identity
of the single current i
y
To find i
x
, we apply Kirchhoffs voltage law around the single closed
loop.
Defining the voltage across each resistor as a drop in the direction of
i
s
gives
-¾ + (,/?] + i
s
R
2
+
i
s
Ri
+ isR
4
+
i
s
R$
+ i
s
R(, +
i
s
Ri
= 0, (3.2)
or
v
s
= i,(R
{
+ R
2
+ /?3 + R
4
+ R
5
+ R
6
+ R
7
).
(3.3)
The significance of Eq. 3.3 for calculating i
s
is that the seven resistors can
be replaced by a single resistor whose numerical value is the sum of the
individual resistors, that is,
Figure 3.3 A A simplified version of the circuit shown
in Fig. 3.2.
R
cq
= R
1
+ R
2
+ R
3
+ R
4
+ R
5
+ R
6
+ R-
and
v
s
= i
s
R
cq-
(3.4)
(3.5)
Thus we can redraw Fig. 3.2 as shown in Fig. 3.3.
In general, if k resistors are connected in series, the equivalent single
resistor has a resistance equal to the sum of the k resistances, or
Combining resistors in series •
/=1
+ R
t
.
(3.6)
<^>
+
a
<Req
h
Figure 3.4 A The black box equivalent of the circuit
shown in Fig. 3.2.
Note that the resistance of the equivalent resistor is always larger than
that of the largest resistor in the series connection.
Another way to think about this concept of an equivalent resistance is
to visualize the string of resistors as being inside a black box. (An electri-
cal engineer uses the term black box to imply an opaque container; that is,
the contents are hidden from view. The engineer is then challenged to
model the contents of the box by studying the relationship between the
voltage and current at its terminals.) Determining whether the box con-
tains k resistors or a single equivalent resistor is impossible. Figure 3.4
illustrates this method of studying the circuit shown in Fig. 3.2.
3.2 Resistors
in
Parallel
59
3.2 Resistors in Parallel
When two elements connect at a single node pair, they are said to be in
parallel. Parallel-connected circuit elements have the same voltage across
their terminals. The circuit shown in Fig. 3.5 illustrates resistors connected
in parallel. Don't make the mistake of assuming that two elements are
parallel connected merely because they are lined up in parallel in a circuit
diagram. The defining characteristic of parallel-connected elements is that
they have the same voltage across their terminals. In Fig. 3.6, you can see
that R] and R
3
are not parallel connected because, between their respec-
tive terminals, another resistor dissipates some of the voltage.
Resistors in parallel can be reduced to a single equivalent resistor
using Kirchhoffs current law and Ohm's law, as we now demonstrate. In
the circuit shown in Fig. 3.5, we let the currents
/j,
i
2
, h*
an
d U be the cur-
rents in the resistors R
{
through
JR
4
,
respectively. We also let the positive
reference direction for each resistor current be down through the resistor,
that
is,
from node a to node b. From Kirchhoffs current law,
Figure 3.5 A Resistors in parallel.
Figure 3.6 A Nonparallel resistors.
h
=
z
i
+
h
+
h + 'V
(3,7)
The parallel connection of the resistors means that the voltage across each
resistor must be the same. Hence, from Ohm's law,
/i/?i = i
2
R
2
= hR$ = UR4
(3.8)
Therefore,
h
'2
h
v
s
Ri
v
s
=
Ri
V
s
*V
l
4
=
RA
and
(3.9)
Substituting Eq. 3.9 into Eq. 3.7 yields
from which
h =
v
*
1 1 1
— + — + — +
R\
R
2
A3
1_
RA
v
s
R
eq
*1
1 1
+
h
— +
R
2
R3
(3.10)
(3.11)
Equation 3.11 is what we set out to show: that the four resistors in the cir-
cuit shown in Fig. 3.5 can be replaced by a single equivalent resistor. The
circuit shown in Fig. 3.7 illustrates the substitution. For k resistors con-
nected in parallel, Eq. 3.11 becomes
Figure 3.7 A Replacing the four parallel resistors shown
in Fig. 3.5 with a single equivalent resistor.
R
eq
V — - — — —
,=i Ri Ri R
2
Rk
(3.12) < Combining resistors in parallel
Note that the resistance of the equivalent resistor is always smaller than the
resistance of the smallest resistor in the parallel connection. Sometimes,
60 Simple Resistive Circuits
Figure 3.8 A Two resistors connected in parallel.
using conductance when dealing with resistors connected in parallel is more
convenient. In that case,Eq. 3.12 becomes
G
cq
=
2 G
i
= G
l
+ G
2
+ + G
k
. (3.13)
/
=
1
Many times only two resistors are connected in parallel. Figure 3.8
illustrates this special case. We calculate the equivalent resistance from
Eq.3.12:
1
R
cq
J_
R
x
+
R
2
L - ^2 + #1
R,R
7
or
R
eq
R\R
2
Ri +
&>'
(3.14)
(3.15)
Thus for just two resistors in parallel the equivalent resistance equals
the product of the resistances divided by the sum of the resistances.
Remember that you can only use this result in the special case of just two
resistors in parallel. Example 3.1 illustrates the usefulness of these results.
Example 3.1
Applying Series-Parallel Simplification
Find i
s
, i
x
, and i
2
in the circuit shown in Fig. 3.9.
Solution
We begin by noting that the 3 ft resistor is in series
with the 6 ft resistor. We therefore replace this series
combination with a 9 ft resistor, reducing the circuit
to the one shown in Fig. 3.10(a). We now can replace
the parallel combination of the 9 ft and 18 ft resis-
tors with a single resistance of (18 X 9)/(18 + 9), or
6 ft. Figure 3.10(b) shows this further reduction of
the circuit. The nodes x and y marked on all diagrams
facilitate tracing through the reduction of the circuit.
From Fig. 3.10(b) you can verify that i
s
equals
120/10, or 12 A. Figure 3.11 shows the result at this
point in the analysis. We added the voltage V\ to
help clarify the subsequent discussion. Using Ohm's
law we compute the value of V\.
v
t
= (12)(6) = 72 V.
(3.16)
But V\ is the voltage drop from node x to node
y,
so
we can return to the circuit shown in Fig. 3.10(a)
and again use Ohm's law to calculate i\ and i
2
. Thus,
-1 = ™=4A
18 18 '
!-?-"•
(3.17)
(3.18)
<2
We have found the three specified currents by using
series-parallel reductions in combination with
Ohm's law.
120 V
3 0
iiisn /
2
|^6ft
Figure 3.9 • The circuit for Example 3.1.
4
a x
120 V
120 V
Figure 3.10 • A simplification of the circuit shown in Fig. 3.9.
120V 611
Figure 3.11 • The circuit of Fig. 3.10(b) showing the numerical
value of i
$
.
3.3
The
Voltage-Divider and Current-Divider Circuits 61
Before leaving Example 3.1, we suggest that you take the time to
show that the solution satisfies Kirchhoffs current law at every node and
Kirchhoffs voltage law around every closed path. (Note that there are
three closed paths that can be tested.) Showing that the power delivered
by the voltage source equals the total power dissipated in the resistors also
is informative. (See Problems 3.8 and 3.9.)
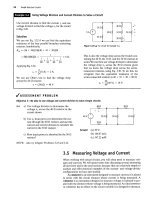
^ASSESSMENT PROBLEM
Objective 1—Be able to recognize resistors connected in series and in parallel
3.1 For the circuit shown, find (a) the voltage u,
(b) the power delivered to the circuit by the
current source, and (c) the power dissipated in
the 10
O.
resistor.
Answer: (a) 60 V;
(b)300W;
(c) 57.6 W.
NOTE: Also try Chapter Problems 3.1-3.4.
7.2 n
10X1
33 The Voltage-Divider
and Current-Divider Circuits
At times—especially in electronic circuits—developing more than one
voltage level from a single voltage supply is necessary. One way of doing
this is by using a voltage-divider circuit, such as the one in Fig. 3.12.
We analyze this circuit by directly applying Ohm's law and
Kirchhoffs
laws.
To aid the analysis, we introduce the current i as shown in
Fig. 3.12(b). From Kirchhoffs current law, R
]
and R
2
carry the same cur-
rent. Applying Kirchhoffs voltage law around the closed loop yields
v
s
= iRi + iR
2
,
(3.19)
«i«
b
R
2
t
+
IV\
+
l
v
2
—
M
^U
*.
1
^\
/?
2
«
+
IV\
+
t
V
2
—
(a)
(b)
Figure 3.12 • (a)
A
voltage-divider circuit and (b) the
voltage-divider circuit
with
current i indicated.
or
i =
Now we can use Ohm's law to calculate v
t
and v
2
:
Vi = iRi = -y,
R
]
+ R
2
(3.20)
(3.21)
v
2
= iR
2
R^
i?!
+ R
2
(3.22)
Equations 3.21 and 3.22 show that v
{
and v
2
are fractions of v
s
. Each frac-
tion is the ratio of the resistance across which the divided voltage is
defined to the sum of the two resistances. Because this ratio is always less
than 1.0, the divided voltages v
x
and v
2
are always less than the source
voltage v
s
.
62 Simple Resistive Circuits
Figure 3.13 •
A
voltage divider connected to
a
load R
t
If you desire a particular value of v
2
, and v
s
is specified, an infinite
number of combinations of R^ and R
2
yield the proper ratio. For example,
suppose that v
s
equals 15 V and v
2
is to be 5
V.
Then v
2
/v
s
= | and, from
Eq. 3.22, we find that this ratio is satisfied whenever R
2
=
{-Rp
Other fac-
tors that may enter into the selection of R
h
and hence R
2
, include the
power losses that occur in dividing the source voltage and the effects of
connecting the voltage-divider circuit to other circuit components.
Consider connecting a resistor R
L
in parallel with R
2
, as shown in
Fig. 3.13. The resistor R
L
acts as a load on the voltage-divider circuit. A
load on any circuit consists of one or more circuit elements that draw
power from the circuit. With the load R
L
connected, the expression for the
output voltage becomes
Kx
v„ =
R,
+ R
C(
•v
st
(3.23)
where
R-IRI
q
R
2
+ RL
(3.24)
Substituting Eq. 3.24 into Eq. 3.23 yields
R,
v,, =
/?,[!
+ (R
2
/R
L
)] + R
2
(3.25)
Note that Eq. 3.25 reduces to Eq. 3.22 as R
L
—»oo, as it should.
Equation 3.25 shows that, as long as R
L
:=>> R
2
, the voltage ratio v
n
/v
s
is
essentially undisturbed by the addition of the load on the divider.
Another characteristic of the voltage-divider circuit of interest is the
sensitivity of the divider to the tolerances of the resistors. By tolerance we
mean a range of possible values. The resistances of commercially avail-
able resistors always vary within some percentage of their stated value.
Example 3.2 illustrates the effect of resistor tolerances in a voltage-
divider circuit.
Example 3.2 Analyzing the Voltage-Divider Circuit
The resistors used in the voltage-divider circuit
shown in Fig. 3.14 have a tolerance of ±10%. Find
the maximum and minimum value of ?;,
100 V
6
25 left f R\
lOOkftf Ri
Figure 3.14 A The circuit for Example 3.2.
Solution
From Eq. 3.22, the maximum value of v
0
occurs when
R
2
is 10% high and R
{
is 10% low, and the minimum
value of v
a
occurs when R
2
is 10% low and R\ is
10%
high.Therefore
z;„(max) =
v„(min) =
(100)(110)
110 + 22.5
(100)(90)
90 + 27.5
83.02 V,
= 76.60 V.
Thus,
in making the decision to use 10% resistors in
this voltage divider, we recognize that the no-load
output voltage will lie between 76.60 and 83.02 V.
3,3 The Voltage-Divider and Current-Divider Circuits 63
The Current-Divider Circuit
The current-divider circuit shown in
Fig.
3.15 consists of two resistors con-
nected in parallel across a current
source.
The current divider is designed
to divide the current i
s
between Ri and R
2
. We find the relationship
between the current i
s
and the current in each resistor (that
is,
i\
and i
2
) by
directly applying Ohm's law and Kirchhoffs current law. The voltage
across the parallel resistors is
(3.26)
Figure 3.15 A The current-divider circuit.
From Eq. 3.26,
Zl
-
Rl
+ R
2
h
>
*i .
ii =
R
1
+ R
2
(3.27)
(3.28)
Equations 3.27 and 3.28 show that the current divides between two resis-
tors in parallel such that the current in one resistor equals the current
entering the parallel pair multiplied by the other resistance and divided by
the sum of the resistors. Example 3.3 illustrates the use of the current-
divider equation.
Example 3.3
Analyzing a Current-Divider Circuit
Find the power dissipated in the 6 ft resistor shown
in
Fig.
3.16.
Solution
First,
we
must find the current in the resistor by sim-
plifying the circuit with series-parallel reductions.
Thus,
the circuit shown in Fig. 3.16 reduces to the
one shown in Fig. 3.17. We find the current i
a
by
usins the formula for current division:
16
i„ =
16 + 4
(10) = 8 A.
Note that i
a
is the current in the 1.6ft resistor in
Fig. 3.16. We now can further divide
i„
between the
6 ft and
4
ft resistors. The current in the
6
ft resistor is
«6 =
6 + 4
(8) = 3.2 A.
and the power dissipated in the 6 ft resistor is
p = (3.2)
2
(6) - 61.44W.
Figure 3.16 • The circuit for Example 3.3.
10AM J 16 ft
Figure 3.17 A A simplification of the circuit shown in Fig, 3.16.
64 Simple Resistive Circuits
^ASSESSMENT
PROBLEMS
Objective 2—Know how to design simple voltage-divider and current-divider circuits
3.2 a) Find the no-load value of v
0
in the
circuit shown.
b) Find v
0
when R
L
is 150 kft.
c) How much power is dissipated in the 25 kft
resistor if the load terminals are accidentally
short-circuited?
d) What is the maximum power dissipated in
the 75 kft resistor?
3.3 a) Find the value of R that will cause 4 A of
current to flow through the 80 ft resistor in
the circuit shown.
b) How much power will the resistor R from
part (a) need to dissipate?
c) How much power will the current source
generate for the value of R from part (a)?
200 V
60
n
20 A
Answer: (a) 150 V;
(b) 133.33 V;
(c) 1.6 W;
(d)0.3W.
NOTE: Also try Chapter Problems 3.15, 3.16, and 3.18.
Answer: (a) 30ft;
(b)7680W;
(c) 33,600 W.
Figure 3.18 A Circuit used to illustrate voltage division.
3,4 Voltage Division
and Current Division
We can now generalize the results from analyzing the voltage divider cir-
cuit in Fig. 3.12 and the current-divider circuit in Fig.
3.15.
The generaliza-
tions will yield two additional and very useful circuit analysis techniques
known as voltage division and current division. Consider the circuit shown
in Fig. 3.18.
The box on the left can contain a single voltage source or any other
combination of basic circuit elements that results in the voltage v shown in
the figure. To the right of the box are n resistors connected in series. We
are interested in finding the voltage drop
Vj
across an arbitrary resistor Rj
in terms of the voltage v. We start by using Ohm's law to calculate /, the
current through all of the resistors in series, in terms of the current v and
the n resistors:
i —
R,
+ Ri + + R,
v
(3.29)
The equivalent resistance,
i?
eq
,
is the sum of the n resistor values
because the resistors are in series, as shown in Eq. 3.6. We apply Ohm's
3.4 Voltage Division and Current Division 65
law a second time to calculate the voltage drop vj across the resistor Rp
using the current i calculated in Eq. 3.29:
R
J
(3.30) ^ Voltage-division equation
Note that we used Eq. 3.29 to obtain the right-hand side of Eq. 3.30.
Equation 3.30 is the voltage division equation. It says that the voltage
drop Vj across a single resistor Rj from a collection of series-connected
resistors is proportional to the total voltage drop v across the set of series-
connected resistors. The constant of proportionality is the ratio of the sin-
gle resistance to the equivalent resistance of the series connected set of
resistors, or Rj/R
cq
.
Now consider the circuit shown in Fig. 3.19. The box on the left can
contain a single current source or any other combination of basic circuit
elements that results in the current i shown in the figure. To the right of
the box are n resistors connected in parallel. We are interested in finding
the current L through an arbitrary resistor Rj in terms of the current
i.
We
start by using Ohm's law to calculate v, the voltage drop across each of the
resistors in parallel, in terms of the current i and the n resistors:
v = /(jyjy !*„) =
iR
cq
.
(3.31)
The equivalent resistance of n resistors in parallel, R
cq
, can be calculated
using Eq. 3.12. We apply Ohm's law a second time to calculate the current
ij through the resistor Rj, using the voltage v calculated in Eq. 3.31:
V
R
eq .
lj
=
*T
"V"
(3.32) 4 Current-division equation
Note that we used Eq. 3.31 to obtain the right-hand side of Eq. 3.32.
Equation 3.32 is the current division equation. It says that the current i
through a single resistor Rj from a collection of parallel-connected resis-
tors is proportional to the total current /' supplied to the set of parallel-
connected resistors. The constant of proportionality is the ratio of the
equivalent resistance of the parallel-connected set of resistors to the single
resistance, or R
eq
/Rj. Note that the constant of proportionality in the cur-
rent division equation is the inverse of the constant of proportionality in
the voltage division equation!
Example 3.4 uses voltage division and current division to solve for
voltages and currents in a circuit.
Circuit
t
R
}
:
: Ri\
Figure 3.19 • Circuit used to illustrate current division.