Tự học iLife - p 5 pot
Bạn đang xem bản rút gọn của tài liệu. Xem và tải ngay bản đầy đủ của tài liệu tại đây (3.39 MB, 10 trang )
23
INTRODUCING iLIFE ’09
Exploring iLife ’09 on the Mac
chapter
2
22
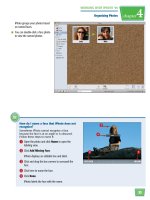
How do I access a video tutorial?
You can access online video tutorials that step you
through common tasks in the iLife applications.
1 Click Help and then click Video Tutorials.
A Web browser window opens showing the tutorial
page for iLife.
2 Click to access the tutorials for an iLife application.
The videos play inside your Web browser.
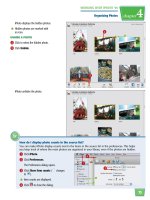
A window opens showing help
information.
●
A list of related results appears at
the bottom. You can click one for
more information.
●
You can click in the search box to
start a new search.
24
33
11
22
44
55
1 Click the Apple menu ( ).
2 Click System Preferences.
The System Preferences window
opens.
3 Click Displays.
Change Monitor Resolution
You can change the monitor resolution to give
you more area for the workspace of your iLife
applications.
Change Monitor
Resolution
4 Click a new resolution.
The monitor resolution changes.
In this example, the monitor
resolution is increased to offer
more space to application
windows.
For LCD monitors, the maximum
resolution listed offers the
sharpest picture.
5 Click to close the System
Preferences window.
The changes are saved.
25
INTRODUCING iLIFE ’09
Exploring iLife ’09 on the Mac
chapter
2
11
22
The application quits.
1 Click the menu named for the
iLife application.
This example shows the
GarageBand application, so
GarageBand is clicked.
2 Click the Quit command.
Quit an iLife Application
You can quit an iLife application after you have finished
viewing, organizing, and sharing your digital media.
Quit an iLife ’09
Application
26
11
22
33
The System Preferences window
opens.
3 Click MobileMe.
1 Click the Apple menu ( ).
2 Click System Preferences.
Sign In to MobileMe
Many of the iLife applications can publish
media such as photos, movies, and Web
pages to MobileMe. MobileMe is a service
run by Apple that lets you store content
online and share it with friends and family.
To use the MobileMe-based features of
iLife, you must sign in to your MobileMe
account.
Sign In to
MobileMe
27
INTRODUCING iLIFE ’09
Exploring iLife ’09 on the Mac
chapter
2
44
55
66
How do I sign up for a MobileMe account and what does it include?
Visit www.me.com to sign up for a MobileMe account. An account costs $99 per year from Apple. You
can try the service free for 60 days. You can also purchase MobileMe from online vendors such as
Amazon.com, sometimes for a discount. A MobileMe account includes:
●
E-mail access with a personalized address at
●
Synchronized access to your contact list for all your computers and
mobile devices.
●
Synchronized access to your calendar for all your computers and
mobile devices.
●
An online system for sharing photos and videos.
●
The iDisk service, which lets you share and back up files from your computers and other devices. You can also
access your Web pages published from iWeb in your iDisk files.
●
You are signed in and your
account status appears.
Note: See the other chapters in this book for
details about using MobileMe-based features.
●
You can click to sign out.
Sign-in fields appear if you are not
signed in.
4 Type your member name.
5 Type your password.
6 Click Sign In.
part
I
I
III
I
I
III
A
B
C
A
B
C
my photos
A
B
C
A
B
C
A
B
C
A
B
C
Working with iPhoto ’09
With iPhoto ’09, you can
easily edit, enhance, and
share the images on your
Mac. The program helps you
download images from a
digital camera, optimize
color and lighting of the
images, and assemble the
images into photo books,
slideshows, and other
projects. This part teaches
you to how to make the
most of this powerful
program.
I
I
II
I
I
II
Chapter 3: Importing and Viewing
Photos 30
Chapter 4: Organizing Photos 48
Chapter 5: Editing Photos 76
Chapter 6: Sharing Photos 94
30
iPhoto enables you to organize, enhance,
and share your collection of digital photos.
Take a moment to familiarize yourself with
the iPhoto workspace.
Thumbnails
Small versions of your photos, called thumbnails, appear here in the photo browser. You can change their size
using the slider in the bottom-right corner of the workspace or magnify them by double-clicking. See the tasks
in this chapter for more about viewing photos.
Source List
By clicking different buttons in the source list, you can filter and sort your library photos by when or where they
were taken, or by the faces that appear in them. See Chapter 4 for more about organizing photos.
Organization
You can organize photos into subject-specific albums or display them as slideshows. With slideshows, you can
control the transitions between photos as well as slide durations.
Name Faces
The Name feature allows you to label the faces in your photos with names. iPhoto automatically recognizes
faces in your images to help you with the labeling.
Editing Tools
You can edit the color, lighting, and other characteristics of a photo using various tools. This can help you fix
poorly exposed or washed-out photos. You can also remove unwanted objects or blemishes with a Retouch
tool. See Chapter 5 for more.
Search Box
A search box allows you to search by title or description, date, keyword, or rating.
Play Slideshow
A button at the bottom of the workspace lets you quickly show the currently displayed photos as a slideshow
with a theme and background music.
Understanding the
iPhoto Workspace
31
chapter
3
Importing and Viewing Photos
WORKING WITH iPHOTO ‘09
Keepsakes
Keepsakes are photo-related projects such as photo books and calendars that you can create in iPhoto. You can
have your finished keepsakes printed professionally. See Chapter 6 for more about keepsakes.
Sharing
You can share your photos by posting them to Web galleries, sending them by e-mail, or transferring them to
online services such as Facebook and Flickr. See Chapter 6 for more information.
32
44
33
22
66
22
55
iPhoto
Library
Recent
Last Import
Devices
File Edit Photos
iPhotos
Events Share View Window Help
Im
a
g
es
Expo
r
t
in
g
Importing Images
Mac Mo
de
3 Type an event name to categorize
the selected photos.
Note: For more about how iPhoto organizes photos
by event, see Chapter 4.
4 Type a description of the event.
5 Select Autosplit events after
importing to automatically group
your photos by date ( changes
to ).
6 Click Import Selected.
●
You can click Import All to
import all the photos on your
camera at once.
1 Connect your camera to your Mac
using a USB cable and turn the
camera on.
iPhoto launches and displays the
photos on your camera.
If iPhoto does not launch
automatically, click iPhoto in the
Dock to launch it.
●
The camera name appears here.
2 -click the photos you want to
import.
Import Photos from a Camera
You can bring digital images into iPhoto
directly from a camera. Most digital cameras
connect to a Mac through a USB cable. Mac
computers come with multiple USB ports
where you can connect cables.
For details about connecting your specific camera, see the
documentation that came with the device.
Import Photos
from a Camera