Giải pháp thiết kế web động với PHP - p 28 pps
Bạn đang xem bản rút gọn của tài liệu. Xem và tải ngay bản đầy đủ của tài liệu tại đây (537.22 KB, 10 trang )
PAGES THAT REMEMBER: SIMPLE LOGIN AND MULTIPAGE FORMS
251
<?php
session_start();
ob_start();
?>
This turns on output buffering and prevents output being sent to the browser until the end of
the script, or until you specifically flush the output with ob_end_flush().
2. Flush the output immediately after invalidating the session cookie like this:
// invalidate the session cookie
if (isset($_COOKIE[session_name()])) {
setcookie(session_name(), '', time()-86400, '/');
}
ob_end_flush();
3. Save session_03.php, and test the sequence again. This time, there should be no warning.
More importantly, the session cookie is no longer valid.
Using file-based authentication
As you have just seen, the combination of session variables and conditional statements lets you present
completely different pages to a visitor depending on whether a session variable has been set. All you need
to do is add a password checking system, and you have a basic user authentication system.
In PHP Solution 7-2, I showed you how to use the file() function to read each line of a text file into an
array. You can now adapt that script to create a simple login system using sessions. Each persons
username and password is separated by a comma and recorded on a new line of a text file like this:
david, codeslave
chris, bigboss
Ill use the same text file as before: filetest_02.txt, which is in the private folder that was set up in
Chapter 7. Refer to Chapter 7 if you havent set up a folder for PHP to read and write files.
PHP Solution 9-3: Building the login page
This PHP solution shows how to submit a username and password through the post method and check the
submitted values against those stored in an external text file. It uses the file() function to inspect the
external file one line at a time. If a match is found, the script sets a session variable and then redirects the
user to another page.
1. Create a file called login.php in the sessions folder, and insert a form with a text input field
each for username and password, plus a submit button named login, like this (alternatively,
use login_01.php in the ch09 folder):
<form id="form1" method="post" action="">
<p>
<label for="username">Username:</label>
<input type="text" name="username" id="username">
</p>
<p>
CHAPTER 9
252
<label for="pwd">Password:</label>
<input type="password" name="pwd" id="pwd">
</p>
<p>
<input name="login" type="submit" id="login" value="Log in">
</p>
</form>
Its a simple form, nothing fancy.
2. Add the following code in a PHP block above the DOCTYPE declaration:
$error = '';
if (isset($_POST['login'])) {
session_start();
$username = $_POST['username'];
$password = $_POST['pwd'];
// location of usernames and passwords
$userlist = 'C:/private/filetest_02.txt;
// location to redirect on success
$redirect = 'http://localhost/phpsols/sessions/menu.php';
require_once(' /includes/authenticate.inc.php');
}
This initializes a variable called $error as an empty string. If the login fails, this will be used to
display an error message informing the user of the reason.
The conditional statement then checks whether the $_POST array contains an element named
login. If it does, the form has been submitted, and the code inside the curly braces initiates a
PHP session and stores the values passed through the $_POST array in $username and
$password. Then, it creates $userlist, which defines the location of the file that contains
the registered usernames and passwords, and $redirect, the URL of the page the user will
be sent to after logging in successfully.
Finally, the code inside the conditional statement includes authenticate.inc.php, which
youll create next.
Download from Wow! eBook <www.wowebook.com>
PAGES THAT REMEMBER: SIMPLE LOGIN AND MULTIPAGE FORMS
253
Adjust the value of $userlist to match the location in your own setup, if necessary.
3. Create a file called authenticate.inc.php in the includes folder. It will contain only PHP
code, so strip out any HTML inserted by your script editor, and insert the following code:
<?php
if (!file_exists($userlist) || !is_readable($userlist)) {
$error = 'Login facility unavailable. Please try later.';
} else {
// read the file into an array called $users
$users = file($userlist);
// loop through the array to process each line
for ($i = 0; $i < count($users); $i++) {
// separate each element and store in a temporary array
$tmp = explode(', ', $users[$i]);
// assign each element of the temp array to a named array key
$users[$i] = array('name' => $tmp[0], 'password' => rtrim($tmp[1]));
}
}
This is almost identical to the code that you used in file.php in PHP Solution 7-2. The only
differences are the use of $userlist instead of $textfile and the conditional statement.
Rather than testing that the file exists and is readable, the conditions check for a nonexistent
file or one that cant be read. This has been done to make the code easier to read. If theres a
problem with $userfile, the error message is created immediately. Otherwise, the main code
in the else clause is executed.
The main code works exactly the same as in PHP Solution 7-2. It extracts the content of the
text file into an array and loops through it, creating a multidimensional array containing the
name and password of each registered user. The names and passwords in filetest_02.txt
produce the following values:
$users[0]['name'] = 'david';
$users[0]['password'] = 'codeslave';
$users[1]['name'] = 'chris';
$users[1]['password'] = 'bigboss';
4. To authenticate the user, you need to check the submitted values against those stored in the
text file. Add the highlighted code to the for loop:
for ($i = 0; $i < count($users); $i++) {
// separate each element and store in a temporary array
$tmp = explode(', ', $users[$i]);
// assign each element of the temp array to a named array key
$users[$i] = array('name' => $tmp[0], 'password' => rtrim($tmp[1]));
// check for a matching record
if ($users[$i]['name'] == $username && $users[$i]['password'] ==
$password) {
CHAPTER 9
254
$_SESSION['authenticated'] = 'Jethro Tull';
session_regenerate_id();
break;
}
}
If the record matches $username and $password, the script creates a variable called
$_SESSION['authenticated'] and assigns it the name of one of the great folk-rock bands of
the 70s. Theres nothing magic about either of these (apart from Jethro Tulls music); Ive
chosen the name and value of the variable arbitrarily. All that matters is a session variable is
created. As soon as a match is found, the session ID is regenerated, and break exits the loop.
5. Take a closer look at these two lines:
$users[$i] = array('name' => $tmp[0], 'password' => rtrim($tmp[1]));
if ($users[$i]['name'] == $username && $users[$i]['password'] == $password) {
The first one assigns $tmp[0] to $users[$i]['name'] and rtrim($tmp[1]) to
$users[$i]['password']. The next line compares the values in the $users array with
$username and $password. Thats all the $users array is ever used for. Creating the array
made sense in PHP Solution 7-2, because you wanted to inspect the entire contents of the
file. However, all you need here is to compare $tmp[0] with $username and rtrim($tmp[1])
with $password.
Delete the first of these two lines, and amend the second one like this:
if ($tmp[0] == $username && rtrim($tmp[1]) == $password) {
6. If the login is successful, the header() function needs to redirect the user to the URL stored
in $redirect, and exit the script. Otherwise, an error message needs to be created, informing
the user that the login failed. The complete script looks like this:
<?php
if (!file_exists($userlist) || !is_readable($userlist)) {
$error = 'Login facility unavailable. Please try later.';
} else {
// read the file into an array called $users
$users = file($userlist);
// loop through the array to process each line
for ($i = 0; $i < count($users); $i++) {
// separate each element and store in a temporary array
$tmp = explode(', ', $users[$i]);
// check for a matching record
if ($tmp[0] == $username && rtrim($tmp[1]) == $password) {
$_SESSION['authenticated'] = 'Jethro Tull';
session_regenerate_id();
break;
}
}
// if the session variable has been set, redirect
if (isset($_SESSION['authenticated'])) {
PAGES THAT REMEMBER: SIMPLE LOGIN AND MULTIPAGE FORMS
255
header("Location: $redirect");
exit;
} else {
$error = 'Invalid username or password.';
}
}
7. In login.php, add the following short code block just after the opening <body> tag to display
any error messages:
<body>
<?php
if ($error) {
echo "<p>$error</p>";
}
?>
<form id="form1" method="post" action="">
Before you can test login.php, you need to create menu.php and restrict access with a session.
PHP Solution 9-4: Restricting access to a page with a session
This PHP solution demonstrates how to restrict access to a page by checking for the existence of a
session variable that indicates the users credentials have been authenticated. If the variable hasnt been
set, the header() function redirects the user to the login page.
1. Create two pages in the sessions folder called menu.php and secretpage.php. It doesnt
matter what they contain, as long as they link to each other. Alternatively, use menu_01.php
and secretpage_01.php in the ch09 folder.
2. Protect access to each page by inserting the following above the DOCTYPE declaration:
<?php
session_start();
// if session variable not set, redirect to login page
if (!isset($_SESSION['authenticated'])) {
header('Location: http://localhost/phpsols/sessions/login.php');
exit;
}
?>
After starting the session, the script checks whether $_SESSION['authenticated'] has
been set. If it hasnt, it redirects the user to login.php and exits. Thats all there is to it! The
script doesnt need to know the value of $_SESSION['authenticated'], although you could
make doubly sure by amending line 4 like this:
if (!isset($_SESSION['authenticated']) || $_SESSION['authenticated']
!= 'Jethro Tull') {
This now also rejects a visitor if $_SESSION['authenticated'] has the wrong value.
CHAPTER 9
256
3. Save menu.php and secretpage.php, and try to load either of them into a browser. You
should always be redirected to login.php.
4. Enter a valid username and password in login.php, and click Log in. You should be
redirected immediately to menu.php, and the link to secretpage.php should also work.
5. All you need to do to protect any page on your site is add the eight lines of code in step 2
above the DOCTYPE declaration.
PHP Solution 9-5: Creating a reusable logout button
As well as logging into a site, users should be able to log out. This PHP solution shows how to create a
logout button that can be inserted in any page.
Continue working with the files from the preceding section.
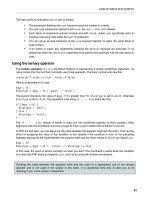
1. Create a logout button in the <body> of menu.php by inserting the following form:
<form id="logoutForm" method="post" action="">
<input name="logout" type="submit" id="logout" value="Log out">
</form>
The page should look similar to the following screenshot:
2. You now need to add the script that runs when the logout button is clicked. Amend the code
above the DOCTYPE declaration like this (the code is in menu_02.php):
<?php
session_start();
// if session variable not set, redirect to login page
if (!isset($_SESSION['authenticated'])) {
header('Location: http://localhost/phpsols/sessions/login.php');
exit;
}
// run this script only if the logout button has been clicked
if (isset($_POST['logout'])) {
// empty the $_SESSION array
$_SESSION = array();
// invalidate the session cookie
PAGES THAT REMEMBER: SIMPLE LOGIN AND MULTIPAGE FORMS
257
if (isset($_COOKIE[session_name()])) {
setcookie(session_name(), '', time()-86400, '/');
}
// end session and redirect
session_destroy();
header('Location: http://localhost/phpsols/sessions/login.php');
exit;
}
?>
This is the same code as in “Destroying a session” earlier in this chapter. The only differences
are that its enclosed in a conditional statement so that it runs only when the logout button is
clicked, and it uses header() to redirect the user to login.php.
3. Save menu.php, and test it by clicking Log out. You should be redirected to login.php. Any
attempt to return to menu.php or secretpage.php will bring you back to login.php.
4. You can put the same code in every restricted page, but PHP is all about saving work, not
making it. It makes sense to turn this into an include file. Create a new file called
logout.inc.php in the includes folder. Cut and paste the new code from steps 1 and 2 into
the new file like this (its in logout.inc.php in the ch09 folder):
<?php
// run this script only if the logout button has been clicked
if (isset($_POST['logout'])) {
// empty the $_SESSION array
$_SESSION = array();
// invalidate the session cookie
if (isset($_COOKIE[session_name()])) {
setcookie(session_name(), '', time()-86400, '/');
}
// end session and redirect
session_destroy();
header('Location: http://localhost/phpsols/sessions/login.php');
exit;
}
?>
<form id="logoutForm" method="post" action="">
<input name="logout" type="submit" id="logout" value="Log out">
</form>
5. At the same point in menu.php from which you cut the code for the form, include the new file
like this:
<?php include(' /includes/logout.inc.php'); ?>
6. Including the code from an external file like this means that there will be output to the browser
before the calls to setcookie() and header(). So you need to buffer the output, as shown in
PHP Solution 9-2.
CHAPTER 9
258
Add ob_start(); immediately after the call to session_start() at the top of menu.php.
Theres no need to use ob_end_flush() or ob_end_clean(). PHP automatically flushes the
buffer at the end of the script if you havent already done so explicitly.
7. Save menu.php, and test the page. It should look and work exactly the same as before.
8. Repeat steps 5 and 6 with secretpage.php. You now have a simple, reusable logout button
that can be incorporated in any restricted page.
9. You can check your code against menu_03.php, secretpage_02.php, and logout.inc.php
in the ch09 folder.
Making passwords more secure
Although this file-based user authentication setup is adequate for restricting access to web pages, all the
passwords are stored in plain text. For greater security, its advisable to encrypt passwords. PHP
provides a simple and effective way to encrypt passwords, using the SHA-1 (US Secure Hash Algorithm 1;
for more info, see www.faqs.org/rfcs/rfc3174), which produces a 40-digit hexadecimal number. When
encrypted with SHA-1, codeslave turns into this:
fe228bd899980a7e23fd08082afddb74a467e467
SHA-1 performs one-way encryption. This means that even if your password file is exposed, no one will be
able to work out what the passwords are. It also means that you have no way of converting
fe228bd899980a7e23fd08082afddb74a467e467 back to codeslave. In one respect, this is unimportant:
when a user logs in, you encrypt the password again and compare the two encrypted versions. The
disadvantage is that there is no way that you can send users password reminders if they forget them; you
must generate a new password. Nevertheless, good security demands encryption.
Another precaution thats worth taking is adding a salt to the password before encrypting it. This is a
random value thats added to make decryption even harder. Even if two people choose the same
password, adding a unique value to the password before encryption ensures that the encrypted values
are different.
Encryption is no protection against the most common problem with passwords: ones that are easy to
guess or use common words. Many registration systems now enforce the use of stronger passwords by
requiring a mixture of alphanumeric characters and symbols.
To improve the basic login system developed so far, you need to create a user registration form that
checks the following:
• The password and username contain a minimum number of characters.
• The password matches minimum strength criteria, such as containing a mixture of numbers,
uppercase and lowercase characters, and symbols.
• The password matches a second entry in a confirmation field.
• The username isnt already in use.
PHP Solution 9-6: Creating a password strength checker
This PHP solution shows how to create a class that checks whether a password meets certain
requirements, such as no spaces, a minimum number of characters, and a combination of different types
PAGES THAT REMEMBER: SIMPLE LOGIN AND MULTIPAGE FORMS
259
of characters. By default, the class checks only that the password has no spaces and contains a
minimum number of characters. Optional methods allow you to set tougher conditions, such as using a
combination of uppercase and lowercase characters, numbers, and nonalphanumeric symbols.
This PHP solution starts by building the user registration form that will also be used in PHP Solution 9-7.
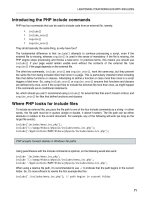
1. Create a page called register.php in the sessions folder, and insert a form with three text
input fields and a submit button. Lay out the form, and name the input elements as shown in
the following screenshot. If you want to save time, use register_01.php in the ch09 folder.
2. As always, you want the processing script to run only if the form has been submitted, so
everything needs to be enclosed in a conditional statement that checks whether the name
attribute of the submit button is in the $_POST array. Then, you need to check that the input
meets your minimum requirements. Insert the following code in a PHP block above the
DOCTYPE declaration:
if (isset($_POST['register'])) {
$username = trim($_POST['username']);
$password = trim($_POST['pwd']);
$retyped = trim($_POST['conf_pwd']);
require_once(' /classes/Ps2/CheckPassword.php');
}
The code inside the conditional statement passes the input from the three text fields to trim()
to remove whitespace from the beginning and end, and assigns the results to simple variables.
It then includes the file that will contain the class that checks the password, which youll define
next.
3. Create a file called CheckPassword.php in the classes/Ps2 folder. It will contain only PHP
script, so strip out any HTML, and add the following code:
<?php
class Ps2_CheckPassword{
CHAPTER 9
260
protected $_password;
protected $_minimumChars;
protected $_mixedCase = false;
protected $_minimumNumbers = 0;
protected $_minimumSymbols = 0;
protected $_errors = array();
public function __construct($password, $minimumChars = 8) {
$this->_password = $password;
$this->_minimumChars = $minimumChars;
}
public function check() {
if (preg_match('/\s/', $this->_password)) {
$this->_errors[] = 'Password cannot contain spaces.';
}
if (strlen($this->_password) < $this->_minimumChars) {
$this->_errors[] = "Password must be at least $this->_minimumChars
characters.";
}
return $this->_errors ? false : true;
}
public function getErrors() {
return $this->_errors;
}
}
This defines the basic Ps2_CheckPassword class, which initially checks only whether the
password contains any spaces and whether it has the required minimum number of
characters. Youll add the other features shortly.
The class begins by defining six protected properties. The first two are for the password and
minimum number of characters. The $_mixedCase, $_minimumNumbers, and
$_minimumSymbols properties will be used to add strength to the password but are initially set
to false or 0. The $_errors property will be used to store an array of error messages if the
password fails any of the checks.
The constructor method takes two arguments—the password and minimum number of
characters—and assigns them to the relevant properties. By default, the minimum number of
characters is set to 8, making this an optional argument.
The check() method contains two conditional statements. The first uses preg_match() with
a regular expression that searches for whitespace characters inside the password. The
second conditional statement uses strlen(), which returns the length of a string, and
compares the result with $_minimumChars.