Professional Information Technology-Programming Book part 53 ppsx
Bạn đang xem bản rút gọn của tài liệu. Xem và tải ngay bản đầy đủ của tài liệu tại đây (41.57 KB, 9 trang )
12.2. Showing Your Work
There are a variety of ways to show your work to clients and other interested
viewers. In this section, we'll take a look at a few tools to make that presentation
accessible and professional looking.
12.2.1. Contact Sheets
Photoshop contact sheets have several advantages over the analog variety, where
you simply place a piece of photographic paper face up under an enlarger head, lay
the negatives atop it, lay a piece of glass over that to keep everything flat, make a
brief exposure with the enlarger, and then process and dry the result.
In Photoshop, open your shoot's folder in Bridge, then: I am assuming you've
already followed this book's workflow for image management.
1. From the Unfiltered menu, choose three or more stars. When those images
show up, press Cmd/Ctrl-A to Select All.
2. Choose Tools Photoshop Contact Sheet II. The Contact Sheet II
dialog opens (see Figure 12-19).
Figure 12-19. The Contact Sheet II dialog, as it should be specified. If you
have a letter size printer, make the Width 8 and the Height 10.
3. From the Use menu, choose Selected Images in Bridge.
4. Under Document, choose Inches, then the Width and Height of your printer's
largest paper size (I use 11x14 for my Epson 1270 because it's easier for art
directors to judge a larger thumbnail). Be sure the Flatten All Layers box is
checked to minimize your file size. Resolution should be 300 ppi and Mode
should be RGB.
5. Under Thumbnails, choose Place Across First, check Auto for Spacing, and
make your columns 4x5. This gives you 20 images per pageequivalent to
about half roll of film.
NOTE
Be sure Use Filename as Caption is checked. This assures that you're all talking
about exactly the same frame when choosing a particular image.
12.2.2. Creating a Portfolio
When it comes to making yourself and your images look good, let's face it:
presentation is everything. The problem arises from the fact that no single
presentation method, size, style, or form factor is right for all situations. For
example, a web-based portfolio is shown in Figure 12-20. A binder portfolio is
another possibility, and is shown in Figure 12-21. No matter what route you go,
you need to know what sizes, styles, and form factors are accepted in specific
industries and specific places; and of course, you also want to adopt a style that
promotes your own unique perspective.
Figure 12-21. A typical presentation binder portfolio book.
Figure 12-20. A web portfolio.
There isn't room here to tell you everything there is to know about portfolio
presentation, but you'll find concise, rule-based techniques for creating binder,
boxed, and electronic portfolios.
12.2.2.1. Binder portfolios
Loose-leaf binder portfolios are a great way to make a quick presentation with a
few prints. Prints are generally placed inside an acid-free glassine sleeve, which
helps to protect them as clients flip through the portfolio. Prints are most often
shown borderless and hinge-mounted on black matte paper. The loose-leaf rings
allow you to remove any blank pages. Loose-leaf portfolios come in a variety of
sizes, but the ones that hold 11x14 and 16x20 prints seem to be the most popular.
Be sure that any loose-leaf portfolio you buy is clearly labeled as archival.
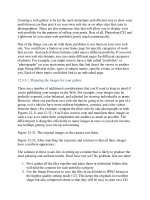
With binder portfolios, photos are held in place with acid-free tape hinges (see
Figure 12-22) so they can be easily removed and replaced without damage to the
book, print, or page. This allows you to easily vary the size of prints and pages.
Figure 12-22. Taped hinge for temporary mounting of prints in a portfolio.
NOTE
Itoya makes a large series of black polypropylene ("poly") binders in sizes ranging
from 4x6 to 18x24 inches. The pages are acid- and lignin-free black pages with
polypropylene sleeves. The poly sleeves keep the prints safe and unscathed, and
even better, you can easily slide prints in and out of the sleeves so you can quickly
target a book toward a specific client. Since the average cost of these books is well
under $20, it's not a bad idea to just keep a couple around.
Most art supply and photographer's supply stores also provide leather zippered
binders with handles or black hardcover binders that will hold the same archival
sleeves with black pages. Of course, these portfolios tend to be a bit pricier than
the Itoya binders. If you need to protect those less expensive Itoya binders while
you are pounding the pavement in search of clients, there are portfolio-size
briefcases that will both do the job and add a look of class and prestige to your
presentation.
In My Humble Opinion
I don't love the look of plastic sleeves, but so many pros use this type of
presentation that it's not likely to prejudice your audience against your
portfolio. You do gain the benefit of being able to use the same portfolio
for different presentations, as the images just slide in and out.
Most professionals make borderless prints for loose-leaf portfolios. The black
backgrounds make it possible to include prints in a variety of sizes and shapes by
providing an element of uniformity.
12.2.2.2. Boxed portfolios
Despite the convenience of loose-leaf portfolios, I generally prefer boxed
portfolios of loose prints, such as the one shown in Figure 12-23. I leave the prints
unmounted so that the viewer can easily flip through and rearrange them to put
their favorites at the top of the stack. This has its drawbacks, most notably that
you'll have to warn the viewers to keep their fingers off the surface of the prints,
but I still like knowing that the audience gets to see and appreciate the quality of
the printing, printing paper, and image in a more honest, up-close, and personal
way.
Figure 12-23. A typical boxed portfolio.
I always make prints for a boxed portfolio in a uniform paper size and use the most
heavyweight paper that is consistent with the image type I'm presentingfor
instance, sports and food seem to look snappier on glossy papers, romantic
portraits and nature scenes seem to be more compatible with the softer look of
matte papers, and painterly interpretations of digital photos work best on
watercolor or other types of artist's papers. I also leave a generous amount of
border space around each image.
12.2.3. Create a Limited-Edition Book
If you specialize in fine-art photography or want to move some of your commercial
work into that arena, you might find that the high cost of large prints and the lack
of consumer wall space (given today's high cost of real estate) are limiting the
market for fine-art prints. You might consider a fairly new idea that is catching on
quickly in the fine-art worldthe limited-edition book, which is sometimes referred
to as a monograph. Monographs are bound volumes of limited-edition fine-art
prints. At press time, a typical price for a book of 8x10 prints on 11x14 paper from
a credentialed but not internationally known artist is between $400 and $1,200.
Monographs should have all the same parts as other books: a title page, table of
contents, and text introduction. The most important function of the introduction is
to present the techniques and the materials that were used to make the monograph.
There should also be a statement regarding the edition number, the archival
qualities of the prints, and the value of the monograph versus the value of framing
individual prints. Finally, you should also include an artist's biography, credit and
credentials, and a statement of purpose and artistic philosophy.
NOTE
Just as this book was going through it's final copy edit I was lucky enough to be
able to test a new web site called Blurb.com. I created a 60 page book with a full-
color dust-over and roughly 100 photos. The book is perfect bound and has a very
elegant cloth hard-bound cover. I worked from ColorVision's Spyder 2 calibrator
and saved the files as full-resolution sRGB JPEGs before pasting them into the
book template software. You could have picked me off the floor when the result
arrived in the mail. Every single image looked exactly and precisely as I have
envisioned it. The end book looked thoroughly professional. It has snagged me
several jobs in just the past few days. And it cost a mere $35, plus about $8
shipping. I'm going to make up a lot of these. Oh and the software is free and took
only minutes to learn. Check out www.blurb.com.
12.2.4. Event Monographs
A monograph is also an impressive way to present a book or brochure idea to a
publisher or client. For example, there is currently a huge market for monograph
books in wedding and event photography.
Online Options
If you want to experiment with the idea of a monograph or would like to
create a less expensive version to use as a leave-by (a give-away
promotional item left with a potential client), consider submitting your
photos as pre-edited digital images to an online photo-processing service.
Here are a few:
Blurb, Inc. (www.blurb.com): $29.95 for 40 8x10 pages. Wide
variety of layout pages and types. Can include unlimited amounts of
text, captions, forwards, etc. Software is free. These are the most
professional-looking books I've seen and the price is outstanding. It
offers twice as many pages as others services, a photographic
dustcover, and cover. You can do a book with a few photos and lots
of text or a portfolio or any mix. It's a great way to publish a book
proposal.
Picaboo (www.picaboo.com): Lots of choices of page color, themes,
etc. $9.95 for 20 small pages; $29.95 for 20 8.5x11 pages hard-
bound.
Shutterfly (www.shutterfly.com): Hard-cover $29.99 for first 20
8.5x11 pages. 15 different styles with 20 layouts each. Softcover
books are $12.99 and have 20 pages with additional pages at $0.40.
You can even do a spiral bound mini-album$10 for 4x6 or $15 for
5x7.
PhotoWorks (www.photoworks.com): For $12.95 it offers a 20 page
5x7 book. Additional pages are $0.99. The 8.5x11 size is $29.95 for
20 pages, $1.99 for each additional. The hardcover album is 12x8.5
and the pages lace together so you can add as many pages as you
like whenever you like.
Winkflash (www.winkflash.com): Not only books, but also all sorts
of gifts and specialized prints, such as posters. The maximum
printing is 100 pages and extra pages are $0.50 each. You could put
a photo on the cover with rubber cement. The title is embossed.
Layout styles can include multiple photos. The prices per book are:
$26.95 for a 12x16, $18.95 for a 9x12, and $12.95 for a 6x8. Gifts
include aprons, bibs, calendars ($12.95), stretched canvas, coasters,
cutting boards, paperweights, t-shirts, tote bags, and sticky note
holders.
Here's a useful list of tips for creating monographs:
Follow the recommendations earlier in this chapter for archival printing. For
example, use archival inks and papers. The paper should also be heavy
enough to have a substantial feel.
Choose a paper surface that suits your style and, more importantly, the
subject matter being portrayed.
Decide whether you want to print on both sides of the paper. Even if you
don't, it's a good idea to print on double-sided paper because the backs of the
pages won't be discolored or have watermarks showing. Also, papers coated
on both sides will lie flatter.
Consider using binders that are premade for monographs; this will allow you
to make smaller editions at more affordable prices. These monograph-
friendly binders come in several styles and sizes and usually have space for a
title and/or cover art.
Test the layout and content of your book by first making an electronic
version. I love what FlipAlbum Pro can do in this area.
One of the simplest easiest and most affordable ways to create a book is
through an online service. Adobe Photoshop Album, Apple iPhoto, and
Apple Aperture offer this option, among other products.
You can also send your printed pages to a custom book bindery, which will
stitch the pages together and bind the book in leather, canvas, linen, or some
other traditional and professional-looking material. Prices for this service
range all over the map.
Many artists, and especially fine-art photographers, have small digital offset press
books made of their work. They generally print around 500 to 1,000 copies, and
the cost of printing averages around $15 per book. These artists then sell these
books at the art fairs, festivals, and galleries where they exhibit their work, and
often also make them available online. At an average retail price of $25 to $35,
these books are an affordable way for people to start collecting an artist's work and
showing it to friends. Over time, making these books available also builds mailing
lists and repeat orders for both larger art prints and monographs. Most of the books
I've seen in this category are either 8.5x11 or smaller, contain 25 to 50 images, and
are printed on good varnished stock.
12.2.5. Make Self-Promoting Postcards
No one will hire or buy from a photographer they don't know about, so it is
essential that you have something impressive that you can leave behind. If you
have an event coming up, it is also a good idea to let everyone who has shown an
interest in your work and career know about it. Furthermore, you'll be giving them
something that they can hang on the wall, the refrigerator, or the company soft
drink machine to remember you by.
There are two ways you can make promotional cards: print them yourself, as
shown in Figure 12-24, or have them commercially printed. Either way, you'll be
designing and picking the subject matter yourself.
Figure 12-24. A self-printed promotional card.
12.2.5.1. Printing the card yourself
When printing your promotional cards, you'll want to use an inexpensive paper, but
one that shows off the photograph well. Personally, I'm more concerned about cost
than archival propertiesobviously, you don't want to give away the same quality of
photograph you'd be printing as a limited-edition print. Of course, you could also
argue that the more you are collected, the more you will be remembered.
Of course, if the time you spend printing your own cards keeps you from a more
profitable endeavor, it's not a smart idea. However, by and large, the real advantage
of printing my own cards lies in the fact that I can print an unlimited number of
different subjects for the same amount of time and money.
A Six-Color Printer
Consider buying an inexpensive six-color printer that prints a very good
photo-quality image and equipping it with a Continuous Inking System
(CIS) just for printing promotional work. Printing from 4 oz. bottles of
ink, I can print hundreds of pages of glossy photos before I have to replace
the ink.
12.2.5.2. Having the card offset-printed
Offset-printed cards tend to look a bit more professional just by the fact that, well,
they are offset printed. If you go this route, remember that offset printers work
from CMYK images. The easiest way to see what will happen when the image is
converted to CMYK is simply to duplicate the image in Photoshop, convert the
duplicate to CMYK, and compare it side-by-side with the original.
A quick look through Sunshine Artist or Photo District News (PDN) magazines
will supply you with several sources for printing promotional cards and postcards.
To give you a quick reference and an idea of what's available and what pricing is
like, here's a short list of card printing services:
Postcard Press
At press time, 1,000 4x6 cards were priced at $145; 1,000 5x7 cards were
$219. Both prices are for full color front, black printing on reverse.
PSPrint
This company prints all sorts of promotional materials including calendars,
stickers, and postcards. Several of the galleries in my area employ PSPrint's
services steadily. Postcards can be ordered in gloss or matte surfaces, and
are available in 4x6, 5x8, and 6x9. Again, at press time, 1,000 full-color
front 5x8 cards were $191.25 with a 10-day turnaround.
The Great American Printing Company
At press time, this company printed 4x6 cards only, at a cost of $99.50 for
500 cards. Other items such as extra text to the back, new type to the front,
etc., can be added for an additional price. You can download an order form
from the web site.