Netframwork 2.0 (phần 3) ppt
Bạn đang xem bản rút gọn của tài liệu. Xem và tải ngay bản đầy đủ của tài liệu tại đây (516.52 KB, 50 trang )
75 Lesson 2: Creating and Configuring Command and Text Display Controls
// C#
// Opens a new Form
ShippingForm.Show();
// Opens a new web site in Internet Explorer
System.Diagnostics.Process.Start("www.microsoft.com");
// Set the LinkVisited property to true
linkLabel1.LinkVisited = true;
Quick Check
1. What events of the Button control can be used to respond to mouse clicks?
2. When would you use a LinkLabel control instead of a Label control?
Quick Check Answers
1. The Click event responds to the right button click, and the MouseDown
event can be used to respond to other button clicks.
2. The Label control is designed primarily to label other controls on a form.
The LinkLabel control can label other controls but also exposes a link to the
user that can open a new form or Web page.
Lab: Practice with Command and Text Display Controls
In this lab, you will practice some of the techniques covered in this lesson. You will
add a LinkLabel to a form and configure it to open a dialog form that asks the user to
input his name.
� Exercise 1: Creating a Dialog Form
1. From the Toolbox, drag a LinkLabel control onto the form.
2. In the Property Grid, set the Text property to Open Form.
3. From the Project menu, choose Add Windows Form and add a new Windows
Form to your project named Form2.
4. In the Designer, drag two Button controls onto Form2. Set the Text property of these
buttons to Accept and Cancel.
5. Set the DialogResult property of the AcceptButton to OK and the DialogResult
property of the Cancel button to Cancel.
6. From the Toolbox, drag two TextBox controls onto the form.
7. C# only: Set the Modifiers property of each TextBox control to Internal.
76 Chapter 2 Configuring Controls and Creating the User Interface
8. From the Toolbox, drag two Label controls onto the form and place each near a
TextBox control.
9. Set the Text properties of the Label controls to &First Name and &Last Name.
10. Set the UseMnemonic property for each label to True.
11. In the Properties window, set the TabIndex property as shown.
Control Tab Index Setting
Label1 0
TextBox1 1
Label2 2
TextBox2 3
Button1 4
Button2 5
12. In the Designer, choose the tab for Form1. Double-click the LinkLabel control to
create a LinkLabel.LinkClicked event handler. Add the following code:
' VB
Dim aResult As DialogResult
aResult = Form2.ShowDialog()
If aResult = Windows.Forms.DialogResult.OK Then
MsgBox("Your name is " & Form2.TextBox1.Text & " " & _
Form2.TextBox2.Text)
End If
LinkLabel1.LinkVisited = True
// C#
DialogResult aResult;
Form2 aForm = new Form2();
aResult = aForm.ShowDialog();
if (aResult == System.Windows.Forms.DialogResult.OK)
{
MessageBox.Show("Your name is " + aForm.textBox1.Text + " " +
aForm.textBox2.Text);
}
linkLabel1.LinkVisited = true;
13. Press F5 to run the application. Click the LinkLabel to open the form. Test the
access keys and both the Accept and the Cancel buttons.
77 Lesson 2: Creating and Configuring Command and Text Display Controls
Lesson Summary
■ The Button control is the primary command control for the user interface. The
Button_Click event handler is the method that is executed when the button is
clicked. The button can respond to other mouse button clicks via the Mouse-
Down event.
■ The FlatAppearance property governs how a Button looks and behaves when the
FlatStyle property is set to Flat.
■ By setting the DialogResult value of a Button control, you can create a Cancel or
Accept button. You can then examine the result of the form as you would a stan-
dard dialog box.
■ The Label control conveys read-only information to the user. You can use the Label
to define an access key by setting the Text, TabOrder, and UseMnemonic properties.
■ The LinkLabel control allows you to create Web-style links in your user interface.
The LinkColor, ActiveLinkColor, and VisitedLinkColor properties control the color
of the link in the LinkLabel control. You write code to open new forms or Web
pages in the LinkLabel.LinkClicked event handler.
Lesson Review
The following questions are intended to reinforce key information presented in this
lesson. The questions are also available on the companion CD if you prefer to review
them in electronic form.
NOTE Answers
Answers to these questions and explanations of why each answer choice is right or wrong are
located in the “Answers” section at the end of the book.
1. Which Button events can be used to respond to mouse clicks? (Choose all that
apply.)
A. Button.Click
B. Button.LinkClicked
C. Button.MouseDown
D. Button.MouseOver
78 Chapter 2 Configuring Controls and Creating the User Interface
2. Which property does not control how a Button looks or behaves when the Flat-
Style property is set to Flat?
A. FlatAppearance.MouseOverBackColor
B. FlatAppearance.MouseDownBackColor
C. FlatAppearance.BorderSize
D. FlatAppearance.Text
3. Which is necessary to define an access key using a Label control? (Choose all
that apply.)
A. Set the TabOrder so that the control for the access key is immediately after
the Label.
B. Set the UseMnemonic property to True.
C. Set the Text property with an ampersand to indicate the access key.
D. Set the CausesValidation property to True.
4. Which properties can be used to define the color behavior of the LinkLabel con-
trol? (Choose all that apply.)
A. ActiveLinkColor
B. LinkLabel_LinkClicked
C. VisitedLinkColor
D. LinkBehavior
79 Lesson 3: Creating and Configuring Text Edit Controls
Lesson 3: Creating and Configuring Text Edit Controls
This lesson describes how to create and configure text edit controls. TextBox controls
are used to both display text to the user and receive textual input. The MaskedTextBox
allows you to display text in a preset format and validate user input against a format.
In this lesson, you will learn how to configure the TextBox and MaskedTextBox con-
trols to receive and display user input.
After this lesson, you will be able to:
■ Configure the TextBox control to receive editable, multiline input from the user.
■ Configure the MaskedTextBox control for formatted text and data entry.
Estimated lesson time: 30 minutes
The TextBox Control
The TextBox control is the primary control used to receive textual input from the user.
The TextBox allows you to receive text from and display text to the user. You can create
text boxes that can display multiline text, and you can create text boxes that display
a password character instead of the actual text.
The TextBox control exposes several properties that allow you to configure its behav-
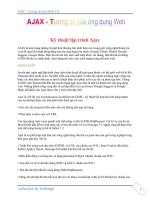
ior. Important properties of the TextBox control are shown in Table 2-6.
Table 2-6 Important Properties of the TextBox Control
Property Description
AutoCompleteCustomSource Holds a string collection that contains auto-com-
plete data when the AutoCompleteMode is set to a
value other than None and the AutoCompleteSource
is set to Custom.
AutoCompleteMode Sets the AutoComplete mode of the control. Possi-
ble values are None, Append, Suggest, or Suggest-
Append.
AutoCompleteSource Sets the source for auto-complete data. Can be set
to any of a variety of system sources or to a custom
source provided by the AutoCompleteCustomSource
property.
80 Chapter 2 Configuring Controls and Creating the User Interface
Table 2-6 Important Properties of the TextBox Control
Property Description
CharacterCasing Indicates the casing of the characters in the Text-
Box control. Possible values are Normal, Upper, or
Lower.
Lines Returns a string array representing the individual
lines of the text box. This property is most useful
when MultiLine is set to True. Note that a line is
defined as a string that is terminated by a carriage
return character and does not refer to visible lines
in the UI as might be seen when the WordWrap
property is set to True.
MaxLength Specifies the maximum number of characters that
can be entered into the TextBox.
MultiLine Indicates whether the TextBox can contain only a
single line of text or multiple lines.
PasswordChar Sets the password character to be displayed in the
Textbox instead of the actual characters of the text.
ReadOnly Indicates whether the text in the TextBox can be
edited.
ScrollBars Indicates the scroll bars that will be displayed in
the TextBox when the MultiLine property is set to
True.
Text Gets or sets the text contained in the TextBox.
UseSystemPasswordChar Indicates whether to use the system password
instead of the actual text character in the TextBox.
WordWrap Indicates whether words automatically wrap from
one line to the next when the MultiLine property is
set to True.
The main purpose of the TextBox control is to provide a container for editable text.
Users can input text into text boxes or edit textual data the application displays. The
81 Lesson 3: Creating and Configuring Text Edit Controls
text held by the TextBox property is accessible via the Text property. The text in the
TextBox is editable if the ReadOnly property is set to False, which is the default. If the
ReadOnly property is set to True, the user cannot edit the text displayed.
Creating a MultiLine TextBox Control
TextBox controls are single-line by default, but you can create a multiline TextBox by
setting the MultiLine property to True. This allows you to resize the TextBox vertically
as well as horizontally.
When the MultiLine property is set to True, several other properties become impor-
tant. The Lines property exposes a string array that contains the individual lines of the
TextBox. The ScrollBars property indicates whether scroll bars will be displayed for the
TextBox and, if so, whether Horizontal, Vertical, or both will be displayed. The Word-
Wrap property indicates whether words will automatically wrap from one line to the
next. Note that if the WordWrap property is set to True, horizontal scroll bars will
never appear, even if the ScrollBars property is set to Horizontal.
Creating a Password TextBox Control
You can use the PasswordChar or UseSystemPasswordChar properties to create a text
box that can receive text input but display a masking character instead of the actual
text, rendering the user input unreadable by observers. This is most commonly used
to create a text box for entering a password. If the PasswordChar property is set to a
character (for example, an asterisk [“*”]), that character will be displayed whenever
the user types a character into the text box. Note that the actual characters the user
types will be stored in the Text property—only the rendering of these characters in the
UI will change. You can also set the UseSystemPasswordChar property to True, which
will display the password character defined by the system for each character typed in
the text box. If UseSystemPasswordChar is set to True and PasswordChar is set to a char-
acter, the system password character will be used.
The MaskedTextBox Control
The MaskedTextBox control is a modified TextBox that allows you to define a preset
pattern for accepting or rejecting user input. The Mask property allows you to specify
required or optional characters, or specify whether input characters are letters or
numbers, and apply formatting for the display of strings. Important properties of the
MaskedTextBox are shown in Table 2-7.
82 Chapter 2 Configuring Controls and Creating the User Interface
Table 2-7 Important Properties of the MaskedTextBox Control
Property Description
AllowPromptAsInput Indicates whether the prompt character is valid as
input.
AsciiOnly Indicates if only ASCII characters are valid as input.
When set to True, only A–Z and a–z are accepted as
input.
BeepOnError Indicates whether the MaskedTextBox sends a system
beep for every input character it rejects.
CutCopyMaskFormat Determines whether literals and prompt characters
are included when the text is cut or copied.
HidePromptOnLeave Indicates whether prompt characters are hidden
when the MaskedTextBox loses the focus.
InsertKeyMode Gets or sets the text insertion mode for the Masked-
TextBox.
Mask Defines the input mask for the MaskedTextBox
(explained in detail in the following text).
PromptChar Gets or sets the character used for the prompt.
RejectInputOnFirstFailure Gets or sets a value indicating whether parsing of user
input stops after the first invalid character is reached.
ResetOnPrompt Indicates how an input character that matches the
prompt character should be handled.
ResetOnSpace Determines how a space input character should be
handled.
SkipLiterals Indicates whether literals in the mask should be
reentered or skipped.
TextMaskFormat Indicates whether prompt characters and literal char-
acters are included in the text returned by the Text
property.
83
0
9
L
Lesson 3: Creating and Configuring Text Edit Controls
The Mask Property
The most important property of the MaskedTextBox is the Mask property. This prop-
erty allows you to define a string that represents the required format of an input string
in the MaskedTextBox. The MaskedTextProvider associated with the MaskedTextBox
provides the parsing engine that parses the Mask format. The code characters used by
the default MaskedTextProvider are shown in Table 2-10.
Table 2-8 Elements of the Default MaskedTextProvider
Masking
Element
Description
Represents a required digit between 0 and 9.
Represents an optional digit between 0 and 9.
# Represents an optional digit between 0 and 9, or a space. Plus
(+) and minus (–) signs are also accepted.
Represents a required letter, either uppercase or lowercase (A–Z,
a–z).
? Represents an optional letter, uppercase or lowercase (A–Z, a–z).
& Represents a required character. If AsciiOnly is set to True, this
element behaves like the L element.
C Represents an optional character. If AsciiOnly is set to True, this
element behaves like the [?] element.
A, a Represents an optional alphanumeric character. If AsciiOnly is
set to True, it will accept only A–Z and a–z.
. Decimal placeholder. Represents a decimal character. The actual
character used will be the decimal character that is set by the
control’s FormatProvider.
, Thousands placeholder. Represents a thousands separator. The
actual character used will be the thousands separator that is set
by the control’s FormatProvider.
84 Chapter 2 Configuring Controls and Creating the User Interface
Table 2-8 Elements of the Default MaskedTextProvider
Masking
Element
Description
: Time separator. Represents a time separator. The actual charac-
ter used will be the time separator character that is set by the
control’s FormatProvider.
/ Date separator. Represents a date separator. The actual character
used will be the date separator that is set by the control’s Format-
Provider.
$ Currency symbol. Represents a currency symbol. The actual
character used will be the currency symbol that is set by the con-
trol’s FormatProvider.
< Shift down. Converts all following characters to lowercase.
> Shift up. Converts all following characters to uppercase.
| Disables a previous shift up or shift down.
\ Escapes a mask character, turning it into a literal character. The
double slash (\\) is the escape sequence for a backslash.
All other All other characters appear as themselves in the MaskedTextBox
characters and cannot be moved or deleted by the user.
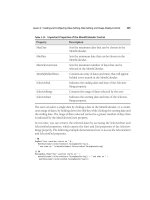
You can design a mask for the masked text box by creating a string made of characters
described in Table 2-8. Setting the Mask property of the MaskedEditBox restricts the
input that is allowed to the format determined by the mask string. Some examples of
mask strings, together with input strings and the output string that is displayed in the
control, are shown in Table 2-9.
Table 2-9 Examples of Mask Strings
Mask String Input Text Displayed Text
(999)-000-0000 1234567890 (123)-456-7890
00/00/0000 07141969 07/14/1969 – Note that the actual date
separator displayed will be determined by
the control’s FormatProvider.
85 Lesson 3: Creating and Configuring Text Edit Controls
Table 2-9 Examples of Mask Strings
Mask String Input Text Displayed Text
$99,999.00 1234567 $12,345.00 – Note that the actual cur-
rency symbol, thousands separator, and
decimal separator will be determined by
the control’s FormatProvider.
LL>L|LLL<LL abcdABCD abCdABcd
Configuring the MaskedTextBox for User Input
In addition to the Mask property, the MaskedTextBox control has several properties
that affect how the control behaves when receiving user input. The AsciiOnly property
determines if only ASCII characters are allowed as input; when set to True, it restricts
input to A–Z and a–z. Other inputs are rejected. You can set the control to notify users
when an error has been committed by setting the BeepOnError property to True. The
SkipLiterals property determines whether literal characters should be reentered by the
user (if set to False) or skipped over in the MaskedTextBox (when set to True).
The RejectInputOnFirstFailure property governs how text that is pasted into the
MaskedTextBox is handled. If a string that does not match the Mask format is pasted
into the MaskedTextBox, the MaskedTextBox will reject the entire string if the Reject-
InputOnFirstFailure is set to True. If set to False, the MaskedTextBox will accept all the
characters that match the Mask format.
The Prompt property sets the character that is displayed in the MaskedTextBox when
there is no input for a given position. The default value for the Prompt character is the
underscore character ( _ ). The AllowPromptAsInput and ResetOnPrompt properties
govern how the prompt character is treated when entered as input. If the ResetOnPrompt
property is set to True, prompt characters will be accepted, the Mask will be reset
for that character position, and the cursor will advance to the next position. If the
ResetOnPrompt property is set to False and the AllowPromptAsInput property is set
to True, then the prompt character will be processed as regular input. If both prop-
erties are set to False, the prompt character will be rejected. The ResetOnSpace prop-
erty governs the treatment of spaces in the same way that ResetOnPrompt governs
the treatment of prompt characters.
86 Chapter 2 Configuring Controls and Creating the User Interface
Manipulating Text in the MaskedTextBox
The text shown in the MaskedTextBox is not necessarily the text that is available to the
user when cutting and pasting or to the application when text is manipulated program-
matically. The CutCopyMaskFormat determines how the text in the MaskedTextBox is
treated when it is cut or copied by the user. The default value for this property is
IncludeLiterals, in which case, literals from the Mask are included when text is cut or
copied, but prompt characters are not. You can also set this property to
ExcludePromptAndLiterals, which excludes both literals and prompts; IncludePrompt,
which includes prompt characters but excludes literals; and IncludePromptAndLiter-
als, which includes both prompts and literals. The TextMaskFormat property has the
same possible values and functions in the same way with respect to the text
returned by the Text property.
Quick Check
1. How can you create a TextBox with more than one line?
2. What is the purpose of the MaskedTextBox?
Quick Check Answers
1. You can create a multiline TextBox by setting the MultiLine property to True.
2. The MaskedTextBox control is used to display a format to the user for data
entry or display, and to validate that data is input in the correct format.
Lab: Practice with Text Display Controls
In this lab, you will add additional controls to the project you created in Lesson 2. You
will add a multi-line textbox to prompt the user for an address, and you will add a
MaskedTextBox to collect a phone number.
� Exercise 1: Adding Text Display Controls
1. In Visual Studio, load the solution you completed in Lesson 2 or the completed
Lesson 2 solution located on the companion CD in the code folder.
2. In the Solution Explorer, double-click Form2 to open the Designer for Form2.
3. From the Toolbox, drag a TextBox onto the form. Drag a Label onto the form next
to the TextBox.
4. Set the Text property of the Label to Address.
87 Lesson 3: Creating and Configuring Text Edit Controls
5. Set the Multiline property of the TextBox to True and set the WordWrap property
to False. Set the ScrollBars property to Both. Resize the TextBoxt to make it large
enough to hold an address. From the Toolbox, drag a MaskedTextBox and a Label
onto the form.
6. Set the Text property of the Label to Phone Number.
7. Set the Mask property of the MaskedTextBox to (999)-000-0000.
8. C# only. Set the Modifiers property of the TextBox and MaskedTextBox to Internal.
9. In the Solution Explorer, right-click Form1 and choose View Code.
10. In the LinkLabel1_LinkClicked event handler, add the following code to the If block
beneath the code you added in Lesson 2.
' VB
MsgBox("Your address is " & Form2.TextBox3.Text)
MsgBox("Your phone number is " & Form2.MaskedTextBox1.Text)
// C#
MessageBox.Show("Your address is " + aForm.textBox3.Text);
MessageBox.Show("Your phone number is " + aForm.maskedTextBox1.Text);
11. Press F5 to run and test your application.
Lesson Summary
■ The TextBox control allows the user to enter text. The text that is entered can be
accessed through the Text property.
■ TextBox controls can be single-line or multiline, depending on the value of the
MultiLine property.
■ The MaskedTextBox control can be configured for formatted text display and entry.
■ The Mask property determines the formatting for text in MaskedTextBox controls.
Lesson Review
The following questions are intended to reinforce key information presented in this
lesson. The questions are also available on the companion CD if you prefer to review
them in electronic form.
NOTE Answers
Answers to these questions and explanations of why each answer choice is right or wrong are
located in the “Answers” section at the end of the book.
88 Chapter 2 Configuring Controls and Creating the User Interface
1. Which of the following properties of the TextBox control should be set to the
value indicated to ensure that the TextBox can accommodate a string 10,000
characters in length?
A. MultiLine = True
B. WordWrap = True
C. ScrollBars = True
D. MaxLength = 10000
2. Which of the following Mask property settings will configure a MaskedTextBox
for the entry of a social security number, which is displayed as three digits, fol-
lowed by a hyphen, then two digits, followed by another hyphen and then finally
four digits?
A. 999-99-9999
B. 999/00/0000
C. 000-00-0000
D. 000/00/0000
3. You have a MaskedTextBox with the Mask property set to 000-0000 to indicate
a 7-digit phone number. You want users to be able to cut and paste the entire
string, including the ‘-’ character, but when the program accesses the Masked-
TextBox you want to exclude the ‘-’ character. Which of the following will con-
figure the MaskedTextBox to provide this functionality?
A. Set the CutCopyMaskFormat property to ExcludePromptAndLiterals and
TextMaskFormat to IncludeLiterals.
B. Set the CutCopyMaskFormat property to IncludeLiterals and TextMaskFormat
to ExcludePromptAndLiterals.
C. Set the CutCopyMaskFormat property to ExcludePromptAndLiterals and
TextMaskFormat to IncludePrompt.
D. Set the CutCopyMaskFormat property to IncludeLiterals and TextMaskFormat
to IncludeLiterals.
89 Chapter 2 Review
Chapter Review
To further practice and reinforce the skills you learned in this chapter, you can perfom
the following tasks:
■ Review the chapter summary.
■ Review the list of key terms introduced in this chapter.
■ Complete the case scenarios. These scenarios set up real-world situations involv-
ing the topics of this chapter and ask you to create a solution.
■ Complete the suggested practices.
■ Take a practice test.
Chapter Summary
■ Controls are visual components that contain functionality designed to enable
common tasks. You can add controls to the designer by dragging them from the
Toolbox.
■ The Visual Studio IDE contains several mechanisms for managing the layout of
controls on your form, including:
❑ The Properties window.
❑ Layout toolbar.
❑ Snaplines.
❑ Control modification in the designer using the mouse.
❑ Anchor and Dock properties.
■ The Button control is designed to accept user commands and execute code when
clicked. You can use the Button_Click and Button_MouseDown events to respond
to user clicks.
■ Label controls are primarily used to display read-only text and can be used to
create access keys for other controls.
■ The LinkLabel control allows you to create Web-style links that open Web pages
or other forms when clicked.
■ The TextBox control is used to receive user input as well as to display text. TextBox
controls can be either single-line or multiline.
90 Chapter 2 Review
■ The MaskedTextBox enables you to specify a format for text display or user input.
It enables you to configure how that format restricts user input and how the for-
mat is treated during user cut and copy operations.
Key Terms
Do you know what these key terms mean? You can check your answers by looking up
the times in the glossary at the end of the book.
■ access key
■ event handler
■ mask
■ snaplines
Case Scenarios
In the following case scenarios, you will apply what you’ve learned about how to use
controls to design user interfaces. You can find answers to these questions in the
“Answers” section at the end of this book.
Case Scenario 1: Designing a Simple User Interface
Your organization, Humongous Insurance, is creating an application to help custom-
ers calculate the future value of bonds and other investments that will be held for a
number of years. As a new employee, you are assigned a simple task: create the front-
end interface and prepare the user input to be processed by the calculation engine
that will be supplied by another development team. You begin by reviewing the tech-
nical requirements.
Technical Requirements
Create a user interface that accepts the following information from users in a simple,
straightforward way:
■ Current investment value
■ Assumed interest rate
■ Time span in years
91 Chapter 2 Review
Questions
Answer the following questions for your manager:
1. How can you provide an easy-to-understand interface that provides visual cues
to the user, clearly indicates currency when appropriate, and accepts user input
for all three of the aforementioned factors?
2. How can you provide a keyboard-based system of navigation as an alternative to
mouse use?
Case Scenario 2: Designing a User Interface
Your company has been contracted to design and implement a reservation system for
a ski resort and chalet. You have been handed the job of creating a page that is used
to enter and display client data. You begin by reviewing the technical requirements.
Technical Requirements
Create a user interface that accepts the following information from users in a simple,
straightforward way:
■ First and Last Name.
■ Address.
■ City, state, and Zip Code.
■ Credit card number.
■ A general area for comments about the client.
■ At the bottom of the technical requirements section is a note from the head of
security that reads, “We need to be extra careful about our customer credit card
information. Make sure it isn’t displayed with the rest of the data.”
Questions
Answer the following questions for your manager:
1. What controls are most appropriate for the design of the user interface?
2. How can you keep customer credit card data from being displayed but still
enable its entry?
92 Chapter 2 Review
Suggested Practices
To master the Add and configure a Windows Forms control objective, you must com-
plete the following practices, as well as the practices in Chapter 3.
Add and Configure a Windows Forms Control
For this task, complete practices 1, 2, and 3.
■ Practice 1 Build an application that performs simple arithmetic calculation and
displays the result to the user.
■ Practice 2 Create a front-end for a hotel reservation system that collects relevant
data about the customer.
■ Practice 3 Design MaskedTextBox masks that create formats appropriate for
apartment numbers, monthly bank deposits, dates and times, and other real-
world examples.
Take a Practice Test
The practice tests on this book’s companion CD offer many options. For example, you
can test yourself on just the content covered in this chapter, or you can test yourself on
all the 70-526 certification exam content. You can set up the test so that it closely sim-
ulates the experience of taking a certification exam, or you can set it up in study mode
so that you can look at the correct answers and explanations after you answer each
question.
MORE INFO Practice tests
For details about all the practice test options available, see the “How to Use the Practice Tests” sec-
tion in this book’s Introduction.
Chapter 3
Advanced Windows Forms Controls
This chapter continues where Chapter 2, “Configuring Controls and Creating the
User Interface,” left off with an in-depth examination of Windows Forms controls. In
this chapter, you will learn how to create and configure controls for displaying lists,
setting values and dates, displaying images, browsing the Web, and notifying the user
of background processes. You will also learn how to create access keys for controls
without using the Label control as shown in Chapter 2.
Exam objectives in this chapter:
■ Add and configure a Windows Forms control.
❑ Provide a list of options on a Windows Form by using a ListBox control, a
ComboBox control, or a CheckedListBox control.
❑ Configure the layout and functionality of a Windows Form to display a list
of items.
❑ Implement value-setting controls on a Windows Form.
❑ Configure a WebBrowser control.
❑ Add and configure date-setting controls on a Windows Form.
❑ Display images by using Windows Forms controls.
❑ Configure the NotifyIcon component.
❑ Create access keys for Windows Forms controls.
Lessons in this chapter:
■ Lesson 1: Creating and Configuring List-Display Controls . . . . . . . . . . . . . . . . 95
■ Lesson 2: Creating and Configuring Value-Setting, Date-Setting,
and Image-Display Controls . . . . . . . . . . . . . . . . . . . . . . . . . . . . . . . . . . . . . . . . . . 119
■ Lesson 3: Configuring the WebBrowser Control and the NotifyIcon
Component and Creating Access Keys . . . . . . . . . . . . . . . . . . . . . . . . . . . . . . . . 133
93
94 Chapter 3 Advanced Windows Forms Controls
Before You Begin
To complete the lessons in this chapter, you must have:
■ A computer that meets or exceeds the minimum hardware requirements listed in
the “Introduction” at the beginning of the book.
■ Microsoft Visual Studio 2005 Professional Edition installed on your computer.
■ An understanding of Microsoft Visual Basic or C# syntax and familiarity with
the .NET Framework.
■ Completed Chapter 1, “Windows Forms and the User Interface,” or have a good
understanding of Windows Forms, how to add controls to forms, and how to
use the Visual Studio Integrated Development Interface (IDE).
Real World
Matt Stoecker
When I am creating a user interface (UI), the large variety of Windows controls
that are available for use dramatically streamlines the UI creation process. Built-
in controls for displaying lists and images and setting dates and other values
allow me to spend less time on UI coding tasks and more time developing the
application’s custom functionality.
95 Lesson 1: Creating and Configuring List-Display Controls
Lesson 1: Creating and Configuring List-Display Controls
A common scenario in user interface design is to present lists of data to users and to
allow them to select items from that list. Visual Studio provides several list-based
controls that allow a variety of presentation options. In this lesson, you will learn
about the basic list-based controls, such as the ListBox, ComboBox, and CheckedList-
Box, as well as more specialized list-based controls such as ListView, TreeView,
NumericUpDown, and DomainUpDown. You will learn how to display lists and select
items from lists.
After this lesson, you will be able to:
■ Programmatically determine which item in a list appears in a given position.
■ Add or remove items from a list of items in a list-based control.
■ Bind a list-based control to a data source.
■ Sort list data.
■ Display data in a drop-down combo box.
■ Select one or more items from a pre-defined list.
■ Use the ListView control to display a list of items with icons.
■ Use the TreeView control to display a list of items in a hierarchical view.
■ Configure the DomainUpDown control to display a list of strings.
■ Configure the NumericUpDown control to display a list of numbers.
Estimated lesson time: 60 minutes
Overview of List-Based Controls
The basic list-based controls are the ListBox, ComboBox, and CheckedListBox controls.
Although differing somewhat in appearance and functionality, each of these controls
organizes and presents lists of data in the same way, and each contains an Items col-
lection that organizes the items contained in one of these controls.
The Items collection is basically a collection of objects. Although these objects are
often strings, they do not have to be. If a collection does contain a string, however, the
string representation of the object will be displayed in the control.
96 Chapter 3 Advanced Windows Forms Controls
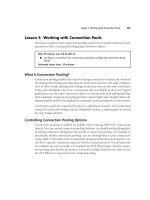
ListBox Control
The ListBox control is the simplest of the list-based controls. It serves primarily to dis-
play a simple list of items in an easy-to-navigate user interface. Users can select one or
more items. Table 3-1 describes the important properties of the ListBox control.
Table 3-1 Important Properties of the ListBox Control
Property Description
DataSource Sets the source for data binding in this control.
DisplayMember Represents the data member that is displayed in this
control.
FormatString Specifies a formatting string that will be used to format
the entries in the control if FormattingEnabled is set to
True.
FormattingEnabled Determines whether the entries in the control are format-
ted using the FormatString.
Items Returns the collection of items contained in this control.
MultiColumn Indicates whether this item shows multiple columns of
items or only a single item.
SelectedIndex Gets the index of the selected item or, if the SelectionMode
property is set to MultiSimple or MultiSelect, returns any
selected index.
SelectedIndices Returns a collection of all selected indexes.
SelectedItem Returns the selected item or, if the SelectionMode property
is set to MultiSimple or MultiSelect, returns any selected
item.
SelectedItems Returns a collection of all selected items.
SelectedValue In a data-bound control, returns the value associated with
the selected item. If the control is not data bound, or, if
the ValueMember is not set, this property returns the
ToString value of the selected item.
97 Lesson 1: Creating and Configuring List-Display Controls
Table 3-1 Important Properties of the ListBox Control
Property Description
SelectionMode Determines how many items can be selected in a ListBox.
Can be set to None, Single, MultiSimple, or MultiExtended.
MultiSimple allows the selection of multiple objects, and
MultiExtend allows the use of the Shift and Ctrl keys when
making multiple selections.
ValueMember Indicates the data member that will provide the values for
the ListBox.
ComboBox Control
The ComboBox control is similar to the ListBox control, but, in addition to allowing the
user to select items from a list, it provides a space for a user to type an entry as well as
select items from a list. Additionally, the ComboBox can be configured to either display
a list of options or provide a drop-down list of options. Table 3-2 details the important
properties of the ComboBox control.
Table 3-2 Important Properties of the ComboBox Control
Property Description
DataSource Sets the source for data binding in this control.
DisplayMember Represents the data member that is displayed in this con-
trol.
DropDownHeight Sets the maximum height for the drop-down box.
DropDownStyle Determines the style of the combo box. Can be set to Sim-
ple, which is similar to a ListBox; DropDown, which is the
default; or DropDownList, which is similar to DropDown,
but does not allow the user to type a new value.
DropDownWidth Sets the width of the drop-down section of the combo
box.
FormatString Specifies a formatting string that will be used to format the
entries in the control if FormattingEnabled is set to True.
98 Chapter 3 Advanced Windows Forms Controls
Table 3-2 Important Properties of the ComboBox Control
Property Description
FormattingEnabled Determines whether the entries in the control are format-
ted using the FormatString.
Items Returns the collection of items contained in this control.
SelectedIndex Gets the index of the selected item, or, if the SelectionMode
property is set to MultiSimple or MultiSelect, returns any
selected index.
SelectedItem Returns the selected item, or, if the SelectionMode property
is set to MultiSimple or MultiSelect, returns any selected
item.
SelectedValue In a data-bound control, returns the value associated with
the selected item. If the control is not data bound, or, if the
ValueMember is not set, this property returns the ToString
value of the selected item.
ValueMember Indicates the data member that will provide the values for
the ListBox.
CheckedListBox Control
The CheckedListBox displays a list of items to users and allows them to select multiple
items by checking boxes that are displayed next to the items. Any number of items can
be checked, but only one item can be selected at a time. You can retrieve a collection
that represents the checked items by accessing the CheckedItems collection, and you
can get a collection of the checked indexes by accessing the CheckedIndices collection.
Table 3-3 details the important properties of the CheckedListBox control.
Table 3-3 Important Properties of the CheckedListBox Control
Property Description
CheckedIndices Returns a collection that represents all of the checked
indexes.
CheckedItems Returns a collection that exposes all of the checked items
in the control.
99 Lesson 1: Creating and Configuring List-Display Controls
Table 3-3 Important Properties of the CheckedListBox Control
Property Description
FormatString Specifies a formatting string that will be used to format the
entries in the control if FormattingEnabled is set to True.
FormattingEnabled Determines whether the entries in the control are format-
ted using the FormatString.
Items Returns the collection of items contained in this control.
MultiColumn Indicates whether this control shows multiple columns
of items or only a single item.
SelectedIndex Gets the index of the selected item, or, if the Selection-
Mode property is set to MultiSimple or MultiSelect, it can
return any selected index.
SelectedItem Returns the selected item, or, if the SelectionMode prop-
erty is set to MultiSimple or MultiSelect, it can return any
selected item.
You can set an item to be checked or unchecked by calling the SetItemChecked method
as shown below:
' VB
CheckedListBox.SetItemChecked(0, True)
// C#
checkedListBox.SetItemChecked(0, true);
Likewise, you can use the SetItemCheckState method to set the CheckState of an item:
' VB
CheckedListBox.SetItemCheckState(0, CheckState.Indeterminate)
// C#
checkedListBox.SetItemCheckState(0, CheckState.Indeterminate);
Adding Items to and Removing Items from a List-Based Control
You can add or remove items to a list-based control through either the designer at
design time or code at run time.