Netframwork 2.0 (phần 8) pot
Bạn đang xem bản rút gọn của tài liệu. Xem và tải ngay bản đầy đủ của tài liệu tại đây (516.68 KB, 50 trang )
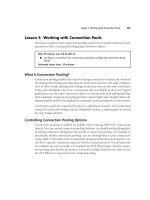
Lesson 5: Performing Transactions by Using the Transaction Object 325
1. How do you create a new transaction?
A. Assign a transaction variable the return value of the Connection.Begin-
Transaction method.
B. Declare a new instance of the Transaction class.
C. Call the Command.CreateTransaction method.
D. Declare a new Command.Transaction object.
2. What is the main purpose of a transaction?
A. To validate that multiple commands complete successfully
B. To handle exceptions that may occur on the database during command
execution
C. To abort the outcome of an executed command and return data to the state
it was in prior to the transaction
D. To provide an option to abort the outcome of executed commands and
return data to the state it was in prior to the transaction
3. What is the difference between a local transaction and a distributed transaction?
A. Local transactions are performed on a single database table, whereas dis-
tributed transactions are performed on multiple database tables.
B. Local transactions are performed on a single database, whereas distributed
transactions are performed on multiple databases on the same server.
C. Local transactions are performed on a single database server, whereas dis-
tributed transactions can be performed across multiple database servers.
D. Local transactions are performed on a database on the local machine,
whereas distributed transactions are performed on a database on a remote
machine.
326 Chapter 6 Review
Chapter Review
To further practice and reinforce the skills you learned in this chapter, you can per-
form the following tasks:
■ Review the chapter summary.
■ Complete the case scenarios. These scenarios set up real-world situations involv-
ing the topics of this chapter and ask you to create a solution.
■ Complete the additional practices.
■ Take a practice test.
Chapter Summary
■ SQL statements and stored procedures can be run using provider-specific Command
objects.
■ Data returned by Command objects can be accessed through provider-specific
DataReader objects.
■ Command objects have parameter collections that can contain one or more
parameters for executing parameterized queries and stored procedures.
■ BLOB data can be saved and retrieved from a database using DataReaders and
Stream objects.
■ Bulk copy operations can be performed using the SqlBulkCopy object as well as
by executing a SQL BULK INSERT statement.
■ Commands can be executed within the context of a local transaction, or a com-
mand can be enlisted in a distributed transaction.
Key Terms
■ BLOB
■ parameter
■ transaction
327 Chapter 6 Review
Case Scenarios
In the following case scenarios, you will apply what you’ve learned about working
with data in a connected environment. You can find answers to these questions in the
“Answers” section at the end of this book.
Case Scenario 1: Troubleshooting a Non-Performing Application
You’ve been contracted by The Phone Company to investigate why their Customer
Relationship Management (CRM) application is running slow, causing support techs
to spend an unreasonable amount of time waiting for queries to execute. After several
days of analyzing their code base and backend database, you come to the conclusion
that the lack of performance is due to the exponential increase of their customer base,
which is causing too many records to be fetched when running queries that were not
designed with scalability in mind. You also notice the archiving utility is constantly
running, moving individual records from current to history.
List the potential improvements you can make to the application.
Case Scenario 2: Preventing the Inventory System from Selling
Unavailable Products
Your biggest customer, Wide World Importers, is now selling items from many new
manufacturers around the globe. Their system is set up to forward orders to the cor-
rect manufacturers if local warehouses are out of stock so items can be drop-shipped
to the proper customers. The main problem this poses is that they seem to be forward-
ing orders for items that are not in stock or have longer than acceptable lead times,
and it’s causing customers to become extremely upset.
Given that each manufacturer exposes its inventory information and projected man-
ufacture date for new inventory, what modifications can you make to the Wide World
Importers sales application to remedy this problem?
328 Chapter 6 Review
Suggested Practices
To gain further knowledge on the subject of working with data in a connected envi-
ronment, complete the following practices:
■ Practice 1 Create an application that saves data to the Northwind Employees
table and allows you to select a picture from your hard drive to save in the Photo
column.
■ Practice 2 Create an application that queries the Northwind Customers table
and has separate commands to return data based on CompanyName, City, or
PostalCode.
■ Practice 3 Create an application that bulk copies all Northwind Orders, which
have already shipped, into a ShippedOrders table.
Take a Practice Test
The practice tests on this book’s companion CD offer many options. For example, you
can test yourself on just the content covered in this chapter, or you can test yourself on
all the 70-526 certification exam content. You can set up the test so that it closely sim-
ulates the experience of taking a certification exam, or you can set it up in study mode
so that you can look at the correct answers and explanations after you answer each
question.
MORE INFO Practice tests
For details about all the practice test options available, see the “How to Use the Practice Tests” sec-
tion in this book’s Introduction.
Chapter 7
Create, Add, Delete, and Edit Data
in a Disconnected Environment
This chapter describes how to work with data loaded from a database or XML docu-
ment into your application. ADO.NET provides several objects, such as DataSet and
DataTable objects, for caching data in applications so that you can disconnect from
the database and work with the data in your application and then reconnect when
you are ready to save your updates back to the data source.
Exam objectives in this chapter:
■ Create, add, delete, and edit data in a disconnected environment.
❑ Create a DataSet graphically.
❑ Create a DataSet programmatically.
❑ Add a DataTable to a DataSet.
❑ Add a relationship between tables within a DataSet.
❑ Navigate a relationship between tables.
❑ Merge DataSet contents.
❑ Copy DataSet contents.
❑ Create a typed DataSet.
❑ Create DataTables.
❑ Manage data within a DataTable.
❑ Create and use DataViews.
❑ Represent data in a DataSet by using XML.
❑ Use the OleDbDataAdapter object to access an ADO Recordset or Record.
❑ Generate DataAdapter commands automatically by using the Command-
Builder object.
329
330 Chapter 7 Create, Add, Delete, and Edit Data in a Disconnected Environment
❑ Generate DataAdapter commands programmatically.
❑ Populate a DataSet by using a DataAdapter.
❑ Update a database by using a DataAdapter.
❑ Resolve conflicts between a DataSet and a database by using a DataAdapter.
❑ Respond to changes made to data at the data source by using DataAdapter
events.
❑ Perform batch operations by using DataAdapters.
Lessons in this chapter:
■ Lesson 1: Creating DataSet Objects. . . . . . . . . . . . . . . . . . . . . . . . . . . . . . . . . . . 332
■ Lesson 2: Creating DataTable Objects. . . . . . . . . . . . . . . . . . . . . . . . . . . . . . . . . 349
■ Lesson 3: Creating DataAdapter Objects . . . . . . . . . . . . . . . . . . . . . . . . . . . . . . 358
■ Lesson 4: Working with Data in DataTable Objects . . . . . . . . . . . . . . . . . . . . . 373
■ Lesson 5: Working with XML in DataSet Objects. . . . . . . . . . . . . . . . . . . . . . . 387
■ Lesson 6: Creating and Using DataView Objects . . . . . . . . . . . . . . . . . . . . . . . 396
Before You Begin
To complete the lessons in this chapter, you must have:
■ A computer that meets or exceeds the minimum hardware requirements listed in
the “Introduction” at the beginning of the book.
■ Microsoft Visual Studio 2005 Professional Edition installed on your computer.
■ An understanding of Microsoft Visual Basic or C# syntax and familiarity with
the Microsoft .NET Framework.
■ Available data sources, including Microsoft SQL Server (SQL Server Express Edi-
tion is acceptable), the Northwind sample database for SQL Server, and the
Nwind.mdb Microsoft Office Access database file.
■ A basic understanding of relational databases.
■ Completed the exercises or understood the concepts presented in Chapter 5,
“Configuring Connections and Connecting to Data,” and Chapter 6, “Working
with Data in a Connected Environment.”
Before You Begin 331
Real World
Steve Stein
I always spent way too much time whenever I needed to create objects to cache
data in my applications. With DataSet objects, the standard database structures
are already there, so quickly creating a representative object model for my data
is really easy.
332 Chapter 7 Create, Add, Delete, and Edit Data in a Disconnected Environment
Lesson 1: Creating DataSet Objects
DataSet objects are available in the System.Data namespace and are used as an in-
memory cache of the data being used in your application. DataSet objects contain
DataTable objects that can be related with DataRelation objects much like the struc-
ture of a relational database.
After this lesson, you will be able to:
■ Create a DataSet graphically.
■ Create a typed DataSet.
■ Create a DataSet programmatically.
■ Add a DataTable to a DataSet.
■ Add a relationship between tables within a DataSet.
■ Navigate a relationship between tables.
Estimated lesson time: 45 minutes
DataSet Objects
Datasets are objects that you use to temporarily store the data that is used in your
application. There are basically two distinct kinds of DataSet objects: typed, and
untyped. Untyped DataSets are the standard generic instances of the DataSet class
where you manually build up the DataSet definition (schema) by creating DataTable
objects (untyped DataTables) and adding them to the Tables collection in the DataSet.
You can access untyped DataTable and DataColumn objects through their collection
indices. Typed DataSet objects derive their schema from an .xsd file and contain
explicitly typed collections (such as a specific CustomersTable object).
There are three distinct ways to create DataSet objects in Visual Studio:
■ Declare a new DataSet object programmatically in the code editor, which results
in an empty DataSet that requires creating DataTable and optional DataRelation
objects to be added to the DataSet.
■ Use design-time tools such as the DataSet Designer and the Data Source Con-
figuration Wizard which assists in the creation of typed DataSet objects by step-
ping you through the process of selecting or creating a data connection and
then allowing you to select database objects available from that connection to
build up a typed DataSet and have most, if not all, of the necessary code gener-
ated for you.
Lesson 1: Creating DataSet Objects 333
■ Drag a DataSet object from the Toolbox onto a form and use the Table and Col-
umn Collection editors to build up the schema of your DataSet.
This lesson describes how to create DataSet objects using each of these methods.
NOTE Generating DataSet objects
You can also create DataSet objects based on configured DataAdapter objects. This will be covered
in Lesson 3, “Creating DataAdapter Objects,” of this chapter.
Creating DataSet Objects Programmatically
Create DataSet objects by declaring instances of them. You can optionally provide the
name of the DataSet. For example, the following code example creates a new DataSet
named NorthwindDataSet:
' VB
Dim NorthwindDataset As New DataSet ("NorthwindDataset")
// C#
DataSet NorthwindDataset = new DataSet ("NorthwindDataset");
Adding DataTable Objects to a DataSet
After declaring a new DataSet, you need to add DataTable objects to it to actually hold
the data in your application. The following code sample shows how to add a Customers-
Table and OrdersDataTable to the NorthwindDataset:
' VB
' Create some DataTables
Dim CustomersTable As New DataTable
Dim OrdersDataTable As New DataTable
' Add DataTables to the Dataset's Tables collection.
NorthwindDataset.Tables.Add(CustomersTable)
NorthwindDataset.Tables.Add(OrdersDataTable)
// C#
// Create some DataTables
DataTable CustomersTable = new DataTable ();
DataTable OrdersDataTable = new DataTable ();
// Add DataTables to the Dataset's Tables collection.
NorthwindDataset.Tables.Add(CustomersTable);
NorthwindDataset.Tables.Add(OrdersDataTable);
334 Chapter 7 Create, Add, Delete, and Edit Data in a Disconnected Environment
Adding a Relationship Between Tables in a DataSet
After adding tables to a DataSet, you can use DataRelation objects to represent the rela-
tion between DataTable objects just like the relationships between tables in a data-
base. Create relationships in DataSet objects by declaring DataRelation objects and
providing the columns from the parent and child tables to the DataRelation construc-
tor. After creating the relationship, you must add it to the Relations collection of the
DataSet.
The following code sample creates a relationship in the NorthwindDataSet and
assumes the Customers and Orders DataTable objects each have a CustomerID column
that is used to relate the table’s data together:
' VB
' Create the new relationship.
Dim CustomersOrders As New DataRelation ("CustomersOrders", _
CustomersTable.Columns("CustomerID"), OrdersTable.Columns("CustomerID"))
' Add the relationship to the DataSet.
NorthwindDataset.Relations.Add(CustomersOrders)
// C#
// Create the new relationship.
DataRelation CustomersOrders = new DataRelation ("CustomersOrders",
CustomersTable.Columns["CustomerID"], OrdersTable.Columns["CustomerID"]);
// Add the relationship to the DataSet.
NorthwindDataset.Relations.Add(CustomersOrders);
Navigate a Relationship Between Tables
To access related records in DataTable objects, you must first select a DataRow from
either the parent or child table and then call either the GetParentRow or GetChildRows
method of the DataRow. Calling the GetParentRow method returns a single DataRow
representing the parent record, whereas calling the GetChildRows method returns an
array of DataRows representing all rows that are related to the selected parent.
Returning the Parent Row of a Selected Child Record The following example returns
the Customer of a selected Order:
' VB
Dim Customer As DataRow = SelectedOrdersRow.GetParentRow("FK_Orders_Customers")
// C#
DataRow Customer = SelectedOrdersRow.GetParentRow("FK_Orders_Customers");
Lesson 1: Creating DataSet Objects 335
Returning the Related Child Rows of a Selected Parent Row The following example
returns the Orders of a selected Customer:
' VB
Dim Orders() As DataRow = SelectedCustomersRow.GetChildRows("FK_Orders_Customers")
// C#
DataRow Orders() = SelectedCustomersRow.GetChildRows("FK_Orders_Customers");
Merging DataSet Contents
You can take the contents from one DataSet (the source dataset) and merge it with the
contents of another DataSet (the target dataset) using the DataSet.Merge method.
When merging datasets, the actual data is combined depending on whether a similar
record exists in the DataSet into which it will be merged. For example, if you merge
two datasets that both contain a record with the same primary key, the values in the
target DataSet will be overwritten with the new values in the source DataSet. You can
control this behavior and restrict changes from being made in the target DataSet by
passing in a true or false value to the PreserveChanges flag in the Merge method. In
addition to merging the actual data, when you merge two DataSets that have tables
with differing schema, you can pass an optional MissingSchemaAction parameter to
the Merge method that controls the behavior of the merge when the source DataSet
has objects that are not currently in the target DataSet. The following are valid values
for the MissingSchemaAction parameter:
■ Add (default) All schema items in the source DataSet are added to the target
DataSet and populated.
■ AddWithKey All schema items and primary key settings are added to the target
DataSet.
■ Error An exception will be thrown when the schemas in the source and target
DataSets do not match.
■ Ignore All schema inconsistencies between the source and target DataSets are
ignored.
In the following code example, the contents of the OldSalesDataSet are merged into
the contents of the SalesHistoryDataSet. The PreserveChanges parameter is set to True
and any schema differences will be ignored.
336 Chapter 7 Create, Add, Delete, and Edit Data in a Disconnected Environment
' VB
SalesHistoryDataSet.Merge(OldSalesDataSet, True, MissingSchemaAction.Ignore)
// C#
SalesHistoryDataSet.Merge(OldSalesDataSet, true, MissingSchemaAction.Ignore);
Copying DataSet Contents
In some situations you may need to create a copy of the data in a DataSet. For exam-
ple, you might need to manipulate a copy of the data and perform some processing,
but you might not want to modify the original data. To create a copy of a DataSet, you
simply create a new DataSet object and assign it the return value of the DataSet. Copy
method. The following code example demonstrates this:
' VB
Dim CopyOfDataSet As New DataSet
CopyOfDataSet = OriginalDataSet.Copy
// C#
DataSet CopyOfDataSet = new DataSet();
CopyOfDataSet = OriginalDataSet.Copy();
Lab: Creating DataSet Objects
In this lab you will create typed and untyped DataSet objects.
� Exercise 1: Creating a DataSet with the DataSet Designer
The DataSet Designer is a design-time tool that assists in the creation of typed DataSet
objects by allowing you to drag and drop database tables from Server Explorer onto
the design surface. As you drop tables on the surface, they are added to the DataSet as
typed objects that make programming as simple as writing the table and column
names you want to access.
1. Create a Windows application and name it DataSetDesignerExample.
2. From the Project menu, select Add New Item.
3. Select the DataSet template and name it NorthwindDataSet.xsd.
4. Navigate to the Customers table in Server Explorer and drag it onto the design
surface.
5. Navigate to the Orders table in Server Explorer and drag it onto the design sur-
face.
Lesson 1: Creating DataSet Objects 337
After dropping the Customers and Orders tables onto the DataSet Designer, the
design surface should look similar to Figure 7-1.
Figure 7-1 Customers and Orders DataTable objects and TableAdapter objects as seen in the
DataSet Designer
6. Build the project before moving on to the next step.
7. Drag a ListBox onto Form1 and name it CustomersListBox.
8. Drag a button onto Form1 and set the following properties:
❑ Name = GetCustomersButton
❑ Text = Get Customers
9. Double-click the Get Customers button and add the following code to the
GetCustomersButton_Click event handler:
' VB
' Instantiate a Northwind typed dataset.
Dim NorthwindDataSet1 As New NorthwindDataSet
' Instantiate a CustomersTableAdapter.
Dim CustomersTableAdapter1 As New NorthwindDataSetTableAdapters.CustomersTableAdapter
' Call the default Fill method to load all customers into the Customers DataTable.
CustomersTableAdapter1.Fill(NorthwindDataSet1.Customers)
' Loop through the rows in the Customers table and add the value from the CompanyName
column
338 Chapter 7 Create, Add, Delete, and Edit Data in a Disconnected Environment
' to the ListBox.
For Each NWCustomer As NorthwindDataSet.CustomersRow In NorthwindDataSet1.Customers.Rows
CustomersListBox.Items.Add(NWCustomer.CompanyName)
Next
// C#
// Instantiate a Northwind typed dataset.
NorthwindDataSet NorthwindDataSet1 = new NorthwindDataSet ();
// Instantiate a CustomersTableAdapter.
NorthwindDataSetTableAdapters.CustomersTableAdapter CustomersTableAdapter1 =
new NorthwindDataSetTableAdapters.CustomersTableAdapter();
// Call the default Fill method to load all customers into the Customers DataTable.
CustomersTableAdapter1.Fill(NorthwindDataSet1.Customers);
// Loop through the rows in the Customers table and add the value from the CompanyName
column
// to the ListBox.
foreach (NorthwindDataSet.CustomersRow NWCustomer in NorthwindDataSet1.Customers.Rows)
{
CustomersListBox.Items.Add(NWCustomer.CompanyName);
}
10. Run the application and click the Get Customers button. Verify that the Company-
Name from each customer is displayed in the CustomersListBox similar to Figure 7-2.
Figure 7-2 The CompanyName from all customers appearing in the CustomersListBox after
clicking the Get Customers button
� Exercise 2: Creating a Typed DataSet with the Data Source Configuration Wizard
This exercise provides instructions for creating a strongly typed DataSet using the
Data Source Configuration Wizard.
1. Create a Windows application and name it DataSourceWizardExample.
2. Start the Data Source Configuration Wizard by selecting Add New Data Source
from the Data menu.
Lesson 1: Creating DataSet Objects 339
NOTE Data menu
If the Data menu is not available, open the form in Design view.
3. Leave the default selection of Database on the Choose A Data Source Type page,
as shown in Figure 7-3. Then, click Next.
Figure 7-3 The Choose a Data Source Type page of the Data Source Configuration Wizard
4. The list box displays the available data connections from Server Explorer. Select
a connection to the Northwind sample database or create a new data connection
on the Choose Your Data Connection page, as shown in Figure 7-4. Then, click
Next. If prompted, click Yes to add the database to your project.
Figure 7-4 The Choose Your Data Connection page of the Data Source Configuration Wizard
340 Chapter 7 Create, Add, Delete, and Edit Data in a Disconnected Environment
5. After selecting the desired data connection, you are given the option of saving it
to the application configuration file. Leave the default option selected, as shown
in Figure 7-5. Then, click Next.
Figure 7-5 The Save the Connection String to the Application Configuration File page of the
Data Source Configuration Wizard
6. Expand the Tables node and select the Customers table on the Choose Your
Database Objects page, as shown in Figure 7-6.
Figure 7-6 The Choose Your Database Objects page of the Data Source Configuration Wizard
7. Click Finish to complete the wizard and add the typed DataSet to your project.
After completing the wizard, the data source is available in the Data Sources win-
dow, which enables the quick construction of data-bound forms.
8. With Form1 in Design view, select Show Data Sources from the Data menu.
Lesson 1: Creating DataSet Objects 341
9. Drag the Customers node from the Data Sources window onto Form1, as shown
in Figure 7-7.
Figure 7-7 Form1 in the Visual Studio IDE after dropping the Customers node from the Data
Sources window
Visual Studio adds code to fill the Customers DataTable to the form as a result of
dropping the Customers table from the Data Sources window.
10. Run the application and verify that the Customers table data appears on the
form, as shown in Figure 7-8.
Figure 7-8 The Customers data displayed on Form1
342 Chapter 7 Create, Add, Delete, and Edit Data in a Disconnected Environment
� Exercise 3: Configuring Untyped DataSet Objects
Create untyped DataSet objects by dragging DataSet objects from the Toolbox onto a
form.
1. Create a Windows application and name it UntypedDataSet.
2. From the Data section of the Toolbox, drag a DataSet object onto Form1.
3. In the Add DataSet dialog box, select Untyped DataSet and click OK.
4. Drag a DataGridView onto the form.
5. Select the DataSet1 instance in the component tray and navigate to the Tables
property in the Properties window. Click the ellipsis in the Tables property to
open the Tables Collection Editor.
6. Add a table and set its Name and TableName properties to Categories.
7. Select the Columns property and click the ellipsis to open the Columns Collec-
tion Editor.
8. Add a column and set the following properties:
❑ AllowDBNull = False
❑ AutoIncrement = True
❑ ColumnName = CategoryID
❑ DataType = System.Int32
❑ Name = CategoryID
9. Add a second column and set the following properties:
❑ AllowDBNull = False
❑ ColumnName = CategoryName
❑ Name = CategoryName
10. Close the Columns Collection Editor, select the Constraints property, and add a
Unique constraint.
11. Select the CategoryID column and the Primary key check box and click OK.
12. Close the Constraints Collection Editor and the Tables Collection Editor.
13. Add a button to the form and set the following properties:
❑ Name = FillDataSetButton
❑ Text = Fill DataSet
Lesson 1: Creating DataSet Objects 343
14. Create a Form1_Load event handler and add the following code:
' VB
DataGridView1.DataSource = DataSet1.Tables("Categories")
DataGridView1.SelectionMode = DataGridViewSelectionMode.FullRowSelect
// C#
dataGridView1.DataSource = dataSet1.Tables["Categories"];
dataGridView1.SelectionMode = DataGridViewSelectionMode.FullRowSelect;
15. Create a FillDatasetButton_Click event handler and add the following code to it:
' VB
Dim newRow As DataRow = DataSet1.Tables("Categories").NewRow()
newRow.Item("CategoryName") = "Beverages"
DataSet1.Tables("Categories").Rows.Add(newRow)
Dim newRow2 As DataRow = DataSet1.Tables("Categories").NewRow()
newRow2.Item("CategoryName") = "Condiments"
DataSet1.Tables("Categories").Rows.Add(newRow2)
Dim newRow3 As DataRow = DataSet1.Tables("Categories").NewRow()
newRow3.Item("CategoryName") = "Seafood"
DataSet1.Tables("Categories").Rows.Add(newRow3)
// C#
DataRow newRow = dataSet1.Tables["Categories"].NewRow();
newRow["CategoryName"] = "Beverages";
dataSet1.Tables["Categories"].Rows.Add(newRow);
DataRow newRow2 = dataSet1.Tables["Categories"].NewRow();
newRow2["CategoryName"] = "Condiments";
dataSet1.Tables["Categories"].Rows.Add(newRow2);
DataRow newRow3 = dataSet1.Tables["Categories"].NewRow();
newRow3["CategoryName"] = "Seafood";
dataSet1.Tables["Categories"].Rows.Add(newRow3);
16. With Form1 in Design view, select DataSet1 in the component tray.
17. From the Tables property in the Property window, open the Tables Collection
Editor and add another table to the DataSet.
18. Set its Name and TableName properties to Products.
19. Add a column and set the following properties:
❑ AllowDBNull = False
❑ AutoIncrement = True
❑ ColumnName = ProductID
344 Chapter 7 Create, Add, Delete, and Edit Data in a Disconnected Environment
❑ DataType = System.Int32
❑ Name = ProductID
20. Add a column and set the following properties:
❑ AllowDBNull = False
❑ ColumnName = ProductName
❑ DataType = System.String
❑ Name = ProductName
21. Add a column and set the following properties:
❑ AllowDBNull = False
❑ ColumnName = CategoryID
❑ DataType = System.Int32
❑ Name = CatID
22. Click Close. Select the Constraints property for the Products table and add a
Unique constraint.
23. Select the ProductID column and the Primary key check box and click OK.
24. Add a Foreign Key Constraint and set the following:
❑ Parent table = Categories
❑ Child table = Products
❑ Key columns = CategoryID
❑ Foreign Key columns = CategoryID
25. Click OK.
26. Close the Collection Editors, and then close the Table Collection Editor.
27. Select DataSet1 in the component tray and add a DataRelation by clicking the
ellipsis in the Relations property of DataSet1.
28. Click Add in the Relations Collection Editor. Set the following in the Relations
dialog box:
❑ Name = CategoriesProducts
❑ Parent table = Categories
❑ Child table = Products
❑ Key columns = CategoryID
❑ Foreign Key columns = CategoryID
Lesson 1: Creating DataSet Objects 345
29. Close the dialog boxes.
30. Add the following code to the bottom of the FilllDatasetButton_Click event handler:
' VB
Dim newRow4 As DataRow = DataSet1.Tables("Products").NewRow()
newRow4.Item("CategoryID") = 1
newRow4.Item("ProductName") = "Chai"
DataSet1.Tables("Products").Rows.Add(newRow4)
Dim newRow5 As DataRow = DataSet1.Tables("Products").NewRow()
newRow5.Item("CategoryID") = 2
newRow5.Item("ProductName") = "Aniseed Syrup"
DataSet1.Tables("Products").Rows.Add(newRow5)
Dim newRow6 As DataRow = DataSet1.Tables("Products").NewRow()
newRow6.Item("CategoryID") = 3
newRow6.Item("ProductName") = "Ikura"
DataSet1.Tables("Products").Rows.Add(newRow6)
Dim newRow7 As DataRow = DataSet1.Tables("Products").NewRow()
newRow7.Item("CategoryID") = 1
newRow7.Item("ProductName") = "Chang"
DataSet1.Tables("Products").Rows.Add(newRow7)
Dim newRow8 As DataRow = DataSet1.Tables("Products").NewRow()
newRow8.Item("CategoryID") = 2
newRow8.Item("ProductName") = "Chef Anton's Gumbo Mix"
DataSet1.Tables("Products").Rows.Add(newRow8)
Dim newRow9 As DataRow = DataSet1.Tables("Products").NewRow()
newRow9.Item("CategoryID") = 3
newRow9.Item("ProductName") = "Boston Crab Meat"
DataSet1.Tables("Products").Rows.Add(newRow9)
// C#
DataRow newRow4 = dataSet1.Tables["Products"].NewRow();
newRow4["CategoryID"] = 1;
newRow4["ProductName"] = "Chai";
dataSet1.Tables["Products"].Rows.Add(newRow4);
DataRow newRow5 = dataSet1.Tables["Products"].NewRow();
newRow5["CategoryID"] = 2;
newRow5["ProductName"] = "Aniseed Syrup";
dataSet1.Tables["Products"].Rows.Add(newRow5);
DataRow newRow6 = dataSet1.Tables["Products"].NewRow();
newRow6["CategoryID"] = 3;
newRow6["ProductName"] = "Ikura";
dataSet1.Tables["Products"].Rows.Add(newRow6);
DataRow newRow7 = dataSet1.Tables["Products"].NewRow();
newRow7["CategoryID"] = 1;
346 Chapter 7 Create, Add, Delete, and Edit Data in a Disconnected Environment
newRow7["ProductName"] = "Chang";
dataSet1.Tables["Products"].Rows.Add(newRow7);
DataRow newRow8 = dataSet1.Tables["Products"].NewRow();
newRow8["CategoryID"] = 2;
newRow8["ProductName"] = "Chef Anton's Gumbo Mix";
dataSet1.Tables["Products"].Rows.Add(newRow8);
DataRow newRow9 = dataSet1.Tables["Products"].NewRow();
newRow9["CategoryID"] = 3;
newRow9["ProductName"] = "Boston Crab Meat";
dataSet1.Tables["Products"].Rows.Add(newRow9);
31. Create an event handler for the DataGridView1_CellDoubleClick event and add
the following code:
' VB
' Get the CategoryID of the selected row
Dim Category As Integer = CInt(DataGridView1.SelectedRows(0).Cells("CategoryID").Value)
' Get the underlying DataRow that is selected
Dim rows() As DataRow = DataSet1.Tables("Categories").Select("CategoryID = " & Category)
' Use the GetChildRows method to navigate the relationship and return the related records
Dim ProductList As String = ""
For Each r As DataRow In rows(0).GetChildRows("CategoriesProducts")
ProductList += r.Item("ProductName").ToString & Environment.NewLine
Next
' Display the products in a message box
MessageBox.Show(ProductList)
// C#
// Get the CategoryID of the selected row
int Category = (int)dataGridView1.SelectedRows[0].Cells["CategoryID"].Value;
// Get the underlying DataRow that is selected
DataRow[] rows = dataSet1.Tables["Categories"].Select("CategoryID = " + Category);
// Use the GetChildRows method to navigate the relationship
// and return the related records
string ProductList = "";
foreach (DataRow r in rows[0].GetChildRows("CategoriesProducts"))
{
ProductList += r["ProductName"].ToString() + Environment.NewLine;
}
// Display the products in a message box
MessageBox.Show(ProductList);
32. Run the application and click the Fill Dataset button.
Lesson 1: Creating DataSet Objects 347
33. Now double-click one of the categories in the grid to open a message box dis-
playing the related products.
Lesson Summary
■ Create DataSet objects programmatically by instantiating new DataSet objects in
code and adding DataTable and DataRelation objects, much like tables and rela-
tionships in a database.
■ Create typed DataSet objects with the DataSet Designer and the Data Source
Configuration Wizard.
■ Typed DataSet objects are automatically created with TableAdapter objects that
have methods that fill and update the data in the data tables of the DataSet.
■ Untyped and typed DataSet objects can be created by dragging a DataSet object
from the data Toolbox onto a form.
Lesson Review
The following questions are intended to reinforce key information presented in this
lesson. The questions are also available on the companion CD if you prefer to review
them in electronic form.
NOTE Answers
Answers to these questions and explanations of why each choice is correct or incorrect are located
in the “Answers” section at the end of the book.
1. What is a DataSet? (Choose all that apply.)
A. A pointer to a remote database
B. A collection of DataTable and DataRelation objects
C. An in-memory cache of data
D. A collection of records from a database
2. What are the three main objects when working with a DataSet?
A. DataTable, DataRelation, and DataAdapter
B. DataTable, DataColumn, and DataRelation
C. DataTable, DataRelation, and Constraint
D. DataTable, DataColumn, and type
348 Chapter 7 Create, Add, Delete, and Edit Data in a Disconnected Environment
3. How do you programmatically access related records in a DataSet?
A. By calling the GetParentRow and GetChildRows methods of a DataSet
B. By calling the GetParentRow and GetChildRows methods of a DataTable
C. By calling the GetParentRow and GetChildRows methods of a DataRow
D. By accessing the ParentColumns and ChildColumns of a DataRelation
Lesson 2: Creating DataTable Objects 349
Lesson 2: Creating DataTable Objects
This lesson describes how to create DataTable objects, which are ADO.NET objects in
the System.Data namespace that provide in-memory storage for the data in your appli-
cation similar to a table in a database. DataTable objects can be added to DataSet
objects and related to other DataTable objects using a DataRelation object, or you can
use DataTable objects as standalone objects independent of DataSet objects.
Once a DataTable object is created, define the schema of the table by creating and add-
ing columns and constraints similar to tables in a database. This lesson will focus on
creating and configuring the DataTable, preparing it to receive data. The process of fill-
ing the DataTable with data, as well as manipulating the data in the table, will be cov-
ered later in this chapter.
After this lesson, you will be able to:
■ Create DataTable objects.
❑ Create a DataTable.
❑ Add a DataTable to a DataSet.
❑ Define the schema of a DataTable.
❑ Add columns to a table.
❑ Create expression columns.
❑ Create AutoIncrementing columns.
❑ Define a primary key for a table.
❑ Add constraints to a table.
Estimated lesson time: 45 minutes
How to Create DataTable Objects
Create DataTable objects by declaring an instance of the DataTable object. You can
optionally provide the name of the DataTable as well as the Namespace that will be
used when rendering the data in XML. For example, the following code example cre-
ates a new DataTable named SalesData:
' VB
Private SalesDataTable As New DataTable ("SalesData")
// C#
Private DataTable SalesDataTable = new DataTable("SalesData");