Microsoft ASP Net 3.5 Step By Step (phần 10) ppsx
Bạn đang xem bản rút gọn của tài liệu. Xem và tải ngay bản đầy đủ của tài liệu tại đây (886.85 KB, 30 trang )
Chapter 11 Data Binding 241
ones that come from databases. Before seeing how to render database queries using UI ele-
ments, let’s take a quick look at the .NET database story.
The .NET Database Story
Just as .NET includes a library of classes for managing rich client UI (Windows Forms) and for
handling HTTP requests (ASP.NET), .NET includes a library for connecting to a wide range of
databases. That library is named ADO.NET.
ADO.NET is similar to Microsoft’s previous database technology (named simply ADO). ADO
stands for Active Data Objects. Although Microsoft has dropped “Active” from its marketing
lexicon, it kept the name ADO and appended “.NET” to name the managed database tech-
nology (surely for brand name recognition). ADO represents a set of managed providers that
is very similar in function and form to classic ADO. ADO.NET centers around three main units
of functionality: connecting to a database, commanding the database, and using the results.
Connections
When you want to talk to a specifi c database, you usually need to connect to it. At the very
least, most of the time this involves specifying the location of the database. For many sce-
narios, connecting also requires managing security (via user names and passwords). More
advanced scenarios may also require dealing with such issues as connection pooling and
transactions. These are all handled as part of the process of connecting to the database. The
connection information is usually passed in via a string, the contents of which are used to set
various connection parameters when the ADO.NET internals interpret the string.
ADO.NET has classes for making connections to a database. ADO.NET 1.x included only two:
a connection for Microsoft SQL Server and another for connecting to OLEDB databases. Later
versions of ADO.NET add classes specialized for more database types and include a new set
of database services using the provider pattern.
Working with ADO.NET 1.x involved writing most of the data access code using the ADO
interfaces (rather than directly instantiating the database classes). This allowed you to isolate
the vendor-specifi c details in a single place in the code—in the spot where the connection is
managed. After that, getting the other parts required for making queries (for example, get-
ting the correct command object) was a matter of asking the connection for it. While you
may still write code to connect to the database using ADO.NET 1.x–style code, there’s now a
better way—using the ADO.NET database provider factories.
The ADO.NET provider pattern offers an improvement in connecting to and using databases.
By using the provider pattern, you limit exposing the kind of database you’re using to a sin-
gle call to a provider factory. You choose the kind of database in one place and the provider
takes care of making sure the correct connection and command objects are used. This was
242 Part II Advanced Features
less important in ADO 1.x, when ADO divided the database world into two kinds of databas-
es: SQL Server and OLEDB databases. However, with its support of new database types, the
provider pattern is a welcome addition.
If you look in machine.confi g, you’ll see providers for the following database types:
Odbc Data Provider
OleDb Data Provider
OracleClient Data Provider
SqlClient Data Provider
SQL Server CE Data Provider
Listing 11-3 shows a snippet from machine.confi g illustrating how the provider keys are
mapped to provider factories.
LISTING 11-3 Default Provider Factories Defi ned in Machine.Confi g
<system.d<configuration>
<system.data>
<DbProviderFactories>
<add name="Odbc Data Provider"
invariant="System.Data.Odbc"
type="System.Data.Odbc.OdbcFactory " />
<add name="OleDb Data Provider"
invariant="System.Data.OleDb"
type="System.Data.OleDb.OleDbFactory "/>
<add name="OracleClient Data Provider"
invariant="System.Data.OracleClient"
type="System.Data.OracleClient.OracleClientFactory "/>
<add name="SqlClient Data Provider"
invariant="System.Data.SqlClient"
"System.Data.SqlClient.SqlClientFactory" />
<add name="Microsoft SQL Server Compact Data Provider"
invariant="System.Data.SqlServerCe.3.5"
type="Microsoft.SqlServerCe.Client.SqlCeClientFactory " />
</DbProviderFactories>
</system.data>
</configuration>>
To get a connection to a database, you ask the runtime for a reference to the right factory
and then get a connection from the factory, as shown in Listing 11-4. You use the name of
the database type (System.Data.SqlClient or System.Data.SqlServerCe.3.5, for example). After
getting the right kind of factory, you ask it to create a connection for you.
LISTING 11-4 Obtaining a Database Provider Factory
DbConnection GetConnectionUsingFactory()
{
DbProviderFactory dbProviderFactory =
DbProviderFactories.GetFactory("System.Data.SqlClient")
return dbProviderFactory.CreateConnection();
}
Chapter 11 Data Binding 243
Once you have a connection, you may use it to connect to the database. Given an SQL Server
database named AspDotNetStepByStep available on your machine, you’d insert a connection
string as shown in Listing 11-5 in your web.confi g. Listing 11-5 shows how this might appear
in a web.confi g fi le.
LISTING 11-5 Example Web.Confi g Connection String Settings
<configuration>
<connectionStrings>
<add name="AspDotNetStepByStep"
connectionString=
"server=(local);integrated security=sspi;database=AspDotNetStepByStepDB "/>
</connectionStrings>
</configuration>
Once you have a reference to the database connection, you may open the connection and
start commanding the database.
Commands
Once connected, the database is waiting for you to send database commands. These com-
mands usually include querying the database, updating existing data, inserting new data, and
deleting data. Most databases support Structured Query Language (SQL) to manage these
commands. (Some databases may support specialized variations of SQL, so the actual com-
mand text may differ from one implementation to the other.) Commanding the database
usually entails writing SQL statements such as
SELECT * FROM DotNetReferences WHERE AuthorLastName = 'Petzold'
For example, to connect to an SQL database named AspDotNetStepByStepDB and query the
DotNetReferences table for all the references by someone with the last name “Petzold,” you’d
use code as shown in Listing 11-6.
LISTING 11-6 Example Database Query Using a DataReader
class UseDBApp {
static void Main()
{
DbProviderFactory dbProviderFactory =
DbProviderFactories.GetFactory("System.Data.SqlClient");
using(DbConnection conn = dbProviderFactory.CreateConnection())
{
string s =
ConfigurationManager.ConnectionStrings["AspDotNetStepByStep"].ConnectionString;
conn.ConnectionString = s;
conn.Open();
DbCommand cmd = conn.CreateCommand();
cmd.CommandText =
"SELECT * FROM DotNetReferences WHERE AuthorLastName='Petzold'";
244 Part II Advanced Features
DbDataReader reader = cmd.ExecuteReader();
// do something with the reader
}
}
}
Executing the command using ExecuteReader sends a query to the database. The results
come back via an instance of the IDataReader interface. The code listed above stops short of
using the results. Let’s take a look at how that works.
Managing Results
Once you’ve connected to the database and issued a query, you probably need to sift
through the data to use it. ADO.NET supports two broad approaches to managing result sets:
the IDataReader interface and the DataSet class.
DataReader
The example above retrieves an IDataReader from the query operation. The IDataReader in-
terface is useful for iterating through the results of the query. Listing 11-7 shows part of the
IDataReader interface.
LISTING 11-7 Part of the IDataReader Interface
public interface IDataReader
{
bool IsClosed {get;}
int RecordsAffected {get;}
void Close();
bool NextResult();
bool Read();
//
}
When iterating through the results of a query, Read fetches the next row. NextResult will
fetch the next result set.
Accessing data through IDataReader is often termed “fi re hose mode” because you have to eat
your way through the data one row at a time going forward only. There’s no way to revert back
to a previous row except by resetting the reader and starting again. The data rows the reader
returns to you are also read-only. You can retrieve the data for whatever purpose you need
them for, but you can’t update the database (insert, update, or delete) using IDataReader. An
alternative to accessing data through the IDataReader interface is to use a DataSet.
DataSet
In addition to the IDataReader, ADO.NET supports the notion of a disconnected record
set—the DataSet class in ADO.NET. The ADO.NET is primarily designed to help you write
Chapter 11 Data Binding 245
large, highly scalable applications. One of the biggest hindrances to scalability is the limits of
database connectivity. Databases usually have a limit on the number of active connections
available at one time, and if all the connections are in use at any particular time, any piece of
code wanting a database connection will need to wait. If the number of users of a system is
about the same as the number of connections available, then perhaps that’s not a problem.
However, if the number of users of a system is greater than the number of database connec-
tions, the system performance will likely be impacted greatly.
To encourage scalability, ADO.NET includes a class named DataSet that’s designed to give
you an easily navigable snapshot of your application’s database. The idea behind a database
is to get in and get out quickly with a copy of the data. The really good news is that you can
insert rows, update columns, and even delete rows using the DataSet and later have those
changes propagated to the database.
The DataSet class is usually fi lled with data using a DataAdapter. A DataSet includes a
DataTable array—one for each selection statement in the query. Once the DataAdapter
comes back from fetching the data for the DataSet, you have the latest snapshot of the que-
ried data in memory. The DataSet contains a DataTable collection and contains a DataTable
element for each SELECT statement in the query. You may access the Tables collection us-
ing either ordinal or String-type indices. Once you get to a table, iterating through the rows
and columns is a matter of indexing into the table using ordinal indices for the rows and
ordinal or String-type indices for the columns. Listing 11-8 shows an example of using the
SqlDataAdapter to get a DataSet.
LISTING 11-8 Example Database Query Using a DataSet and DataAdapter
class UseDBApp2
{
static void Main()
{
DataSet ds = new DataSet();
DbProviderFactory dbProviderFactory =
DbProviderFactories.GetFactory("System.Data.SqlClient");
using (DbConnection conn = dbProviderFactory.CreateConnection())
{
string s =
ConfigurationManager.ConnectionStrings["AspDotNetStepByStep"].ConnectionString;
conn.ConnectionString = s;
conn.Open();
DbCommand cmd = conn.CreateCommand();
cmd.CommandText =
"SELECT * FROM customer; SELECT * FROM country";
DbDataAdapter adapter = dbProviderFactory.CreateDataAdapter();
adapter.SelectCommand = cmd;
adapter.Fill(ds);
}
246 Part II Advanced Features
foreach (DataTable t in ds.Tables)
{
Console.WriteLine("Table " + t.TableName + " is in dataset");
Console.WriteLine("Row 0, column 1: " + t.Rows[0][1]);
Console.WriteLine("Row 1, column 1: " + t.Rows[1][1]);
Console.WriteLine("Row 2, column 1: " + t.Rows[2][1]);
}
ds.WriteXml("dataset.xml");
ds.WriteXmlSchema("dataset.xsd");
// Also- may bind to the tables here:
;
}}
The code in Listing 11-8 illustrates using a DataAdapter and a DataSet. The code prints out
the fi rst two columns of the fi rst three rows of each table in the DataSet. The example in
Listing 11-8 indicates that a DataTable is valid as a DataSource for data-bound controls. The
example also shows that the DataSet objects also serialize as XML. Both the table schema and
the contents may be serialized this way—making it especially useful for transferring data be-
tween systems.
Here’s one fi nal note about items in the DataSet class: They’re disconnected and are not
restricted to the “fi re hose mode” of data access. You have complete random access to any
table, any column, and/or any row in the DataSet. In fact, objects in the DataSet class are also
smart enough to keep track of any data you change inside of them. You may fl ush the data
back to the physical database by using the CommandBuilder to prepare the DataSet for an
Update through the DataAdapter. A CommandBuilder will construct SQL statements on your
behalf. This is useful for simple commands and provides a quick and convenient approach for
updating a database through a DataAdapter.
Given either an IDataReader or a DataSet, the data-bound controls will automatically render
themselves appropriately to show the control on the browser. While you may always connect
to the database and fetch the data manually through the standard connection/command ar-
chitecture, ASP.NET and Visual Studio support an even easier-to-use way to render data—via
declarative data binding.
ASP.NET Data Sources
After seeing how to access data in the raw using ADO.NET, let’s look at an easier way. ASP.
NET includes some new classes that hide the complexity of managing connections and of
gathering data. They’re the DataSource controls.
Chapter 11 Data Binding 247
These DataSource controls abstract the entire connection and command mechanism so that
all you need to do is decide on a data source, point the control to that data source, and
provide an appropriate query. Visual Studio provides a wizard that guides you through this.
Once you have a DataSource, you may attach it to a data-bound control that uses it.
Let’s take a look at making a query and populating some controls with the results of the query.
Use a DataSource to populate controls using a DataReader
1. Add a new form to DataBindORama named DataBindingWithDB.
2. The example for this chapter (named DataBindORama), available on the CD that
comes with this book, includes an Access database named ASPNETStepByStep.mdb.
Set up an accessor for the database. Go to the Data controls in the toolbox. Drag an
AccessDataSource onto the form. Select Confi gure Data Source… from the local
menu displayed by Visual Studio. Click Browse in the Confi gure Data Source dialog
box. You’ll see a directory named App_Data in the list box on the left side. Highlight
it. Then select ASPStepByStep.mdb from the list box on the right side. This will insert
an Access database accessor into your project. Confi gure the data accessor to use the
AspDotNetStepByStep database that comes with this book.
3. Select all the columns and all the rows from the DotNetReferences table when confi gur-
ing the query (that is, choose “*” to query for all the columns). Click Next.
248 Part II Advanced Features
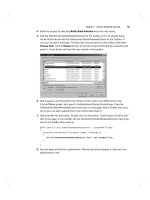
4. Test the query if you want to by clicking the Test Query button:
5. Set the DataSourceMode property to DataReader.
6. Now drag a ListBox onto the page. Set the AutoPostBack property to true by clicking
the checkbox in the tasks window. You could, if you wanted, click Choose Data Source
in the ListBox Tasks window. In practice, this is what you’d often do. However, let’s add
the code by hand to perform the data binding so that you see how it’s done in code. In
the code view, locate the Page_Load method and attach the ListBox DataSource prop-
erty to AccessDataSource1 like so:
protected void Page_Load(object sender, EventArgs e)
{
Chapter 11 Data Binding 249
if (!this.IsPostBack)
{
this.ListBox1.DataSource = this.AccessDataSource1;
this.ListBox1.DataTextField = "AuthorLastName";
this.ListBox1.DataValueField = "Title";
this.ListBox1.DataBind();
}
}
7. Put a label near the bottom of the page. This label will hold the selected value from the
ListBox.
8. Double-click on ListBox1 to insert an item changed event handler into your code. In the
event handler, set the Label1 text property to the value fi eld of the selected item.
protected void ListBox1_SelectedIndexChanged(object sender,
EventArgs e)
{
this.Label1.Text = this. ListBox1.SelectedItem.Value;
}
9. Now drag a RadioButtonList onto the form. When you fi nish dropping it on the form,
Visual Studio will ask you if you want to confi gure the control. First, check the Enable
AutoPostBack checkbox. Then, click Choose Data Source….
250 Part II Advanced Features
10. Confi gure the control to use AccessDataSource1 that you just added.
11. Confi gure the control to use the AuthorLastName column for the text fi eld and the Title
column for the value fi eld. Click OK.
12. Double-click on the RadioButtonList1 object on the form to create a handler for the ra-
dio button selection. Handle the selection by updating the Label1 object with the value
associated with the current radio button selection.
protected void RadioButtonList1_SelectedIndexChanged(object sender,
EventArgs e)
{
this.Label1.Text = this.RadioButtonList1.SelectedItem.Value;
}
Chapter 11 Data Binding 251
13. Now run the program. The ListBox and the RadioButton list should show the
AuthorLastName fi eld. Selecting one name out of either list will cause a postback and
show the title (the associated value) in the label near the bottom of the page.
Now we’ve had a taste of how binding to the simple controls works. Although using these
controls is common in many scenarios, the data-bound controls don’t end there. ASP.NET
includes other, more complex, controls that render data such as complex UI elements as grids
and control combinations.
Other Data-bound Controls
In addition to the simple bound controls, ASP.NET includes several more complex controls.
They work very much like the simple bound controls in that you attach a data source to them
and they render automatically. However, these controls differ by displaying the data in more
elaborate ways. These controls include the GridView, the FormView, the DetailsView, and the
DataList.
The best way to understand the nature of these controls is to work through a couple of ex-
amples. Let’s start with the GridView.
252 Part II Advanced Features
The GridView
1. Add a new Web form to the DataBindORama site. Name it UseGridView.
2. Pick up a GridView from the Toolbox (it’s under the Data controls). Drop it on the form.
Visual Studio will ask you to confi gure the GridView. Under the Choose Data Source…
option, select New Data Source…. Point Visual Studio to the ASPNetStepByStep.mdb
under the App_Data directory. When specifying the query, select “*” to query for all the
columns. Finally, enable Paging, Sorting, and Selection from the GridView Confi guration
menu. After confi guring the GridView, Visual Studio will show you a representation of
the format the query will use when it is rendered to the browser.
3. Run the program. Try the various options such as paging through the data and sorting
to get a feel as to how the GridView works.
Chapter 11 Data Binding 253
4. Go back to Visual Studio and try formatting the GridView to change its appearance. As
with all the other ASP.NET controls, the GridView includes a number of confi gurable
properties such as the foreground and background colors. Some of the other special-
ized properties within the GridView include the AlternateRowStyle, the PagerSettings,
and the PagerStyle. The following graphic illustrates the UseGridView.aspx page with
the Classic formatting style applied:
254 Part II Advanced Features
The GridView is useful for displaying tables in a format in which you can see all the rows and
columns at once. While the classic DataGrid is still available, the GridView handles tasks such
as selecting rows and sorting by column.
Here’s a look at another complex control: the FormView.
The FormView
1. Add a new Web form to the DataBindORama site named UseFormView.
2. Pick up a FormView from the Toolbox (it’s under the Data controls). Drop it on the form.
Visual Studio will ask you to confi gure the FormView. Under the Choose Data Source…
option, select New Data Source…. Point Visual Studio to the ASPNetStepByStep.mdb
under the App_Data directory. When specifying the query, select “*” to query for all the
columns.
3. Select the AutoFormat option from the Confi guration menu. Here you have the oppor-
tunity to apply a couple of canned styles to the FormView. The example accompanying
this text uses the Classic formatting style.
4. Finally, enable paging from the FormView Confi guration menu by selecting the Enable
Paging check box. Set the HeaderText property (from the Visual Studio Properties win-
dow) to give the FormView a title (perhaps something like “.NET Reference Authors and
Titles”).
5. After confi guring the FormView, Visual Studio will show you a representation of the for-
mat the query will use when it is rendered to the browser.
Chapter 11 Data Binding 255
6. Run the program. Try the various options such as paging through the data to get a feel
for how the FormView works.
The FormView is useful for gathering the information for singular rows in one place. The user
navigates between each row, but the focus is always on the current row.
The DetailsView
1. Add a new Web form to the DataBindORama site named UseDetailsView.
2. Pick up a DetailView from the Toolbox (it’s under the Data controls). Drop it on the
form. Visual Studio will ask you to confi gure the DetailsView. Under the Choose
Data Source… option, select New Data Source…. Point Visual Studio to the
ASPNetStepByStep.mdb under the App_Data directory. When specifying the query, se-
lect “*” to select all the columns.
3. Select the AutoFormat option from the Confi guration menu. Here you have the oppor-
tunity to apply a couple of canned styles to the DetailsView. The example accompany-
ing this text uses the Classic formatting style.
4. Select the Edit Fields… option from the DetailsView Tasks window. Check the Auto-
Generate Fields check box on the dialog box if it isn’t already checked.
5. Finally, enable paging from the DetailsView Tasks window. Set the HeadingText prop-
erty (in the Visual Studio Properties window) to give the DetailsView a title (perhaps
something like “.NET Reference Authors and Titles”).
256 Part II Advanced Features
6. After confi guring the DetailsView, Visual Studio will show you a representation of the
format the query will use when it is rendered to the browser.
7. Run the program. Try the various options such as paging through the data to get a feel
as to how the DetailsView works.
Chapter 11 Data Binding 257
Now for the DataList. The DataList control was available in ASP.NET 1.x. It’s been updated
with later versions of ASP.NET to support declarative data binding. Here’s a look at the
DataList.
The DataList
1. Add a new Web form to the DataBindORama site named UseDataList.
2. Pick up a DataList from the toolbox (it’s under the Data controls). Drop it on the form.
Visual Studio will ask you to confi gure the DataList. Under the Choose Data Source…
option, select New Data Source…. Point Visual Studio to the ASPNetStepByStep.mdb
under the App_Data directory. When specifying the query, select “*” to query for all the
columns.
3. Select the AutoFormat option from the DataList Tasks window. Here you have the op-
portunity to apply a couple of canned styles to the DataList. The example accompany-
ing this text uses the Slate formatting style.
4. Select the DataList Properties dialog box from the DataList Tasks window by selecting
Property Builder. If not already checked, make sure the Show Header and the Show
Footer check boxes are selected.
5. Set the Caption property to give the DataList a title (perhaps something like .NET
Reference Authors and Titles).
6. After confi guring the DataList, Visual Studio will show you a representation of the for-
mat the query will use when it is rendered to the browser.
258 Part II Advanced Features
7. Run the program to see how the DataList renders itself.
While the classic data access technologies are here to stay, .NET versions 3.0 and later bring a
new way to access and manage data—Language Integrated Query. Let’s take a look.
Chapter 11 Data Binding 259
LINQ
New with .NET 3.0 is a database technology named Language Integrated Query (LINQ). LINQ
is a set of extensions to the .NET Framework for performing data queries inline. LINQ extends
the C# and Visual Basic syntaxes to enable inline queries in the native language syntax (versus
SQL or XPath). LINQ doesn’t replace existing data access technologies. Instead, LINQ augments
existing data query technologies making it approachable to perform streamlined queries.
This new technology for making queries is called “language integrated” because you can
build queries and use C# (or Visual Basic) language constructs to make selection statements.
The following example shows how to develop some queries using LINQ.
Using LINQ
1. Add a new page to the DataBindORama site. Name the page UseLinq.
2. Drop a GridView onto the page. This will hold the information returned from the LINQ
queries.
3. Update the Page_Load method to make a LINQ query. Use the TechnologyDescriptor
collection mentioned earlier in the chapter as the data source for making the query.
(Don’t forget to add a using statement to include System.Collections.Generic!)
Set the DataGrid’s DataSource property to the results of a LINQ query against the
TechnologyDescriptor collection. The format of the LINQ statement should be from
<variable of type held in collection> in <the collection> where <criteria> orderby <cri-
teria> select <property from selected item>. Select TechnologyDescriptors that include
“.NET” in the name and order them by length of the TechnologyName property. Here is
the code that does just that:
public partial class UseLinq : System.Web.UI.Page
{
protected void Page_Load(object sender, EventArgs e)
{
List<TechnologyDescriptor> techList =
TechnologyDescriptor.CreateTechnologyList();
GridView1.DataSource = from technologyDescriptor in techList
where
technologyDescriptor.TechnologyName.Contains(".NET") == true
orderby technologyDescriptor.TechnologyName.Length
select technologyDescriptor.TechnologyName.ToUpper();
GridView1.DataBind();
}
}
260 Part II Advanced Features
4. Run the UseLinq.aspx page to see how the query looks within the GridView.
5. Notice how the GridView shows only the single property grabbed from each
TechnologyDescriptor. Now update the query statement to include the whole
TechnologyDescriptor structure. It should look like this:
public partial class UseLinq : System.Web.UI.Page
{
protected void Page_Load(object sender, EventArgs e)
{
List<TechnologyDescriptor> techList =
TechnologyDescriptor.CreateTechnologyList();
GridView1.DataSource = from technologyDescriptor in techList
where
technologyDescriptor.TechnologyName.Contains(".NET") == true
orderby technologyDescriptor.TechnologyName.Length
select technologyDescriptor;
GridView1.DataBind();
}
}
Chapter 11 Data Binding 261
6. Run the page and see how the GridView now shows the entire TechnologyDescriptor.
This example only scratches the surface of the power of LINQ. LINQ introduces a very stream-
lined way to make queries on demand from within your project using the language of your
project (Visual Basic, C#, and so forth). The data coming back from the queries may be used
in any context. In this case, the example shows using the results of a LINQ query within a
GridView.
Summary
In this chapter, we looked at ASP.NET’s support for data-bound controls. Although it’s not
rocket science to iterate through a collection and add the data to ASP.NET’s server-side
controls, it’s a fairly common operation. That Microsoft pushed it down into the Framework
classes is a good thing.
One of the advantages of these controls is that they don’t care at all where their data comes
from. The data might be as simple as an ArrayList composed of .NET types (with each ele-
ment in the array representing a row and each property representing a column). On the
other hand, the data bound to a control might be as complex as IDataReader or a DataSet
acquired from a physical database.
262 Part II Advanced Features
Looking at data-bound controls invariably involves mentioning the ASP.NET database story:
ADO.NET. The ADO.NET managed classes are for connecting to the database, commanding
the database, and harvesting the results afterward. Although connecting to the database
manually (via .NET 1.x-style code) is still supported, today .NET and Visual Studio offer an
easier way to associate controls with data via the DataSource controls.
ASP.NET includes a number of data-bound controls that may be matched up with a collection
or (in the case of certain DataSource controls) a data source. The controls then assume the
burden of iterating through the data and rendering the correct tags to the client.
Chapter 11 Quick Reference
To Do This
Bind a collection to a control
Set the control’s DataSource property to the
collection.
Choose a column to display in the control
Set the control’s TextTextField property to the
column name.
Choose a column to use programmatically (that’s NOT
displayed in the control)
Set the control’s TextValueField property to the
column name.
Display a DataTable as a grid Use the DataGrid or the GridView controls.
Display a DataTable as a formatted, repeating list Use the DataList
Make a class’s member variables available as
DataTextFields and DataValueFields within a control
Expose the members as properties.
Represent data using Master/Detail style presentations
Use the FormView control
T
o
D
o Thi
s
263
Chapter 12
Web Site Navigation
After completing this chapter, you will be able to
Understand ASP.NET’s support for navigation and site maps
Implement a site map using an XML data source
Use the site map to power ASP.NET’s navigation controls
Capture and respond to site map navigation events
One of the major issues facing Web site users is fi guring out how to get around the site ef-
fectively. Web sites are often hierarchical in nature, and pages are sometimes nested several
layers deep. Users may often fi nd themselves asking questions like “Where am I now?” and
“Where can I go from here?” This chapter covers ASP.NET’s support for addressing the issue
of Web site navigation.
The art of Web site design has progressed far enough that some common navigation idioms
are beginning to appear ubiquitously. If you browse a few Web sites hosted on various plat-
forms, you’ll notice that the sites support a number of different ways to navigate their con-
tent. For example, many Web sites include a menu bar across the top of the page with links
to separate areas on the site. Certain sites include some sort of tree structure to navigate
the site. Still others include a “breadcrumb” trail showing you where you are and how to get
back. ASP.NET supports all these idioms.
ASP.NET’s Navigation Support
ASP.NET’s navigation support comes in three parts: the navigation controls, the site map
data source, and the site map provider architecture. The navigation controls (the Menu, the
TreeView, and the SiteMapPath) all have the capability to resolve human-readable display
names to real URLs to which HTTP requests may be sent. The site map data source stores
information about a site’s hierarchical organization. The site map provider interprets physical
data (often in the form of an XML fi le) and implements a kind of database cursor represent-
ing the current position within a site’s hierarchy.
The Navigation Controls
ASP.NET includes three server-side controls devoted specifi cally to site navigation—the
SiteMapPath, the Menu, and the TreeView control. The Menu and the TreeView both maintain
collections of display name/URL mappings. These collections may be edited by hand. In addition,
264 Part II Advanced Features
these controls can build hierarchical collections of display name/URL mappings based on
information in a site map data source. The SiteMapPath builds its collection of display name/
URL mappings solely through a site map data source. Table 12-1 summarizes the ASP.NET
navigation controls.
TABLE 12-1 The ASP.NET Navigation Controls
Navigation Control Description
Menu
Interprets the site navigational information contained in the sitemap XML
fi le and presents it in a menu format. Top level XML nodes become top
level menu items, with child XML nodes becoming child menu items.
TreeView
Interprets the site navigational information contained in the sitemap XML
fi le and presents it in a tree format. The top level sitemap XML nodes in
this case become higher-level branches in the tree, with child nodes rep-
resented as child tree nodes.
SiteMapPath
Interprets the site navigational information contained in the sitemap XML
fi le and presents it in a “breadcrumb” format. In this case, only the current
XML node’s path is displayed (from the root node to the current child node).
All three controls are useful for navigation, but the Menu and the TreeView are useful outside
the context of site navigation. SiteMapPath is designed strictly for navigating the Web site’s
sitemap XML fi le. The Menu control displays items hierarchically and fi res events back to the
server as the items are selected. The items in the Menu control may also be assigned naviga-
tion URLs. The TreeView is useful for displaying any hierarchical data source that implements
either the IHierarchicalDataSource or the IHierarchicalEnumerable interface, and it also has
the capability to cause redirects to other URLs (that is, it’s useful for site navigation). And, as I
mentioned, the SiteMapPath is meant specifi cally to be used for Web site navigation.
For shallow Web sites that will probably change very little over time, building a navigation
infrastructure from scratch is not very diffi cult. However, as the complexity of a site increases,
so does the diffi culty in managing a navigation structure.
When you organize your site and determine the layout of your pages, it’s easy to formal-
ize the layout with a master page that includes a menu linking to other pages (just as in the
master page chapter). The work involves creating the menu and adding the links (through the
NavigateUrl property of the menu item). Implementing the navigation infrastructure by hand
is easy enough the fi rst time around. However, as your site grows and becomes more com-
plex, having to update the navigation support repeatedly becomes a problem.
Enter ASP.NET’s navigation and site map support. The main advantage of using ASP.NET’s
navigation support is that you can establish the layout of the site and then represent it using
a hierarchical data structure (like an XML fi le or even a database table). The Menu, TreeView,
and SiteMapPath controls may all point to a site map data source and use the data source to
populate themselves. When you plug the site map data source into the navigation controls,
the navigation controls use the data source to create the individual links.
Nav
i
gat
i
on Control Descr
i
pt
i
on
Chapter 12 Web Site Navigation 265
After the site map has been established, updating the navigation links simply requires
updating the site map. All controls using the site map data source will refl ect the change
automatically.
XML Site Maps
ASP.NET includes built-in support for navigation via XML fi les that describe the layout of the site.
These are called XML site maps. ASP.NET’s default site map support consists of an XML fi le de-
scribing the site layout and the SiteMapProvider that reads the XML fi le and generates SiteMap
nodes to whatever components are listening (for example, a Menu or a TreeView control).
The SiteMapProvider
The SiteMapProvider establishes the base class used by the navigation controls. ASP.NET’s de-
fault implementation is the XmlSiteMapProvider, which reads the XML fi le named (by default)
web.sitemap.
While the default XML site map generally works very well, the ASP.NET navigation controls
are perfectly happy using data sources generated from other places (rather than the XML
data source). For example, you might decide to implement your own site map provider based
on data in a database. The XML site map provides basic raw functionality for navigating a
site. However, if you want to do something like manage the site map using a schema differ-
ent from the default XML schema, that calls for designing a custom provider.
In this chapter, we’ll look at the default XML site map provider—which is plenty powerful for
most circumstances.
The SiteMap Class
The main rendezvous point for the ASP.NET navigation infrastructure is the SiteMap class.
To support the navigation infrastructure, the SiteMap class has a set of static methods for
managing site navigation. The SiteMap class serves as an in-memory representation of the
navigation structure for a site, and its functionality is implemented by one or more site map
providers. It’s an abstract class so it must be inherited.
The SiteMap class performs several functions. First, it serves as the root node of the site navi-
gation hierarchy. Second, it establishes the principal site map provider. Finally, it keeps track
of all the provider objects that comprise the site map.
The SiteMap contains a hierarchical collection of SiteMapNode objects. Regardless of how
the site map data are maintained, the SiteMap is the interface for accessing a site’s navigation
information.