C++ Programming for Games Module II phần 6 ppt
Bạn đang xem bản rút gọn của tài liệu. Xem và tải ngay bản đầy đủ của tài liệu tại đây (1.22 MB, 31 trang )
162
Next, we create a global vector of
Shape pointers, gShapes, which will maintain all the shapes we
have created so that we can draw all the shapes whenever a
WM_PAINT message is generated. In
addition, we keep a global shape pointer
gShape, which will be the temporary shape we will draw while
the user is moving the mouse around and deciding where exactly to make the shape permanent. Notice
how we can talk about shapes in general. This is because of the polymorphism. Each shape will know
how to draw itself correctly based on its concrete dynamic type (that is, if it is a
LineShape then it will
know to draw a line, if it is a
RectShape then it will know to draw a rectangle, and so on).
vector<Shape*> gShapes;
Shape* gShape = 0;
Recall that the program allows the user to draw three kinds of shapes. The primitive menu item that is
selected determines the shape that will be drawn at a given time. For example, if the “Line” menu item
is selected (checked) then the user can draw lines. If the “Rectangle” menu item is selected (checked)
then the user can draw rectangles.
Figure 15.17: User can select which type of shape to draw via the menu.
We need to keep track of which primitive menu item is selected so that we know which kind of shape to
create. To facilitate this, we keep a global variable that keeps track of the currently selected primitive:
int gCurrPrimSel = ID_PRIMITIVE_LINE;
Later in the
WM_LBUTTONDOWN message handler, we create the shape based on the currently selected
type:
switch( gCurrPrimSel )
{
case ID_PRIMITIVE_LINE:
gShape = new LineShape(p0, p1, gLogPen, gLogBrush);
break;
case ID_PRIMITIVE_RECTANGLE:
gShape = new RectShape(p0, p1, gLogPen, gLogBrush);
break;
case ID_PRIMITIVE_ELLIPSE:
gShape = new EllipseShape(p0, p1,gLogPen,gLogBrush);
break;
};
In addition to keeping track of the selected primitive type, we will also want to keep track of the selected
pen and brush color, and the selected pen and brush style. For this purpose, we add the following global
variables:
163
int gCurrPenColSel = ID_PENCOLOR_BLACK;
int gCurrBrushColSel = ID_BRUSHCOLOR_BLACK;
int gCurrPenStyleSel = ID_PENSTYLE_SOLID;
int gCurrBrushStyleSel = ID_BRUSHSTYLE_SOLID;
The values to which these global variables are initialized are the program’s “default” selected values.
Therefore, we also need to check the corresponding menu items at the start of the program so that the
default selections are checked. We implement this functionality in the
WM_CREATE message:
case WM_CREATE:
CheckMenuItem(ghMenu, ID_PRIMITIVE_LINE, MF_CHECKED);
CheckMenuItem(ghMenu, ID_PENCOLOR_BLACK, MF_CHECKED);
CheckMenuItem(ghMenu, ID_BRUSHCOLOR_BLACK, MF_CHECKED);
CheckMenuItem(ghMenu, ID_PENSTYLE_SOLID, MF_CHECKED);
CheckMenuItem(ghMenu, ID_BRUSHSTYLE_SOLID, MF_CHECKED);
return 0;
This way, the default-selected menu items will be checked when the window is first created.
We also keep a global instance of a
LOGPEN and LOGBRUSH:
LOGPEN gLogPen;
LOGBRUSH gLogBrush;
We update the data members of these structures interactively as the user makes new menu selections.
For instance, if the user selects the menu item with the ID
ID_PENSTYLE_DOTTED then we update
gLogPen like so:
case ID_PENSTYLE_DOTTED:
CheckMenuItem(ghMenu, ID_PENSTYLE_DOTTED, MF_CHECKED);
CheckMenuItem(ghMenu, gCurrPenStyleSel, MF_UNCHECKED);
gCurrPenStyleSel = ID_PENSTYLE_DOTTED;
gLogPen.lopnStyle = PS_DOT; // update pen style
return 0;
Also notice how we check the newly selected item, uncheck the previously selected item, then update
gCurrPenStyleSel.
When a shape is created, we pass
gLogPen and gLogBrush into the constructor. For example,
gShape = new LineShape(p0, p1, gLogPen, gLogBrush);
Because we update
gLogPen and gLogBrush immediately as the user selects new colors and styles
from the menu, these objects always reflect the current user menu selections. Therefore, any object
created will always be created with the currently selected pen and brush colors, and pen and brush
styles, which is the exact functionality which should happen.
The majority of code in the paint-drawing program has to do with the menu and updating the primitive
type that is selected, the colors of the pen and brush, and the styles of the pen and brush. The code is
164
long, but simple. For example, the part of the code that checks for which primitive type the user
selected is as follows:
case WM_COMMAND:
switch( LOWORD(wParam) )
{
//=======================================
// Primitive Types (Shape Types)
//=======================================
case ID_PRIMITIVE_LINE:
CheckMenuItem(ghMenu, ID_PRIMITIVE_LINE, MF_CHECKED);
CheckMenuItem(ghMenu, gCurrPrimSel, MF_UNCHECKED);
gCurrPrimSel = ID_PRIMITIVE_LINE;
return 0;
case ID_PRIMITIVE_RECTANGLE:
CheckMenuItem(ghMenu, ID_PRIMITIVE_RECTANGLE, MF_CHECKED);
CheckMenuItem(ghMenu, gCurrPrimSel, MF_UNCHECKED);
gCurrPrimSel = ID_PRIMITIVE_RECTANGLE;
return 0;
case ID_PRIMITIVE_ELLIPSE:
CheckMenuItem(ghMenu, ID_PRIMITIVE_ELLIPSE, MF_CHECKED);
CheckMenuItem(ghMenu, gCurrPrimSel, MF_UNCHECKED);
gCurrPrimSel = ID_PRIMITIVE_ELLIPSE;
return 0;
It is all quite redundant. We simply update which menu items should be checked, and update the global
gCurrPrimSel variable so that it reflects the currently selected item. We execute similar code for the
pen color menu items, the brush color menu items, the pen style menu items, and the brush style menu
items. As mentioned, the code is all largely the same, so we will not discuss it further.
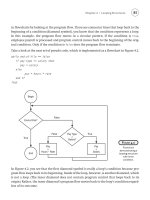
You should now be able to understand the drawing program. The code is listed in Program 15.5.
Program 15.5: Paint drawing program.
#include <windows.h>
#include <string>
#include <vector>
#include "Shape.h"
#include "resource.h"
using namespace std;
//=========================================================
// Globals.
const COLORREF BLACK = RGB(0, 0, 0);
const COLORREF WHITE = RGB(255, 255, 255);
const COLORREF RED = RGB(255, 0, 0);
const COLORREF GREEN = RGB(0, 255, 0);
const COLORREF BLUE = RGB(0, 0, 255);
HWND ghMainWnd = 0;
HINSTANCE ghAppInst = 0;
HMENU ghMenu = 0;
165
vector<Shape*> gShapes;
Shape* gShape = 0;
bool gMouseDown = false;
int gCurrPrimSel = ID_PRIMITIVE_LINE;
int gCurrPenColSel = ID_PENCOLOR_BLACK;
int gCurrBrushColSel = ID_BRUSHCOLOR_BLACK;
int gCurrPenStyleSel = ID_PENSTYLE_SOLID;
int gCurrBrushStyleSel = ID_BRUSHSTYLE_SOLID;
LOGPEN gLogPen;
LOGBRUSH gLogBrush;
//=========================================================
// Step 1: Define and implement the window procedure.
LRESULT CALLBACK
WndProc(HWND hWnd, UINT msg, WPARAM wParam, LPARAM lParam)
{
// Objects for painting.
HDC hdc = 0;
PAINTSTRUCT ps;
// Local POINT variables we will use in some of the case
// statements.
POINT p0;
POINT p1;
switch( msg )
{
case WM_CREATE:
CheckMenuItem(ghMenu, ID_PRIMITIVE_LINE, MF_CHECKED);
CheckMenuItem(ghMenu, ID_PENCOLOR_BLACK, MF_CHECKED);
CheckMenuItem(ghMenu, ID_BRUSHCOLOR_BLACK, MF_CHECKED);
CheckMenuItem(ghMenu, ID_PENSTYLE_SOLID, MF_CHECKED);
CheckMenuItem(ghMenu, ID_BRUSHSTYLE_SOLID, MF_CHECKED);
return 0;
case WM_COMMAND:
switch( LOWORD(wParam) )
{
//=======================================
// File Menu
//=======================================
case ID_FILE_EXIT:
DestroyWindow(ghMainWnd);
return 0;
//=======================================
// Primitive Types (Shape Types)
//=======================================
case ID_PRIMITIVE_LINE:
CheckMenuItem(ghMenu, ID_PRIMITIVE_LINE, MF_CHECKED);
CheckMenuItem(ghMenu, gCurrPrimSel, MF_UNCHECKED);
gCurrPrimSel = ID_PRIMITIVE_LINE;
return 0;
case ID_PRIMITIVE_RECTANGLE:
166
CheckMenuItem(ghMenu, ID_PRIMITIVE_RECTANGLE, MF_CHECKED);
CheckMenuItem(ghMenu, gCurrPrimSel, MF_UNCHECKED);
gCurrPrimSel = ID_PRIMITIVE_RECTANGLE;
return 0;
case ID_PRIMITIVE_ELLIPSE:
CheckMenuItem(ghMenu, ID_PRIMITIVE_ELLIPSE, MF_CHECKED);
CheckMenuItem(ghMenu, gCurrPrimSel, MF_UNCHECKED);
gCurrPrimSel = ID_PRIMITIVE_ELLIPSE;
return 0;
//=======================================
// Pen Colors
//=======================================
case ID_PENCOLOR_BLACK:
CheckMenuItem(ghMenu, ID_PENCOLOR_BLACK, MF_CHECKED);
CheckMenuItem(ghMenu, gCurrPenColSel, MF_UNCHECKED);
gCurrPenColSel = ID_PENCOLOR_BLACK;
gLogPen.lopnColor = BLACK;
return 0;
case ID_PENCOLOR_WHITE:
CheckMenuItem(ghMenu, ID_PENCOLOR_WHITE, MF_CHECKED);
CheckMenuItem(ghMenu, gCurrPenColSel, MF_UNCHECKED);
gCurrPenColSel = ID_PENCOLOR_WHITE;
gLogPen.lopnColor = WHITE;
return 0;
case ID_PENCOLOR_RED:
CheckMenuItem(ghMenu, ID_PENCOLOR_RED, MF_CHECKED);
CheckMenuItem(ghMenu, gCurrPenColSel, MF_UNCHECKED);
gCurrPenColSel = ID_PENCOLOR_RED;
gLogPen.lopnColor = RED;
return 0;
case ID_PENCOLOR_GREEN:
CheckMenuItem(ghMenu, ID_PENCOLOR_GREEN, MF_CHECKED);
CheckMenuItem(ghMenu, gCurrPenColSel, MF_UNCHECKED);
gCurrPenColSel = ID_PENCOLOR_GREEN;
gLogPen.lopnColor = GREEN;
return 0;
case ID_PENCOLOR_BLUE:
CheckMenuItem(ghMenu, ID_PENCOLOR_BLUE, MF_CHECKED);
CheckMenuItem(ghMenu, gCurrPenColSel, MF_UNCHECKED);
gCurrPenColSel = ID_PENCOLOR_BLUE;
gLogPen.lopnColor = BLUE;
return 0;
//=======================================
// Brush Colors
//=======================================
case ID_BRUSHCOLOR_BLACK:
CheckMenuItem(ghMenu, ID_BRUSHCOLOR_BLACK, MF_CHECKED);
CheckMenuItem(ghMenu, gCurrBrushColSel, MF_UNCHECKED);
gCurrBrushColSel = ID_BRUSHCOLOR_BLACK;
gLogBrush.lbColor = BLACK;
return 0;
case ID_BRUSHCOLOR_WHITE:
CheckMenuItem(ghMenu, ID_BRUSHCOLOR_WHITE, MF_CHECKED);
CheckMenuItem(ghMenu, gCurrBrushColSel, MF_UNCHECKED);
gCurrBrushColSel = ID_BRUSHCOLOR_WHITE;
gLogBrush.lbColor = WHITE;
return 0;
167
case ID_BRUSHCOLOR_RED:
CheckMenuItem(ghMenu, ID_BRUSHCOLOR_RED, MF_CHECKED);
CheckMenuItem(ghMenu, gCurrBrushColSel, MF_UNCHECKED);
gCurrBrushColSel = ID_BRUSHCOLOR_RED;
gLogBrush.lbColor = RED;
return 0;
case ID_BRUSHCOLOR_GREEN:
CheckMenuItem(ghMenu, ID_BRUSHCOLOR_GREEN, MF_CHECKED);
CheckMenuItem(ghMenu, gCurrBrushColSel, MF_UNCHECKED);
gCurrBrushColSel = ID_BRUSHCOLOR_GREEN;
gLogBrush.lbColor = GREEN;
return 0;
case ID_BRUSHCOLOR_BLUE:
CheckMenuItem(ghMenu, ID_BRUSHCOLOR_BLUE, MF_CHECKED);
CheckMenuItem(ghMenu, gCurrBrushColSel, MF_UNCHECKED);
gCurrBrushColSel = ID_BRUSHCOLOR_BLUE;
gLogBrush.lbColor = BLUE;
return 0;
//=======================================
// Pen Styles
//=======================================
case ID_PENSTYLE_SOLID:
CheckMenuItem(ghMenu, ID_PENSTYLE_SOLID, MF_CHECKED);
CheckMenuItem(ghMenu, gCurrPenStyleSel, MF_UNCHECKED);
gCurrPenStyleSel = ID_PENSTYLE_SOLID;
gLogPen.lopnStyle = PS_SOLID;
return 0;
case ID_PENSTYLE_DOTTED:
CheckMenuItem(ghMenu, ID_PENSTYLE_DOTTED, MF_CHECKED);
CheckMenuItem(ghMenu, gCurrPenStyleSel, MF_UNCHECKED);
gCurrPenStyleSel = ID_PENSTYLE_DOTTED;
gLogPen.lopnStyle = PS_DOT;
return 0;
case ID_PENSTYLE_DASHED:
CheckMenuItem(ghMenu, ID_PENSTYLE_DASHED, MF_CHECKED);
CheckMenuItem(ghMenu, gCurrPenStyleSel, MF_UNCHECKED);
gCurrPenStyleSel = ID_PENSTYLE_DASHED;
gLogPen.lopnStyle = PS_DASH;
return 0;
//=======================================
// Brush Styles
//=======================================
case ID_BRUSHSTYLE_SOLID:
CheckMenuItem(ghMenu, ID_BRUSHSTYLE_SOLID, MF_CHECKED);
CheckMenuItem(ghMenu, gCurrBrushStyleSel, MF_UNCHECKED);
gCurrBrushStyleSel = ID_BRUSHSTYLE_SOLID;
gLogBrush.lbStyle = BS_SOLID;
return 0;
case ID_BRUSHSTYLE_NULL:
CheckMenuItem(ghMenu, ID_BRUSHSTYLE_NULL, MF_CHECKED);
CheckMenuItem(ghMenu, gCurrBrushStyleSel, MF_UNCHECKED);
gCurrBrushStyleSel = ID_BRUSHSTYLE_NULL;
gLogBrush.lbStyle = BS_NULL;
return 0;
case ID_BRUSHSTYLE_DIAGONAL:
CheckMenuItem(ghMenu, ID_BRUSHSTYLE_DIAGONAL, MF_CHECKED);
CheckMenuItem(ghMenu, gCurrBrushStyleSel, MF_UNCHECKED);
168
gCurrBrushStyleSel = ID_BRUSHSTYLE_DIAGONAL;
gLogBrush.lbStyle = BS_HATCHED;
gLogBrush.lbHatch = HS_BDIAGONAL;
return 0;
case ID_BRUSHSTYLE_CROSS:
CheckMenuItem(ghMenu, ID_BRUSHSTYLE_CROSS, MF_CHECKED);
CheckMenuItem(ghMenu, gCurrBrushStyleSel, MF_UNCHECKED);
gCurrBrushStyleSel = ID_BRUSHSTYLE_CROSS;
gLogBrush.lbStyle = BS_HATCHED;
gLogBrush.lbHatch = HS_CROSS;
return 0;
}
// Handle left mouse button click message.
case WM_LBUTTONDOWN:
// Capture the mouse (we still get mouse input
// even after the mouse cursor moves off the client area.
SetCapture(hWnd);
gMouseDown = true;
// Point that was clicked is stored in the lParam.
p0.x = LOWORD(lParam);
p0.y = HIWORD(lParam);
// We don’t know the end point yet, so set to zero.
p1.x = 0;
p1.y = 0;
// Create the shape based on what shape the user has
// selected in the menu.
switch( gCurrPrimSel )
{
case ID_PRIMITIVE_LINE:
gShape = new LineShape(p0, p1, gLogPen, gLogBrush);
break;
case ID_PRIMITIVE_RECTANGLE:
gShape = new RectShape(p0, p1, gLogPen, gLogBrush);
break;
case ID_PRIMITIVE_ELLIPSE:
gShape = new EllipseShape(p0, p1,gLogPen,gLogBrush);
break;
};
return 0;
// Message sent whenever the mouse moves.
case WM_MOUSEMOVE:
if(gMouseDown)
{
// Current mouse position is stored in the lParam.
p1.x = LOWORD(lParam);
p1.y = HIWORD(lParam);
// Update the end point of the current temporary
// shape based on the mouse position.
gShape->setEndPt(p1);
// Repaint the window so the temporary shape
169
// is redrawn interactively as the mouse moves.
InvalidateRect(hWnd, 0, true);
}
return 0;
case WM_LBUTTONUP:
// Release the captured mouse when the left mouse button
// is lifted.
ReleaseCapture();
gMouseDown = false;
// Current mouse position is stored in the lParam.
p1.x = LOWORD(lParam);
p1.y = HIWORD(lParam);
// Update the end point of the current temporary shape
// based on the mouse position.
gShape->setEndPt(p1);
// The user lifted the left mouse button, so the shape
// becomes permanent, so add it to the shape container.
gShapes.push_back( gShape );
// Repaint the window so the new permanent shape will
// be displayed.
InvalidateRect(hWnd, 0, true);
return 0;
case WM_PAINT:
hdc = BeginPaint(hWnd, &ps);
// Only draw temporary shape if the mouse is down.
if( gMouseDown )
gShape->draw(hdc);
// Draw all the permenent shapes.
for(int i = 0; i < gShapes.size(); ++i)
gShapes[i]->draw(hdc);
EndPaint(hWnd, &ps);
// Handle key down message.
case WM_KEYDOWN:
if( wParam == VK_ESCAPE )
DestroyWindow(ghMainWnd);
return 0;
// Handle destroy window message.
case WM_DESTROY:
PostQuitMessage(0);
return 0;
}
// Forward any other messages we didn't handle to the
// default window procedure.
return DefWindowProc(hWnd, msg, wParam, lParam);
}
170
// WinMain: Entry point for a Windows application.
int WINAPI
WinMain(HINSTANCE hInstance, HINSTANCE hPrevInstance,
PSTR cmdLine, int showCmd)
{
// Save handle to application instance.
ghAppInst = hInstance;
// Step 2: Fill out a WNDCLASS instance.
WNDCLASS wc;
wc.style = CS_HREDRAW | CS_VREDRAW;
wc.lpfnWndProc = WndProc;
wc.cbClsExtra = 0;
wc.cbWndExtra = 0;
wc.hInstance = ghAppInst;
wc.hIcon = ::LoadIcon(0, IDI_APPLICATION);
wc.hCursor = ::LoadCursor(0, IDC_ARROW);
wc.hbrBackground = (HBRUSH)::GetStockObject(WHITE_BRUSH);
wc.lpszMenuName = 0;
wc.lpszClassName = "MyWndClassName";
// Step 3: Register the WNDCLASS instance with Windows.
RegisterClass( &wc );
// Step 4: Create the window, and save handle in globla
// window handle variable ghMainWnd.
ghMenu = LoadMenu(ghAppInst, MAKEINTRESOURCE(IDR_MENU1));
ghMainWnd = ::CreateWindow("MyWndClassName", "My Paint Program",
WS_OVERLAPPEDWINDOW, 200, 200, 640, 480, 0, ghMenu,
ghAppInst, 0);
if(ghMainWnd == 0)
{
::MessageBox(0, "CreateWindow - Failed", 0, 0);
return false;
}
// Step 5: Show and update the window.
ShowWindow(ghMainWnd, showCmd);
UpdateWindow(ghMainWnd);
// Step 6: Enter the message loop and don't quit until
// a WM_QUIT message is received.
MSG msg;
ZeroMemory(&msg, sizeof(MSG));
while( GetMessage(&msg, 0, 0, 0) )
{
TranslateMessage(&msg);
DispatchMessage(&msg);
}
for(int i = 0; i < gShapes.size(); ++i)
delete gShapes[i];
// Return exit code back to operating system.
return (int)msg.wParam;
}
171
15.8 Summary
1. Windows sends a window a WM_PAINT message whenever a window needs to repaint its client
area (or a region of the client area). A window may need to repaint its client area when it is
resized, or when a previously obscured part of it becomes visible. The program can explicitly
send a
WM_PAINT message with the InvalidateRect function. A Windows program should
know how to draw all of its data, so that if all or part of its client area drawing data is erased (by
resizing the window or obscuring the window, for example) it can all be restored at the
appropriate time when the next
WM_PAINT is sent to the window.
2.
A device context is a software abstraction of a display device, such as the video card or a printer.
We do all drawing operations through the device context (abbreviated as DC). As such, we must
pass a handle to a device context (HDC) to all GDI related functions. One way to obtain an
HDC is with the
BeginPaint function.
3.
To draw text onto the client area of a window, we use the TextOut function. To draw a line
onto the client area of a window, we use the
MoveToEx function to specify the line’s start point,
and the
LineTo function to specify the line’s end point. To draw a rectangle onto the client area
of a window, we use the
Rectangle function. Finally, to draw an ellipse onto the client area of
a window, we use the
Ellipse function. Recall that when specifying an ellipse we specify its
bounding rectangle; that is, an ellipse that fits tightly into that bounding rectangle will be drawn.
4.
A bitmap is a matrix of color elements, or pixels. To load a bitmap we must first load the .bmp
file as a resource. After that, we can load the bitmap resource into our program and obtain a
handle to it with the
LoadBitmap function. To copy the pixels in the bitmap to the window’s
client area we use the
BitBlt function. When we are finished with a bitmap, we should delete
it with the
DeleteObject function.
5.
Pens and brushes allow us to alter the way in which shapes are drawn with GDI. In particular,
we can draw shapes with different colors, styles, and patterns. Pens are used to draw lines,
curves, and also to draw the border of solid shapes like rectangles and ellipses. The properties of
a pen are described with the
LOGPEN structure. Brushes are used to fill in the interiors of solid
shapes like rectangles and ellipses. The properties of a brush are described with the
LOGBRUSH
structure.
6.
Menus allow the user to make selections. To load a menu, we must first create a menu resource
in the Visual C++ resource editor. After we have finished editing the menu resource, we can
load it with the
LoadMenu function. To attach the menu to a window, we can pass in a handle to
the menu (
HMENU returned from LoadMenu) to the hMenu parameter of CreateWindow. We
can check/uncheck a menu item with the
CheckMenuItem function. When the user selects a
menu item, Windows sends the window a
WM_COMMAND message. The lower 16-bits of the
wParam parameter of this message specify the numeric resource ID of the menu item that was
selected. In this way, we can test which menu item was selected and execute the appropriate
consequential code.
172
15.9 Exercises
15.9.1 Colors
Modify Program 15.5 by adding additional pen and brush colors (you pick the colors), which the user
can select from the menu and draw with.
15.9.2 Styles
Look up the LOGPEN and LOGBRUSH structures in the Win32 documentation to see some of the
additional styles and hatch patterns that are supported. Modify Program 15.5 by adding additional pen
and brush styles/hatch patterns (you pick the styles/patterns), which the user can select from the menu
and draw with.
15.9.3 Cube
Figure 15.18 shows a cube. As you can see, a cube is made up of twelve lines. Write a function that
draws a cube to the client area of a window. Then add a new “cube” primitive to Program 15.5 that the
user can select from the menu and draw.
Figure 15.18: A cube outline drawn with twelve lines.
15.9.4 Undo Feature
Modify Program 15.5 by implementing an undo feature that erases the last shape that was drawn (add an
undo menu item). Be sure to avoid memory leaks.
173
Chapter 16
Introduction to
Dialogs and Controls
174
Introduction
The final Win32 API-related topics we need to discuss are dialog boxes and controls. A dialog box is a
type of window, which is commonly used to display a variety of controls the user can set and configure.
Figure 16.1 shows a dialog box that is used in the demos programs for the DirectX Graphics
Programming course here at Game Institute.
Figure 16.1: An example of a dialog box with controls.
As you can see from Figure 16.1, controls and dialog boxes go hand in hand.
Chapter Objectives
• Learn how to create modal and modeless dialog boxes, and how to distinguish between the two.
•
Discover how to create and design dialog boxes with the Visual C++ resource editor.
•
Become familiar with several Win32 controls such as static text controls, picture box controls,
edit box controls, radio button controls, button controls, and combo box controls.
Note: As with the previous two Win32 API chapters in this book, we cannot possibly cover everything.
Therefore, if you are interested in learning how to create the various other Win32 controls you may have
seen, but which we do not cover here (e.g., slider controls, color controls, spin controls, tree controls),
then you will need to consult MSDN or a book devoted to the Win32 API. The standard “bible” text on
the Win32 API is
Programming Windows 5
th
Edition
By Charles Petzold.
175
16.1 Modal Dialog Boxes; The Static Text Control; The
Button Control
A modal dialog box is a dialog box that does not close until the user has made some sort of selection
(i.e., the user cannot switch to another window until the modal dialog box has ended). Typically, an
application will use a modal dialog box when it needs immediate input from the user, and cannot
continue until it receives that input. For our first program, we will illustrate a modal dialog box by
creating a simple window that can display an “About” dialog box. Figure 16.2 shows our goal:
Figure 16.2: The dialog box is launched by going to File and selecting the “About” menu item.
16.1.1 Designing the Dialog Box
Dialogs are created and edited in the Visual C++ Resource editor, just like menus and icons. Select the
Add Resource button and select a “Dialog” from the “Add Resource” dialog and then select the “New”
button—Figure 16.3.
176
Figure 16.3: Select “Dialog” and then press the “New” button.
At this point, the Dialog Editor will open up. Before we begin designing the dialog box, let us rename
the dialog resource ID to IDD_ABOUTBOX—Figure 16.4.
Figure 16.4: Renaming the dialog resource ID to IDD_ABOUTBOX.
Now, design your dialog box as Figure 16.5 shows.
177
Figure 16.5: Designing the dialog. To add a control to the dialog, select the control from the left hand side control
listing and drag it onto the dialog.
To delete a control, select the control from the dialog and press the delete key on your keyboard. To add
a control to the dialog, select the control from the left hand side control listing and drag it onto the
dialog. You can move controls around the dialog by selecting them and dragging them about; controls
can also be resized by dragging the borders of the control windows.
First, change the dialog box caption from “Dialog” to something else. We chose to rename it as “About
Box.” You can rename the dialog box caption by selecting the dialog box and editing the “Caption”
property—Figure 16.6
a. The dialog properties should be displayed in the lower right corner of Visual
C++ .NET when you select the dialog. While we are editing the dialog box properties, also set the
“System Menu” property to false—Figure 16.6
b. This removes the ‘X’ close button from the dialog
box—typically, modal dialog boxes do not have system menus.
Second, change the static text from the default text to “Game Institute About Dialog Box. Version 1.0.”
Just like menu items, each control has a list of properties, which are displayed in the lower right corner
of Visual C++ .NET when you select the control. You can change the caption of the static text control
by editing the “Caption” property.
178
Next, load the Game Institute logo into the picture box (you can use another image if you like, of
course). First, you need to load the bitmap image as a resource. We showed how to load a bitmap
resource in the previous chapter. In our program, we keep the default bitmap resource ID, namely,
IDB_BITMAP1. Now, select the picture control so that its properties are displayed. Change the “Type”
property to “Bitmap” and then change the “Image” property to the bitmap resource ID which you want
displayed in the picture box. In our example, this is IDB_BITMAP1—Figure 16.6
c.
Figure 16.6: (a) Changing the dialog box’s caption. (b) Removing the dialog box’s system menu. (c) Setting the
picture control type to bitmap, and loading the bitmap IDB_BITMAP1 as the picture box’s image.
Your loaded image logo should now be displayed in the picture box, as it is in Figure 16.5.
Note that we do not care about the resource ID of the picture box control or the static text control. This
is because these controls are static and do not change, in general. Thus we will not need to access them
from our program. However, we should take a brief look at the properties of the OK button control.
Recall that the button was placed on the dialog box by default. If we select the OK button control, the
properties window looks like Figure 16.7. The key observation for now is that the resource ID that was
given to it: IDOK. That name sounds reasonable, so we will keep it, but we must remember it because
we will need to know the ID so that we can execute the appropriate code when the user presses the
button in the program. In particular, we will kill the modal dialog when the user presses the OK button.
179
Figure 16.7: The OK Button’s control properties.
16.1.2 Modal Dialog Box Theory
A dialog box is a kind of window, and as such, has its own window procedure function. A dialog box
window procedure looks similar to a regular window procedure except that it returns
BOOL, which is
typedefed as int by the Win32 API. Here is a typical dialog procedure declaration:
BOOL CALLBACK
AboutDlgProc(HWND hDlg, UINT msg, WPARAM wParam, LPARAM lParam);
A special message that is specific to dialog boxes is the
WM_INITDIALOG message. This message is an
analog to the
WM_CREATE message we handle for non-dialog windows. Typically, we handle the
WM_INITDIALOG message so that we can initialize the controls of the dialog to default values. In
addition, the
WM_INITDIALOG is a good place to obtain window handles to each control on the dialog
(remember, controls are child windows and the dialog is the parent window).
After we have implemented a dialog window procedure, we can display a modal dialog with the
DialogBox function:
DialogBox(
ghAppInst, // Application instance.
MAKEINTRESOURCE(IDD_ABOUTBOX), // Dialog resource ID.
hWnd, // Parent window of dialog box.
AboutDlgProc); // Ptr to dialog box window procedure.
180
Note that
DialogBox is used only for modal dialog boxes. We will illustrate how to create and show
modeless dialog boxes in the next section.
In the sample program we developed, we display the “About” dialog box when the user selects the
“About” menu item—see Figure 16.8.
Figure 16.8: The user can launch the “About” dialog box by selecting the “About” menu item.
In the main window procedure, we execute the
DialogBox function in response to the user selecting the
“About” menu item like so:
// User selected About menu item, so show the modal dialog box.
case ID_FILE_ABOUT: // About menu item resource ID.
DialogBox(
ghAppInst, // Application instance.
MAKEINTRESOURCE(IDD_ABOUTBOX), // Dialog resource ID.
hWnd, // Parent window of dialog box.
AboutDlgProc); // Ptr to dialog box window procedure.
return 0;
To close a modal dialog box, we use the
EndDialog function. This function is used only for modal
dialog boxes—modeless dialog boxes are destroyed via another approach. By convention, a modal
dialog box is typically ended when the user presses the OK or CANCEL buttons of the dialog box. In
our “About” dialog box we only have an OK button. Now we need to address how button clicks are
handled with dialog boxes. When a button is clicked, a
WM_COMMAND message is sent to the parent
window, which would be the dialog window. This is similar to what happens when a menu item is
clicked. The lower 16-bits of the
wParam parameter specify the resource ID of the button that was
clicked. Consequently, in the dialog procedure, we can check if a particular button was clicked by
handling the
WM_COMMAND message and examining the lower 16-bits of the wParam:
case WM_COMMAND:
// The low 16-bits of the wParam stores the resource
// ID of the button control the user pressed. So from
// that information, we can determine which button was pressed
181
switch(LOWORD(wParam))
{
// Did the user press the OK button (resource ID = IDOK)?
// If so, close the dialog box.
case IDOK:
EndDialog(
hDlg, // Handle to dialog to end.
0); // Return code generally always zero.
return true;
}
break;
In summary:
• Create and design the graphical layout of a dialog box with the Visual C++ Resource Editor.
•
A dialog box is a kind of window and, as such, needs its own dialog procedure.
•
A modal dialog can be displayed with the DialogBox function.
•
A modal dialog can be ended with the EndDialog function.
•
When a button control is pushed, it sends a WM_COMMAND message to the parent dialog’s window
procedure.
16.1.3 The About Box Sample
Now that we have created and designed a dialog resource, and have discussed the necessary background
for showing and ending modal dialog boxes, we present the code for the “About” dialog box sample, as
displayed in Figure 16.2. The concepts related to dialog boxes have been bolded.
Program 16.1: This program displays a window with a menu. The menu has an “About” menu item, which, when
clicked, displays an about dialog box. See Figure 16.2 for an illustration.
#include <windows.h>
#include "resource.h" // For dialog and menu resource.
// Store handles to the main window and application
// instance globally.
HWND ghMainWnd = 0;
HINSTANCE ghAppInst = 0;
HMENU ghMenu = 0;
// Define a window procedure for the dialog box:
// A dialog box is a kind of window, and as such we need to
// define a window procedure for it.
BOOL CALLBACK
AboutDlgProc(HWND hDlg, UINT msg, WPARAM wParam, LPARAM lParam)
{
switch( msg )
{
// A WM_INITDIALOG message is sent right before the
// dialog is displayed. This gives you a chance to
// initialize any dialog related variables. For an
// About Box, we do not need to do any initialization
182
// so we just return true.
case WM_INITDIALOG:
return true;
// We learned in the last chapter that a WM_COMMAND
// message is sent when the user selects a menu item
// from the menu. In addition to that, a WM_COMMAND
// message is also sent when the user presses a
// button control.
case WM_COMMAND:
// The low 16-bits of the wParam stores the resource
// ID of the button control the user pressed. So from
// that information, we can determine which button was
// pressed.
switch(LOWORD(wParam))
{
// Did the user press the OK button (resource ID = IDOK)?
// If so, close the dialog box.
case IDOK:
EndDialog(
hDlg, // Handle to dialog to end.
0); // Return code generally always zero.
return true;
}
break;
}
return false;
}
// Step 1: Define and implement the window procedure.
LRESULT CALLBACK
WndProc(HWND hWnd, UINT msg, WPARAM wParam, LPARAM lParam)
{
switch( msg )
{
case WM_COMMAND:
switch( LOWORD(wParam) )
{
case ID_FILE_EXIT:
DestroyWindow(ghMainWnd);
return 0;
// User click the “About” menu item?
case ID_FILE_ABOUT:
DialogBox(
ghAppInst, // Application instance.
MAKEINTRESOURCE(IDD_ABOUTBOX), // Dialog resource ID.
hWnd, // Parent window of dialog box.
AboutDlgProc); // Ptr to dialog box window procedure.
return 0;
}
return 0;
// Handle destroy window message.
case WM_DESTROY:
PostQuitMessage(0);
return 0;
}
// Forward any other messages we didn't handle to the
183
// default window procedure.
return DefWindowProc(hWnd, msg, wParam, lParam);
}
// WinMain: Entry point for a Windows application.
int WINAPI
WinMain(HINSTANCE hInstance, HINSTANCE hPrevInstance,
PSTR cmdLine, int showCmd)
{
// Save handle to application instance.
ghAppInst = hInstance;
// Step 2: Fill out a WNDCLASS instance.
WNDCLASS wc;
wc.style = CS_HREDRAW | CS_VREDRAW;
wc.lpfnWndProc = WndProc;
wc.cbClsExtra = 0;
wc.cbWndExtra = 0;
wc.hInstance = ghAppInst;
wc.hIcon = ::LoadIcon(0, IDI_APPLICATION);
wc.hCursor = ::LoadCursor(0, IDC_ARROW);
wc.hbrBackground = (HBRUSH)::GetStockObject(WHITE_BRUSH);
wc.lpszMenuName = 0;
wc.lpszClassName = "MyWndClassName";
// Step 3: Register the WNDCLASS instance with Windows.
RegisterClass( &wc );
// Step 4: Create the window, and save handle in globla
// window handle variable ghMainWnd.
ghMenu = LoadMenu(ghAppInst, MAKEINTRESOURCE(IDR_MENU1));
ghMainWnd = ::CreateWindow("MyWndClassName", "About Box",
WS_OVERLAPPEDWINDOW, 0, 0, 540, 380, 0, ghMenu,
ghAppInst, 0);
if(ghMainWnd == 0){
::MessageBox(0, "CreateWindow - Failed", 0, 0);
return false;
}
// Step 5: Show and update the window.
ShowWindow(ghMainWnd, showCmd);
UpdateWindow(ghMainWnd);
// Step 6: Enter the message loop and don't quit until
// a WM_QUIT message is received.
MSG msg;
ZeroMemory(&msg, sizeof(MSG));
while( GetMessage(&msg, 0, 0, 0) )
{
TranslateMessage(&msg);
DispatchMessage(&msg);
}
// Return exit code back to operating system.
return (int)msg.wParam;
}
184
16.2 Modeless Dialog Boxes; The Edit Control
A modeless dialog box is a dialog box that behaves like a normal window, but is still a dialog box.
Unlike modal dialog boxes, the user can switch to other windows as desired. Therefore, the modeless
dialog box acts like an independent freestanding window. In fact, you can make a modeless dialog box
your primary application window. Take a look at the Calculator program—Figure 16.9—that ships with
Windows and you will observe that it is a pure dialog application.
Figure 16.9: The Windows Calculator program is a pure dialog based application.
Typically, an application uses a modeless dialog box as a tool dialog. That is, the user wants the dialog
to be floating around so that it can be accessed quickly and efficiently. Adobe Photoshop is a good
example of a program that uses a floating tool dialog.
The rest of the programs we create in this chapter will be purely dialog based and use a modeless dialog
box. The next sample program illustrates how to use an edit box control. But before we get to that, we
must first learn how modeless dialog boxes are created and destroyed (recall it is different from modal
dialog boxes).
16.2.1 Modeless Dialog Box Theory
First, as with modal dialog boxes, modeless dialog boxes are also a kind of window and as such, they
too have a window procedure. The window procedure is implemented in the same way a modal dialog
box procedure is, so we will not discuss it further.
Let us now examine how modeless dialog boxes are created. To create a modeless dialog box, we use
the
CreateDialog function instead of the DialogBox function:
185
HWND ghDlg = CreateDialog(
hInstance, // Application instance.
MAKEINTRESOURCE(IDD_MSGDLG), // Dialog resource ID.
0, // Parent window null for no parent.
EditDlgProc); // Dialog window procedure.
The parameters are similar to that of
DialogBox. We note, however, that CreateDialog returns a
window handle to the created dialog box window.
After a dialog is created, we need to show it with
ShowWindow:
// Show the dialog.
ShowWindow(ghDlg, showCmd);
Note: There is a dialog property you can set in the dialog resource editor called “Visible.” If the property
“Visible” is set to true then the dialog will be shown by default and a call to
ShowWindow is
unnecessary. Try it.
To destroy a modeless dialog, we use the
DestroyWindow function instead of the EndDialog
function:
// If the dialog was closed (user pressed 'X' button)
// then terminate the dialog.
case WM_CLOSE:
DestroyWindow(hDlg);
return true;
The final difference between a modeless dialog box and a modal dialog box has to do with the way
messages are processed; we must do a little more work with a modeless dialog. In particular, we need to
intercept messages aimed for the dialog box from the message loop and forward them to the dialog box
procedure. This is done for us with modal dialog boxes. To do this interception we use the
IsDialogMessage function. This function returns true if the message is indeed a dialog message, and
if it is a dialog message it will also dispatch the message to the dialog’s window procedure. Here is the
rewritten message loop:
while( GetMessage( &msg, 0, 0, 0 ) )
{
// Is the message a dialog message? If so the function
// IsDialogMessage will return true and then dispatch
// the message to the dialog window procedure.
// Otherwise, we process as the message as normal.
if( ghDlg == 0 || !IsDialogMessage(ghDlg, &msg ) )
{
// Process message as normal.
TranslateMessage(&msg);
DispatchMessage(&msg);
}
}
186
Essentially, the line
IsDialogMessage(ghDlg, &msg )
can be read as “is the message stored in
msg aimed for the dialog box referred to by ghDlg?”
Also note that if the dialog handle is null (
ghDlg == 0, which means the dialog was destroyed or has
not been created yet) then the ‘if’ statement will be true and the message will be processed normally.
16.2.2 The Edit Box Sample: Designing the Dialog Resource
We now need to design the dialog for our second sample program. This sample program will have an
edit box, which allows the user to input some text. The program will also have a button. When the user
presses the button a message box will be displayed. The message box will contain whatever text the
user entered into the edit box. The goal of this program is to illustrate how text is extracted from an edit
box control. Figure 16.10 shows a screenshot.
Figure 16.10: This program extracts the text entered in the edit box and displays it in a message box whenever the
user presses the “Post Msg” button.
The first task is to design a dialog box in the resource editor as Figure 16.11 shows:
Figure 16.11: Designing the message dialog.