microsoft press windows workflow foundation step by step phần 7 pps
Bạn đang xem bản rút gọn của tài liệu. Xem và tải ngay bản đầy đủ của tài liệu tại đây (962.62 KB, 57 trang )
Chapter 10 Event Activities 215
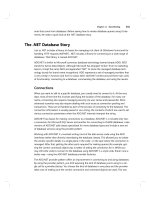
Figure 10-2 Adding a new watched stock
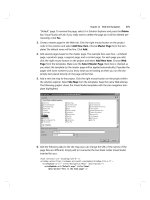
Selecting a symbol in the ticker symbol list enables the Remove button. Clicking the Remove
button removes the item from the watched stock list. The removal action is shown in Figure
10-3. The stocks you are monitoring are stored in the application’s Settings file (in XML form).
The next time you execute eBroker, it will “remember” your stocks and begin checking anew.
Figure 10-3 Removing an existing watched stock
In Figure 10-2, you see that the application needs to know how many shares you currently
have so that it can calculate the total value of the shares you own. These figures are used to cal-
culate the current market value. If you later want to adjust the number of shares (by buying
and selling stock), select the stock in the market value list and click either Buy! or Sell! The
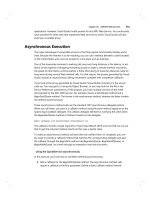
dialog box you see in Figure 10-4 will request the number of shares you want to buy or sell,
and the workflow will be notified.
Figure 10-4 Dialog box requesting number of shares to buy or sell
The Add dialog box in Figure 10-2 also requests buy and sell “trigger” amounts. The workflow
contains business logic that uses these values to notify you when not you should buy or sell
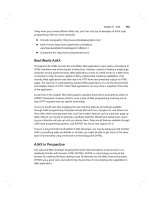
shares in any of the companies you are currently monitoring. If the stock price exceeds the sell
trigger value, a red flag is displayed in the market list. If the stock price drops below the buy
trigger value, a green flag appears. You can buy and sell shares at any time the flags are just
visual indicators. You see a couple of flags in Figure 10-5.
216 Part II Working with Activities
Figure 10-5 The eBroker user interface indicating buy/sell recommendations
Note DO NOT think for a microsecond that the simulation I’ve provided here in any way
truly simulates any stock market or company on the planet. The simulation is completely fab-
ricated for demonstration purposes only.
Each of these four buttons (Add, Remove, Buy! and Sell!) fires an event to the workflow, pro-
viding the appropriate content, which includes the watched stock to add or remove and the
number of shares to buy or sell (so that the total market value is accurate). There is a fifth
event, Stop, that is used to stop the simulation from executing. This event is fired by the Quit
button.
Much of the application has been written for you, allowing you to concentrate on the
workflow-related aspects. Here is the bigger picture. First, you’ll complete the interface
the workflow and host will use for communication. Then you’ll use wca.exe to create activities
based on the CallExternalMethod activity and the HandleExternalEvent activity. With these in
hand, you’ll lay out the actual workflow, using each of the activities you’ve seen in this chapter.
You’ll see how the local communication service glues the host application and workflow com-
munication process together. And finally, you’ll briefly examine and add code to the eBroker
user interface source file to direct it to interact with the workflow. Let’s get started!
Creating the Communication Interface
We need a single method, MarketUpdate, to return market information to the user interface,
as well as five events. The events—AddTicker, RemoveTicker, BuyStock, SellStock, and Stop—are
used to drive the workflow. The single method and five events are plugged into an interface,
which we’ll build first. Everything related to the local communications service hinges on
this interface.
Creating a workflow data communication interface
1. Open Visual Studio, and open the eBroker application’s solution from the book samples.
You’ll find the solution in \Workflow\Chapter10\. Click File, Open, and then finally
Chapter 10 Event Activities 217
Project/Solution. Using the resulting Open Project dialog box, browse your computer’s
file system until you find this chapter’s sample and open its solution file.
Note
As with the most sample applications in this book, the eBroker sample applica-
tion comes in two forms: incomplete and complete. You can follow along and add
code to the incomplete version, or you can open the complete version and verify that
the code I mention here is in place.
2. You will find that three projects have been added to the solution. In Visual Studio
Solution Explorer, expand the eBrokerService project and open the IWFBroker.cs file for
editing.
3. Locate the namespace definition. After the opening brace for the eBrokerService
namespace, add this code and then save the file:
[ExternalDataExchange]
public interface IWFBroker
{
void MarketUpdate(string xmlMarketValues);
event EventHandler<TickerActionEventArgs> AddTicker;
event EventHandler<TickerActionEventArgs> RemoveTicker;
event EventHandler<SharesActionEventArgs> BuyStock;
event EventHandler<SharesActionEventArgs> SellStock;
event EventHandler<StopActionEventArgs> Stop;
}
4. Compile the project by pressing Shift+F6 or by selecting Build eBrokerService from the
main Visual Studio Build menu. Correct compilation errors, if any.
Don’t forget the ExternalDataExchange attribute. Without it you cannot successfully transfer
information between workflow and host using the data transfer mechanism I describe here.
Before you create the communication activities (using wca.exe), take a moment to open
and glance through the event arguments you see in the eBrokerService project.
MarketUpdateEventArgs is really no more than a strongly typed version of
System.Workflow.ExternalDataEventArgs, as is StopActionEventArgs. These event argument
classes convey no data. However, TickerActionEventArgs and SharesActionEventArgs both
convey information to the workflow. TickerActionEventArgs carries XML representing the
stock to add or remove, while SharesActionEventArgs carries the ticker symbol as a primary
key, as well as the number of shares to buy or sell.
Tip
Designing the event arguments is important because the event arguments carry data
from the host to the workflow. Moreover, wca.exe examines the event arguments and builds
bindings into the derived classes that allow you to access the data from the event arguments
as if the data were intrinsic to the derived activity. Put another way, if the event argument has
a property named OrderNumber, the class that wca.exe builds would have a property named
OrderNumber. Its value would come from the underlying event’s event argument and would
be assigned automatically for you.
218 Part II Working with Activities
Now let’s use wca.exe to create the communication activities.
Creating the communication activities
1. To begin, click the Start button and then the Run button to activate the Run dialog box.
Windows Vista users who have not installed the Run command on the Start button can
run the command prompt by selecting the All Programs button from the Start menu.
When the programs appear, select Accessories and then Command Prompt.
2. Type cmd in the Open combo box control, and click OK. This activates the Command
Shell.
3. Change directories so that you can directly access the eBrokerService assembly in
the book’s downloaded sample code. Typically, the command to type is as follows:
cd "\Workflow\Chapter10\eBroker\eBrokerService\bin\Debug". However, your
specific directory might vary.
4. As you did in Chapter 8, type the following at the command-line prompt (including
the double quotes): "<%Program Files%>\Microsoft SDKs\Windows\v6.0
\Bin\Wca.exe" /n:eBrokerFlow eBrokerService.dll. (Note that <%Program Files%>
represents the location of your Program Files directory, typically "C:\Program Files".)
Press the Enter key.
5. wca.exe loads the assembly it finds in eBrokerService.dll and scans the interfaces it
locates for one decorated with the ExternalDataExchange attribute, which in this case
is IWFBroker. The methods are parsed out and turned into classes derived from the
CallExternalMethod activity and stored in the file named IWFBroker.Invokes.cs. The
events are similarly turned into classes derived from the HandleExternalEvent activity
and placed in IWFBroker.Sinks.cs. Rename the “invokes” file by typing this command
on the command line: ren IWFBroker.Invokes.cs ExternalMethodActivities.cs.
6. Rename the “sinks” file by typing the following at the command-line prompt:
ren IWFBroker.Sinks.cs ExternalEventHandlers.cs.
7. Move both files from the current directory into the workflow project’s directory using
this command: move External*.cs \ \ \eBrokerFlow.
8. Now return to Visual Studio and add the newly created files to the eBrokerFlow work-
flow project. Right-click the eBrokerFlow project name in Solution Explorer and select
Add, then Existing Item. From the resulting Add Existing Item dialog box, select the
files to add and then click Add. Be sure to add both ExternalMethodActivities.cs and
ExternalEventHandlers.cs to the project.
9. Compile the eBrokerFlow project by pressing Shift+F6, and fix any compilation errors
that might have occurred. Once you have a successful compilation, verify that Visual
Studio placed the custom activities (in the C# files you just loaded) into the Toolbox. To
do this, open Workflow1.cs for editing in the visual designer by selecting the file and
then clicking the View Designer toolbar button in Solution Explorer. With the workflow
Chapter 10 Event Activities 219
loaded into the visual workflow designer, open the Toolbox and look for the custom
events. You should find AddTicker, BuyStock, and so forth loaded at the head of the Tool-
box tool list.
Note
As a reminder, if after compiling the workflow solution the new activities don’t
appear in the Toolbox, closing and then opening the eBroker solution will force them
to load. You’ll need them in the next section.
Creating the broker workflow
1. In the eBrokerFlow project, if you didn’t already open Workflow1.cs for editing in the
visual designer, do so now. Select the file in Solution Explorer and click the View
Designer button on the toolbar.
2. To begin the workflow, insert a Code activity that will be used to assign the desired time
duration to a Delay activity (which you’ll insert later), as well as to initialize some internal
data structures. Drag an instance of the Code activity onto the visual workflow designer’s
surface. Once you’ve done this, type Initialize into the ExecuteCode property to create
the Initialize event handler in the workflow code. After Visual Studio inserts the event
handler, return to the workflow visual designer to continue adding activities.
Note
Although the user interface doesn’t allow you to change this, there is a setting
for a delay in the workflow that governs the Delay activity in this step. This delay rep-
resents the time elapsed between successive stock value queries. In reality, you’d not
check more often than every 15 or 20 minutes, if that often. But to see the values
actually shift and change, the delay between the simulated stock-market value checks
is set to 7 seconds. The delay value is stored in Settings.
3. Next drag an instance of EventHandlingScope onto the visual workflow designer’s surface
and drop it.
220 Part II Working with Activities
4. Remember that you need to provide an event handler as well as a child activity for
EventHandlingScope to execute while it waits for the event. Let’s set up the event handler
first. To access the event handlers, move the mouse pointer to the tiny rectangular icon
below the first e in eventHandlingScope1. (The rectangle is known as a “Smart Tag.”)
The Smart Tag is transformed into a larger, darker rectangle with a down arrow.
Click the down arrow to activate a small window with four icons: View EventHandling-
Scope, View Cancel Handler, View Fault Handlers, and View Event Handlers.
Click the rightmost icon to activate the Event Handlers view. The user interface you see
is a lot like the user interface associated with fault handlers that you saw in Chapter 7,
“Basic Activity Operations.”
Chapter 10 Event Activities 221
Drag an instance of the EventDriven activity onto the visual workflow designer’s surface
and drop it into the center rectangle (where you see the text “Drop Event Driven Activity
Here”).
5. Now return to the Toolbox and look for the Stop activity in the eBrokerFlow Compo-
nents section. Drag an instance of this activity onto the visual workflow designer’s sur-
face, and drop it into the EventDriven activity you added in the preceding step. If you
want to wait for multiple events, you can drag and drop them at this time. In our case,
only the Stop event is desired.
222 Part II Working with Activities
6. You’ve just added the event that the EventHandlingScope activity will wait for to cease
execution (conveniently named “Stop”). Next you need to add the child activity that
EventHandlingScope will execute while waiting for the Stop activity to fire. To do this, you
need to return to eventHandlingScopeActivity1’s event handling scope view by repeating
the first part of step 4. However, instead of selecting the right icon, select the left icon.
7. Once you click the leftmost icon (“View EventHandlingScope”) and are presented with
the EventHandlingScope activity’s container-based user interface, drag an instance of the
While activity onto the visual workflow designer’s surface and drop it in the center of
your EventHandlingScope activity.
8. Assign its Condition property to be a Code Condition, rather than a Declarative Rule
Condition, and assign the event handler the name TestContinue. Once Visual Studio
Chapter 10 Event Activities 223
adds the TestContinue event handler, return to the visual workflow designer to add more
activities.
9. The While activity accepts only a single child activity, so drop an instance of the Sequence
activity into the While activity you just placed in your workflow.
10. You need a Code activity at this point to perform the Monte Carlo stock-value simulation,
so drag an instance of Code onto the designer’s surface and drop it into the Sequence
activity you added in the preceding step. Use the Properties window to rename it
updateMarket.
224 Part II Working with Activities
11. Assign the updateMarket Code activity’s ExecuteCode property to be UpdateMarketValues.
After Visual Studio adds the method and switches you to the code editor, return to the
visual workflow designer to continue laying out your workflow.
12. With the results of the simulation complete (after you add the code to actually perform
the simulation), you need to communicate the potentially revised values to the host
application. To do this, move the mouse pointer to the Toolbox and find the MarketUp-
date activity you created from IWFBroker and drag it onto the designer’s surface. Drop it
into the Sequence activity following the Code activity you placed in the preceding step.
13. The MarketUpdate activity needs to send a small XML snippet to the host. To do that, it
must bind to the field or property that, at the time, contains the XML it will forward. To
do this, select the xmlMarketValues property in the Visual Studio Properties pane and
click the Browse (…) button to activate the Bind ‘xmlMarketValues’ To An Activity’s
Property dialog box. Click the Bind To A New Member tab, click Create Property, and
Chapter 10 Event Activities 225
type Updates in the New Member Name field. Click OK. Visual Studio then adds the
dependency property Updates.
14. So that you can handle the events coming from the host, drag an instance of the Listen
activity onto the designer’s surface and drop it into the Sequence activity.
15. If you recall, the IWFBroker interface specified five events. One of them, Stop,
you’ve already used, leaving four more to handle. The Listen activity presents only two
EventDriven activity containers by default, but adding more is easy. Simply drag and drop
three more EventDriven activity instances into the Listen activity you placed in the pre-
ceding step. Why add three more and not just two? Because the fifth EventDriven activity
contains a Delay activity that acts as a timer. When the delay expires, the Listen activity
releases the workflow thread. The While activity then tests the condition, which later will
always be set to return true, leaving the While loop to loop forever. The market values are
updated and communicated to the host. The Listen activity then waits for another round
of host events.
226 Part II Working with Activities
16. Into the rightmost EventDriven activity, drag and drop a Delay activity. Name it
updateDelay using the Properties pane.
17. Next drag an instance of SellStock, from eBrokerFlow, onto the designer’s surface, and
drop it into the next rightmost EventDriven activity.
Chapter 10 Event Activities 227
18. Select the NumberOfShares property in the Visual Studio Properties pane, and click the
browse (…) button to again activate the Bind ‘NumberOfShares’ To An Activity’s Property
dialog box. Click the Bind To A New Member tab, click Create Field, and type
_sharesToSell in the New Member Name field. Click OK. Visual Studio then adds
the field _sharesToSell.
Note
I chose to create _sharesToSell as a field instead of as a dependency property
simply because the field is never accessed outside the Workflow1 class. The XML-based
market values are provided to the host, however, and should be exposed to outside
access.
19. The Symbol property must also be bound. Follow the same procedure as in the preceding
step, but name the field _tickerToSell.
228 Part II Working with Activities
20. To actually perform the stock sale, drag an instance of the Code activity and drop it below
the SellStock event handler. Into its ExecuteCode property, type SellStock. Once the code
for SellStock is added, return to the visual workflow designer.
21. Now let’s buy some stock. Drag a BuyStock event handling activity (again from
eBrokerFlow) onto the designer’s surface, and drop it into the middle EventDriven
activity.
Chapter 10 Event Activities 229
22. Bind the BuyStock activity’s NumberOfShares property to a new field, _sharesToBuy, using
the method outlined in step 18. Bind its Symbol property to a new field, _tickerToBuy, as
you did in step 19.
23. Just as you needed a Code activity to sell stock, so will you need a Code activity to buy
stock. Repeat step 20 and add a new Code activity, naming its ExecuteCode method
BuyStock.
24. Repeat steps 17 through 20 two more times, adding the RemoveTicker and AddTicker
events to the Listen activity. The RemoveTicker activity should have its TickerXML prop-
erty bound to a new _tickerToRemove field, while the Code activity for the RemoveTicker
event should have its ExecuteCode property assigned to be RemoveTicker. Similarly,
AddTicker should have its TickerXML property bound to _tickerToAdd, with the
230 Part II Working with Activities
associated Code activity’s ExecuteCode property assigned to be AddTicker. The
completed Listen activity appears as you see here.
25. Compile your workflow by pressing Shift+F6, and correct any errors before adding code.
The visual aspects of the workflow development are now complete.
26. Open the Workflow1.cs file for editing within Visual Studio.
27. Visual Studio added quite a bit of code for you, so first locate the Workflow1 constructor
and insert this code following the constructor. The code you are inserting you probably
recognize as initialization code. When the workflow is started, you’ll pass the workflow
a dictionary of watched stock items contained in a collection of Tickers items keyed by
the stock ticker symbol, such as “CONT.” You also need to provide the polling interval,
which is the amount of time the workflow waits before rechecking the stock-market
values.
private Dictionary<string, eBrokerService.Ticker> _items =
new Dictionary<string, eBrokerService.Ticker>();
private string _tickersXML = null;
public string TickersXML
{
get { return _tickersXML; }
set { _tickersXML = value; }
}
private TimeSpan _interval = TimeSpan.FromSeconds(7);
public TimeSpan PollInterval
{
get { return _interval; }
set { _interval = value; }
}
Chapter 10 Event Activities 231
28. Next locate the Initialize event handler Visual Studio created for you when you added the
first Code activity (step 2). Insert this code:
// Establish the market update timeout
updateDelay.TimeoutDuration = PollInterval;
// Stuff the known ticker values into the dictionary
// for later recall when updating market conditions.
eBrokerService.Tickers tickers = null;
using (StringReader rdr = new StringReader(TickersXML))
{
XmlSerializer serializer =
new XmlSerializer(typeof(eBrokerService.Tickers));
tickers = (eBrokerService.Tickers)serializer.Deserialize(rdr);
} // using
foreach (eBrokerService.Ticker ticker in tickers.Items)
{
// Add the ticker to the dictionary
_items.Add(ticker.Symbol, ticker);
} // foreach
Tip I assigned the Delay activity’s TimeoutDuration in this initialization method
for convenience. Don’t forget, though, that you could also use the Delay activity’s
InitializeTimeoutDuration method to make this assignment.
29. Scrolling down through the code file, find the TestContinue event handler the While
activity uses to decide if it should continue looping. Insert the following code to have the
While activity loop forever (don’t worry it will actually stop looping eventually!):
// Continue forever
e.Result = true;
30. The next code block to insert is a lengthy one, as it forms the Monte Carlo simulation
used to update the stock-market values. Find the UpdateMarketValues event handler
associated with the Code activity named updateMarket (shown in step 10), and insert
this code:
// Iterate over each item in the dictionary and decide
// what its current value should be. Normally we'd call
// some external service with each of our watch values,
// but for demo purposes we'll just use random values.
Random rand = new Random(DateTime.Now.Millisecond);
eBrokerService.UpdateCollection updates =
new eBrokerService.UpdateCollection();
foreach (string key in _items.Keys)
{
// Locate the item
eBrokerService.Ticker item = _items[key];
// If we're starting out, we have no current value,
// so place the value at half the distance between the
// buy and sell triggers.
if (item.LastPrice <= 0.0m)
232 Part II Working with Activities
{
// Assign a price
decimal delta = (item.SellTrigger - item.BuyTrigger) / 2.0m;
// The last price must be a positive value, so add
// the delta to the smaller value.
if (delta >= 0.0m)
{
// Add delta to buy trigger value
item.LastPrice = item.BuyTrigger + delta;
} // if
else
{
// Reverse it and add to the sell trigger
// value
item.LastPrice = item.SellTrigger + delta;
} // else
} // if
// Set up the simulation
decimal newPrice = item.LastPrice;
decimal onePercent = item.LastPrice * 0.1m;
Int32 multiplier = 0; // no change
// We'll now roll some dice. First roll: does the
// market value change? 0-79, no. 80-99, yes.
if (rand.Next(0, 99) >= 80)
{
// Yes, update the price. Next roll: will the
// value increase or decrease? 0-49, increase.
// 50-99, decrease
multiplier = 1;
if (rand.Next(0, 99) >= 50)
{
// Decrease the price.
multiplier = -1;
} // if
// Next roll, by how much? We'll calculate it
// as a percentage of the current share value.
// 0-74, .1% change. 75-89, .2% change. 90-97,
// .3% change. And 98-99, .4% change.
Int32 roll = rand.Next(0, 99);
if (roll < 75)
{
// 1% change
newPrice = item.LastPrice + (onePercent * multiplier * 0.1m);
} // if
else if (roll < 90)
{
// 2% change
newPrice = item.LastPrice + (onePercent * multiplier * 0.2m);
} // else if
else if (roll < 98)
{
Chapter 10 Event Activities 233
// 3% change
newPrice = item.LastPrice + (onePercent * multiplier * 0.3m);
} // else if
else
{
// 4% change
newPrice = item.LastPrice + (onePercent * multiplier * 0.4m);
} // else if
} // if
else
{
// No change in price
newPrice = item.LastPrice;
} // else
// Now create the update for this ticker.
eBrokerService.Update update = new eBrokerService.Update();
update.Symbol = item.Symbol;
update.LastPrice = item.LastPrice;
update.NewPrice = newPrice;
update.Trend = multiplier > 0 ? "Up" :
(multiplier == 0 ? "Firm" : "Down");
update.Action = newPrice > item.SellTrigger ? "Sell" :
(newPrice < item.BuyTrigger ? "Buy" : "Hold");
update.TotalValue = newPrice * item.NumberOfShares;
updates.Add(update);
// Update the data store.
item.LastPrice = newPrice;
} // foreach
// Serialize the data.
StringBuilder sb = new StringBuilder();
using (StringWriter wtr = new StringWriter(sb))
{
XmlSerializer serializer =
new XmlSerializer(typeof(eBrokerService.UpdateCollection));
serializer.Serialize(wtr, updates);
} // using
// Ship the data back
Updates = sb.ToString();
Essentially, for each update loop there is a 20 percent chance the stock value will change.
If the stock value is to change, half the time it increases and half the time it decreases. It
will change value by 1 percent of its current per-share price 75 percent of the time, have
a 2 percent change 15 percent of the time, have a 3 percent change 7 percent of the time,
and have a 4 percent change 3 percent of the time. For each loop, all watched stocks to
be monitored are updated even if there is no change. The data to be sent back to the host
for display is an XML string containing the ticker symbols, their current price and their
calculated total value based on the number of shares purchased, the trend (up or down),
and whether there is a buy or sell recommendation. The buy or sell recommendation
triggers the appropriate flag (red or green), which you saw in Figure 10-5.
234 Part II Working with Activities
31. Now it’s time to add code to the external event handlers, starting with SellStock. Locate
the SellStock event handler, and add the following:
// Reduce the number of shares for the given ticker.
try
{
// Find this ticker.
eBrokerService.Ticker item = _items[_tickerToSell];
if (item != null)
{
// Reduce the number of shares.
item.NumberOfShares = item.NumberOfShares - _sharesToSell >= 0 ?
item.NumberOfShares - _sharesToSell : 0;
} // if
} // try
catch
{
// Do nothing we just won't have sold any.
} // catch
32. Scroll down once again to find the BuyStock event handler, and add this code:
// Increase the number of shares for the given ticker.
try
{
// Find this ticker.
eBrokerService.Ticker item = _items[_tickerToBuy];
if (item != null)
{
// Increase the number of shares.
item.NumberOfShares += _sharesToBuy;
} // if
} // try
catch
{
// Do nothing we just won't have purchased any.
} // catch
33. RemoveTicker is next. Search the code file for RemoveTicker, and insert the following:
// Remove the given ticker from the watch.
try
{
// Deserialize
eBrokerService.Ticker ticker = null;
using (StringReader rdr = new StringReader(_tickerToRemove))
{
XmlSerializer serializer =
new XmlSerializer(typeof(eBrokerService.Ticker));
ticker = (eBrokerService.Ticker)serializer.Deserialize(rdr);
} // using
// Find this ticker.
if (_items.ContainsKey(ticker.Symbol))
{
// Remove it.
Chapter 10 Event Activities 235
_items.Remove(ticker.Symbol);
} // if
} // try
catch
{
// Do nothing we just won't have removed it.
} // catch
34. Finally, modify AddTicker by inserting this code:
try
{
// Deserialize
eBrokerService.Ticker ticker = null;
using (StringReader rdr = new StringReader(_tickerToAdd))
{
XmlSerializer serializer =
new XmlSerializer(typeof(eBrokerService.Ticker));
ticker = (eBrokerService.Ticker)serializer.Deserialize(rdr);
} // using
// Add the item if not already existing.
if (!_items.ContainsKey(ticker.Symbol))
{
// Add it.
_items.Add(ticker.Symbol, ticker);
} // if
} // try
catch
{
// Do nothing we just won't have added it.
} // catch
35. If you press Shift+F6, the workflow project should compile without error.
With the workflow complete, we now need to turn our attention to the local communication
service and host integration. Because we covered both of these topics in some detail in
Chapter 8, I won’t revisit them in their entirety here. If you open the associated files for this
example, you will see code similar to what you saw in Chapter 8.
Note
I mentioned the following in Chapter 8, but it’s an important issue and your aware-
ness of this issue should be reinforced: If you share objects or collections of objects between
workflow and host application, you run the risk of introducing multithreaded data access
problems since the workflow and host application will share references to the same objects. If
this is an issue for your application, consider cloning the objects as they’re moved between
workflow and host (by implementing ICloneable within your data class), or use serialization
techniques. For this application, I chose XML serialization.
However, I would like to touch on some of the code in the connector class,
BrokerDataConnector
.
The
IWFBroker
interface is different from the sample interface we saw in Chapter 8 because of the
events
IWFBroker
contains. Because the connector class must implement the interface (
Broker-
DataConnector
implements
IWFBroker
, in this case), the connector must also deal with the
236 Part II Working with Activities
events. However, the event implementations are nothing special, as Listing 10-1 shows you. If you
look down toward the end of the listing, you’ll see typical event implementations much like event
implementations you might have written yourself.
Listing 10-1 BrokerDataConnector.cs completed
using System;
using System.Collections.Generic;
using System.Text;
using System.Threading;
using System.Workflow.Activities;
using System.Workflow.Runtime;
using System.Data;
namespace eBrokerService
{
public sealed class BrokerDataConnector : IWFBroker
{
private string _dataValue = null;
private static WorkflowBrokerDataService _service = null;
private static object _syncLock = new object();
public static WorkflowBrokerDataService BrokerDataService
{
get { return _service; }
set
{
if (_service == null)
{
lock (_syncLock)
{
// Re-verify the service isn't null
// now that we're locked
if (_service == null)
{
_service = value;
} // if
else
{
throw new InvalidOperationException(
"You must provide a service instance.");
} // else
} // lock
} // if
else
{
throw new InvalidOperationException(
"You must provide a service instance.");
} // else
}
}
public string MarketData
{
get { return _dataValue; }
Chapter 10 Event Activities 237
}
// Workflow to host communication method
public void MarketUpdate(string xmlMarketValues)
{
// Assign the field for later recall
_dataValue = xmlMarketValues;
// Raise the event to trigger host read
_service.RaiseMarketUpdatedEvent();
}
// Host to workflow events
public event EventHandler<TickerActionEventArgs> AddTicker;
public event EventHandler<TickerActionEventArgs> RemoveTicker;
public event EventHandler<SharesActionEventArgs> BuyStock;
public event EventHandler<SharesActionEventArgs> SellStock;
public event EventHandler<StopActionEventArgs> Stop;
public void RaiseAddTicker(Guid instanceID, string tickerXML)
{
if (AddTicker != null)
{
// Fire event
AddTicker(null,
new TickerActionEventArgs(instanceID, tickerXML));
} // if
}
public void RaiseRemoveTicker(Guid instanceID, string tickerXML)
{
if (RemoveTicker != null)
{
// Fire event
RemoveTicker(null,
new TickerActionEventArgs(instanceID, tickerXML));
} // if
}
public void RaiseBuyStock(Guid instanceID,
string symbol,
Int32 numShares)
{
if (BuyStock != null)
{
// Fire event
BuyStock(null,
new SharesActionEventArgs(instanceID,
symbol,
numShares));
} // if
}
238 Part II Working with Activities
public void RaiseSellStock(Guid instanceID,
string symbol,
Int32 numShares)
{
if (SellStock != null)
{
// Fire event
SellStock(null,
new SharesActionEventArgs(instanceID,
symbol,
numShares));
} // if
}
public void RaiseStop(Guid instanceID)
{
if (Stop != null)
{
// Fire event
Stop(null, new StopActionEventArgs(instanceID));
} // if
}
}
}
The workflow executes the connector’s MarketUpdate method, while the host executes the
“raise” methods to fire the various events based on user inputs. Chapter 8 describes the mech-
anism the workflow uses to invoke the MarketUpdate method. To see the host invoke an event
designed to ripple down to the workflow—which might or might not carry data in the event
arguments—look at this code snippet. This code is used by the Quit button to exit the
application.
private void cmdQuit_Click(object sender, EventArgs e)
{
// Stop the processing
// Remove from workflow
eBrokerService.BrokerDataConnector dataConnector =
(eBrokerService.BrokerDataConnector)_workflowRuntime.GetService(
typeof(eBrokerService.BrokerDataConnector));
dataConnector.RaiseStop(_workflowInstance.InstanceId);
// Just quit
Application.Exit();
}
To fire the events that carry data to the workflow, you first retrieve the connector using the
workflow runtime’s GetService method. Note the service is cast to its appropriate type so that
the “raise” methods are known and available. Once the service is retrieved, you simply call the
appropriate “raise” method, sending in the information necessary to create the appropriate
event arguments.
Chapter 10 Event Activities 239
If you want to continue to the next chapter, keep Visual Studio 2005 running and turn to
Chapter 11, “Parallel Activities.” In Chapter 11, we take a look at parallel processing activities.
If you’ve always wanted to multitask, this chapter’s for you!
If you want to stop, exit Visual Studio 2005 now, save your spot in the book, and close it. Take
a break. Just fire an OpenBook event when you’re ready and we’ll get started again.
Chapter 10 Quick Reference
To Do This
Handle an external event, such as
from the host application
Drop an instance of the HandleExternalEvent activity into your
workflow. If you prefer, you can use wca.exe to build classes
derived from HandleExternalEvent that have basic settings and
properties assigned for you (via code that wca.exe injects as it
creates the new classes).
Introduce a delay in your workflow Drag and drop an instance of the Delay activity into your workflow,
and set its TimeoutDuration value to the length of time you want
to delay.
Use an event to drive workflow
execution
The EventDriven activity is made just for this situation. When (or if)
the event triggers the event handling activity you place in the
EventDriven activity, activities that follow are executed. If the event
is never fired, the trailing activities will never execute.
Handle multiple events simultaneously Use the Listen activity. Listen gathers event handlers (two or more)
and allows the code from the first event handled to drive the
workflow execution path. If the event never fires, that particular
path is never executed. Keep in mind the first event to fire dictates
the workflow execution path. Other events, once the first event
fires, are subsequently ignored.
Handle events while processing
another child activity
Consider using the EventhandlingScope activity. EventHandling-
Scope waits for all the events to fire before exiting the activity.
Meanwhile, a single child activity can execute freely. Remember
that all events must fire to cause EventHandlingScope to release
the thread to process other activities in the workflow.
Communicate data between the
host process and the workflow
Create a local communication service based on an interface you
design. This interface should exhibit events. The host raises the
events, with the data to be transferred within custom event
arguments. Event handlers in the workflow read the data from
the event arguments and execute code accordingly.