ECLIPSE WEB TOOLS PLATFORM developing java web applications PHẦN 9 ppsx
Bạn đang xem bản rút gọn của tài liệu. Xem và tải ngay bản đầy đủ của tài liệu tại đây (7.98 MB, 75 trang )
574 CHAPTER 12 • Adding New Servers
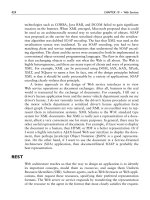
Figure 12.10 New Launch Configuration
4. You should see your GlassFish server adapter listed now. Select GlassFish
and click the Next button. The GlassFish Runtime wizard opens (see Figure
12.12). Note how the wizard UI gets populated with form fields for the
runtime properties you defined in the server definition file.
5. Specify the location of the GlassFish installation directory. Enter the loca-
tion or select it using the Browse button. Note that a directory browse but-
ton has been provided because the type of the property was
directory.
Click the Finish button. The Installed Runtimes preference page now lists
GlassFish (see Figure 12.13).
6. You have now added the GlassFish server runtime environment and are
ready to use it for a new Web project. In the Project Explorer view, right
click and select New
᭤ Dynamic Web Project. The New Dynamic Web
Project wizard opens (see Figure 12.14).
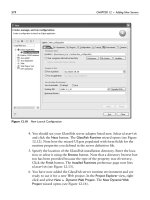
Figure 12.11 New Server Runtime
Figure 12.12 GlassFish Runtime
575
576 CHAPTER 12 • Adding New Servers
Figure 12.13 Installed Runtimes—GlassFish
Figure 12.14 New Dynamic Web Project
Testing the Server Adapter 577
7. Enter TestWebProject as the project name and select GlassFish as the
target runtime. Click the Next button. The Select Project Facets page is
displayed (see Figure 12.15).
Figure 12.15 Select Project Facets
8. Notice how the set of supported facets matches the allowed values that were
defined in
plugin.xml. Accept the defaults for other properties. Click Finish.
WTP creates the project. Notice that a GlassFish library gets added to the proj-
ect as defined by the runtime classpath provider extension (see Figure 12.16).
9. Create a simple JSP named
index.jsp in the WebContent folder. Add some
simple content to it. This completes the project setup.
10. You are now ready to run the JSP on GlassFish. In the Project Explorer,
select
index.jsp, right click, and invoke the Run As ᭤ Run on Server menu
item. The Run On Server wizard opens (see Figure 12.17).
11. Create a new server configuration for the GlassFish runtime. Click Next to
continue. You will see the server properties displayed (see Figure 12.18).
These properties were also defined in the server definitions file. Enter the
proper values.
12. Click Next to continue. The Add and Remove Projects page is displayed (see
Figure 12.19).
578 CHAPTER 12 • Adding New Servers
Figure 12.16 Dynamic Web Project—TestWebProject
Figure 12.17 Define a New Server
Testing the Server Adapter 579
Figure 12.18 GlassFish Server
Figure 12.19 Add and Remove Projects
580 CHAPTER 12 • Adding New Servers
Figure 12.20 Run On Server—index.jsp
13. A server configuration includes the list of dynamic Web projects.
TestWebProject was automatically added for you, so simply click the
Finish button. The wizard creates the server, starts it, publishes the
TestWebProject project to it using the Ant scripts, and launches the
Web browser using the URL for the JSP (see Figure 12.20). As the server
starts and publishes, messages are displayed in the Console view.
Summary
In this chapter you learned about the server tools and how to extend WTP with a
new generic server adapter. You developed and tested a generic server adapter
for GlassFish.
Summary 581
There is more to server tools than what was covered here. Generic server
support is suitable for most purposes. However, you should also have a look at
the custom adapters, such as the Tomcat plug-ins, to see how you can have full
control over the server tools capability. If you would like to learn how to publish
your server plug-ins as installable features, and provide links to your update
sites, you should look at the Apache Geronimo plug-in.
This page intentionally left blank
CHAPTER 13
Supporting New File Types
The limits of my language mean the limits of my world.
583
—Ludwig Wittgenstein
At its core, an integrated development environment (IDE) assists a developer in
working with various development artifacts. While some of the artifacts, such as
server instances, may be intangible, most artifacts map to one or more files
whose syntax is defined by programming languages. The IDE’s job is to simplify
the task of working with these languages.
There are a number of tools an IDE can provide to simplify development of
language-specific files. A new file wizard handles tasks such as naming and place-
ment of the file and can create a skeleton structure of the new file. A rich editor
simplifies manual editing of the file with content assistance and syntax highlight-
ing. Rich editors may also include a design or graphical view that provides an
alternate visualization of the file. A validator, which will typically be integrated
with the editor, checks the file to ensure it is compliant with the language specifica-
tion. If a file requires compilation or some other form of transformation before it
can be deployed, a facility for building the file should also be included.
DocBook is an XML language for authoring documents such as books, articles,
and reference pages (see Example 13.1). It can be obtained from the DocBook
Web site:
Example 13.1 Listing of article.docbook
<?xml version="1.0" encoding="UTF-8"?>
<article>
<title>Supporting New File Types</title>
<para>
At its core, an integrated development environment (IDE) assists a
developer in working with various development artifacts. While some
of the artifacts, such as server instances, may be intangible, most
artifacts map to a file or a variety of files defined by specific
languages. The IDE's job is to simplify the task of working with
specific languages.
</para>
<para>
There are a number of tools an IDE can provide to simplify
development of language-specific files. A new file wizard handles
tasks such as naming and placement of the file and can create a
skeleton structure of the new file. A rich editor simplifies
manual editing of the file with content assistance and syntax
highlighting. Rich editors may also include a design or graphical
view that provides a different visualization of the file. A
validator, which will typically be integrated with the editor,
checks the file to ensure it is compliant with the
language specification. If a file requires compilation or some
other form of transformation before it can be deployed, a facility
for building the file should also be included.
</para>
</article>
Unlike many other authoring formats, DocBook documents contain no for-
matting or presentation information. Instead, a DocBook document contains
tags (XML elements) that describe its content. The removal of presentation
information from the source document solves the typical problem of inconsistent
formatting and provides increased publishing flexibility (the ability to publish a
document in multiple formats). Publishing flexibility is achieved by transforming
the document after it has been authored into a desired format, such as HTML or
PDF. In this way, DocBook is very much like a programming language in that
you write the source and then transform it into a consumable form.
In this chapter you will add support for the DocBook language to Eclipse
as follows:
❍ You create a DocBook validator for files with the .docbook extension.
Note that DocBook files typically use the .
xml extension. The .docbook file
extension is used in this chapter for illustrative purposes since WTP con-
tains a number of tools, including a validator, for XML files.
❍ You define a DocBook marker type to allow end users to filter DocBook
problems from the Problems view.
❍ You specify a DocBook content type that allows DocBook files to make
use of all the XML-related tools, including the XML editor.
584 CHAPTER 13 • Supporting New File Types
Warning: As of WTP 1.5, the WTP extension points and API shown in this chapter
are not final. These extension points and API may change in future versions of WTP.
The DocBook Validator 585
Figure 13.1 Defining the DocBook Plug-in Project
Creating the DocBook Extension Plug-in
As always, the first step in contributing DocBook support to Eclipse is to create a
plug-in that will hold your DocBook-specific extensions. To create the DocBook
extension plug-in, do the following:
1. Open the Plug-in Development perspective, create a new plug-in project
using the New Plug-in Project wizard, and name it:
org.eclipsewtp.docbook
2. The DocBook extensions you will contribute will not make any UI contri-
butions or require an activator. Deselect the options Generate an activator
and This plug-in will make contributions to the UI (see Figure 13.1).
The DocBook Validator
Modern software development requires the use of many languages. Gone are the
days when being an expert in one language was a career option. Many languages
exist in the same space and, to effectively do their job, developers are often
required to work with the many corresponding file types. For example, there are
more than just a few languages available in the Web space, including ASP, CSS,
HTML, Java, JavaScript, Perl, PHP, Ruby, WSDL, XML, XSD, and XSL. While
all of these languages are not required for every Web project, it is typical to use
several of them. DocBook, which can be used to document Web and other appli-
cations, is just one more language in the mix.
With so many different languages, it can be difficult, and overwhelming, for
developers to understand each one in the depth required to ensure that the files
they are creating are correct according to the various specifications. DocBook
contains a well-structured definition for documents. If a document does not com-
ply with the DocBook structured definition, then it is not a DocBook document,
and the behavior of DocBook tools when used with this document cannot be
guaranteed to be correct. To solve this problem, you will contribute a DocBook
validator to the Eclipse IDE. This validator will give developers the assurance that
their DocBook files conform to the specification and remove the burden from
them to be DocBook experts.
In this section you will contribute the DocBook validator to Eclipse using the
WTP validation framework. The following sections will detail why and how you
will use the validation framework. First, the benefits of the framework will be pre-
sented, highlighting how the framework simplifies development of the DocBook
validator. After the rationale for using the framework is clear, you will then imple-
ment the DocBook validator and contribute it to the validation framework.
The WTP Validation Framework
Before creating a DocBook validator for Eclipse, you need to identify how the val-
idator will interact with the Eclipse workbench. In other words, what will the
DocBook validator do in Eclipse? Following the example set by the Java compiler
(the JDT is typically thought to represent the best of Eclipse), the DocBook val-
idator should contribute error and warning markers to the Problems view, be run
automatically on save or when the workspace is cleaned, and have a preference
defined that allows the validator to be disabled. Additionally, you may want to
include an option to manually validate via an action on the context menu.
Although the validator can interact directly with the various pieces of the
platform that provide the functionality outlined above, the validation frame-
work provides a simplified method to consistently add the DocBook validator to
Eclipse. Specifically, the validation framework will add errors and warnings
reported by the validator to the Problems view, add a preference to disable the
validator, and run the validator on save as part of the build and via the standard
context menu Validate action. The validation framework allows you to focus on
your core competency, which in this case is a deep understanding of DocBook,
by handling these various pieces of Eclipse integration. It significantly reduces
the learning curve and time required to add a validator to Eclipse.
586 CHAPTER 13 • Supporting New File Types
Note that as of WTP 1.5, the validation framework does not support Eclipse
content types. The WTP 1.5 support is limited to distinguishing resources based
on file extension.
Implementing the DocBook Validator
In this section you implement the DocBook validator by doing the following:
1. For the DocBook validator to make use of the validation framework, you
first must add a dependency on the validation framework to your plug-in.
In your DocBook project, open the plug-in manifest editor, change to the
dependencies tab, and add a dependency on
org.eclipse.wst.validation
The validation API depends on the core runtime plug-in for the scheduling
of validation jobs and reporting validation status. Specify a second
dependency on the plug-in
org.eclipse.core.runtime
The DocBook validator will make use of Eclipse file resources in order to
validate them. In Eclipse, resources are represented by the
IResource and
IFile interfaces. Add a dependency on the following plug-in that contains
these interfaces:
org.eclipse.core.resources
2. With the dependencies declared, you can now create the extension that
will declare the DocBook validator to the validation framework. Change
to the Extensions tab and click Add to add a new extension.
The validation framework defines this extension point:
org.eclipse.wst.validation.validator
You will use this extension point to register the DocBook validator with the
framework. Select the extension point from the list and click Finish. The
extensions page should now display the new extension point. Give the exten-
sion point the id
docbookValidator and the name DocBook Validator.
3. Next, right click on the extension point and select New ᭤ validator. The to
and from properties on the validator extension are used to migrate an
existing validator to a new class while maintaining the existing marker
affiliation with the validator. This means that when an old workspace is
migrated to a newer version of WTP, markers that were created by a
validator will not be stranded leaving the user with no way to remove
The DocBook Validator 587
them. Because the DocBook validator is a new validator, these properties
are not applicable.
4. The validator extension point requires three elements in order to specify the
DocBook validator: the
run element, the helper element, and the filter
element.
The first element is the
run element, which will be used to specify details
about the validator class and how it should be used by the framework.
Start by declaring the new validator using the
run element. Right click on
validator and select New
᭤ run. You will use the run element’s class
attribute to specify the DocBook validator class to the validation frame-
work, but first you will create the DocBook validator class.
Save your plug-in manifest and open the New Java Class wizard by selecting
File
᭤ New ᭤ Class. Enter the class name DocbookValidator and the
package
org.eclipsewtp.docbook
Add the following interface to the list of interfaces (see Figure 13.2):
org.eclipse.wst.validation.internal.provisional.core.IValidatorJob
588 CHAPTER 13 • Supporting New File Types
Figure 13.2 Creating the DocBook Validator Class
The DocBook Validator 589
Figure 13.3 The run Extension
Click Finish. The DocbookValidator class opens in the Java source editor.
You may see some warnings about discouraged access on your newly cre-
ated class. These warnings are simply stating that you’re not using
API. You can ignore these warnings for now. (In general, these warnings
alert you that you’re in unsupported waters making use of code that has
not been declared API.) Close the editor for now. You’ll deal with the
implementation details after you finish declaring the extension.
Now that you’ve created the class and know the fully qualified class name,
return to your plug-in manifest editor and enter the following for the
run
element’s class attribute:
org.eclipsewtp.docbook.DocbookValidator
There are three other boolean properties on the validator extension that
are relevant for the DocBook validator (see Figure 13.3):
enabled, incre-
menta
l, and fullBuild. The fourth option, async, is deprecated. As the val-
idator implements
IValidatorJob it will be run asynchronously.
The
enabled property specifies whether the DocBook validator should be
enabled by default. You may want to disable a validator by default if
there will be a significant performance penalty when the validator is
enabled. The DocBook validator will be lightweight, so set this property
to
true.
The
incremental property tells the validation framework whether the
DocBook validator should be run as part of the incremental build. The
incremental build runs when a resource is changed (typically when it is
saved). One of the requirements for the DocBook validator is that it
should validate on save. Set this option to
true.
The fullBuild informs the validation framework whether or not the
DocBook validator should run as part of a full build. A full build is run
when users select to clean a project or their workspace (see Figure 13.4). Set
this to
true to allow users to clean DocBook files.
590 CHAPTER 13 • Supporting New File Types
Figure 13.4 The Project ᭤ Clean Menu
5. The second element required by the validation framework is the helper
element, which will be used to specify the class that handles model loading
for the validator.
Right click on validator and select New
᭤ helper.
The validation framework provides a list of resources that should be vali-
dated by passing a workbench context (also known as a helper) of
type
IWorkbenchContext to the validator. The validation framework
requires that validators declare the implementation class of the
IWorkbenchContext interface that they will use. The validation framework
includes a default workbench context that can be used by client valida-
tors. The default workbench context provides the ability to load an IFile
for each file that is to be validated. The DocBook validator will only sup-
port files; therefore, the default workbench context will suit its needs.
Specify that the DocBook validator will use the default workbench con-
text provided by the validation framework by setting the workbench
context class as
org.eclipse.wst.validation.internal.operations.WorkbenchContext
6. The third element that the validation framework requires is the filter
element. This element is used to specify the resources for which the valida-
tor is enabled. As specified in the requirements, the DocBook validator
will run for files with the extension .
docbook.
To specify the filter, right click on the validator element and select
New
᭤ filter. The filter element contains these three properties that you
need to specify:
objectClass, nameFilter, and caseSensitive.
objectClass specifies the type of object that will be filtered. The DocBook
validator will validate files, so specify the
objectClass
org.eclipse.core.resources.IFile
The nameFilter attribute specifies the name of the object. This property
accepts wildcards such as
* and ?. For the DocBook validator, specify it as
*.docbook
caseSensitive is a boolean property that specifies whether the case of the
extension should be taken into account when matching names using the
nameFilter. The DocBook validator will disregard case, so set this prop-
erty to
false.
The
filter element contains an optional fourth property, action, which
can be used to specify the specific actions for which the validator should
run. For example, you can specify that the validator should only run when
the New action is invoked. This will restrict the validator to running only
on file creation. The
action property is not typically used with validators
as validators are generally defined for resources that will be edited.
7. You’ve now completed the DocBook extension declaration. Other exten-
sion contributions exist for the validator that allow further restrictions to
be placed on the condition for which it is enabled. These extensions allow
you to restrict the validator to certain project types or facets. For example,
if you were to define an authoring project nature, you may choose to
restrict the DocBook validator to only run on projects with this nature.
The DocBook validator will be enabled for all projects and facets, because
aside from the name filter no restrictions have been defined.
The manifest editor stores your extension declaration in
plugin.xml. Take
a look at the extension by clicking on the plugin.xml tab (see
Example 13.2).
Example 13.2 Listing of the DocBook Validator Contribution to plugin.xml
<extension
id="docbookValidator"
name="DocBook Validator"
point="org.eclipse.wst.validation.validator">
<validator>
<run
class="org.eclipsewtp.docbook.DocbookValidator"
The DocBook Validator 591
enabled="true"
fullBuild="true"
incremental="true"/>
<helper
class="org.eclipse.wst.validation.internal.operations
.WorkbenchContext"/>
<filter
caseSensitive="false"
nameFilter="*.docbook"
objectClass="org.eclipse.core.resources.IFile"/>
</validator>
</extension>
8. With the DocBook validator declared to the validation framework, you
can now move on to the implementation of the validator class. The
validator class is where the validation logic for the DocBook validator
will reside.
Edit
DocbookValidator.java (see Example 13.3).
Example 13.3 Listing of DocbookValidator.java
package org.eclipsewtp.docbook;
import javax.xml.parsers.DocumentBuilder;
import javax.xml.parsers.DocumentBuilderFactory;
import org.eclipse.core.resources.IFile;
import org.eclipse.core.runtime.IStatus;
import org.eclipse.core.runtime.Status;
import org.eclipse.core.runtime.jobs.ISchedulingRule;
import org.eclipse.wst.validation.internal.core.ValidationException;
import org.eclipse.wst.validation.internal.operations.LocalizedMessage;
import org.eclipse.wst.validation.internal.provisional.core.IReporter;
import org.eclipse.wst.validation core.IValidationContext;
import org.eclipse.wst.validation core.IValidatorJob;
import org.w3c.dom.Document;
import org.w3c.dom.Element;
import org.xml.sax.SAXException;
import org.xml.sax.SAXParseException;
public class DocbookValidator implements IValidatorJob {
public ISchedulingRule getSchedulingRule(IValidationContext helper) {
return null;
}
public IStatus validateInJob(IValidationContext helper,
IReporter reporter) throws ValidationException {
final DocbookValidator validator = this;
final IReporter theReporter = reporter;
String[] uris = helper.getURIs();
for (int i = 0; i < uris.length && !reporter.isCancelled(); i++) {
592 CHAPTER 13 • Supporting New File Types
String filename = uris[i];
filename = filename.substring(filename.indexOf("/", 1));
Object[] parms = { filename };
final IFile file = (IFile) helper.loadModel("getFile", parms);
Document doc = null;
try {
DocumentBuilderFactory domFactory = DocumentBuilderFactory
.newInstance();
DocumentBuilder domBuilder = domFactory.newDocumentBuilder();
domBuilder.setErrorHandler(new org.xml.sax.ErrorHandler() {
public void error(SAXParseException e)
throws SAXException {
reportMessage(LocalizedMessage.NORMAL_SEVERITY,
e.getLocalizedMessage(), e.getLineNumber());
}
public void fatalError(SAXParseException e)
throws SAXException {
reportMessage(LocalizedMessage.HIGH_SEVERITY,
e.getLocalizedMessage(), e.getLineNumber());
}
public void warning(SAXParseException e)
throws SAXException {
reportMessage(LocalizedMessage.LOW_SEVERITY,
e.getLocalizedMessage(), e.getLineNumber());
}
private void reportMessage(int severity, String message,
int lineno) {
LocalizedMessage lMessage = new LocalizedMessage(
severity, message, file);
lMessage.setLineNo(lineno);
theReporter.addMessage(validator, lMessage);
}
});
doc = domBuilder.parse(file.getRawLocation().toFile());
}
catch (Exception e) {
}
if (doc != null) {
Element rootElem = doc.getDocumentElement();
String rootName = rootElem.getNodeName();
if (!"chapter".equals(rootName) && !"set".equals(rootName)
&& !"book".equals(rootName)
&& !"preface".equals(rootName)
&& !"appendix".equals(rootName)
&& !"glossary".equals(rootName)
&& !"bibliography".equals(rootName)
&& !"article".equals(rootName)) {
LocalizedMessage message = new LocalizedMessage(
LocalizedMessage.HIGH_SEVERITY,
"DocBook documents must begin with one of the " +
"following elements: appendix, article, bibliography, " +
"book, chapter, glossary, preface or set.", file);
message.setLineNo(1);
reporter.addMessage(this, message);
}
The DocBook Validator 593
}
}
return Status.OK_STATUS;
}
public void cleanup(IReporter reporter) {
// There is no cleanup for the DocBook validator to perform.
}
public void validate(IValidationContext helper, IReporter reporter)
throws ValidationException {
// This method is for validators that do not run in jobs
// and so is not implemented for the DocBook validator.
}
}
The DocbookValidator contains four methods that we’ll discuss in the
following order:
getSchedulingRule, validateInJob, validate, and cleanup.
The validation framework runs most validators as Eclipse jobs. For each job,
a scheduling rule can be specified that the Eclipse jobs framework will use to
determine when the job will be run.
getSchedulingRule is used to specify a
specific scheduling rule that the validation framework should use when run-
ning the validator job. This method is useful if your validator has scheduling
requirements such as only running after another validator has completed.
Returning null indicates that the validator will run with the default schedul-
ing rule set by the validation framework. The DocBook validator does not
require a special scheduling rule and therefore returns null. (For more about
scheduling rules, see the Eclipse help topic Scheduling rules.)
As stated previously, most validators are run as jobs. This allows the vali-
dation framework to run multiple validators at the same time, can
significantly reduce the amount of time required for all validators to com-
plete, and allows the validators to run without blocking the Eclipse UI. To
run a validator as a job, the validator must implement
validateInJob with
its validation logic. We’ll discuss the DocBook validation logic after cover-
ing the last two methods in the validator.
The DocBook validator could alternatively be run without using a job. A
validator should not be run as a job if it is not thread safe or has a specific
scheduling requirement that cannot be met using Eclipse jobs. In this case,
the
validate method from the IValidator interface must be implemented
instead of the
validateInJob method. The DocBook validator will be run
as a job and has therefore left the
validate method empty. (You may be
thinking that this part of the interface is a little clumsy in its current form.
We agree. This is a candidate for refactoring.)
594 CHAPTER 13 • Supporting New File Types
The cleanup method gives a validator a chance to clean up any artifacts
produced during validation. As we will discuss next, the DocBook valida-
tor logic does not produce any artifacts that require clean up after valida-
tion completes, so this method remains empty.
As it stands, the only method that the DocBook validator needs to implement
is the
validateInJob method, which contains the validation logic.
The
validateInJob method starts by requesting the list of file URIs to be
validated from the helper. Only files applicable for the validator will be
in the list, but it is the responsibility of the validator to iterate over the
files and validate each one. This feature allows validators to implement
specific logic for batch validation such as caching document models to
improve performance.
The validator iterates over this list, validating each file. The exit criteria
for the loop iterating over the files contains an additional check. The exit
criteria contains the expression
!reporter.isCancelled()
This condition checks whether the validator has received a cancel request,
such as that issued when a user selects to cancel validation, and terminates
validation without validating the remaining files. To be a good citizen in the
workbench and as part of the validation framework, a validator should check
periodically to see if it has been canceled. (See the Validator Best Practices
sidebar that follows for more about being a good validation citizen.)
The DocBook validation logic is then implemented as a two-step process:
❍ Step 1: DocBook is an XML language. The first step is to validate the
document for XML conformance. Success in this step means the docu-
ment is a well-formed XML document.
The DocBook validator uses the standard Java XML parsing (JAXP)
interface to parse the DocBook document. Using JAXP serves two
purposes. First, it has a validation option that performs XML confor-
mance validation required by this step. Second, it parses the DocBook
document into an easily traversable XML model, which will be used in
step 2.
A custom error reporter is registered with the parser that allows the
DocBook validator to report XML conformance errors using the
validation framework. A
LocalizedMessage object is used to hold an
error, warning, or information message and is passed to the reporter
to report the message to the workbench.
LocalizedMessage is used
The DocBook Validator 595
both when reporting errors produced from XML conformance
validation and when reporting custom DocBook error messages in
step 2.
❍ Step 2: DocBook contains specific rules beyond those defined for
XML conformance. These rules are what differentiate a DocBook
document from a generic XML document with no specified grammar.
The second step is to validate the document according to the
DocBook specific rule set.
To keep this example simple and focused on the validation extension,
the DocBook validator only checks that the root element is one of the
allowed elements. The allowed root elements are
appendix, article,
bibliography, book, chapter, glossary, preface, and set. Obviously, a
complete validator will need to check a lot more than the root element.
Note that XML languages often define an XML schema or DTD,
which can be used to perform most language-specific validation with
the XML validator. DocBook does have an XML schema defined. This
example does not make use of the schema to show the two stages of
validation.
After all the files have been validated, the validator returns the OK
status, signifying that validation has completed.
596 CHAPTER 13 • Supporting New File Types
Tip: When implementing the DocBook validator you may see several restricted
access warnings. These warnings appear because the validation framework API is still
internal. To make it easier to work, you can disable these warnings by following these
steps:
1. Right click on the DocBook plug-in project and select Properties
᭤ Java
Compiler
᭤ Errors/Warnings. The Errors/Warnings page opens.
2. Select Enable project specific settings, expand the Discouraged
reference (access rules) section and change the Deprecated and
restricted API Discouraged reference (access rules) option to
Ignore.
9. You’ve declared the minimum that’s required to run the DocBook
validator. Now is a good time to take a look at what you’ve accomplished
thus far. Launch a runtime workbench. In the runtime workbench select
Window
᭤ Preferences ᭤ Validation. The Validation preference page should
The DocBook Validator 597
Figure 13.5 The Validation Preference Page
list the DocBook validator, indicating that the validator is registered with
the validation framework (see Figure 13.5). Close the Validation
preference page.
10. Open the J2EE perspective. Open the New Project wizard and create a new
General Project named
Article.
11. Open the New File wizard and create a new DocBook file with the name
article.docbook.
12. Edit
article.docbook as shown in Example 13.1.
13. In the Project Explorer, validate the file. Right click on it and select Validate.
No errors are displayed in the Problems view.
14. Invalidate the file by changing the root element to <eclipsearticle>.
Validate the file again. The Problems view displays an error that the
DocBook validator produced (see Figure 13.6).
598 CHAPTER 13 • Supporting New File Types
Figure 13.6 The DocBook Validator Error Displayed in the Problems View
Validator Best Practices
Given the nature of validators and their interaction with the Eclipse workbench, here
are a few best practices when implementing your own validator:
1. As already mentioned, validators should check their canceled status
and terminate early if they have been canceled. A failure to cancel
when requested can lead to an unresponsive workbench.
2. A validator will likely not be run in isolation but rather as part of
a group of validators and typically as part of the build. Validators
should be lightweight and very fast to avoid introducing lags in build
times.
3. A validator should not lock resources. Validators should only check for
correctness of resources and should not try to fix or otherwise modi-
fy resources. Doing so can lead to deadlocks in the workbench or
periods when the workbench is unresponsive.
Creating a Custom Marker Type
A marker is an annotation on a file that is used to represent information associ-
ated with the file, such as bookmarks, breakpoints, and problems. The DocBook
validator reports error, warning, or information messages as markers. These
markers are displayed in various places in the Eclipse workbench, most notably
the Problems view, and the left margin of most editors. Each marker that is
created is of a certain defined type. The views that display markers give users
the ability to filter certain markers. For example, markers can be filtered
in the Problems view by selecting Menu (down arrow)
᭤ Configure Filters.