Wrox Beginning SharePoint 2010 Development phần 2 docx
Bạn đang xem bản rút gọn của tài liệu. Xem và tải ngay bản đầy đủ của tài liệu tại đây (3.31 MB, 50 trang )
SharePoint Central Administration
19
In the world of SharePoint, data can mean many different things. For example, it might mean con-
necting a Microsoft Access 2010 database to SharePoint by way of Access Data Services by creat-
ing a database in Access and then publishing it to SharePoint. It might also mean interacting with
SQL Server data, or interacting with service endpoints through BCS to integrate with LOB and
non-Microsoft systems. Further, it might also mean leveraging SQL Server Reporting Services or
PerformancePoint Server to bring enhanced BI into your solutions. And, lastly, the data might actu-
ally come from a SharePoint list (where users manually enter the list data, and you programmati-
cally code against it).
Each of these examples will require different ways of interacting with data within SharePoint.
However, each of them will have different implications for you. For example, you’ll find it very easy
to create read/write SharePoint lists that connect to SQL Server using a connection string. However,
you’ll need to think more deeply about authentication to an outside LOB system when connecting
using the BCS. Also, you could leverage the SharePoint client object model or an out-of-the-box Web
service to interact with SharePoint list data, so you’ll need to understand how you design your appli-
cation to work with that data.
You should be interested not only in how you connect to your data sources but also in how you
interact with them. For example, in many cases, you will want to query data when you have created
a connection to it from within your SharePoint site. This may mean creating SQL queries or, more
optimally, it may mean leveraging LINQ in your applications. Because SharePoint 2010 has the
capability to abstract objects such as list data into strongly typed data objects, you can use LINQ to
query that data within your applications, making interacting and managing your data a much more
efficient process.
In a nutshell, those who are new to SharePoint will find a myriad of opportunities to select when
interacting with data. And those who were familiar with SharePoint 2007 will be extremely happy
to discover many advancements in SharePoint 2010.
SHAREPOINT CENTRAL ADMINISTRATION
While this is not a book on administration, this section provides a high-level introduction to the
topic. As a developer, there may be cases where you want to leverage the capabilities built into
SharePoint Central Administration.
After you install SharePoint 2010, a separate site collection is created for your use in performing the
different administrative functions that you might do on a daily basis. This site collection is called
the Central Administration site. This site collection is run as its own Web application in IIS and
is separate from the site collections you create. But it is still the central point of administration for
your SharePoint site. All farm server administrators can access this site, and, much like your regular
SharePoint sites, you can edit and customize the Central Administration site.
Many of you who will develop for SharePoint 2010 will also be the person who administers certain
aspects of your SharePoint site. For example, this might mean that you would have to install and
configure SharePoint, understand how to upgrade some of your solutions from SharePoint 2007 to
2010, or even create new Web applications or sites using the Central Administration functions. And,
while this book is not necessarily meant to be a comprehensive overview of SharePoint 2010 Central
Administration, it does provide an introduction.
584637c01.indd 19 5/2/10 7:12:02 PM
20
CHAPTER 1 IntroductIon to SharePoInt 2010
With this in mind, Figure 1-15 shows the SharePoint 2010 Central Administration site that lists the
core administration features. Within the Central Administration site, you can manage a number of
activities, which are broken out into the following eight areas:
Application management
Monitoring
Security
General application settings
System settings
Backup and restore
Upgrade and migration
Configuration wizards
FIGURE 115 SharePoint 2010 Central Administration
Application Management
Application Management is the place where you can, for example, create new Web applications and
site collections, and, more generally, manage the services that are installed on your SharePoint site
(for example, Excel Services or BCS) and manage your content database. (The content database stores
SharePoint data, and is the reason why SharePoint takes a dependency on SQL Server upon instal-
lation.) Using the application management options, you can accomplish tasks such as modifying the
properties of the content database, activating features, creating new site collections, and so on.
584637c01.indd 20 5/2/10 7:12:02 PM
SharePoint Central Administration
21
Monitoring
Monitoring is the central place within Central Administration to manage reporting, monitoring,
and the status of your SharePoint site. The Monitoring site is broken down into three areas:
Health status
— Health status provides a place for you to manage the status of different ser-
vices on your SharePoint server (such as Visio services or farm-level services). You can see
which services are failing, for example, through reports that are surfaced here. Health status
also enables you to define rules (such as the scheduling of application pool recycles).
Timer jobs
— Timer jobs enable you to define specific jobs to run, and when to run them
(such as search crawl log cleanup or audit log trimming jobs).
Reporting
— Reporting provides you with a set of tools that enables you to create and man-
age reports, run diagnostic logging, and view reports on various server-side activities.
Security
Security covers a number of areas, including the management of administrator accounts, the config-
uration and management of service accounts, the management of password change settings and poli-
cies, and the specification of authentication providers, trusted identity providers, antivirus settings,
blocked file types, Web part security, self-service security, and secure token services. The security
settings here supplement the security in the main browser UI, where users and site administrators
can assess specific permissions that relate to users for their sites.
General Application Settings
The General Application Settings site is where you configure a number of general options for your
SharePoint site collections and sites. For example, you’ll often find that you’ll want to have the capa-
bility for your SharePoint site to send mail to users. You configure these options from within this
part of the site.
Also, in the context of WCM, you may want to manage a number of deployment and approval
options (such as content deployment location and approvers of that content). You also manage that
type of activity from within the General Application Settings.
In general, think of this site as the generic settings for your SharePoint sites.
System Settings
Conversely to using the SharePoint site settings, you may also want to configure more server-centric
settings such as farm-level or access features, or even manage the services (for example, Excel
Services) that are available to users of the site collection. You manage these types of settings from
within the System Settings site.
Backup and Restore
At some point, you may find that you must back up and restore your SharePoint site. The “Backup
and Restore” features within Central Administration enable you to create and schedule regular
584637c01.indd 21 5/2/10 7:12:02 PM
22
CHAPTER 1 IntroductIon to SharePoInt 2010
backups for your SharePoint, perform ad hoc backups, restore from a previously backed-up
SharePoint site, and so on. Essentially, this is your point of entry if you want to ensure that you have
a failover plan for backing up a site.
While you think you may never need this, there is sometimes the convergence of heightened per-
missions settings with user error, which can result in new users deleting parts of a site by acci-
dent — which may include something you’ve created as a developer.
Upgrade and Migration
At some point, you may find yourself wanting to upgrade from one version of SharePoint to
another — for example, moving from SharePoint Standard to SharePoint Enterprise. This requires a
license and a server-driven process to upgrade one version of SharePoint to another.
You can do this type of action from within the “Upgrade and Migration” part of the Central
Administration site. Note that you can also install service patches and check on installation and
upgrade progress from within this part of the administration toolset.
Configuration Wizards
The Configuration Wizard is simply a step-by-step wizard that configures your SharePoint server for
you. You should have seen this wizard when you first installed SharePoint. However, if you want to
run it again after installation to change some of the configurations on your SharePoint server, you
can do so.
SUMMARY
This chapter provided a first look at SharePoint — both for those who have never seen it and for
those who are returning SharePoint developers — and answered the question of what it is and what
the high-level architectural pieces and capabilities of SharePoint are.
In this chapter, SharePoint was broadly defined as a business productivity platform for the enterprise
and the Internet. More specifically, for the developer (and in the context of this book), this definition
was recast as a platform that supports developer productivity, has extensive platform services, and
can support multiple deployment options.
One of the key takeaways from this chapter should be that SharePoint is a rich developer platform.
There are an abundance of APIs, an object model, and a powerful set of services that can be lever-
aged to create some very compelling applications. There is also a great set of tools that will support
your efforts at evolving or improving your SharePoint development skills.
In Chapter 2, you will begin to work through a number of exercises that cover installation, configu-
ration, and development.
584637c01.indd 22 5/2/10 7:12:02 PM
Summary
23
EXERCISES
1. Define what SharePoint is for both the end user and the developer.
2. What are the three ways in which you can look at SharePoint from a developer’s perspective?
3. What are some of the key developer features in SharePoint 2010?
4. What are some of the key administrative features in SharePoint 2010?
584637c01.indd 23 5/2/10 7:12:02 PM
24
CHAPTER 1 IntroductIon to SharePoInt 2010
WHAT YOU LEARNED IN THIS CHAPTER
ITEM DESCRIPTION
SharePoint Business productivity platform for the enterprise and the Internet.
SharePoint for the Developer SharePoint 2010 is about developer productivity, the availabil-
ity of rich platform services, and the capability to manage and
deploy your applications with maximum flexibility.
SharePoint Foundation Core edition for SharePoint 2010. It ships as a free down-
load. (This was called Windows SharePoint Services 3.0 in
SharePoint 2007.)
SharePoint Server 2010 Enterprise edition that is covered in this book, and will be
referred to as SharePoint throughout the book. (This was called
Microsoft Oce SharePoint Server (MOSS) in the 2007 release.)
SharePoint Architecture SharePoint is built on ASP.NET and installs on a number of
64-bit Windows operating systems.
SharePoint Online Hosted version of SharePoint that is managed by Microsoft for
you in the cloud.
SharePoint Central Administration The site collection that you use to administer your SharePoint site.
RECOMMENDED READING
There is a vast array of resources out there to get you started on developing for SharePoint 2010.
Following are some key resources:
MSDN SharePoint Developer Center at
/>default.aspx
Channel 9 SharePoint Developer Learning Center at
/>courses/SharePoint2010Developer/
SharePoint 2010 SDK at
/>ee557253%28office.14%29.aspx
584637c01.indd 24 5/2/10 7:12:02 PM
Getting Started with SharePoint
2010 Development
WHAT YOU'LL LEARN IN THIS CHAPTER:
Getting to know the core developer pillars in SharePoint 2010
(including tools, platform services, and deployment options)
Becoming familiar with the primary tools to develop and deploy
SharePoint solutions
Performing a number of installation, configuration, and simple devel-
opment tasks
Understanding site-level security settings within SharePoint
In Chapter 1, you learned about some of the basics of SharePoint 2010, including what it is
and some of the high-level features for developers. You also became familiar with some of the
basic architectural concepts, as well as the overall look and feel of a SharePoint site — both the
SharePoint site you would interact with on a daily basis and the Central Administration site.
This chapter dives deeper into the developer features of SharePoint 2010, building on the
discussion from Chapter 1. This chapter also walks you through some how-to examples that
show you some basic Web-based actions, and then progresses into some more in-depth devel-
opment samples. This chapter addresses some of the technical skills that you can expect to
learn and hone as you get more involved with SharePoint development.
Thus, the goals of this chapter are twofold:
To get you more familiar and comfortable with some of the core developer features of
SharePoint
To begin to show how you can programmatically interact with SharePoint
2
584637c02.indd 25 5/2/10 7:12:12 PM
26
CHAPTER 2 GettinG Started with SharePoint 2010 develoPment
So, let’s jump in and get started by talking about some of the core developer features for SharePoint.
CORE DEVELOPER FEATURES FOR SHAREPOINT 2010
As mentioned in Chapter 1, the major features for the SharePoint developer can be broken down
into three main categories:
Developer productivity
Rich platform services
Flexible deployment
These three areas, in turn, can be broken down into greater detail. By doing so, you’ll see that there
exist a number of developer-centric features you can take advantage of.
Developer Productivity
For developer productivity, a significant advance for SharePoint 2010 is the tooling support that
ships with Visual Studio 2010. Included with Visual Studio are a number of project-level templates
and item-level templates that you can use to create and deploy a wide array of features and solutions
to SharePoint. For example, Figure 2-1 shows the different templates available to you, which are
described in the following list:
Import SharePoint Solution Package
— This option imports a SharePoint Solution Package
(a file with a
.WSP extension), the standard way of building and deploying SharePoint solu-
tions into your current project that can be redeployed into another SharePoint instance of
your choice.
State Machine Workflow
— This represents a workflow that is based on the system or appli-
cation state and can be deployed to SharePoint. It leverages Windows Workflow and is a spe-
cial template that enables automated deployment to SharePoint.
Event Receiver
— This allows you to create server-side code that can be called and executed
by a feature or solution. Event receivers are often created to respond to a user action (for
example, when a user adds an item to a list, an event is triggered to update a log entry).
Empty Project
— An empty SharePoint project can be used as a blank starting point for proj-
ect development. You can add lists, Web parts, event receivers, and so on, to an empty proj-
ect, and then deploy it to SharePoint.
Module
— This provides a way to deploy a specific file to a SharePoint site. It allows for the
bundling and provisioning of files for a feature. So, when the feature is activated, the files are
deployed to the specified file location.
Business Data Catalog Model
— This is used to create connections to line-of-business (LOB)
systems. This is similar to what is created by SharePoint Designer 2010 (see Chapter 8), but
Visual Studio uses a more code-centric approach for more advanced and complex connectiv-
ity scenarios.
584637c02.indd 26 5/2/10 7:12:12 PM
Core Developer Features for SharePoint 2010
27
Content Type
— A custom content type (for example, a template, document, list column, and
so on) can be repurposed across SharePoint.
Sequential Workflow
— This represents a workflow that works in a sequential manner
through a set of activities and can be deployed to SharePoint. It also leverages Windows
Workflow and is a specific template that enables automated deployment to SharePoint.
List Definition
— This is used to define and deploy a list to a SharePoint site. For example,
you can define fields or columns when you create the list definition.
Import Reusable Workflow
— This is used to import a declarative workflow (only the XML
part of the declarative workflow) that has been created by SharePoint Designer 2010, and
converts it into a code workflow that a developer can then further customize.
Site Definition
— This is used to define and deploy a site into a site collection. Your site can
also contain elements such as lists or Web parts — items that are available from the Project
Item templates.
Visual Web part
— This is an ASP.NET-based Web part that you can use to build and deploy
Web parts using drag-and-drop controls. You can then write ASP.NET event handlers for
those controls.
FIGURE 21 Visual Studio 2010 project templates
584637c02.indd 27 5/2/10 7:12:12 PM
28
CHAPTER 2 GettinG Started with SharePoint 2010 develoPment
NOTE You can also add item-level templates after you create a Visual Studio
project, but that will be examined in greater detail in Chapter 4. Of note is the
fact that you can also extend Visual Studio 2010 SharePoint templates to create
more custom project-level or item-level templates. For example, one interesting
community example is the creation of a Visual Web part project template that
can be deployed to SharePoint Online via a sandboxed solution.
For your SharePoint development, you may find yourself using not only Visual Studio 2010 but also
SharePoint Designer 2010, which is particularly useful for a number of key developer tasks (for
example, building rules-based or declarative workflows, creating and editing master pages and page
layouts, and creating connections to LOB systems via an ADO.NET or Web service connection).
Figure 2-2 illustrates the new SharePoint Designer 2010 interface, and, in this particular instance,
shows the creation of an external content type that maps data sources to a SharePoint list (which is
called an external list).
FIGURE 22 SharePoint Designer interface
584637c02.indd 28 5/2/10 7:12:12 PM
Core Developer Features for SharePoint 2010
29
Interestingly, professional developers historically shied away from SharePoint Designer because
it was mainly used for page layout and design. However, because the 2010 version offers more
ease of use for building workflow (that builds out in a format that is interchangeable with Visual
Studio 2010) and LOB connectivity features, developers most likely will be returning to this tool.
SharePoint Designer has made tremendous strides in the 2010 release, and it’s also free — two rea-
sons why this should be a part of your developer toolkit.
Another key productivity advance for SharePoint 2010 is the operating system support for develop-
ers. With SharePoint 2007, developers were required to use a Windows Server operating system
(OS), such as Windows Server 2003 or 2008, to host and develop for SharePoint. However, with
SharePoint 2010, you can now develop on a client OS like Windows 7. The flip side to this, though,
is that SharePoint 2010 requires a 64-bit machine on which to run.
Another developer-centric feature in SharePoint 2010 is the developer dashboard, which provides
statistics and reports about code that is executed against your SharePoint site. Those who have
coded against SharePoint in the past may have used tools like Fiddler to understand how custom
code was executing against SharePoint. The developer dashboard now tracks how your custom
code interacts with SharePoint to show where performance bottlenecks or exceptions may occur.
Figure 2-3 shows a SharePoint command that turns on the developer dashboard in the SharePoint
site in
ondemand view — meaning you can toggle the view on and off as you wish.
FIGURE 23 PowerShell command
You get a variety of performance and query details for the objects on a given SharePoint page with
the developer dashboard, so you can troubleshoot potential problem areas in your custom code. For
example, you can expect information such as request/response times for your operations, Web part
load times, and database response times.
The developer dashboard is accessible through PowerShell commands, an object model, or through
stsadm commands. Figure 2-3 showed you the command using the ondemand parameter, but you
could also replace the same command with
on or off to either have the developer dashboard turned
on (and have it on all the time), or turned off. Figure 2-4 shows the developer dashboard.
584637c02.indd 29 5/2/10 7:12:12 PM
30
CHAPTER 2 GettinG Started with SharePoint 2010 develoPment
FIGURE 24 Developer dashboard
There are other features that you’ll see throughout this book within the area of developer productiv-
ity. But, from a high level, you can expect to see great opportunities to build your SharePoint appli-
cations using Visual Studio 2010 or SharePoint Designer 2010. Many of the examples throughout
this book will leverage these two tools.
Through template-specific discussions and coverage of Visual Studio 2010, you’ll also learn about
some of the application lifecycle management (ALM) capabilities. Examples of ALM include having
the capability to import existing
.WSP packages and using the Team Foundation Server features of
Visual Studio for your SharePoint 2010 development.
NOTE While Visual Studio 2010 and SharePoint Designer 2010 should be
treated as your primary ways of developing for SharePoint, the Expression
Blend Suite also oers some value for the developer when building advanced
user interfaces (UI) for SharePoint, such as a Silverlight-based UI.
Rich Platform Services
In terms of rich platform services, SharePoint has evolved quite a bit from SharePoint 2007. For
example, you have a rich set of UI objects that you can develop against (such as the SharePoint rib-
bon), and you have a core set of SharePoint artifacts that can be used to build out your SharePoint
site (such as Web parts and lists), which you’ll get a chance to test out later in this chapter.
Beyond these core SharePoint artifacts, you also have a set of services you can leverage in your
SharePoint development and client-side application programming interfaces (APIs) that can be used
in your application development. As discussed in Chapter 1, these services range from ASP.NET (for
example,
Lists.asmx) to native and custom Windows Communication Foundation (WCF) support
(for example,
myCustomService.svc) to RESTful services (for example, ListData.svc). SharePoint
2010 also supports the capability to build and deploy custom services into the SharePoint 2010
584637c02.indd 30 5/2/10 7:12:13 PM
Core Developer Features for SharePoint 2010
31
folder hierarchy (now referred to as the SharePoint root), or you can deploy ASP.NET and WCF ser-
vices to Internet Information Server (IIS) — you’ll see this in detail in Chapter 10.
NOTE In SharePoint 2007, the server file system was often called the
“SharePoint hive.” In SharePoint 2010, it is now referred to as the “SharePoint
root.” However, you may hear developers refer to either of these terms, which
mean the same thing: the SharePoint file system (
<drive>:\Program Files\
Common Files\Microsoft Shared\Web Server Extensions\14
).
Beyond the core support for services, SharePoint 2010 also ships with a number of services out of
the box that are extensible and can be used in a variety of ways. For example, one of the services
that really accelerates SharePoint 2010 development for the beginning professional is the use of the
Business Connectivity Services (BCS), which is discussed more in Chapter 8. In essence, BCS enables
you to quickly integrate LOB system data with SharePoint and Office 2010.
Another set of server-side services that extend the capabilities of the Office client technologies to
SharePoint is Excel services and Word services, which are server-side ways of interacting with your
Microsoft Office documents. For example, you can use Word Services to batch process the transla-
tion of
.docx files (the standard format of documents created with newer versions of Word) into PDF
or
XPS files on the server — which provides a huge cost savings when manipulating data into docu-
ments and then processing those documents for mass distribution to your customers. You’ll also see
coverage of other server-side services in this book, including Visio services (which provide diagram-
ming and workflow capabilities for SharePoint) and Access services (which enable publishing of
Access data to SharePoint).
Data programmability capabilities represent another significant advancement in SharePoint 2010.
Key to any application design is knowing what data source or service you’re programming against.
SharePoint development is no different. If you understand the data source or the Web methods that
connect into that data source, you can design your middle-tier and UI experience from there.
In SharePoint development, your data could be represented as a SharePoint list or derive from exter-
nal data sources that are either ADO.NET-based or integrated using a service-based architecture.
This data programmability will become especially apparent in the way in which you connect lists
to back-end data sources, and the ways in which you can query and filter that data once you’ve suc-
cessfully created a connection to it through, for example, Language Integrated Query (LINQ) for
SharePoint (which applies the principles of LINQ to data that resides in SharePoint).
The following code snippet shows the capability to retrieve data from a SharePoint list and then
treat that list as a strongly typed object by using LINQ (shown in boldface). The query enables
you to filter the data and then bind it to the data-display object, which, in this case, is a datagrid
called
myGrid. This represents a great way to query and filter with data that is being retrieved from
SharePoint.
protected void Page_Load(object sender, EventArgs e)
{
ProjectsDataContext dataContext = new ProjectsDataContext
(“http://stefoxdemosvr/customers);
EntityList<MyCustomers> Customers = dataContext.GetList<MyCustomers>
584637c02.indd 31 5/2/10 7:12:13 PM
32
CHAPTER 2 GettinG Started with SharePoint 2010 develoPment
(“Customers”);
var custQuery = from customer in Customers
where cust.Sales >= 3000000
orderby cust.Name
select new { cust.Name, cust.Sales };
myGrid.DataSource = custQuery;
myGrid.DataBind();
}
Another major investment in SharePoint 2010 is the capability to support Silverlight applications
out of the box. You will see that just this one feature alone will open up quite a few opportunities
for you to really begin to explore and build exciting and dynamic experiences for your users using
Silverlight support.
This support comes in two primary ways:
You can use the Silverlight Web part as
a container for your Silverlight applica-
tion, as shown in Figure 2-5.
Silverlight development on SharePoint
2010 comes already configured and sup-
ported — so, for example, you have no
additional server-side configuration you
must do to prepare your environment.
(In SharePoint 2007, there were a num-
ber of configuration steps you needed to
undertake to get Silverlight to work.)
There are many, many more platform services (such as list lookups and relationships, workflow
enhancements, site theming with live preview, XLST-supported customization, and so on), some
of which are explored throughout this book and others that you’ll discover as you get more deeply
entrenched in SharePoint development. In fact, there are too many to fully articulate in one chapter.
However, your key takeaway should be that there are a ton of great platform services you can lever-
age to get started developing for SharePoint 2010.
Flexible Deployment
With SharePoint 2010, you have two primary deployment options:
On-premises
— The on-premises version of SharePoint is where you or your company own
the assets on which the instance of SharePoint runs. For example, you deploy it on your cor-
porate network behind the firewall, you manage the hardware and updates to that hardware,
and you manage the administration of the site. Subsequently, you absorb the costs of running
SharePoint for your organization.
SharePoint Online
— SharePoint Online is a hosted version of SharePoint that Microsoft
runs for you out of its data centers. In SharePoint Online, you build and deploy your
FIGURE 25 Silverlight Web part
584637c02.indd 32 5/2/10 7:12:13 PM
Core Developer Features for SharePoint 2010
33
SharePoint solutions to a sandboxed environment — a ring-fenced environment that runs in
the cloud within the purview of a site collection. For example, you can build a solution that
reads and writes to a contact list within a site collection. This works on-premises, and can
equally work in SharePoint Online.
The functionality of the two is very similar. However, following are a couple of major differences:
When you navigate to SharePoint Online, you are accessing an instance of SharePoint in the
cloud (so you are accessing it from the Web, as opposed to behind a corporate firewall or
private network).
As a developer, you have some restrictions because you are primarily deploying custom solu-
tions into a managed environment within the site collection. This environment is managed by
Microsoft’s IT staff.
However, the latter notwithstanding, if you combine a new feature in SharePoint 2010 called
sandboxed solutions with SharePoint Online, you can maintain a very comfortable price point for
SharePoint and still reach many development goals. For enterprise-level deployments of SharePoint,
you will more than likely deploy to the on-premises version of SharePoint, and sandboxed solu-
tions can also be used here. However, small and medium-sized businesses may find that SharePoint
Online is the way to go. Either way, you should know that there is a good developer story, and if you
want to have symmetry across both on-premises and SharePoint Online, then sandboxed solutions
are one of the ways in which you can achieve that.
Sandboxed solutions also enable developers to have more control over their site collections. This
frees up the farm-level administrators from the developers/site collection administrators, and enables
both to have a tighter level of management over their environments, as well as the code running in
that environment. The challenge was creating and deploying solutions you could trust not to do bad
things to the SharePoint farm. With sandboxed solutions, site collection administrators have the
authority to manage the applications (or delegate that authority to others) in their site collection.
And developers have more flexibility, at the cost of using a limited subset of SharePoint, to create
solutions they know will be deployed in a safe and rapid manner.
In essence, what you’re deploying to SharePoint is a partially trusted application that runs in a spe-
cial “sandbox.” This sandbox runs at the site-collection or site level, as opposed to the farm level,
and gives you more flexibility for building custom solutions for a surface area in which you have a
vested interest and potential site ownership. What runs within a sandboxed solution is a subset of
the SharePoint object model. For example, using sandboxed solutions, you can build and deploy list
definitions and instances, content types, customize navigation, create and deploy modules or custom
files, a limited set of event receivers, Web parts, custom actions, and workflows.
For example, let’s say you want to build a custom ASP.NET application and deploy it as a Web part
to a site within a site collection. You create the Web part as a partial trust application, so, when
it comes time to deploy that application, Visual Studio knows where to deploy it — that is, in the
Sandboxed Solutions Gallery, where you can activate or de-activate it. With this model, this type of
solution development will broaden the pipeline and really open up SharePoint development opportu-
nities. Figure 2-6 shows the Solutions Gallery, where you upload and activate your custom solution.
584637c02.indd 33 5/2/10 7:12:13 PM
34
CHAPTER 2 GettinG Started with SharePoint 2010 develoPment
FIGURE 26 Sandboxed Solutions Gallery
KEY SKILLS FOR THE SHAREPOINT DEVELOPER
There are a number of skills that are important to learn before you can become proficient at devel-
oping SharePoint 2010 applications. Admittedly, there are many different types of development that
you can accomplish with SharePoint 2010 and still call yourself a SharePoint developer. However,
there is a set of core skills you’ll want to have in your back pocket.
The first is a baseline understanding of how Web pages are structured and rendered using Hypertext
Markup Language (HTML) standards. SharePoint 2010 is a Web-based technology and is built
on ASP.NET. Thus, it is rendered as pages with an
.aspx extension (for example, foo.aspx). This
means that if you have a baseline understanding of how
.aspx pages are structured and where
HTML meets ASP.NET, then you can get up and running very quickly in terms of creating and cus-
tomizing SharePoint site pages.
One example of how you might edit the content on a SharePoint Web page is using the inline HTML
editing capabilities, where you can edit HTML within an editor and then save the HTML code
to render on the SharePoint page. For example, Figure 2-7 illustrates the new wiki experience in
SharePoint, and shows how you can edit the HTML source when the page is in Edit mode through
the HTML Source editor (select Site Actions Edit, click on the top region of the actual wiki page
(in the content area of the page), and then choose “Markup and Edit HTML Source”). When you
save, SharePoint saves your HTML changes to the wiki page, and renders the content. Note that this
method of HTML source injection into the page also supports other mark-up standards and syntax
(for example, JavaScript or CSS).
Another example of how you might edit your SharePoint site pages is with your page design and
layouts from within SharePoint Designer 2010. SharePoint Designer is a much richer development
environment than the inline HTML editors that you use in the browser. It enables you to drag and
drop controls onto a page, view design-time changes that you’re making to the page, create data
views, explore the files and folders that live on your SharePoint site through a site hierarchy, and so
on. If you contrast this with the HTML Source editor (which only provides page content saving and
rendering), SharePoint Designer is a more feature-rich experience, enabling you to create, edit, and
manage content across the entire SharePoint site.
584637c02.indd 34 5/2/10 7:12:13 PM
Key Skills for the SharePoint Developer
35
FIGURE 27 HTML editing on a SharePoint page
If you’re using SharePoint Designer, you may want to use Cascading Style Sheets (CSS), which is
a way of providing custom formatting and structure to your Web pages. (You can apply the CSS
transformations at design-time with SharePoint Designer to see the changes.) And you may also
want to include JavaScript functions, which you can also use in SharePoint Designer.
Thus far, you’ve seen three technologies about which you may want to have some level of under-
standing — HTML, CSS, and JavaScript. One that has not been mentioned but that you’ll come
across in your SharePoint development is Extensible Markup Language (XML). SharePoint makes
good use of XML throughout its architecture and programming model, and you’ll see references to
it throughout this book. Further, to translate XML into styled or structured HTML pages, you may
need to leverage Extensible Stylesheet Language (XSL) and XSL Transformations (XSLT).
These are the baseline languages you want to be sure that you have some familiarity with, and
there’s no reason why you couldn’t exist solely in this space and become a proficient SharePoint
developer. Several people who focus their time on this type of SharePoint customization make a
good living doing so.
However, if you want to move into the solution-development aspect of SharePoint (which is what
this book drives you toward), you must jump into the world of .NET development. SharePoint 2010
is built on ASP.NET as a foundational technology, so, by virtue of this architecture, you can build
and deploy ASP.NET applications to SharePoint with relative ease.
584637c02.indd 35 5/2/10 7:12:13 PM
36
CHAPTER 2 GettinG Started with SharePoint 2010 develoPment
An example of this is building and deploying a Web part that uses ASP.NET controls and events.
Further, when you enter into the world of .NET (if you’re not there already), you’ll begin to real-
ize that there are a lot of things that you can do with SharePoint within the wider scope of .NET.
This is because you can deploy custom assemblies (that is, compiled applications using C# or Visual
Basic) that you create using the .NET Framework and install those as solutions on top of SharePoint.
These solutions can run the gamut; they could be simple .NET applications that leverage a small set
of ASP.NET controls, or they could be more complex Silverlight applications that are still based on
.NET but are more centric to an advanced UI design and experience.
So, as a recommendation for the skills you’ll want to develop as you embark on your SharePoint devel-
opment career, the following is a list you might think about working down as you learn SharePoint:
The first item is an understanding of HTML, XML/XSL, and CSS as a structural baseline to
understand page rendering in SharePoint. Having some dynamic Web language experience
would also be good (such as JavaScript).
The second item is an understanding of ASP.NET. If you don’t have skills in these first two
items out of the gate, you’ll certainly gain them as you develop more with SharePoint. For
those who are ASP.NET developers today, the transition to SharePoint development will be
much easier.
The third item is a baseline understanding of one of the managed code languages — that is,
C# or Visual Basic (VB.NET). These are object-oriented languages that fully leverage the
.NET Framework, and both are supported within Visual Studio 2010 for SharePoint 2010
development.
The last is a wider understanding of the .NET Framework such as Windows Workflow
Foundation or WCF. Again, this is something that will come with experience, but be open to
learning .NET because you’ll begin to understand elements you can apply to your SharePoint
development efforts.
This book presupposes that you have a baseline understanding of building Web sites and some base-
line knowledge of how .NET works.
You may discover along the way that there are other languages that you want to learn — for
example, you may be interested in integrating dynamic languages such as Ruby, Python, or PhP into
SharePoint — and this is possible but out of scope of this book. This book is about the basics of pro-
fessional development, which targets the technologies described previously.
With all this talk of development, it’s time to put this theory to practice. In the next section, you’ll
get a standalone version of SharePoint 2010 up and running and set up your development environ-
ment so that you can get started with a couple of end-user and developer-oriented walkthroughs.
YOUR DEVELOPMENT ENVIRONMENT
Now that you understand some of the core developer features of SharePoint, as well as some of the key
developer skills you’ll need, you’re probably eager to get started developing. Before you can start devel-
oping, though, you must set up your development environment. Let’s first tackle the baseline software
requirements and then examine the different options you have in setting up your environment.
584637c02.indd 36 5/2/10 7:12:13 PM
Your Development Environment
37
Following is the baseline software you need to set up your development environment:
A Windows 64-bit-compliant operating system (for example, Windows Server 2008 R2 or
Windows 7)
SharePoint Foundation 2010 and SharePoint Server 2010
SharePoint Designer 2010
Microsoft Office (Professional Plus) 2010
Visual Studio 2010
.NET Framework 4.0
Microsoft Expression Blend (optional, but recommended for Silverlight programming)
SQL Server (Express) 2008
Not only will having this software enable you to follow along with the coding examples used
throughout this book, but you will also find that these are the baseline requirements to get yourself
up and running for SharePoint 2010 development in your organization.
However, you do have a choice as to whether you should build this out “on the metal” (that is,
install all of the software on the hard drive of your development machine) or create a virtual image
and install all of the software on that image. Many developers prefer to build out a virtual envi-
ronment to host all of the bits that they need to code against and then use that as the development
environment.
For example, for SharePoint 2007, many developers used Virtual PC or Virtual Server (virtualiza-
tion technologies) to create a virtual hard disk so that they could then rebuild that environment on
a regular basis without having to disrupt their primary working environment. Further, they could
keep the environment isolated and then, when finished with the development within the virtual envi-
ronment, move the code into a production environment. Virtualized environments are also useful if
you require a more portable environment, such as demo or prototype environments.
NOTE You can download a preconfigured virtual machine from Microsoft’s
Download Center at
www.microsoft.com/downloads/details.aspx?
FamilyID=0c51819b-3d40-435c-a103-a5481fe0a0d2&displaylang=en
.
You will also find instructions on the Download Center page to add the virtual
machine to an instance of Hyper-V.
Installing and Configuring Windows Server Hyper-V
In Windows 2008 R2 (64 bit), you can use the Hyper-V Manager to manage and run your virtual
machines. The environment is a role you set up when configuring your Windows operating system.
For example, after you install Windows Server 2008 R2, you can add the Hyper-V role through the
Server Manager.
584637c02.indd 37 5/2/10 7:12:13 PM
38
CHAPTER 2 GettinG Started with SharePoint 2010 develoPment
Figure 2-8 shows an example of the Add Roles Wizard at the Server Roles step in the wizard. You
can see that, when you invoke the wizard, you have a place where you can click the checkbox beside
the Hyper-V role, and then Windows installs it for you. Note that in this figure, the Hyper-V role
has been added to the machine.
FIGURE 28 Hyper-V role
Assuming that you already have your Windows operating system in place, let’s walk through the
process of installing the Hyper-V role.
Installing Hyper-VTRY IT OUT
Installing Hyper-V is an alternative to setting up an “on-the-metal” development environment. To
install Hyper-V, follow these steps:
1. Click Start Administrative Tools Server Manager.
2. In the Server Manager, scroll to the Roles Summary, and then click Add Roles. Select Hyper-V
from the list.
3. Server Manager takes you through a number of steps. Accept the default options, and click Next
until the Install button is enabled.
584637c02.indd 38 5/2/10 7:12:13 PM
Your Development Environment
39
4. Click Install to complete the Hyper-V installation. Note that Windows will prompt you for a sys-
tem restart. Restart your computer to complete the Hyper-V installation.
5. After you have Hyper-V installed, you can then add a Hyper-V compliant .vhd file if your team
has already prepared one (see the download location noted previously), or you can go about creat-
ing one from scratch.
6. To add an existing image, open the Hyper-V snap-in by clicking Start Administrative Tools
Hyper-V Manager.
7. Under Actions, click New Virtual Machine. Specify a Name and Location for the image, and
click Next.
8. You’ll then need to assign a level of RAM to the image. Specify 6,500 MB or more.
9. Accept the default option for Configure Networking and click Next.
10. Click the radio button beside “Use an Existing Hard Disk,” and then browse to that disk and
click Finish.
NOTE If you want to create an image from scratch, you can select the first
option (“Create a Virtual Hard Disk”) and then select one of the options for how
you want to install the operating system on the new image. An easy way to
install the image is to have the Windows DVD in your machine’s CD/DVD drive
and select the second option. Associate a specific drive with the installation
process (the drive that contains the Windows Installation DVD). When the wiz-
ard completes, it will automatically begin installing the OS from that drive, after
which you can install all of the software needed for your development.
Once you’ve completed the process of installing Hyper-V and adding a (or creating a new) virtual
hard disk, the last (and optional) step is to set up a network switch with your Hyper-V instance.
This will make it easy for you to both remotely access your Hyper-V development environment and
create a network share on your virtual hard disk where you can move software to be installed on
your virtual hard disk.
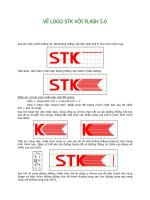
Creating a Network SwitchTRY IT OUT
The network switch enables you to remote into your virtual machine. To configure the network switch
with Hyper-V, follow these steps:
1. In your Hyper-V Manager, click Virtual Network Manage from the Actions pane.
2. Select New virtual network and Internal, then click Add. Provide a name for the network, select
Internal Only, and click OK, as shown in Figure 2-9.
584637c02.indd 39 5/2/10 7:12:13 PM
40
CHAPTER 2 GettinG Started with SharePoint 2010 develoPment
FIGURE 29 Adding a network adapter
3. On the host machine, click Start Control Panel Network and Internet Network and Sharing
Center.
4. Click Change Adapter Settings, and right-click the network adapter you just added. Select
Properties.
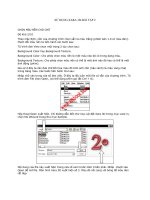
5. Select Internet Protocol Version 4 (TCP/IPv4), and click Properties.
6. Click “Use the following IP Address,” add a unique IP address in the IP address field (for example,
192.168.1.1), and click the Subnet mask field to have one automatically generated for you, as
shown in Figure 2-10.
7. The last step is to configure the network adapter on the virtual hard disk. To do this, start the
image by clicking Start Connect in the Hyper-V Manager.
8. Log in to your virtual image, and then click Start Control Panel Network and Internet
Network and Sharing Center.
9. Click Change Adapter Settings.
584637c02.indd 40 5/2/10 7:12:14 PM
Your Development Environment
41
10. Configure the network adapter properties as you did earlier by right-clicking the network adapter
that is present by default on the image. Select Properties Internet Protocol Version 4 (TCP/IPv4),
and then change the IP address to be something unique (for example, 192.168.1.50). Lastly, tab to
the Subnet mask to have one automatically generated for you.
11. Click OK to complete the process.
12. To test the remote desktop, click Start All Programs Accessories Remote Desktop
Connection. Type the IP address you configured within the virtual hard disk, and then click
Connect. Windows will connect you to your development environment via Remote Desktop.
FIGURE 210 IP properties
How It Works
Using these instructions, you now have an environment that leverages the Hyper-V role within
Windows Server 2008 R2. What this means is that you can have a virtualized instance of SharePoint
on a virtual image (that is, a
.vhd file) that you can start, save, and stop using the features of Hyper-V.
It works by virtue of the Hyper-V role hosting the images and running them in what effectively
becomes a separate environment. The separate (or virtualized) environment can be integrated with the
host or parent environment through the network switch that you set up to open up the resources avail-
able to the virtual image.
584637c02.indd 41 5/2/10 7:12:14 PM
42
CHAPTER 2 GettinG Started with SharePoint 2010 develoPment
Installing SharePoint Server 2010
At this point, you should have successfully created and mounted a virtual machine, and you should
have configured the network switch so that you can remote into your development environment. You
can continue to work with this virtual machine and install all of the software, or if you want to install
all of the software on your machine, you can do that as well. While this chapter won’t cover all of the
software prerequisites, it will briefly walk you through the SharePoint 2010 installation procedures.
There are a number of different ways of installing SharePoint within an environment. A SharePoint
server farm may consist of one or more servers providing various services to the farm. You can also
configure SQL Server when installing SharePoint. (SharePoint uses SQL Server to store all of its
content.) All of the services can be balanced between one or more servers in the farm. A multi-server
farm is typically a higher-end administrative function and one that, at this point, should remain a
goal for your future learning.
For now, install the standalone SharePoint 2010 instance to get started. This will provision a single-
server instance for you without too much configuration hassle, but, more importantly, it will be
simple to set up and configure. This installation method will also give you a baseline development
environment to test out the examples in this book.
WARNING This would not be the option you choose when deploying a SharePoint
2010 server to production. There are a number or restrictions that come along
with the standalone installation — for example, content database size restrictions.
When you do get ready for production-ready SharePoint development, build a rep-
licated production environment that sits in a development (and staging) environ-
ment before you drop your code into a production environment.
Installing a Standalone Instance of SharePoint 2010TRY IT OUT
There are various ways to install and configure SharePoint 2010, one of which is a standalone server
installation. To install a standalone instance of SharePoint, follow these steps:
1. Click the Setup.exe file on your SharePoint 2010 installation DVD (or from your installation
location).
2. You’ll be prompted to “Agree to the License Terms.” Click the “I accept the terms of this agree-
ment” checkbox and click Continue, as shown in Figure 2-11.
3. At the next step, you have the opportunity to select different installation options. Click the
Standalone button to invoke the standalone installation.
4. SharePoint will then work through the installation process.
5. When it has completed the installation process, you will be prompted with a dialog where you
can choose to run the Configuration Wizard, which configures things like the services, content
database, and so on, for first-time use, as shown in Figure 2-12. Click the “Run the SharePoint
Products and Technologies Configuration Wizard now” checkbox and click Close. The
Configuration Wizard is automatically invoked upon closing this dialog.
584637c02.indd 42 5/2/10 7:12:14 PM
Your Development Environment
43
FIGURE 211 SharePoint 2010 license terms
FIGURE 212 Configuration Wizard
6. SharePoint works through a series of 10 configuration steps to complete the installation process.
7. When complete, it will prompt you with a Configuration Successful dialog. Click Finish to com-
plete the process.
584637c02.indd 43 5/2/10 7:12:14 PM